


Hello, PTI friends! Happy 6th day of August to you! I’m sharing one of my very favorite ways to wrap gifts today, and you’ll be happy to know that it’s super-easy. For this ambassador post, we’re just going to stamp, stamp, stamp!
 In a way, we’re creating our own wrapping paper, though I’m encouraging you not just to stamp on your paper, but also on muslin bags and anything else you can think of to wrap with. I’m using wrapping paper, tissue paper, printer/copy paper, and cotton bags. It’s a great idea when you want your gift wrap to coordinate with a card, with a party or wedding invitation, or just want to create some extra special wrapping for a deserving recipient.
 *Because I’ve done quite a few samples for you today, I’ll be listing the supplies after each one, with the hope that it will be easier to keep track if you’d like to make your own.*
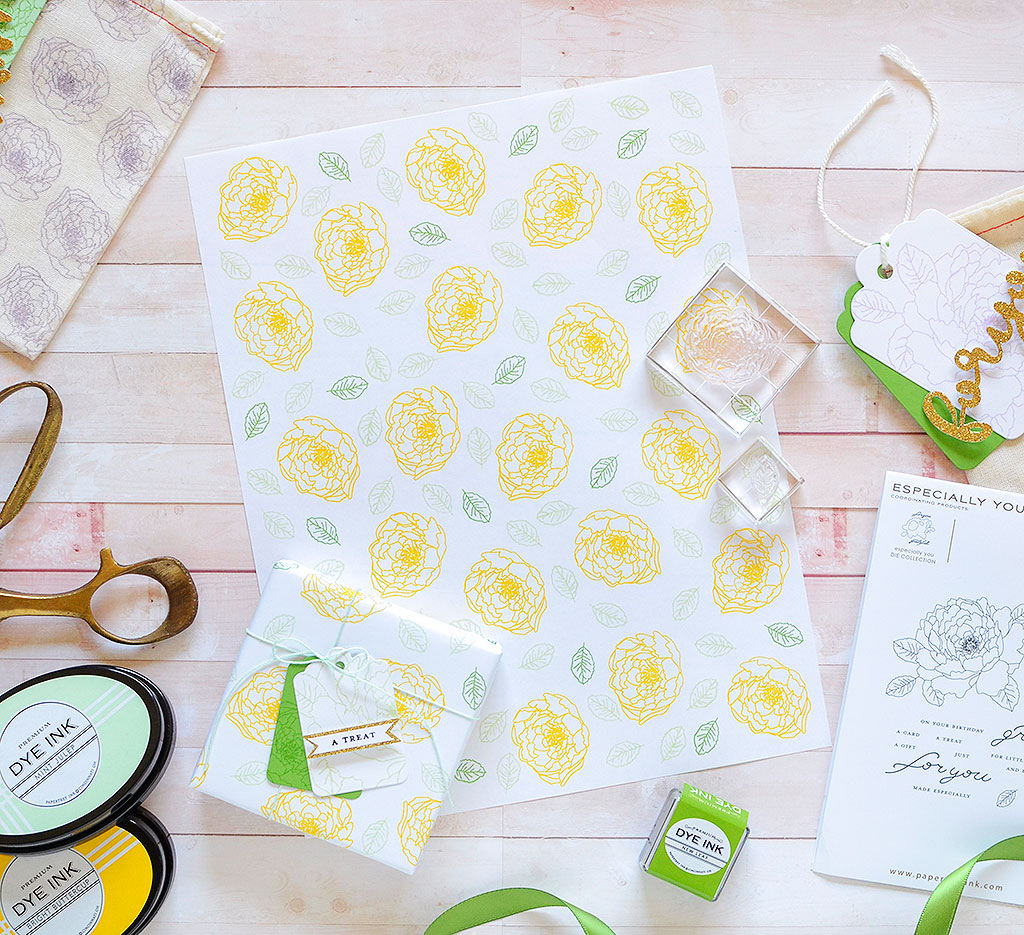
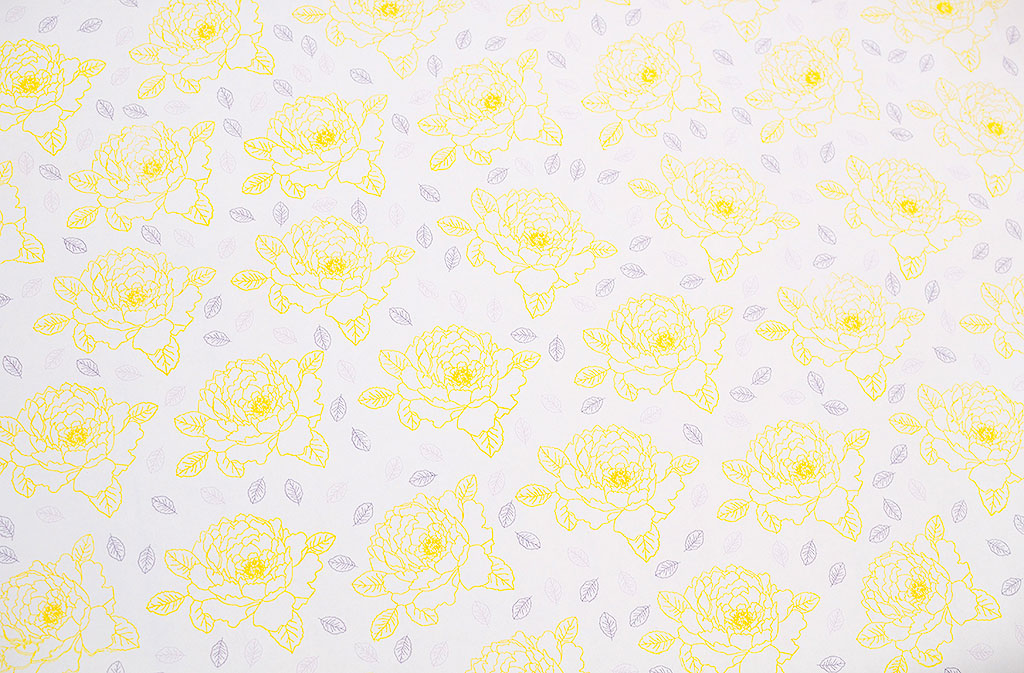
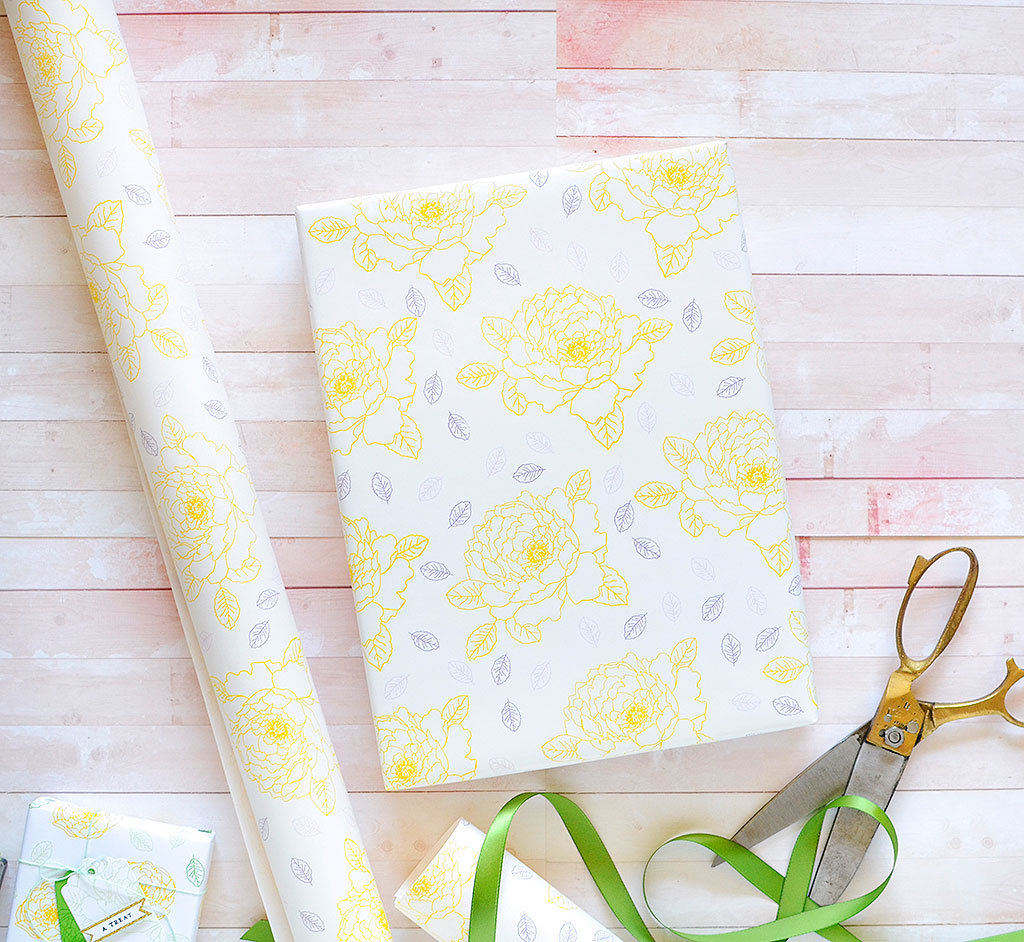
 You can approach this project like stamping on a card front, but, in some cases, on a much larger canvas. My first technique is the easiest to pull off and best for small gifts. Honestly, this isn’t really a technique, but more simply stamping a repetitive image to make an 8 1/2″ x 11″ pattern. I’m using printer or copy paper–the same kind you can buy by the ream, load into your at-home printer, and print out documents. Using the stamp set Especially You, I’ve stamped the smaller floral over and over in Bright Buttercup ink. I left some space between each flower and filled it in with randomly placed leaves in New Leaf and Mint Julep.
 You don’t have to be perfect! This type of project should just be fun and carefree. If you get hung up on perfectly placed, or even perfectly stamped, images, this will only drive you crazy and we don’t want that to happen! Whoever receives your hand-stamped gift-wrapped treat will be so thankful for your kindness, that they won’t even notice if there’s a smudge or a little too much space between this image and that one. They’ll only be impressed that you CREATED your own one-of-a-kind gift wrap just for them!
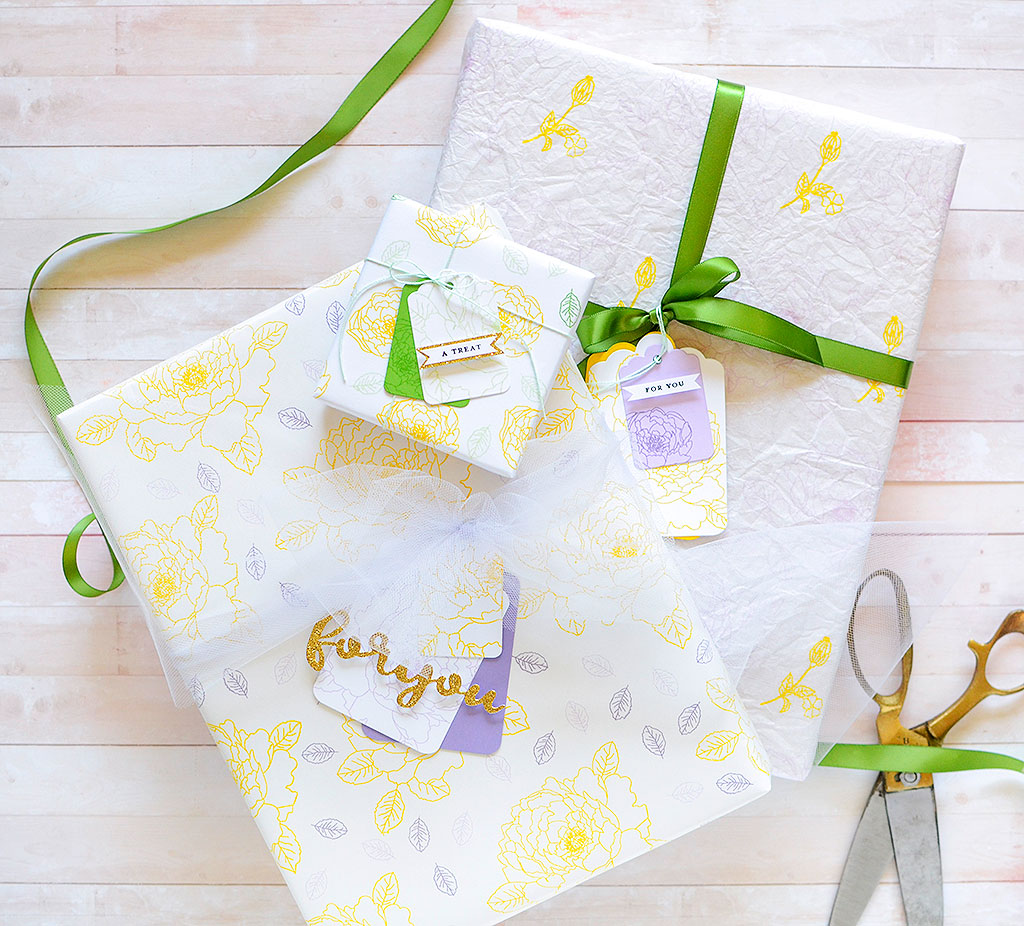
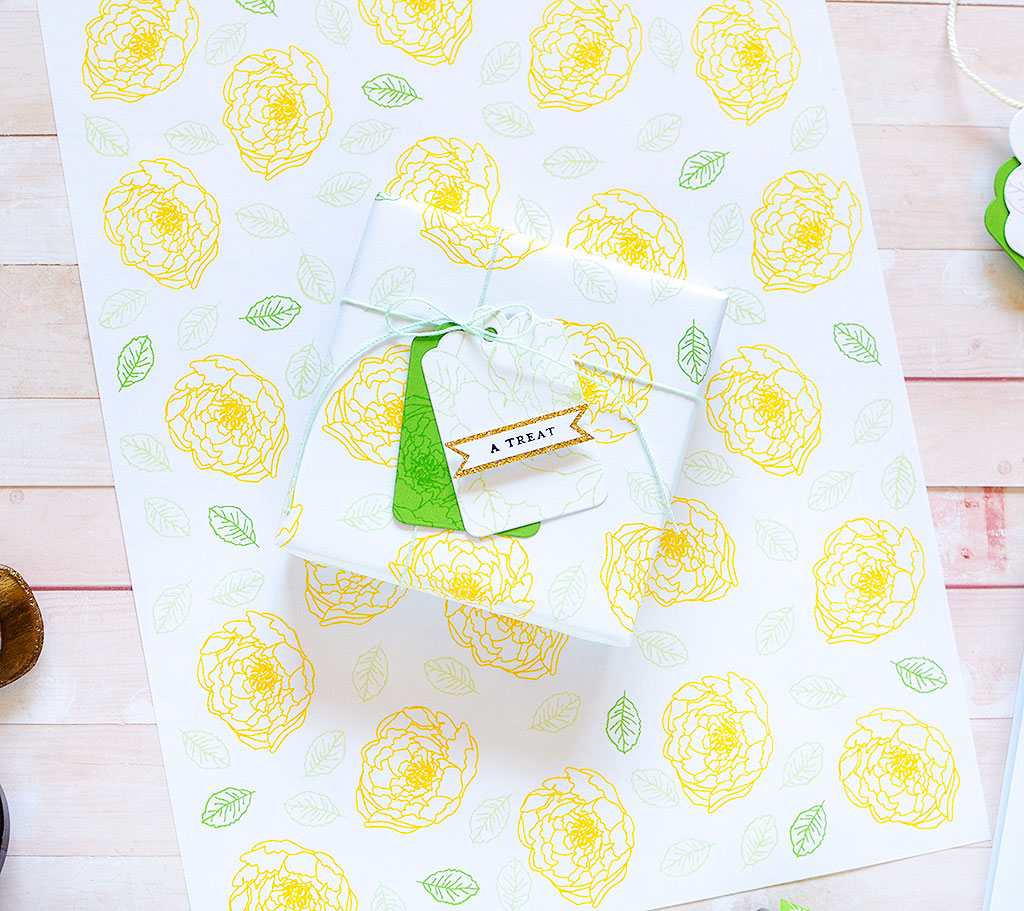 Generally, also, you don’t have to go out to the edges of your paper since they’ll be covered up when you wrap your gift. In my case, I trimmed off a few excess inches of the paper when I wrapped this 4″ x 4″ box.
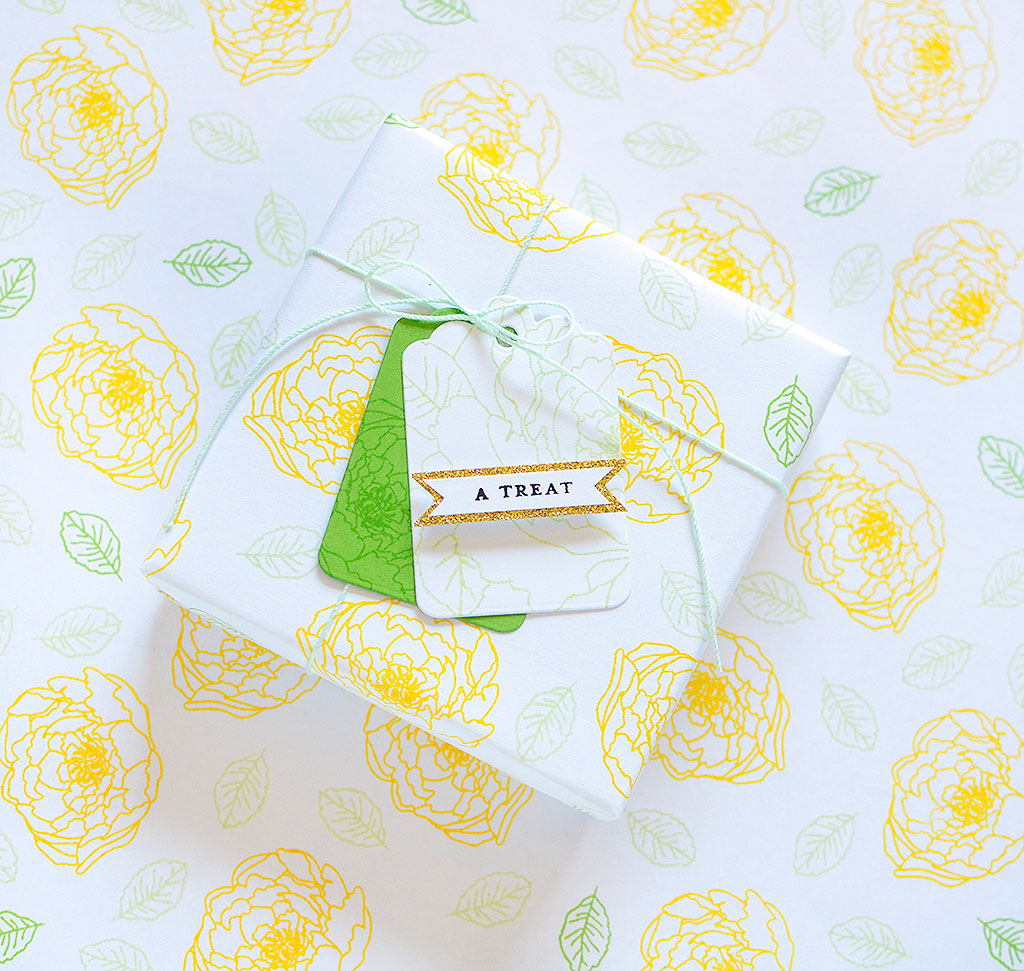 I’m not spending a ton of time embellishing my gifts today because the point of this post is to show you all the ways you can create beautiful wraps. To keep the patterned wrapping the main focus, I’m keeping things simple by using Scalloped Tag dies, the same Especially You stamp set, and coordinating inks. I made two scalloped tags, one Mint Julep and one white, stamping the peony image on both of them, and adding a small sentiment in True Black to the white tag. They’re tied on with minty crochet thread from my own stash.
Supplies:
Stamps: Especially You
Ink: Bright Buttercup, New Leaf, Mint Julep, True Black
Paper: Mint Julep, White
Dies: Scalloped Tags
Other: copy paper, mint crochet thread, glitter tape
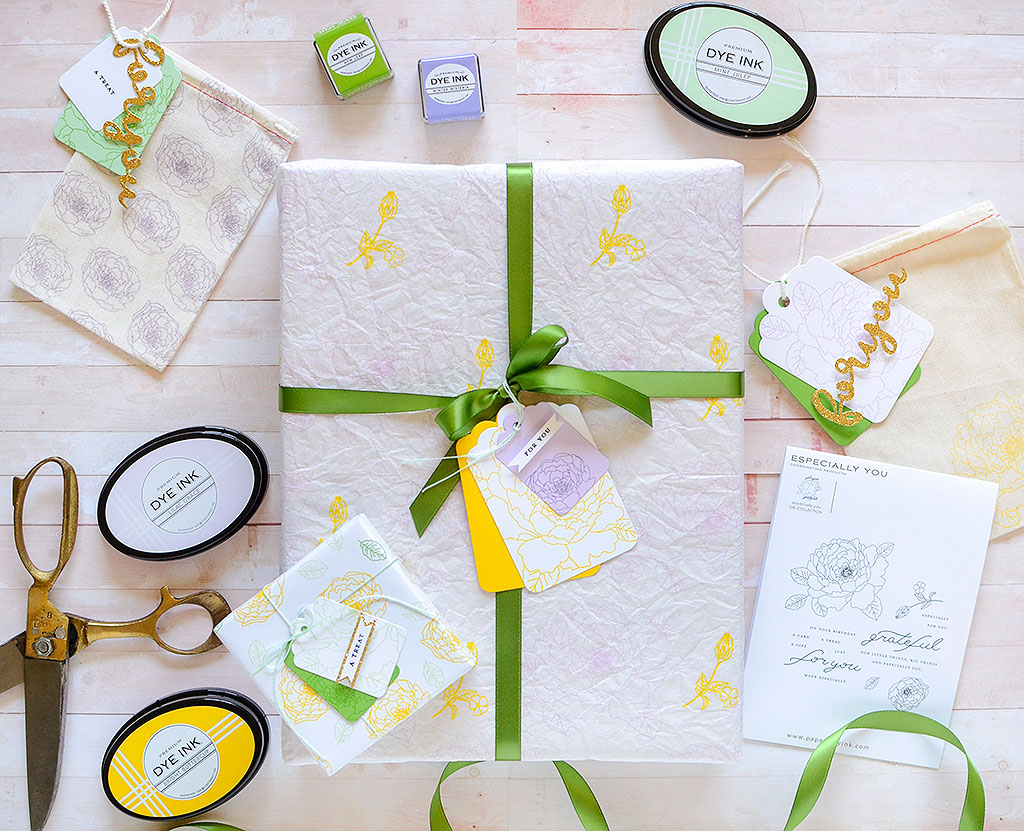
While copy paper is sized just right for smaller gifts, I know that oftentimes gifts come in bigger boxes and you need bigger paper to cover it, like actual wrapping paper. This plain white one I’m using is from Paper Source and I like it because the surface is not slick like most wrapping paper, which means the inks won’t smear or rub off.
 *A tip I’ll offer is that when you have a large surface area to cover, choosing a large stamp is a very good idea! The large peony in Especially You is a great choice, and PTI has many other awesome larger florals and images that will work, too.
 Similar to the smaller paper, I used the larger peony in Bright Buttercup with scattered leaves in Lilac Grace and Winter Wisteria. I think the end result is so pretty!
 After I wrapped up my box, I even had some paper leftover for future use. I really didn’t mind stamping such a large area, either. It was kind of relaxing, actually, and I know many of us who papercraft find it therapeutic. This is straightforward, easy stamping, too, but with a big, gorgeous finish!
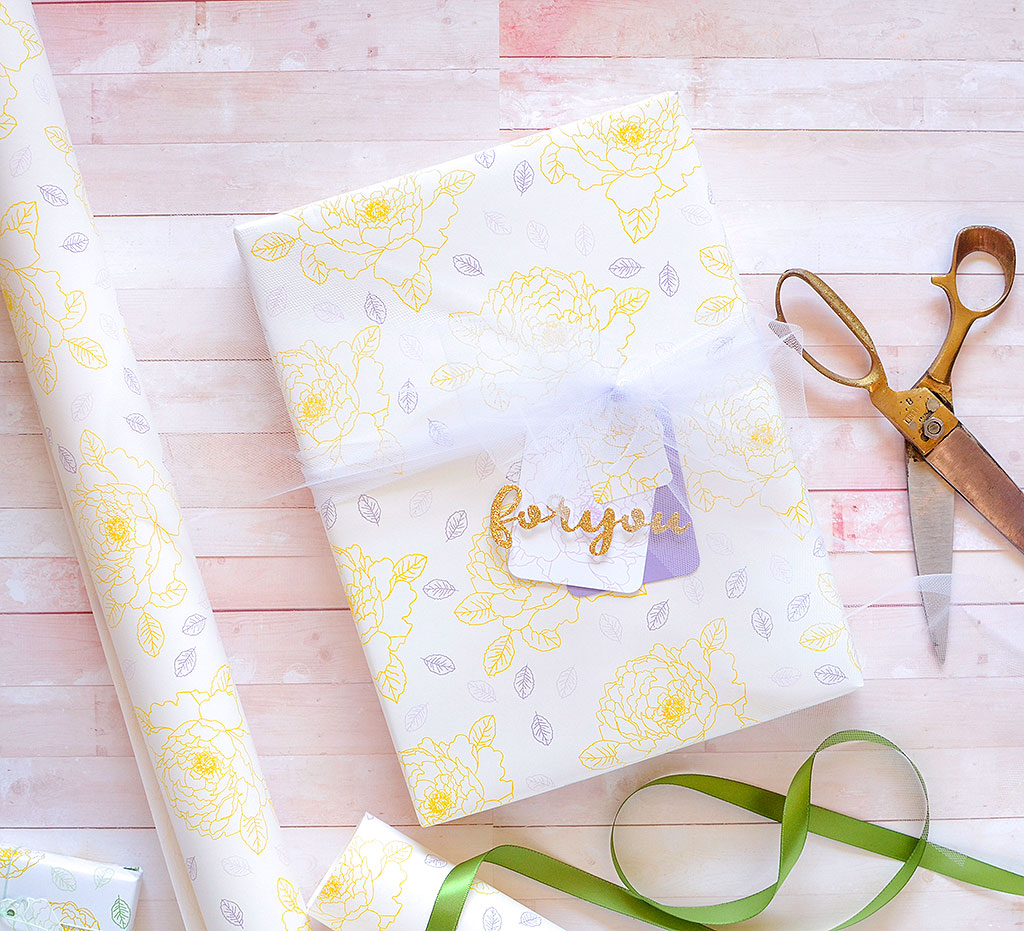
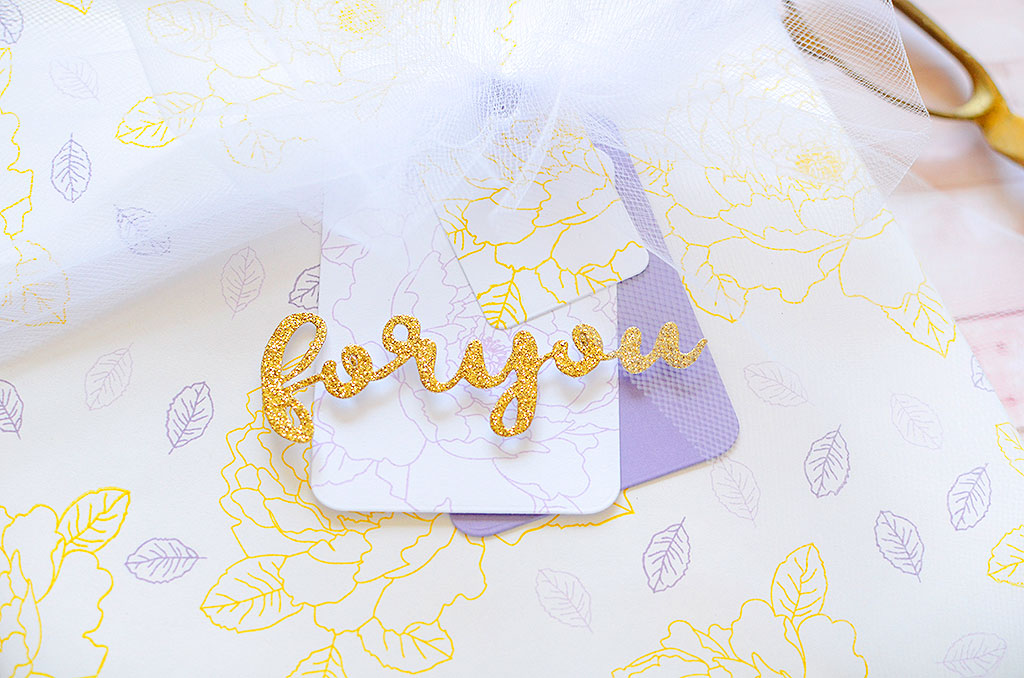
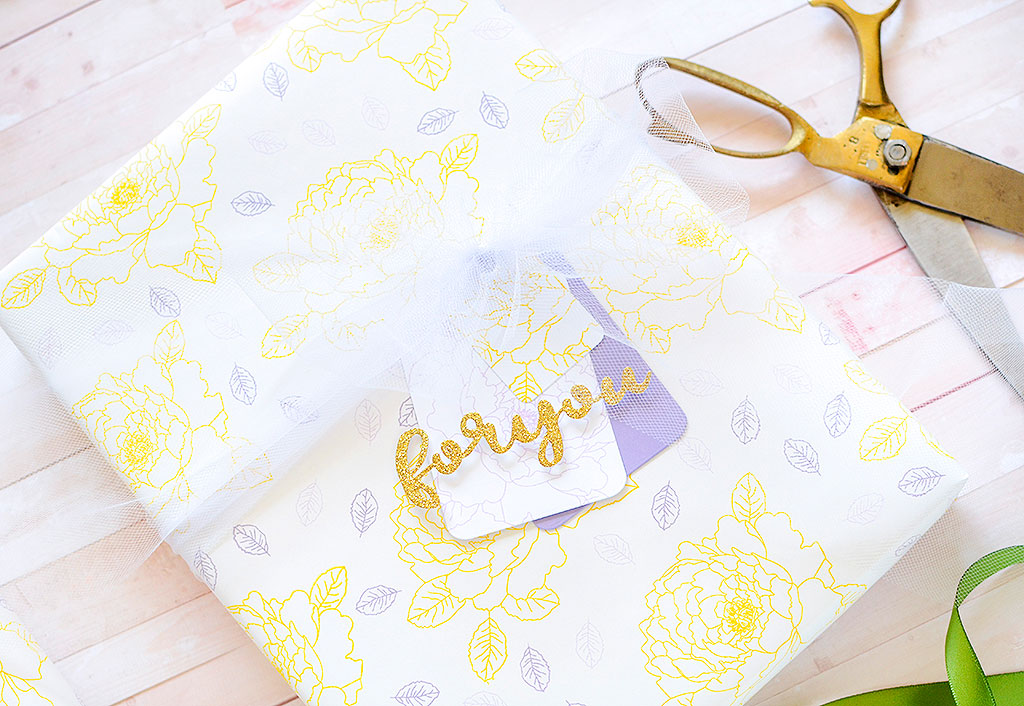 Again, I wanted the paper itself to stand out so I tied on a big lavender tulle bow and added some simple scalloped tags. I did incorporate a “For You” die cut from glitter cardstock for an extra shimmer.
 Supplies:
Stamps: Especially You
Ink: Bright Buttercup, Winter Wisteria, Lilac Grace
Paper: Winter Wisteria, White
Dies: Scalloped Tags, You Deserve Flowers Sentiments (For You)
Other: white gift wrap, tulle, glitter cardstock
Another fun way to wrap up bigger boxes is to wrap them in tissue paper. I’ve used solid white here, but if you want to use colored tissue, lighter shades would also work with a pretty result.
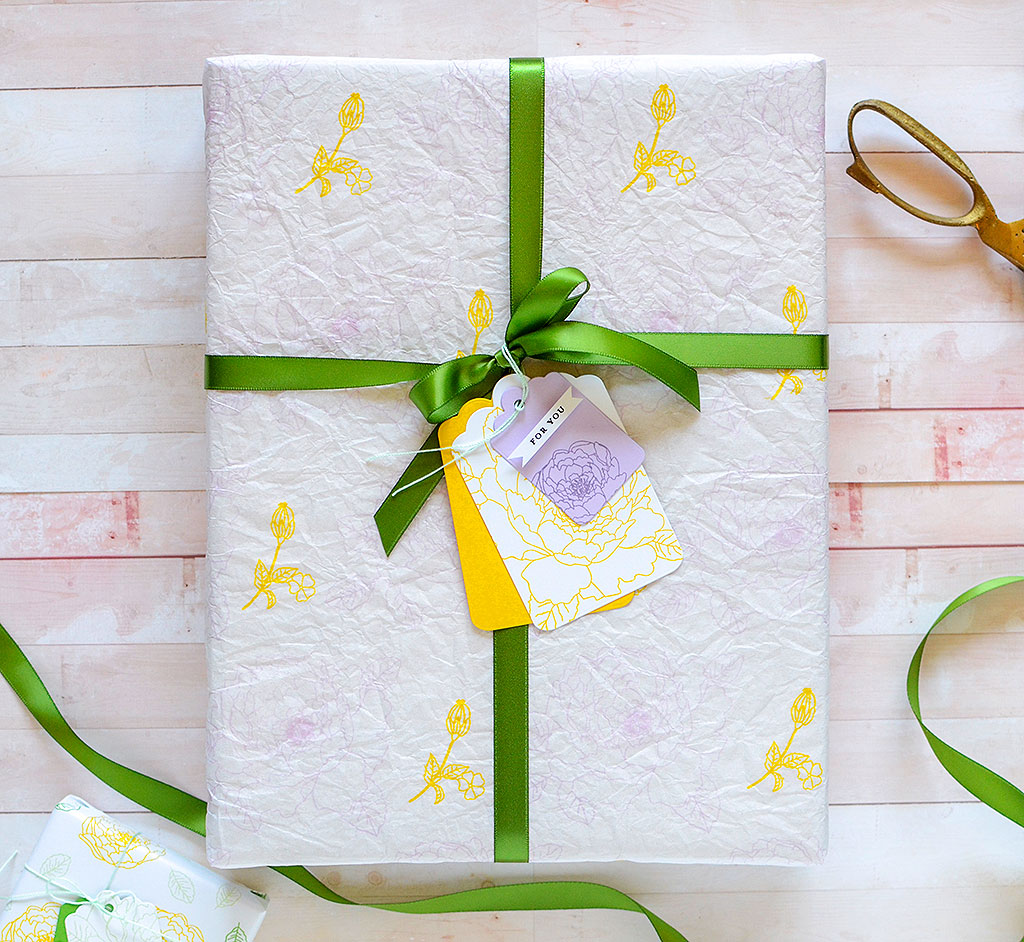
I went about this just as I went about the other two projects, opting for the larger peony due to the amount of space I need to cover. I stamped the flower in Lilac Grace and then filled in the gaps with the small stem and blossom stamped in Bright Buttercup. The tissue is a beautiful surface on which to stamp and the ink binds to it so easily.
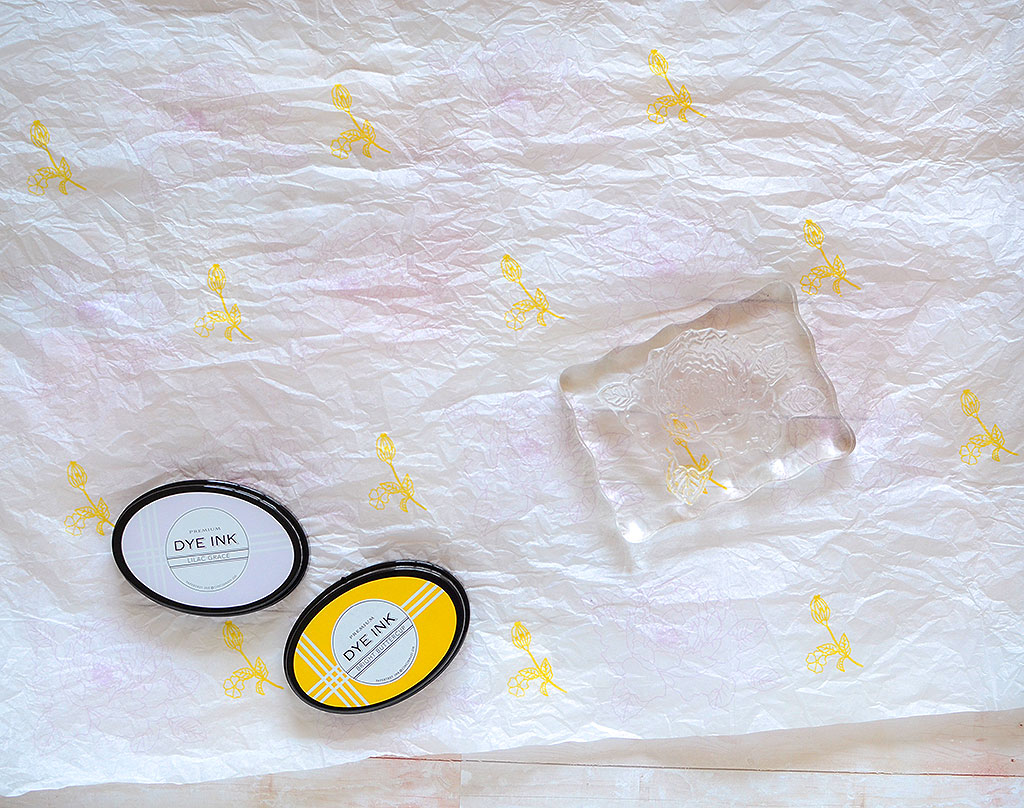 (I was disappointed to find that the Lilac Grace ink I used is really difficult to see in the photos. It looks beautiful and crisp, and shows up very well in real life so don’t let that stop you from using the LG ink! I’ve tried to darken these pictures just a bit so that they show up better.)
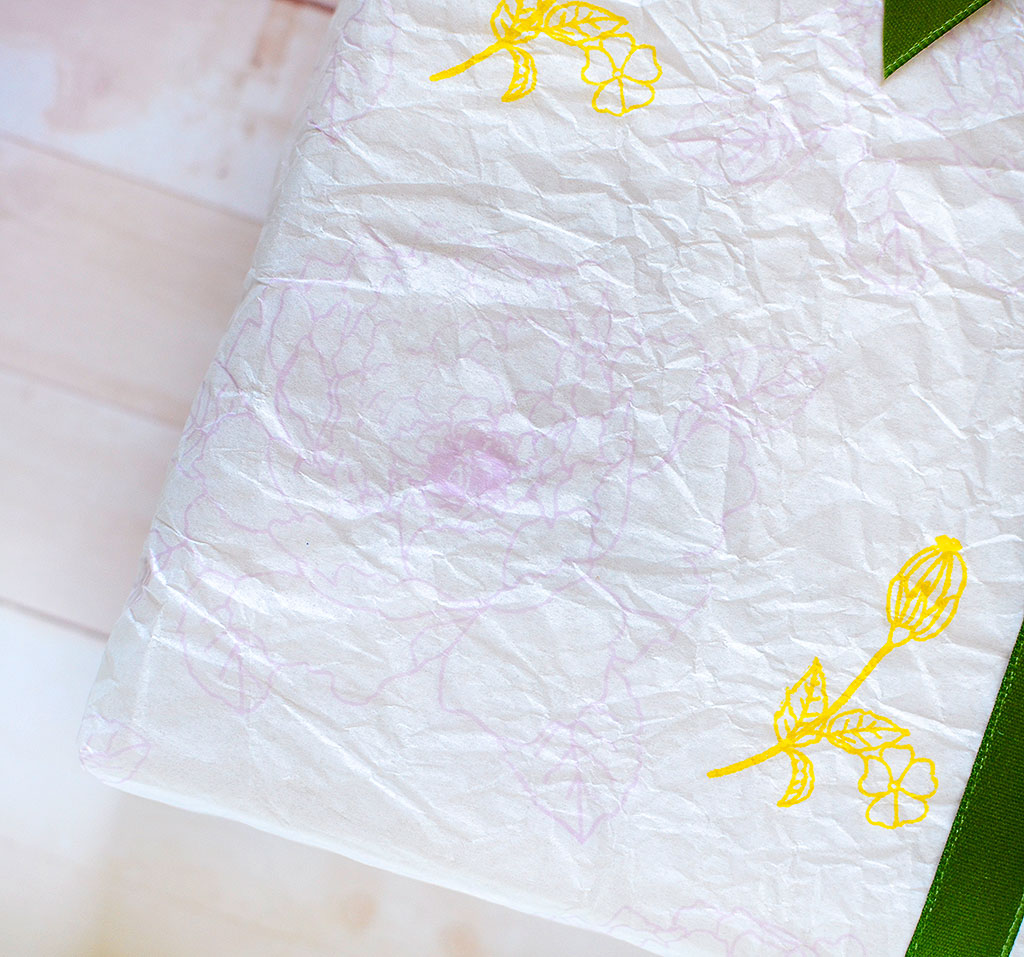 The next step is a personal preference but if it’s not your cup of tea, you can skip it. Tissue paper tends to wrinkle easily, and often comes with folds in it, so I crumpled mine up, then smoothed it back out. It adds a bit of soft texture and the lines aren’t so noticeable anymore.
*I did pre-wrap my box with plain white wrapping paper first, but if your box is solid white, you can likely skip this step as well.
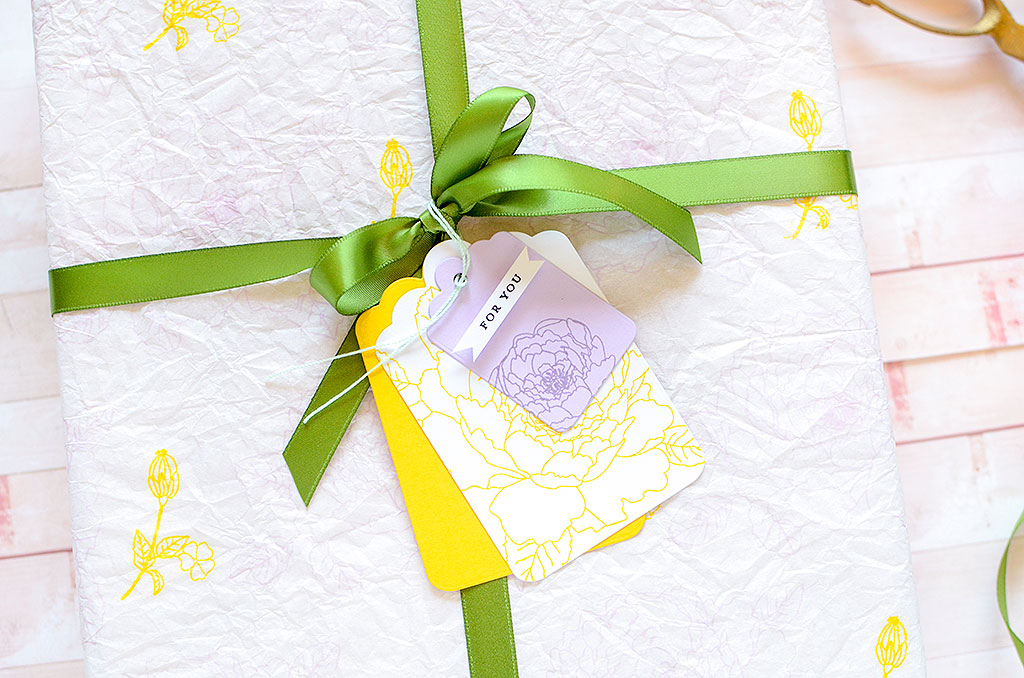
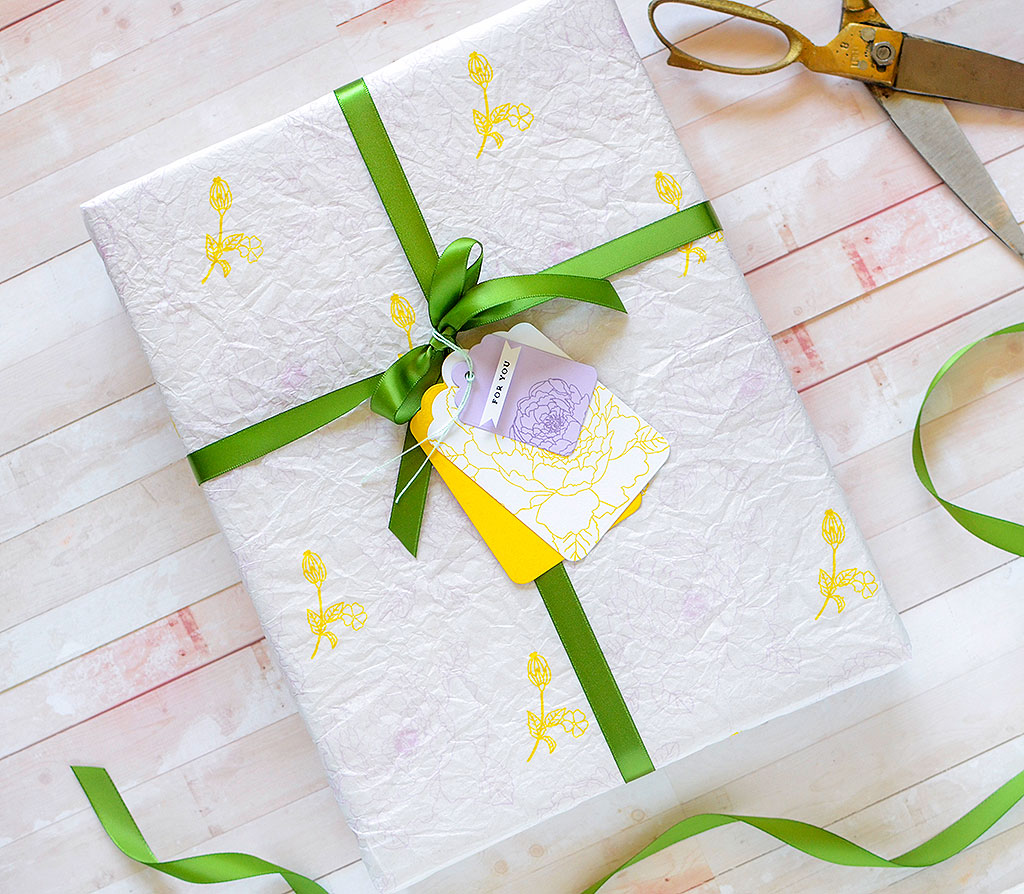 After I’d covered the box with my floral tissue, I tied New Leaf satin ribbon around it and attached my scalloped tags with mint twine. The larger floral stamps make such a nice image on the largest scalloped tag, while a glimpse of the smaller peony stamped in Winter Wisteria in the corner of a Lilac Grace tag is just as lovely. Finally, I hand-snipped a tiny banner from a leftover scrap of white card stock and stamped “For you” on it. Feel free to add more details to your own packaging, if you’d like.
Supplies:
Stamps: Especially You
Ink: Lilac Grace, Bright Buttercup, Winter Wisteria, True Black
Paper: Bright Buttercup, Lilac Grace, White
Dies: Scalloped Tags
Other: white tissue paper, New Leaf Satin Ribbon, mint crochet thread
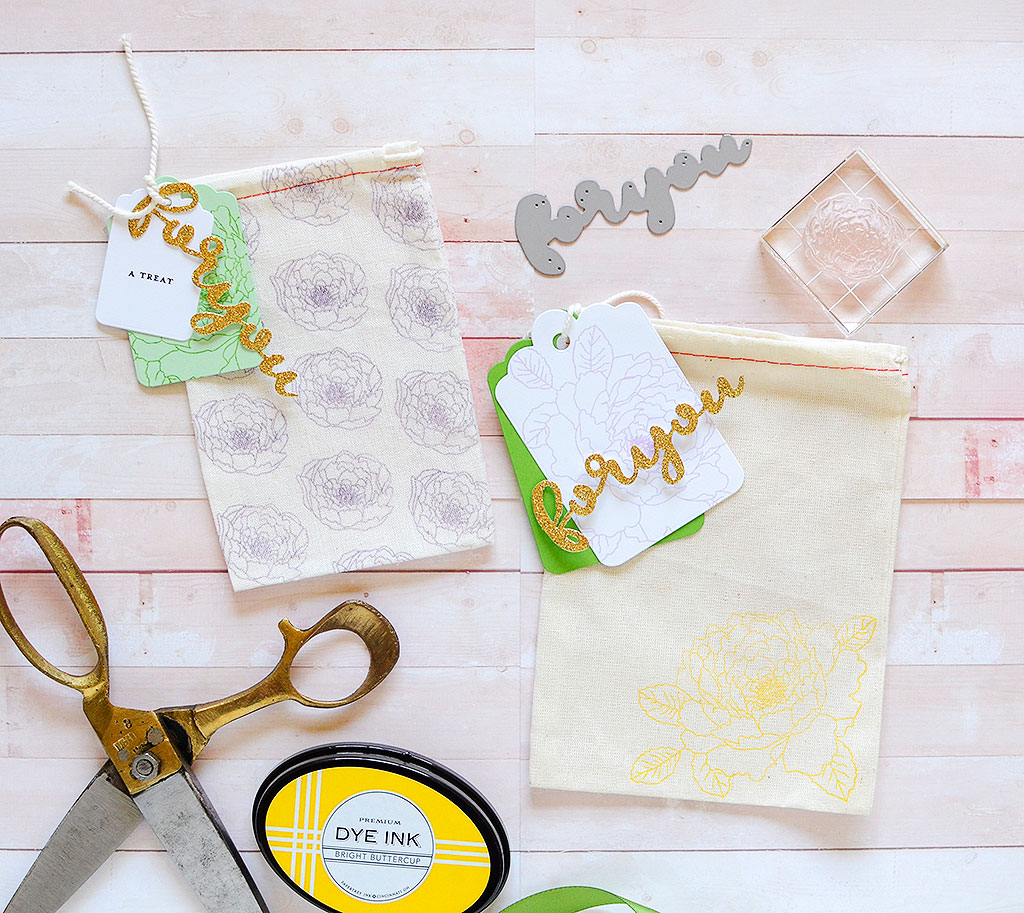 Finally, you don’t have to reserve your stamping just for paper, especially when gift giving! If you’ve followed my monthly Packaging Ambassador posts, then you know how much I love to use muslin bags for gifts, and you can definitely stamp on those! I’ve been seeing so many small businesses using these kinds of bags and stamping their logos on them. I’ve been stamping on them for years, and you may have even done it, too. The best part is you can get them in the PTI shop!
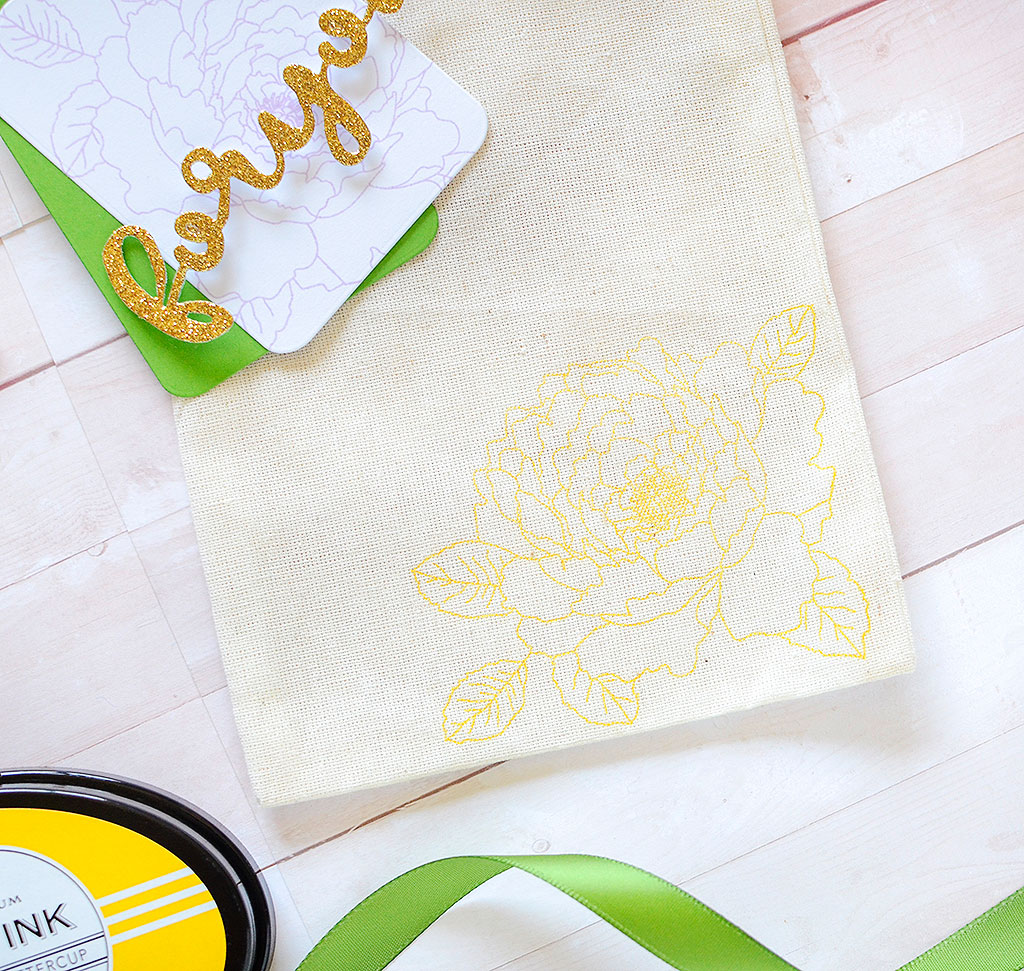 I did my bags today two ways–one has an allover pattern, while the other has just one large image. With Bright Buttercup ink, I stamped the large peony in the lower right corner of a 5″ x 7″ bag. You do want to be sure to press firmly on your stamp block for the bags so the ink absorbs into the fabric, and darker colors show up better than lighter ones. This is a bold yellow so it can be seen well.
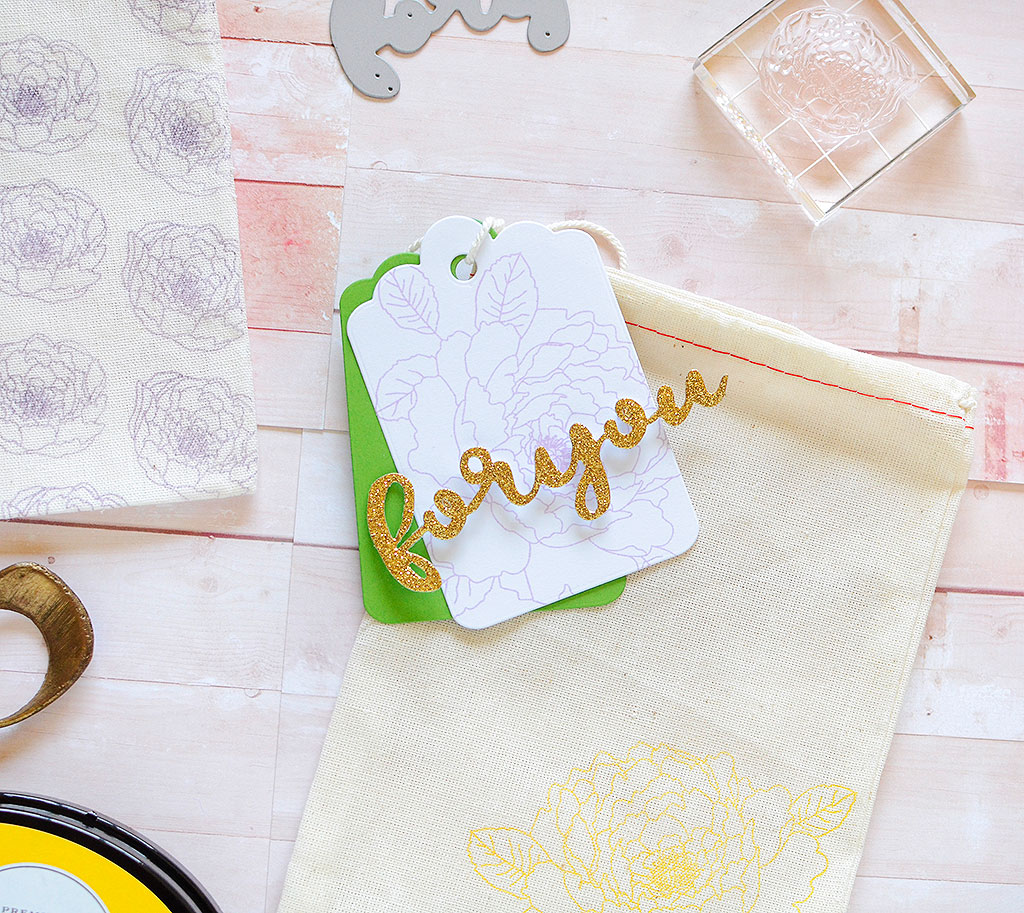 I added some large scalloped tags in New Leaf and white, the white stamped with a matching floral in Lilac Grace. This tag set, in fact, is almost identical to the one I used on the large wrapping paper box, minus the smaller scalloped tag.
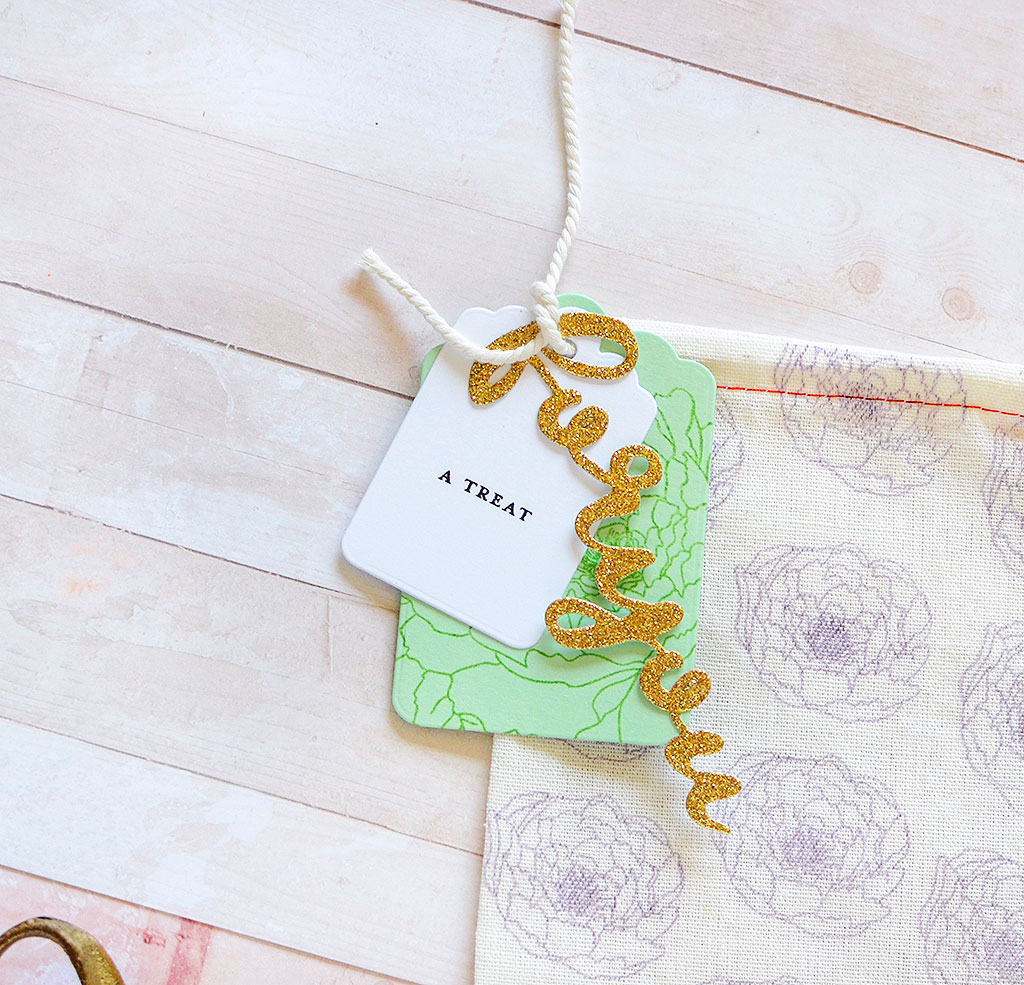
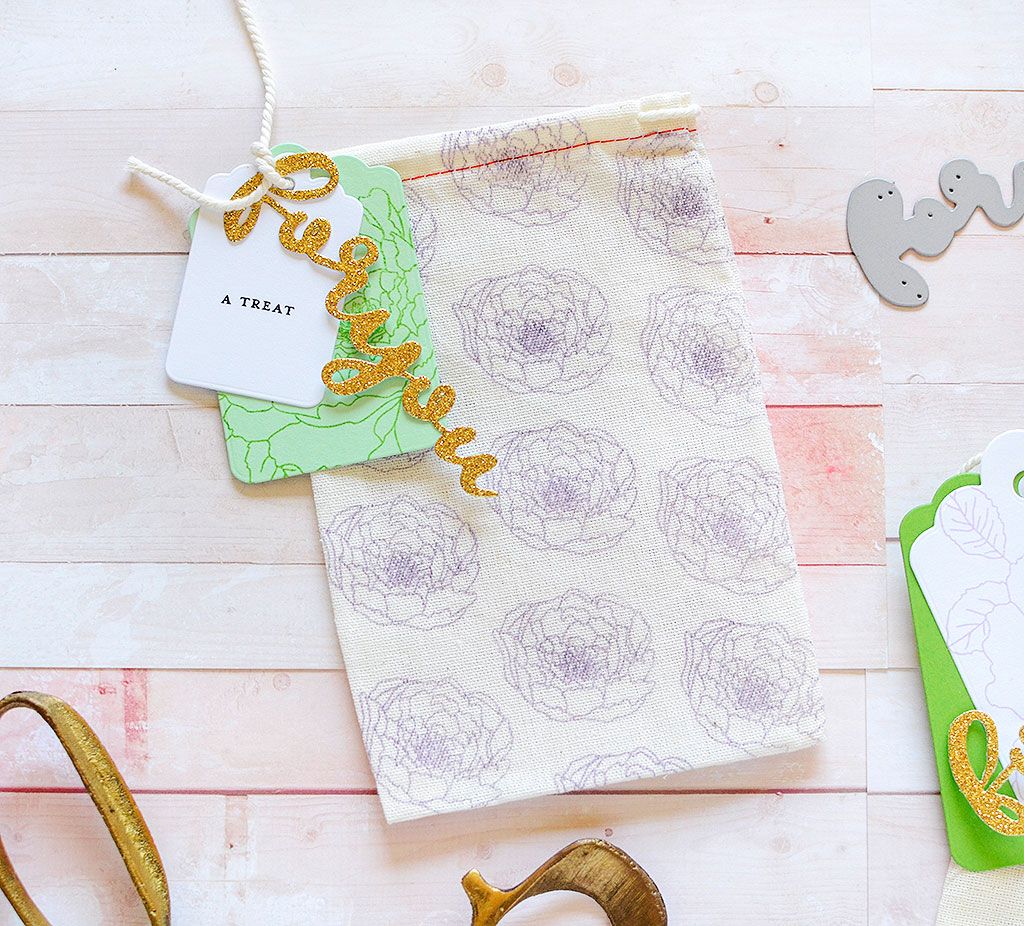 The second bag is smaller at 4″ x 6″, and I chose an allover pattern for it. The Winter Wisteria ink shows up beautifully! I paired the bag with a Mint Julep tag that features a large peony inked in New Leaf. A simply stamped white tag and glittery “for you” die cut top off this simply sweet gift.
 Supplies:
Stamps: Especially You
Ink: Winter Wisteria, Bright Buttercup, New Leaf, Lilac Grace, True Black
Paper: New Leaf, Mint Julep, White
Dies: Scalloped Tags, You Deserve Flowers Sentiments (For You)
Other: Muslin Bags (4″x6″, 5″x7″), glitter cardstock
It’s really easy and so much fun to create your own gift patterns so I hope you’ll give it a try! Anyone can do it–no special skills are required, just a love of stamping, and since you’re here visiting the Papertrey Ink blog, I know that’s YOU! Whoever is on the receiving end of a gift that’s been wrapped with hand-stamped paper (or in a gift bag) is bound to be impressed and appreciative of the thought, care, and time that went into such a special treat. Until next time, happy wrapping!
Leave a Reply