It is so fun to see all of your enthusiasm this month! After reading your comments yesterday, I couldn't help but have a huge smile on my face! I have some more fun stuff to introduce you today, so I hope you are ready for more!

Today I get to show you two new stamp sets from Heather Nichols as well as some other fun goodies! First up is the new set Simple Sentiments. This set is absolutely one of my very favorites from this year! Not only does it feature the unique look of large scale phrases underlined with strings of association words, but it covers practically ANY occasion that you would ever need to make a card for! I just adore all inclusive sets like this! It makes it so easy to reach for one set and know it will have anything you want or need to say!
The details.
- Simple Sentiments will be available for sale on January 15th.
- It will retail for $24.
- Simple Sentiments includes a total of 14 sentiments, each measuring between 3-1/4" to 3-3/4" long and 3/8" high.
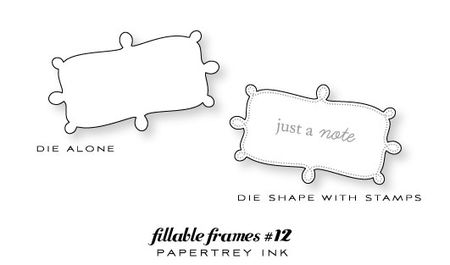
The next set I want to introduce to you today is the next in the Fillable Frames Series. This is the last addition to this product line and I think it rounds everything out nicely! The dotted loops of the frame can be either fancy or whimsical, depending on what you pair it up with! And the sentiments? LOVE this font combo once again!
The details.
- Fillable Frames #12 will be available for sale on January 15th.
- It will retail for $5.
- Fillable Frames #12 contains a total of 7 stamps (1 frame and 6 sentiments).
- A coordinating die will be available for purchase separately for $5. The frame measures 2-7/8" wide and 1-3/4" tall.
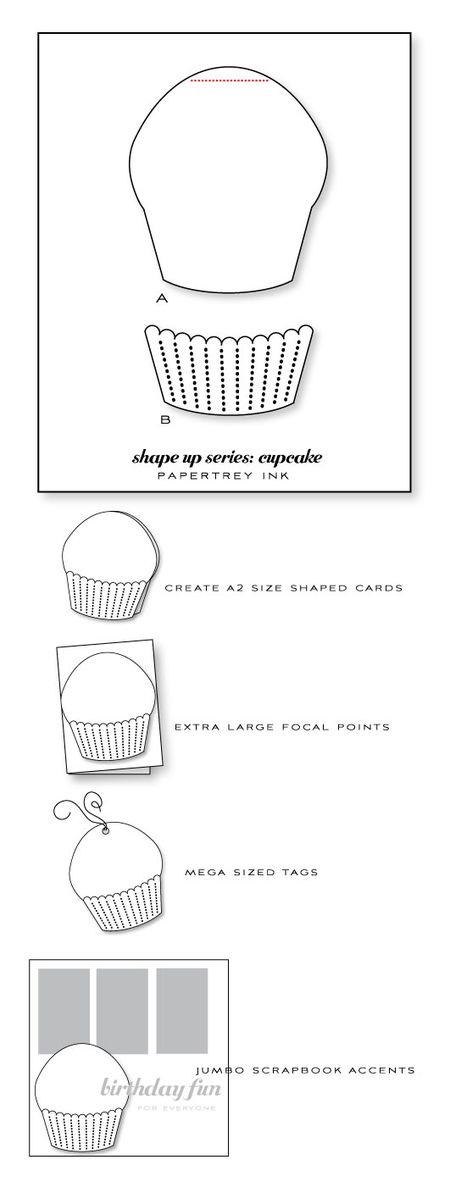
I also have a few new dies to share with you! First, I thought I would share a bit about a new line of dies we will start this month… The Shape Up Series. This collection will be made of large scale shapes that can be used to create unique shaped A2 cards, extra large focal points, mega sized tags and jumbo scrapbook accents. In lieu of birthday month, we are starting the series out with a cupcake. Everyone loves cupcakes, especially when they are super-sized! I have provided a little tutorial below that will show you just how easy it is to use these dies!
The details.
- The Shape Up Series: Cupcake Die will be available for sale on January 15th.
- The set of two dies will retail for $20.
- The large, basic cupcake die measures 4-1/4" wide and 5" tall, allowing you plenty of room to add a cherry or other topper accent to the top of a card created with it and still fit the card into an A2 envelope. The bottom cupcake wrapper die measures 3-1/2" x 2".

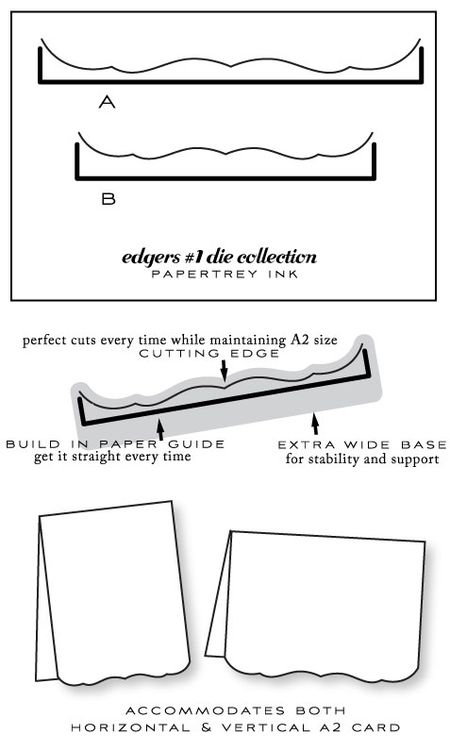
The second series of dies we are bringing you this month is our new Edgers collection. This release marks the first of this collection from Dawn McVey. You have come to love the card edge templates that she includes in her Color Couture downloads each month. Now she is bringing them to you in the form of easy to use dies!
These inexpensive sets of two dies will contain versions for both the horizontal and vertical edges of A2 cards. The Edgers collection is so much more inexpensive than border punches and takes up a lot less room! With a built-in paper guide for your card edge, the dies are easy to line up and get straight every time! You can chose to do just your card cover or both the front and back! Talk about versatility! You'll definitely want to collect the entire series!
The details.
- The Edgers #1 Die Collection will be available for purchase on January 15th.
- The set of two dies will retail for $10.
- The Edgers #1 Die Collection contains two dies, one that will accommodate the 5-1/2" edge of a horizontal A2 card and a second one that will accommodate the 4-1/4" edge of a vertical A2 card.
Now that I've gone over all the nitty-gritty details, let's get onto some projects!
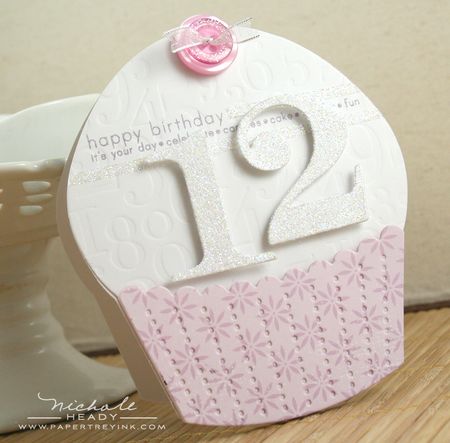
After creating this adorable little piece of art, I knew it just had to go at the top of this post to catch your attention! Shaped cards have been all the rage and this super-sized cupcake couldn't possibly be any cuter!
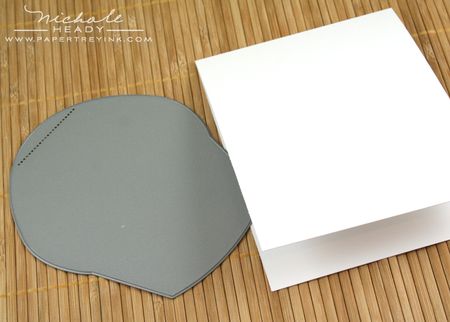
To begin the creation of this specialty card, I created a vertical A2 card base from white cardstock, with the fold at the top. I also got out the gigantic cupcake die to prepare for cutting.

The Shape Up Series dies feature a "dotted" line of small holes drilled through the base of the die for you to use as a guide when lining up the spine of your card for cutting. A few small pieces of tape on either side help to hold it in place. If you place the tape where I did above, the portion of the cardstock with the tape on it will be cut away so your don't have to worry about removing it.
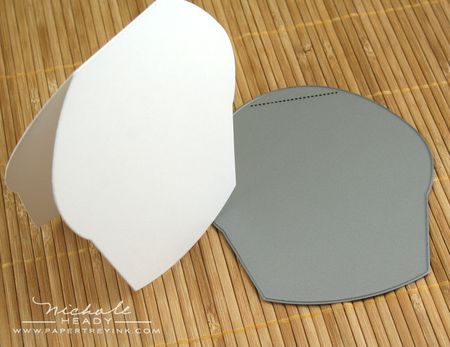
After running the die through my die-machine with the card base, I ended up with a large cupcake shaped card.
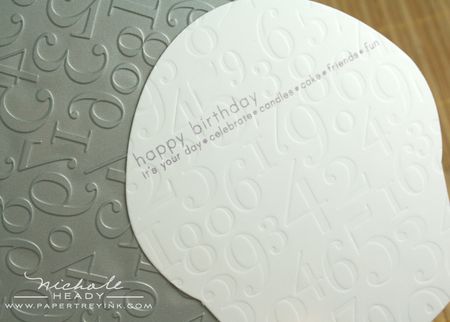
To accommodate the fold of the card, the top rounded portion of the cupcake ends up being eliminated. When designing a cover for your shaped card, you should cut out a second whole cupcake that will eventually be layered onto the cover. I did so here and stamped one of the sentiments from Simple Sentiments along the top of the cupcake with Plum Pudding ink. I then used a new impression plate (more about that later this week!) to add the numbers texture. Gotta love that look!
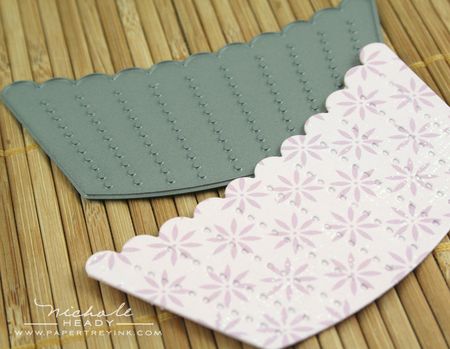
The cupcake bottom liner die features small dotted lines that emboss. If you are going to cut this from patterned paper, I recommend backing it with cardstock first to get a better, deeper emboss. Isn't this just the cutest?!?!
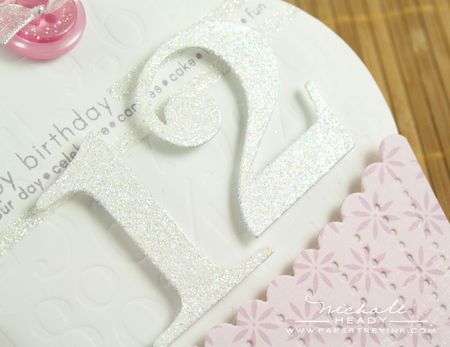
I die-cut some numbers (more about these later this week as well!) from white cardstock and sprinkled them with Prisma Glitter. A few strips of 1/8" Scor-tape added above and below the sentiment were also sprinkled with glitter.
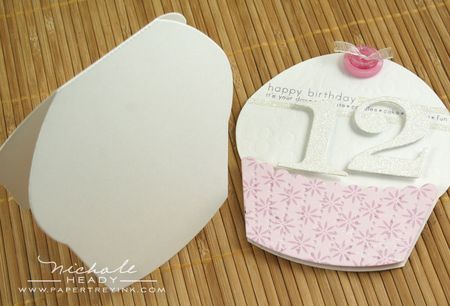
After the cupcake card front was completed, it was time to adhere it to the card base.
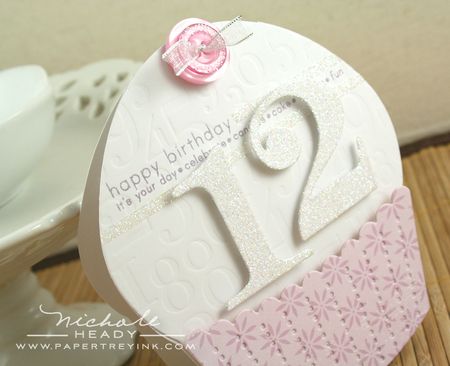
And here it is in all it's adorable cuteness. I'm thinking that this same design would look fantastic added to the front of a gift bag and then later recycled and used on a scrapbook layout commemorating the birthday! What do you think?
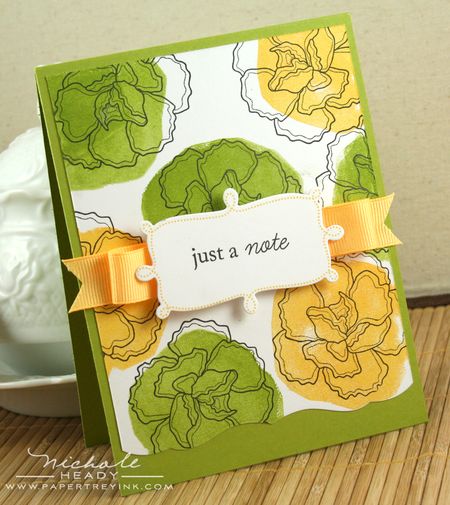
Since my last project was pretty pastels, I thought I would go with something bold and bright this go around!
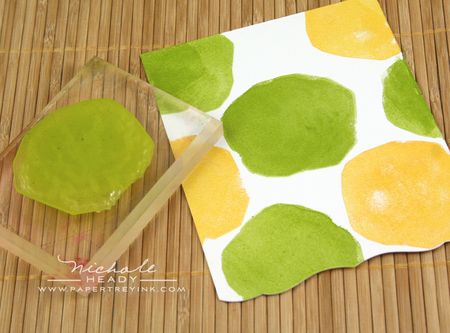
I wanted to create a really bold background with a specific design element I had in mind. To achieve my goal, I flipped over the small carnation stamp from Year of Flowers: Carnations (more about this in tomorrow's post) to the back and inked it up with Summer Sunrise and Simply Chartreuse inks. The artsy blotches are exactly what I had in mind.
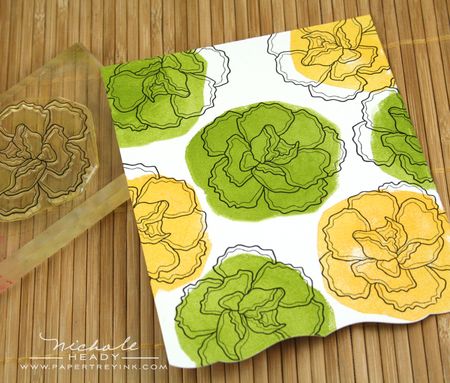
I then flipped the carnation stamp back over to the front and stamped the flower outlines with True Black ink on top of the splotches. I just LOVE how this turned out and will definitely be doing this again!
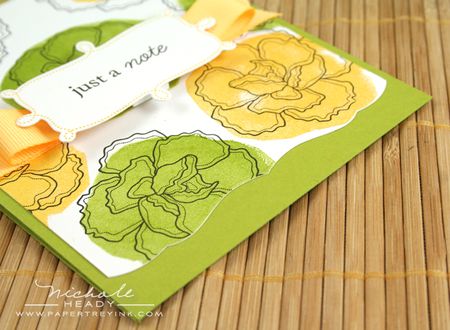
The edge of the card front was trimmed with the narrow Edgers #1 die, showing that it doesn't just have to be used on the edges of cards.
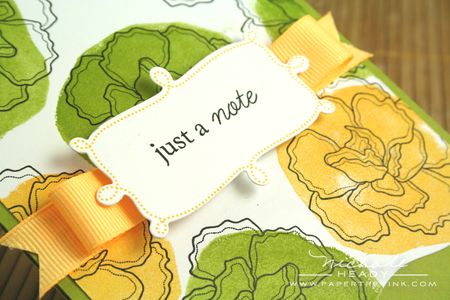
The focal point was created with Fillable Frames #12. I diecut white cardstock and stamped the frame with Summer Sunrise ink, followed by the sentiment in True Black. This was layered on top of loops of Summer Sunrise Grosgrain ribbon.
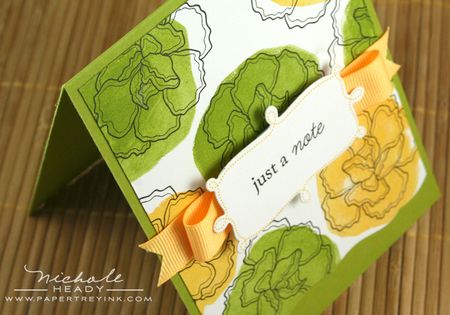
Such a fun & cheerful card that would certainly bring a smile to anyone's face!
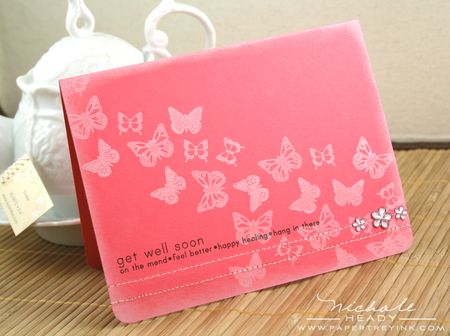
My next project is a super simple one-layer card.
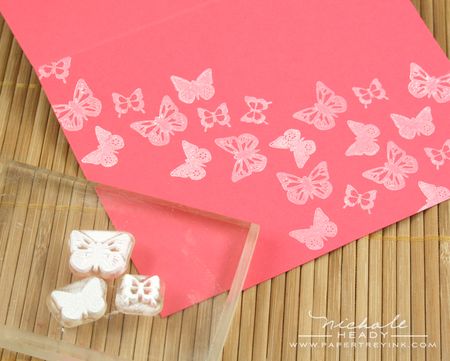
I selected several of the small butterflies from Butterfly Dreams and placed them on block together in a cluster. I used Fresh Snow ink to stamp them across my Berry Sorbet card cover.
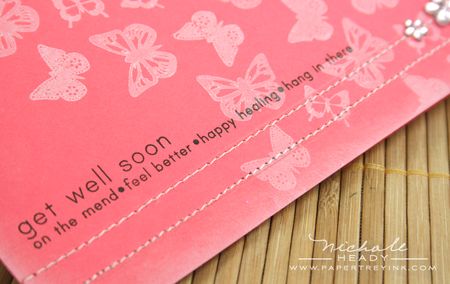
I then added the Get Well Soon sentiment from Simple Sentiments in True Black ink. I love how these border-style sentiments overlap across projects like this and add such a great amount of balance.
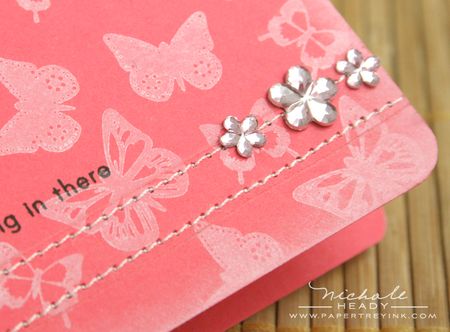
I added a few lines of stitching under the sentiment as well as a few flower rhinestones.
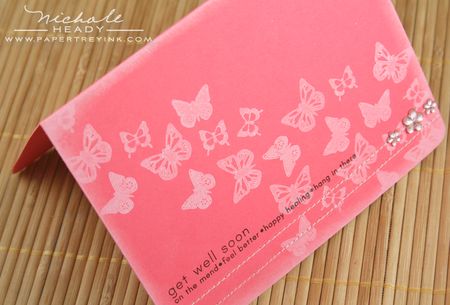
A simple card that would look great in SO many colors!
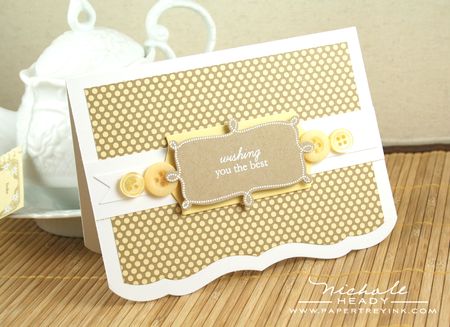
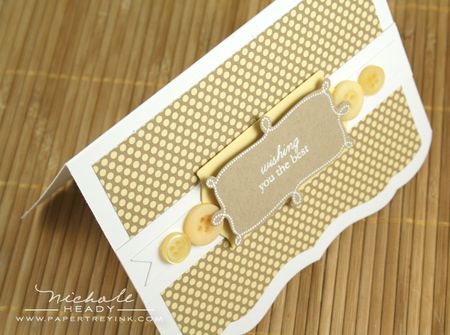
For my last project today, I thought I would show you how to use the Edgers #1 die collection to create matching mat layers for your card covers.
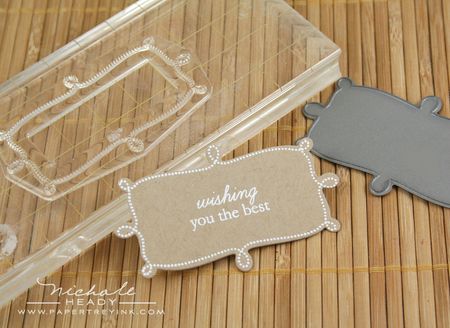
First, the focal point. Once again I used Fillable Frames #12, this time heat embossed onto Kraft cardstock that had been cut first with the coordinating die.
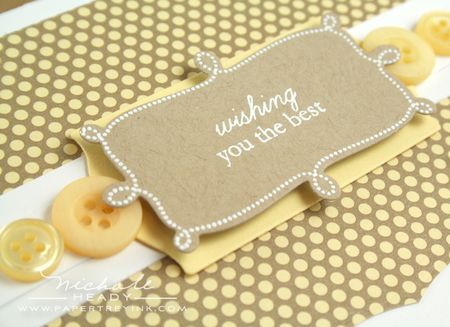
I found that the Fillable Frames #11 die (as well as many of the other previously released Fillable Frames shapes) layers beautiful under the Fillable Frames #12 silhouette.

Next, I cut my card base and mat layer. For the card cover, you want to line-up the card edge perfectly in the guides provided. A little piece of scotch tape will ensure that nothing shifts while you are cranking your die machine. For the mat layer, you simply want to center it on the point of the Edgers #1 die, allowing equal spacing on either side.
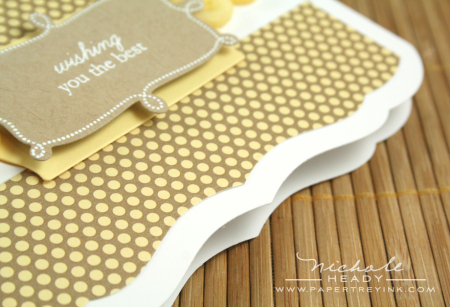
Viola, a perfect coordinating layer. Notice as well that I opted to cut the front and back covers with the decorative edge. I highly recommend doing the front and the back one at a time to insure a crisp edge cut each time.
I hope you enjoyed all of today's creative goodness! All of these amazing dies paired with stamp sets that are fantastic basics, you can create a variety of projects in a full spectrum of styles! What are your first impressions of all of today's introductions? Which stamp set or die has you the most excited and inspired? We would love to hear from you! You can have a chance at winning this amazing prize package just for sharing your thoughts with us!
- Simple Sentiments stamp set
- Fillable Frames #12 stamp set
- Fillable Frames #12 die
- Shape Up Series: Cupcake die collection
- Edgers #1 die collection
You have until 7am EST, Wednesday January 12th to leave your comment and have a chance to win. Only one comment per person please. One randomly selected winner will be announced on our January 2011 Release Winners page no later than noon EST. Thanks for stopping by today and good luck!
Heather Nichols is showcasing both of her new sets today.
Dawn McVey featured some projects using the Edgers #1 dies yesterday and today she is sharing another new product she designed.
Beth Silaika is using her new Inside & Out: Birthday set.
Melissa Bickford has created a few things using both of her new sets for this month.
12TH BIRTHDAY CUPCAKE CARD
- STAMPS: Simple Sentiments (available January 15th),
- INK: Plum Pudding
- PAPER: Stamper's Select White, Pretty Pastels paper pad
- OTHER: Shape Up Series: Cupcake Die, By the Numbers dies, By the Numbers Impression plate, Lavendar Moon buttons, Silver Collection Ribbon, Prisma Glitter, foam dimensionals
- FINISHED SIZE: 4.25" x 5.25"
JUST A NOTE CARD
- STAMPS: Fillable Frames #12, Year of Flowers: Carnations (available January 15th)
- INK: Simply Chartreuse, Summer Sunrise, True Black
- PAPER: Stamper's Select White, Simply Chartreuse
- OTHER: Edgers #1 Die Collection, Fillable Frames #12 Die, Summer Sunrise Grosgrain Ribbon
- FINISHED SIZE: 4.25" x 5.5"
GET WELL SOON CARD
- STAMPS: Simple Sentiments (available January 15th), Butterfly Dreams
- INK: Fresh Snow, True Black
- PAPER: Berry Sorbet
- OTHER: Corner Chomper (We R Memory Keepers), rhinestone flowers (KaierCraft), sewing machine
- FINISHED SIZE: 4.25" x 5.5"
WISHING YOU THE BEST CARD
- STAMPS: Fillable Frames #12 (available January 15th)
- INK: VersaMark
- PAPER: Stamper's Select White, Lemon Tart, Kraft, Dottie Biscotti patterned paper pad (yellow)
- OTHER: Edgers #1 Die Collection, Fillable Frames #12 Die, Double Ended Banners Die, Fillable Frames #11 Die
- FINISHED SIZE: 4.25" x 5.5"




Leave a Reply