


Here we are! The final day of the countdown! So hard to believe! I have some super exciting stamps and projects to introduce to you today. Thanks for your patience with me as I took a little extra time to prepare everything for you!
There are TWO posts with TWO ways to win today, so be sure to scroll down all the way!

First up is a new set from Alli Miles. The second addition to her Take Three stamp collection. Each quarter we will be releasing a new addition based upon the current season. When the year is up, you will have a small collection of stamps that can carry you through nearly any occasion or holiday, and all very reasonably priced.
The Take Three stamp sets always include six images and a handful of complementary sentiments. Between the six image stamps there are actually TWO images, each positioned three ways within three reverse block stamps. By having images available facing left, right and centered, you have options to use them all together or individually.
The details.
- Take Three: Summer will be available for purchase on May 15th.
- It will retail for $15.
- Take Three: Summer contains a total of 14 stamps (6 block images, 1 small accent flower and 7 sentiments).
- The sentiments in the Take Three: Spring stamp set are interchangeable with this month's addition and all other Take Three sets in the future.

The other set I have to introduce to you today is a fabulous background set from Melissa Bickford. Background Basics: Geometrics is an eclectic mix of different takes on basic geometric shapes. They will prove to be a wonderful finishing touch to so many projects!
The details.
- Background Basics: Geometrics will be available for purchase on May 15th.
- It will retail for $15.
- Background Basics: Geometrics contains a total of 3 background building strips.
Now that I have all the introductions out of the way, let's get to the fun stuff!

This is my favorite card of the bunch, so I just simply HAD to share it with you first since I am so excited about it!
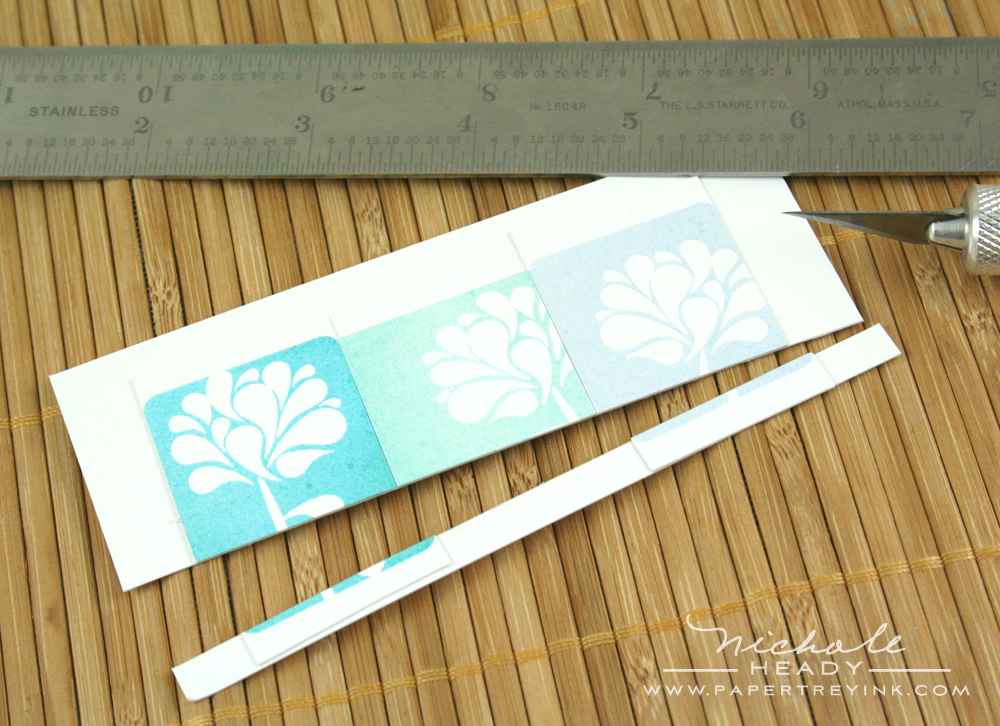
I stamped the three different orientations of the blossom block image, each in a different color on white cardstock. I used Hawaiian Shores, Aqua Mist and Spring Rain. I then trimmed the SIDES of each block even with the edge of the stamp images and adhered them to another piece of white cardstock, butting right up against one another. I then used a ruler and craft knife to trim along the bottom of the strip to eliminate the curved corners and allow this to look like one cohesive block.
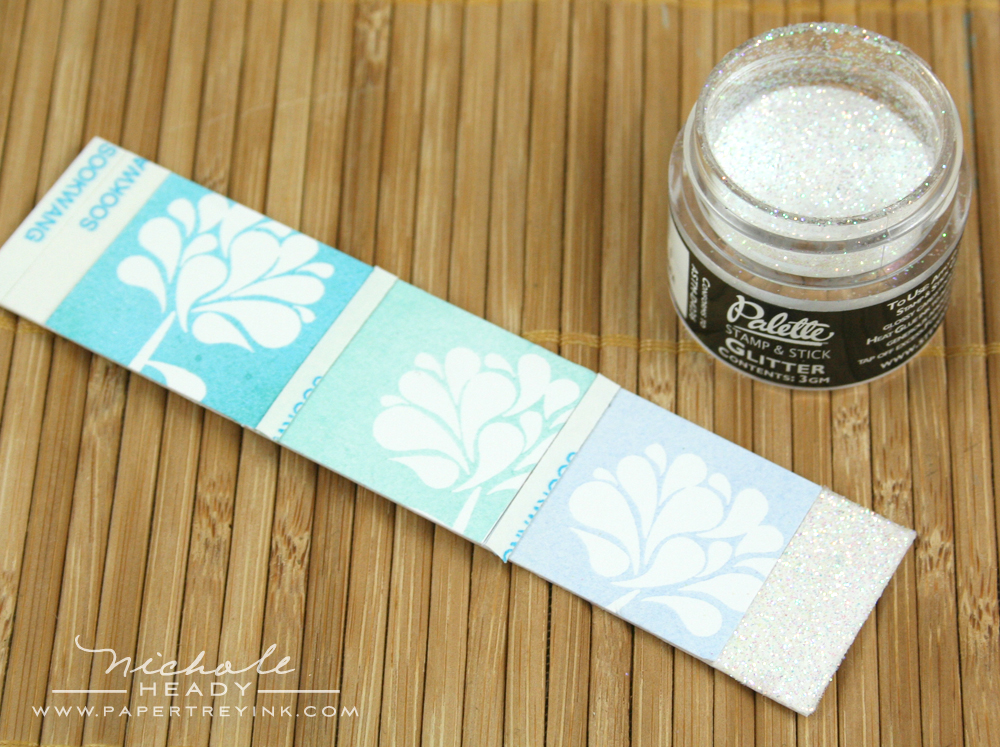
While trimming, I left about a half-inch of white cardstock on either end to use for glitter application later. I applied Scor-tape to the ends and between the blocks and then sprinkled on glitter.
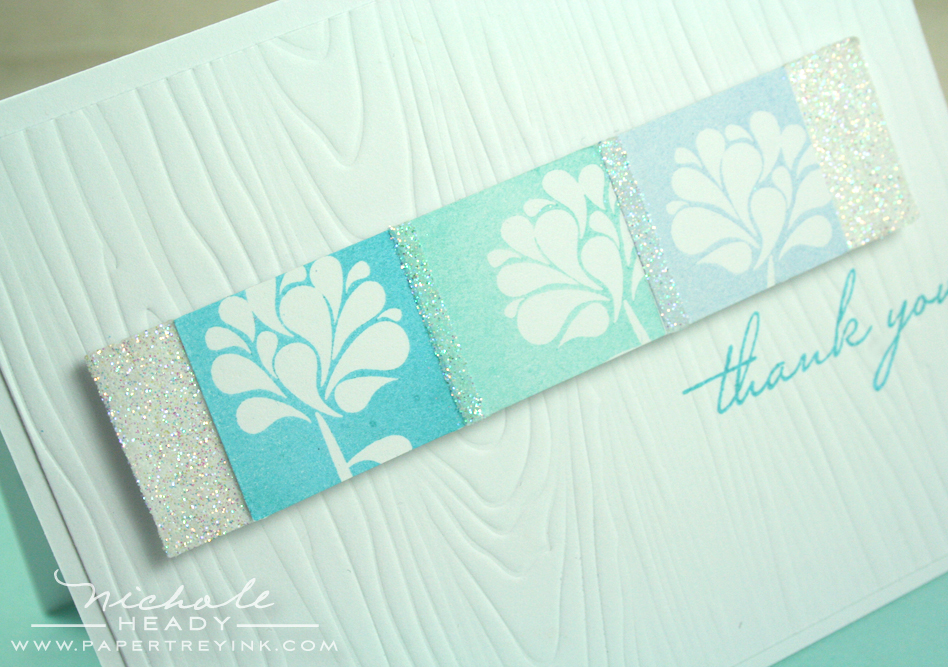
The finished result is just SO pretty! Reminds me a tad of a paint swatch, but in an artistic, sparkley kind of way!
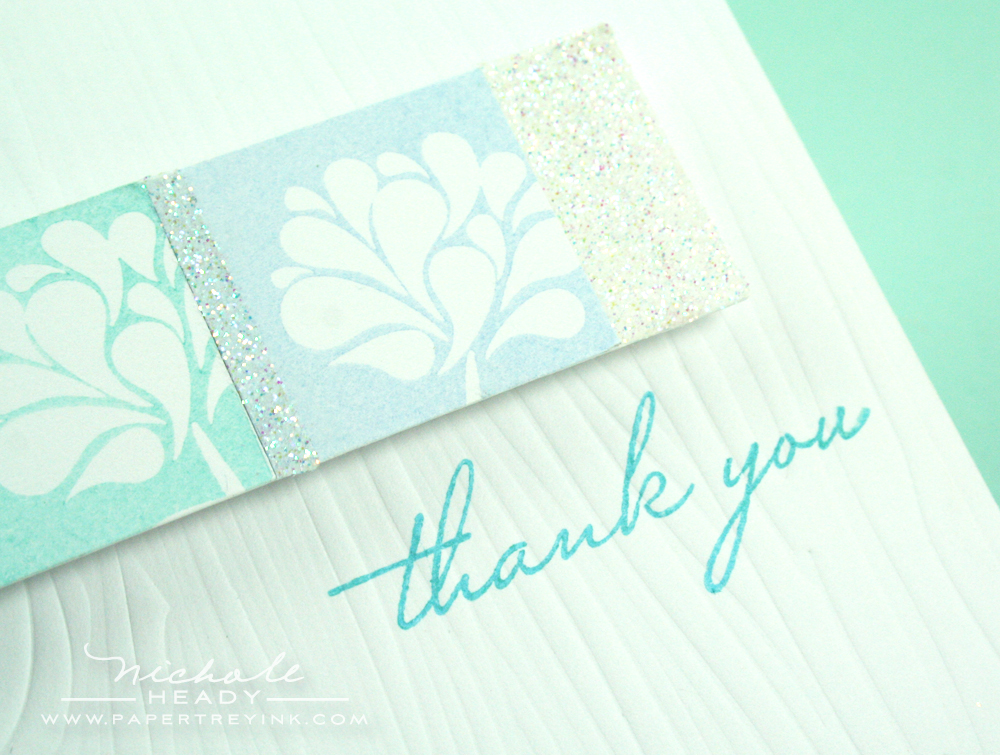
The thank you sentiment on the front cover is from Inside & Out: Thank You and it's stamped with Hawaiian Shores ink.
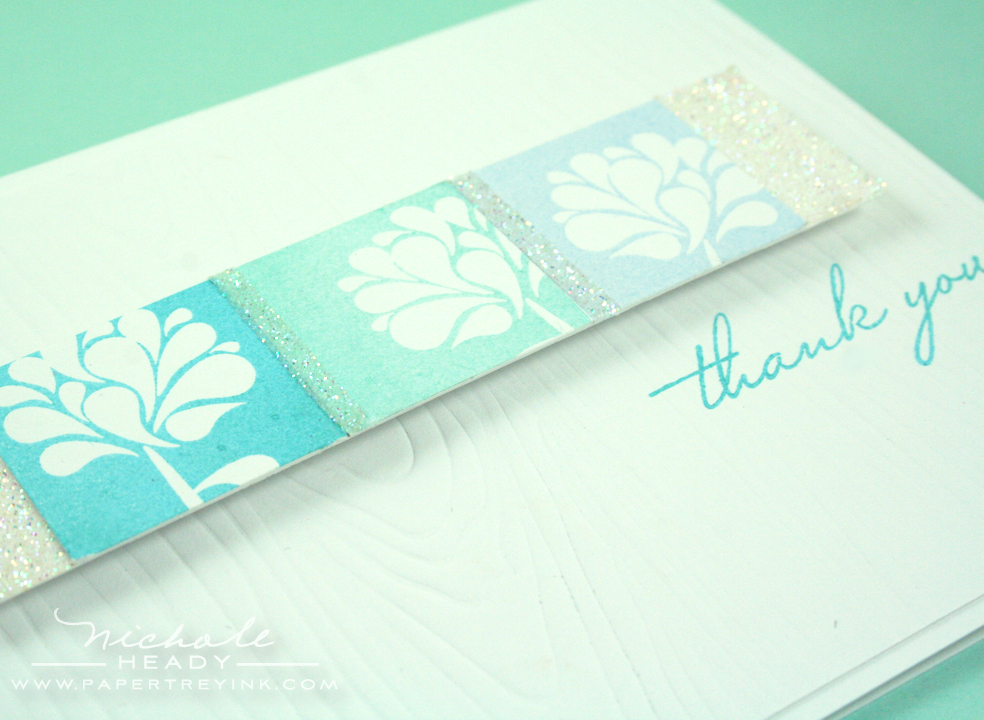
Notice the use of the Woodgrain Impression Plate on the front cover? I love the way this plate accents the design so well. Plus, I'm always a fan of white on white like this, with just a little color pop!

This type of card could be done in a variety of colors so you could create your own little collection. So fun to have on hand whenever you need to jot anyone a little note!

I accented the interior of the card a bit as well. I stamped one of the floral blocks with Aqua Mist ink, then stamped the same thank you from the cover directly over the flower using Hawaiian Shores ink. Underneath that I stamped one of my favorite sentiments from Inside & Out: Thank You using True Black ink. Simple, but really jazzes the inside up!
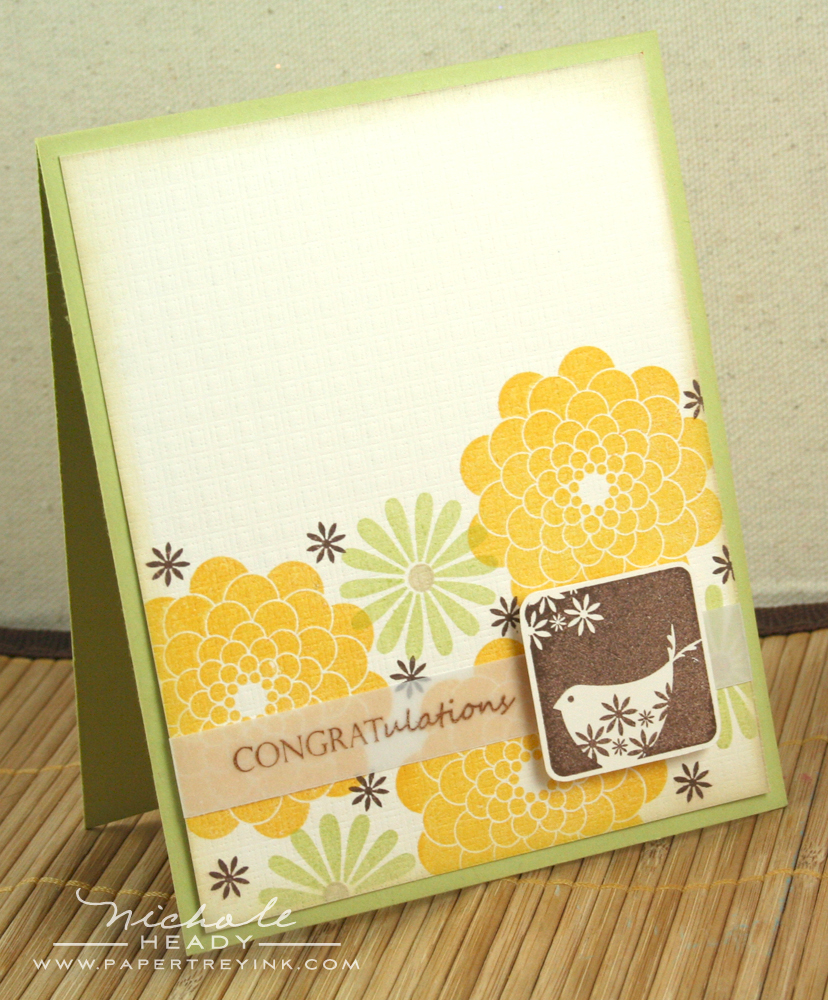
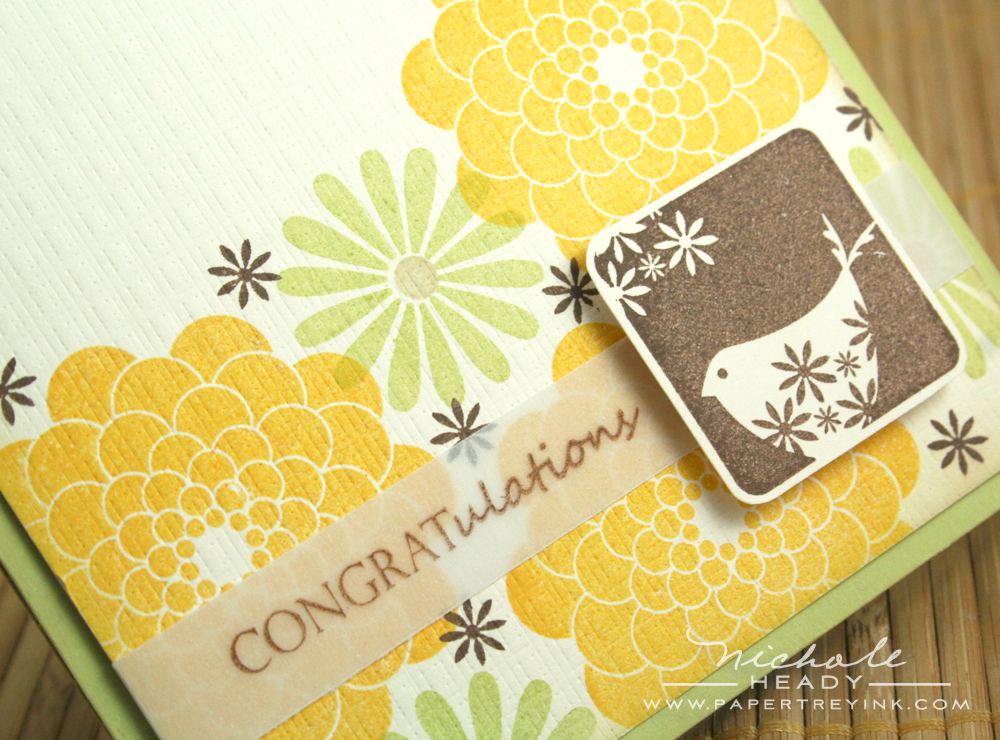
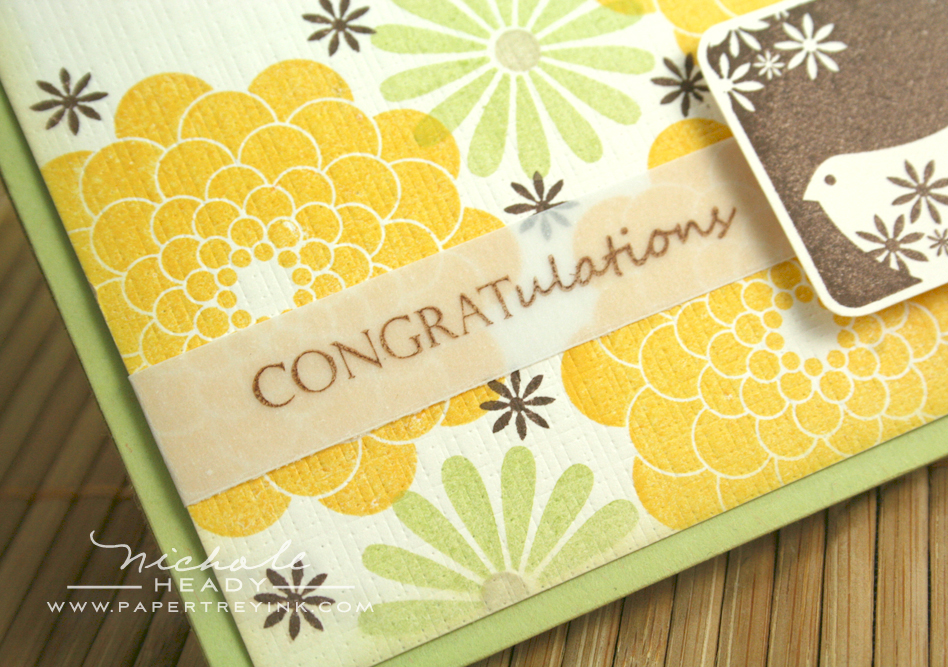
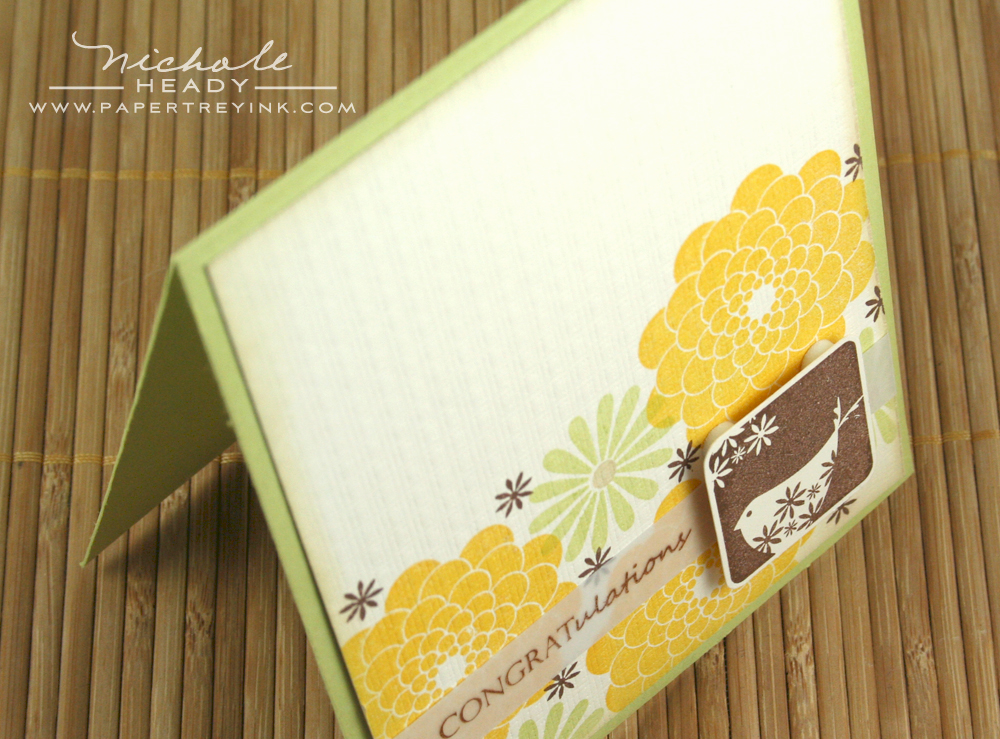
My next card is a bit more vintage. I was inspired by some colors I had seen together in a catalog. Summer Sunrise, Spring Moss, Dark Chocolate & Vintage Cream!
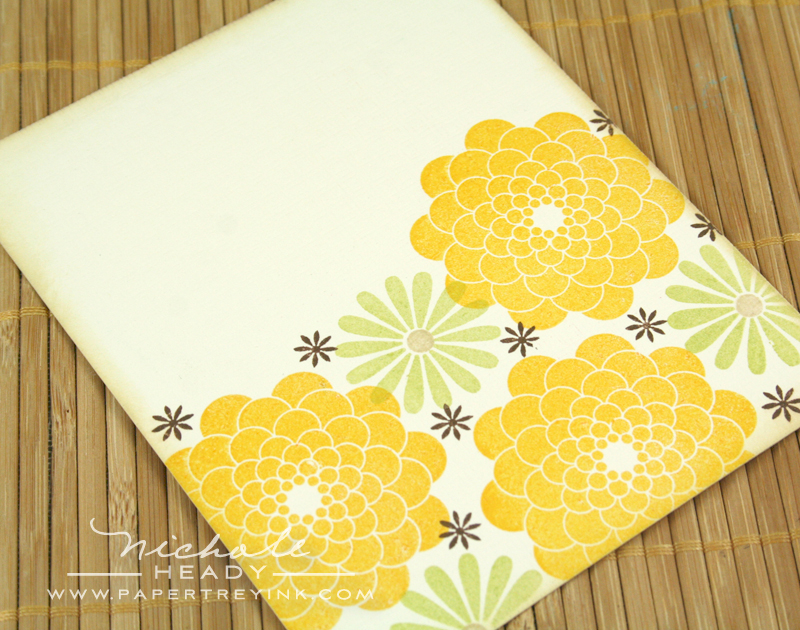
I started with Vintage Cream cardstock and stamped it with various flowers from Beautiful Blooms II using Summer Sunrise and Spring Moss ink. I then used the small daisy from Take Three: Summer, that coordinates with those found in the bird images, to add Dark chocolate accents. I then swiped the edges with the Tea Dye Duo pads. Last but not least, I ran the whole thing through my Big shot with the linen side of the Linen & Canvas Impressions Plate.
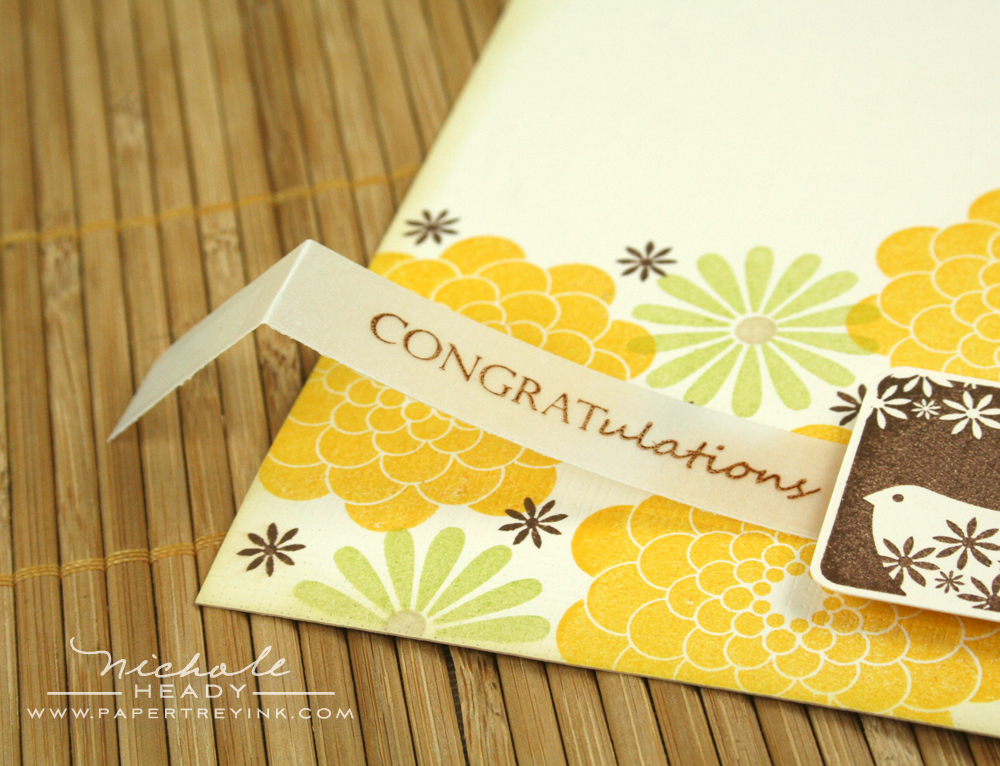
You might have noticed the fun vellum sentiment strip on this card. People are always asking me about how to adhere vellum. For this particular application, I cut the strip twice as long as the card is wide and wrapped the ends of the strip around to the back. I then applied adhesive just to the portions on the back. This hides the adhesive and the portion on the front remains crisp and unaltered!
This hides the adhesive and the portion on the front remains crisp and
unaltered!
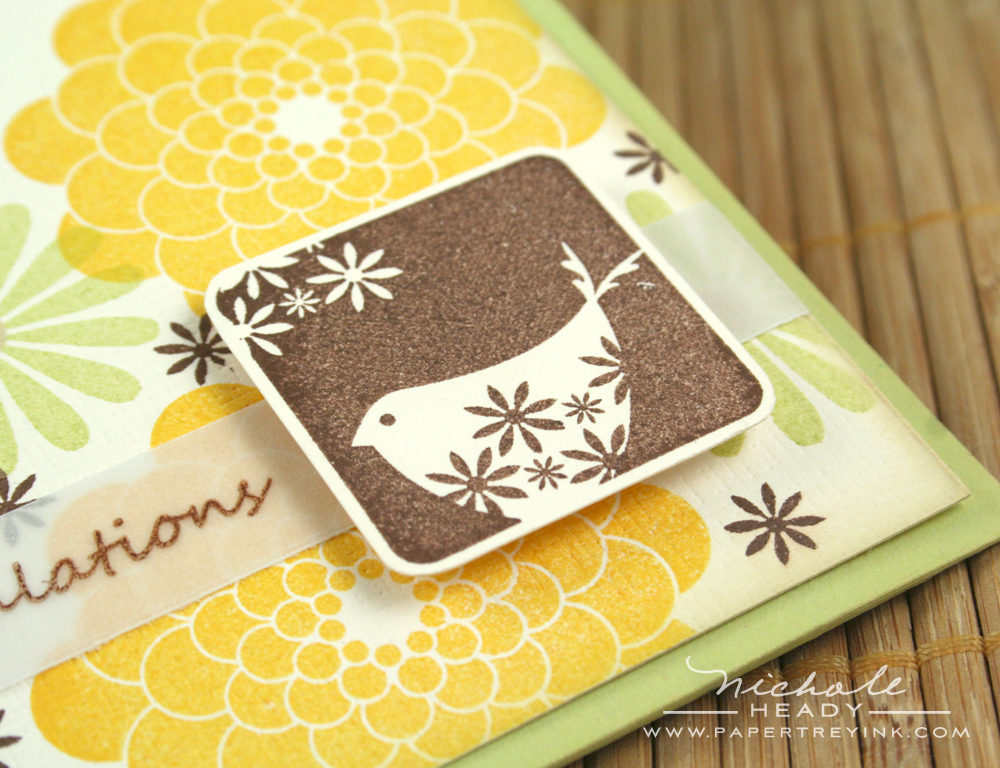
The bird block image was stamped with Dark Chocolate ink and adhered with foam dimensionals.
In this photo I wanted to point out how the small dark chocolate flowers in the bird image are brought out by the matching dark chocolate flowers I stamped on the background paper. This is a design tip implement pretty regularly and you might have success with it if you don't already do it in your own process.
A fun, retro card that nearly anyone would love to receive!
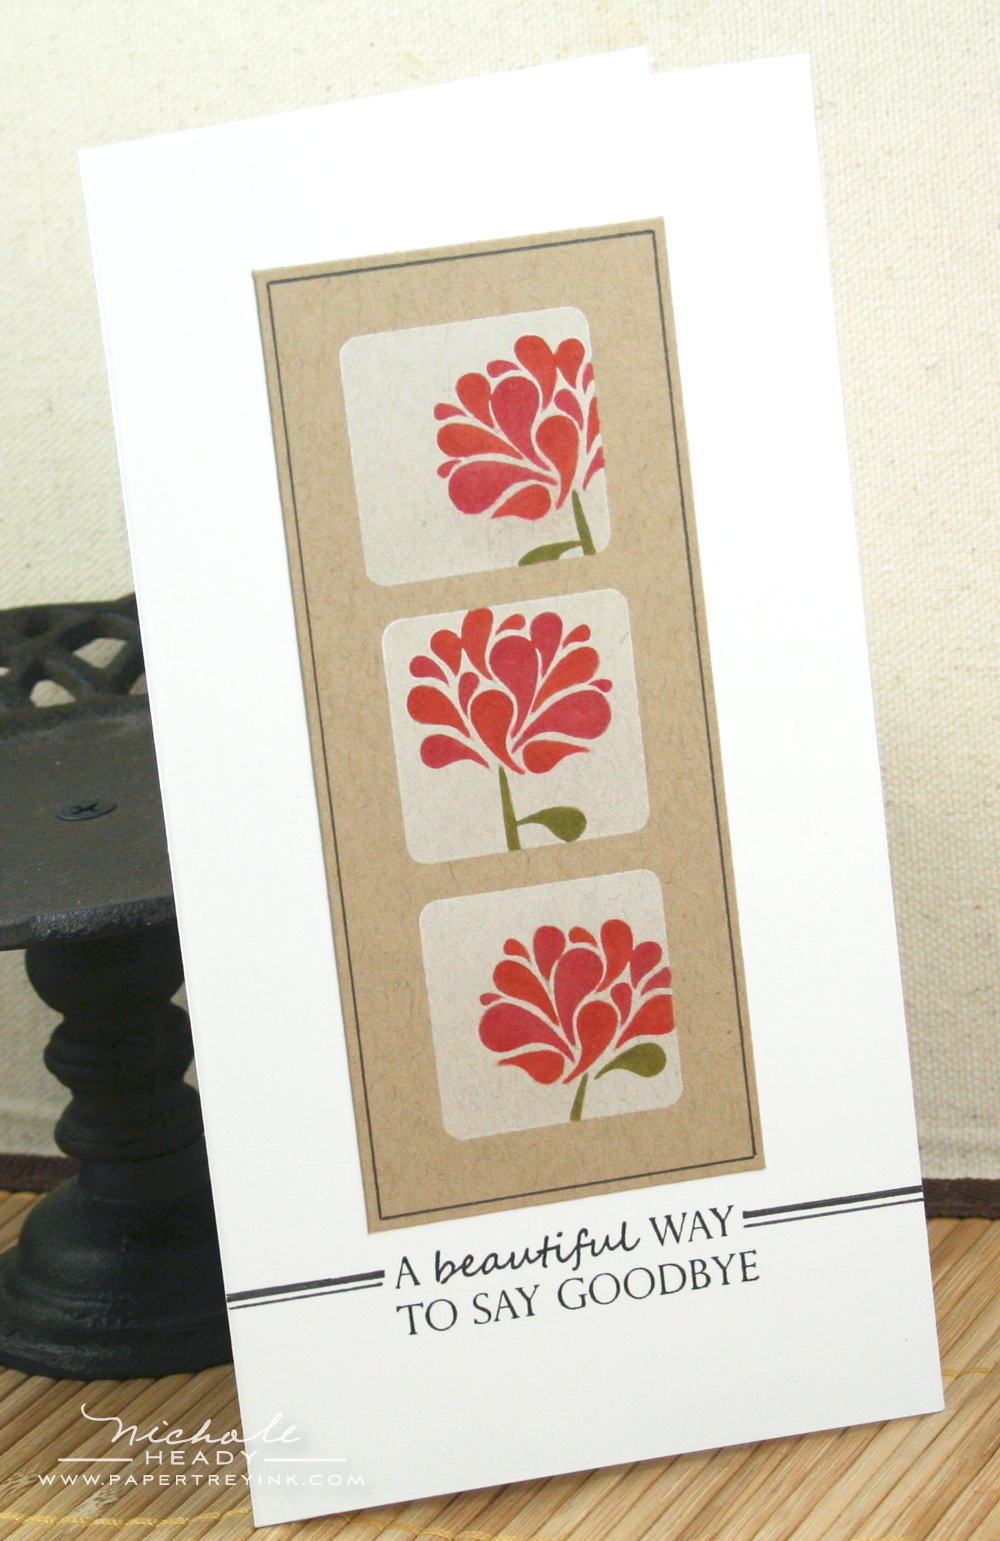
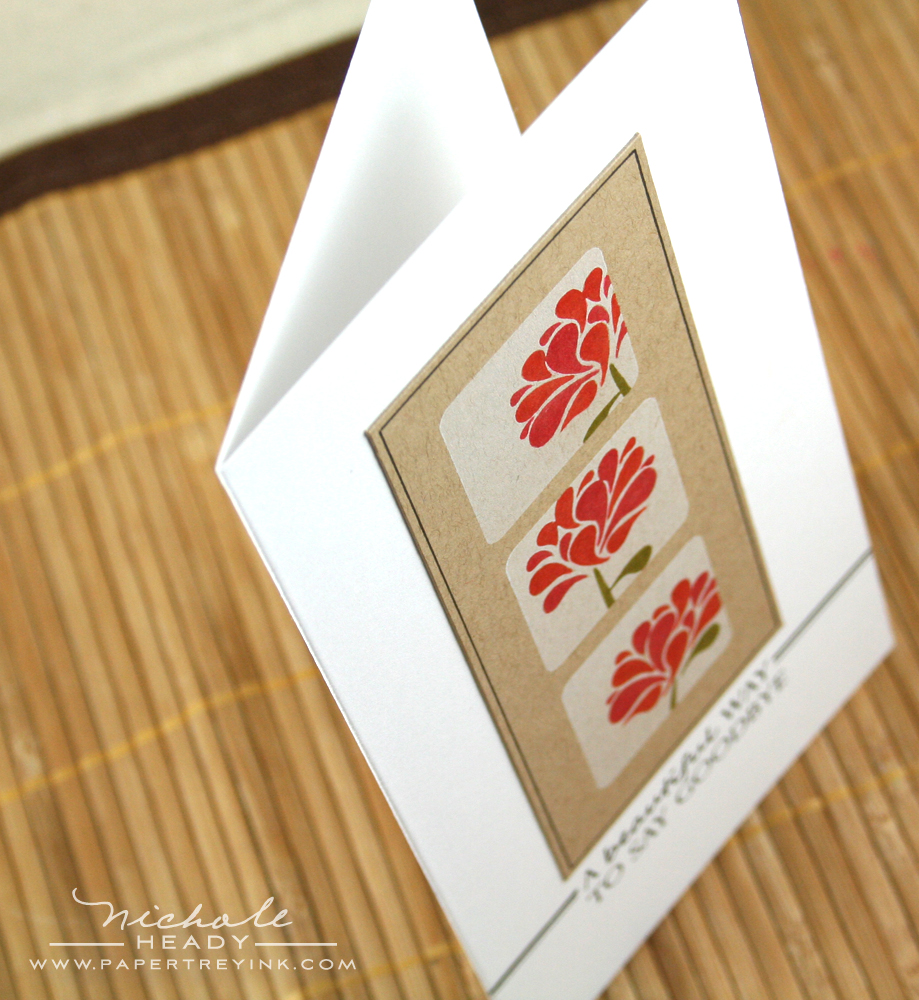
Next, I have a sympathy card I created with a bit of white ink & Copic markers!
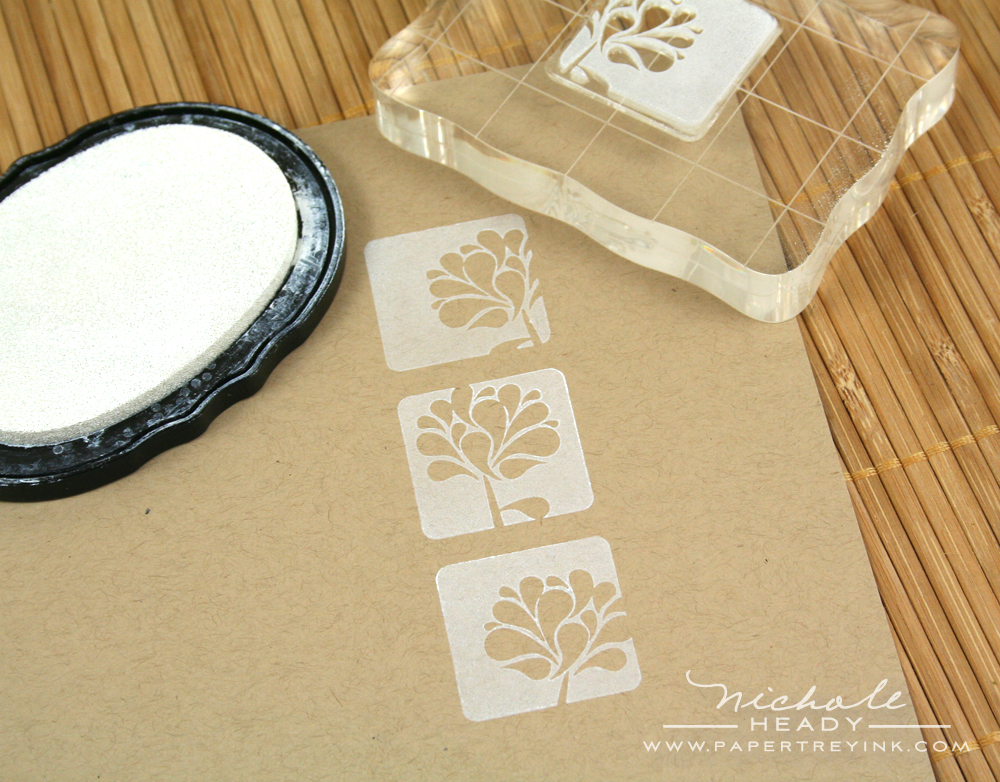
I started by stamping all three of the floral blocks onto kraft cardstock with Fresh Snow ink.

I used a YG95 Copic to color in the stems and leaves, and followed with R35 & R05 for the flower interiors. One of my favorite things to do is color in the negative spaces of reverse images like this. It adds such an unexpected touch and gives you more versatility with your images.
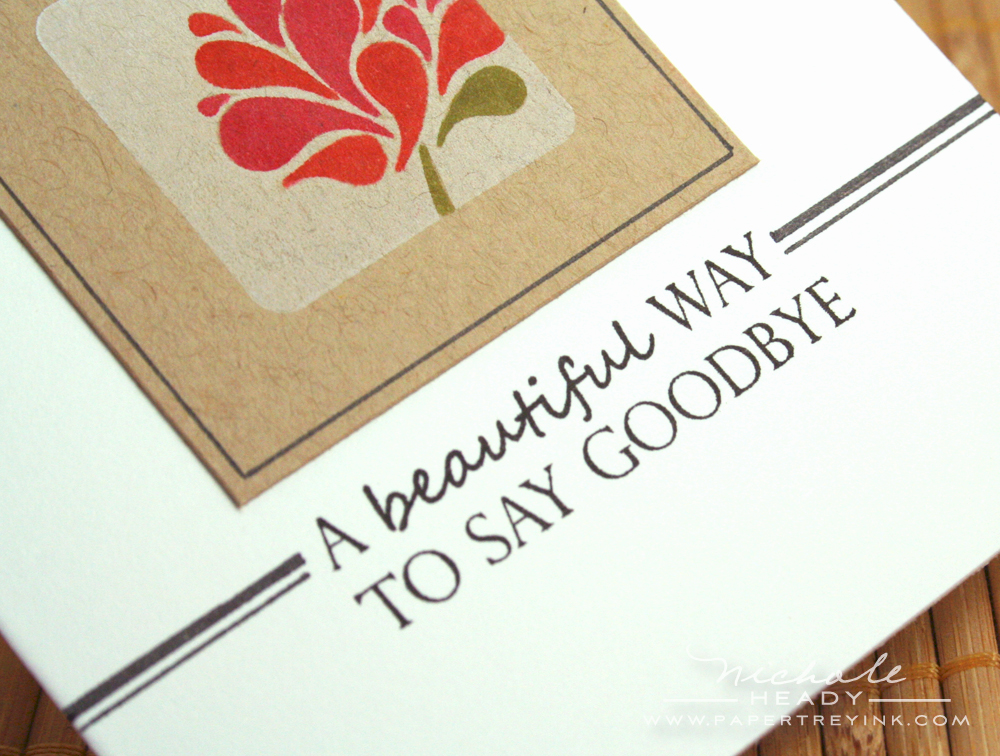
This sentiment that Alli included in Take Three: Summer is one of my favorites from the collection. So much more heartfelt than just "with sympathy".
I used my handy black pen to utline the kraft focal point and accent the sentiment at the bottom of the card. I love how bold and fresh this project turned out! Don't you?

This little piece is sentiment-free, but makes up for that with it's cuteness factor!
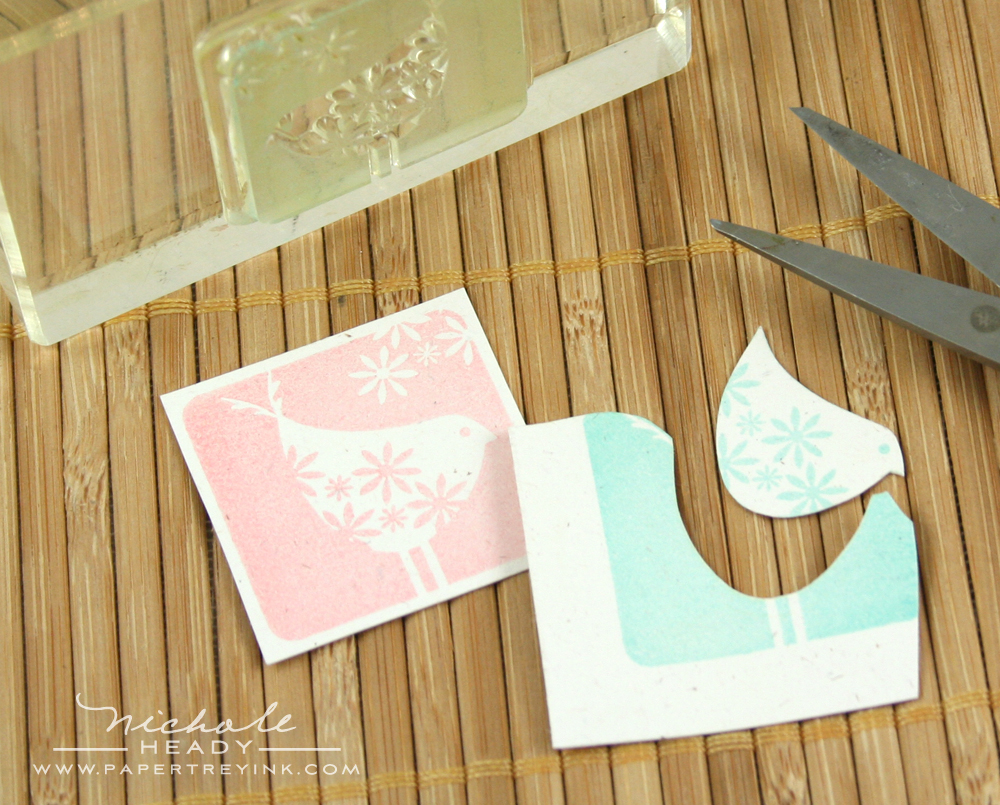
I stamped one of the bird blocks with both Sweet Blush & Aqua Mist ink onto Rustic White cardstock. I carefully cut out the Aqua Mist bird with scissors.
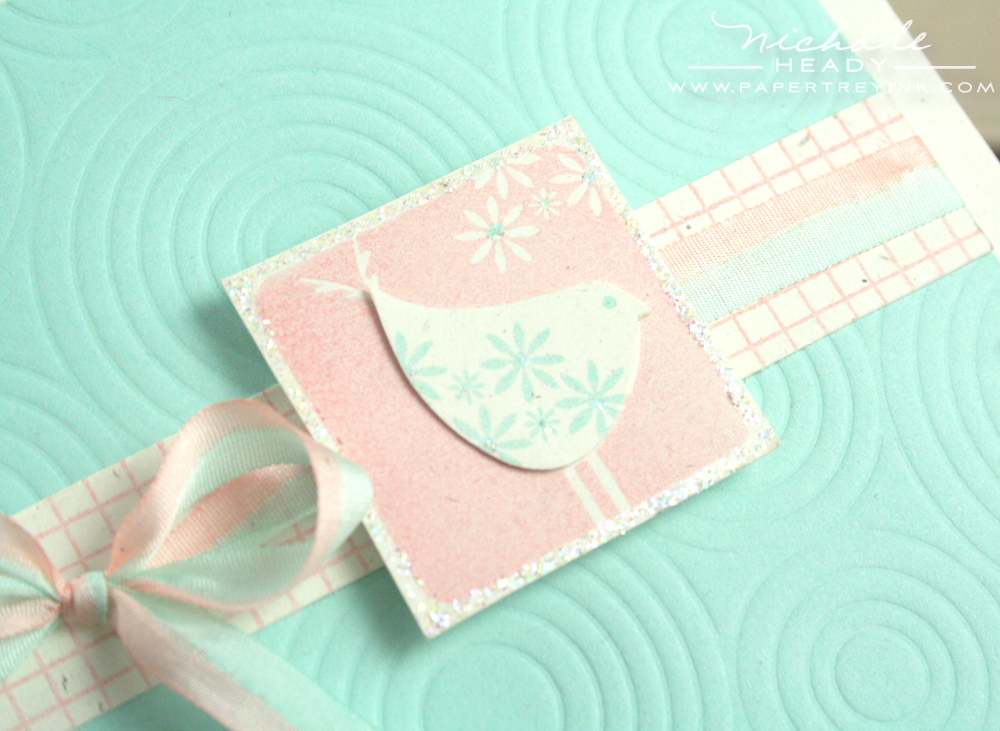
I layered the Aqua Mist bird right on top of the appropriate area on the Sweet Blush image. Using a glue pen, I also added a few glitter highlights!
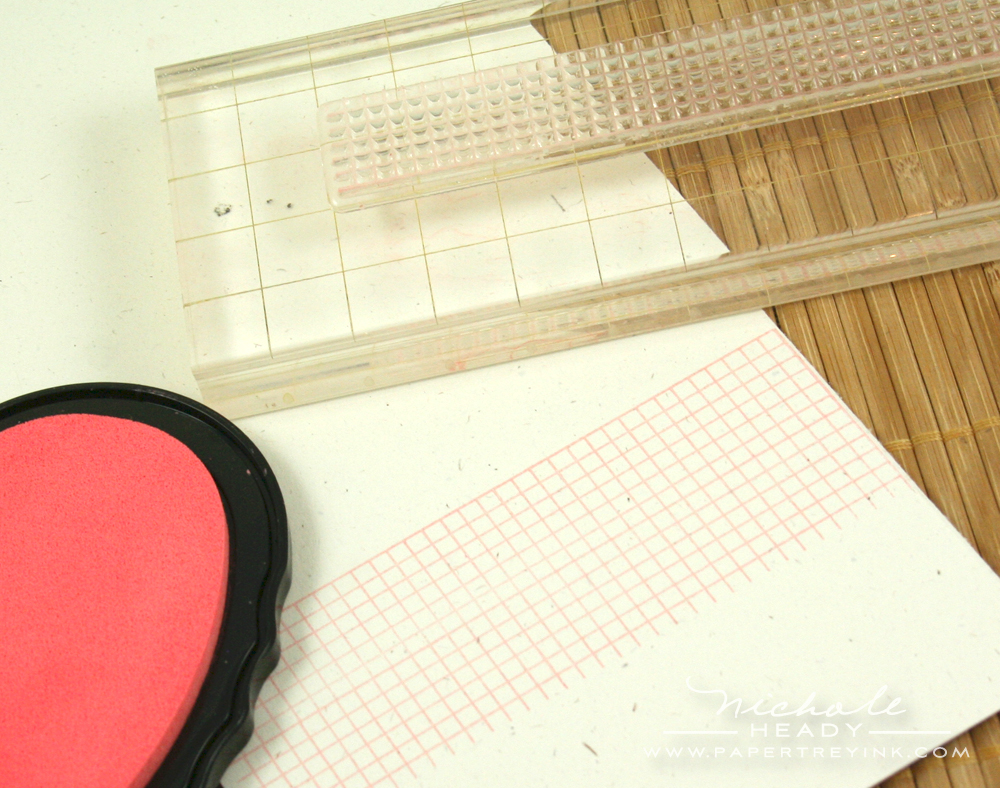
Did you notice the accent strip I used across the middle of the card? That is actually STAMPED with the new grid image from Background Basics: Geometrics using Sweet Blush ink. I love that I can now make this in any color combination I desire!
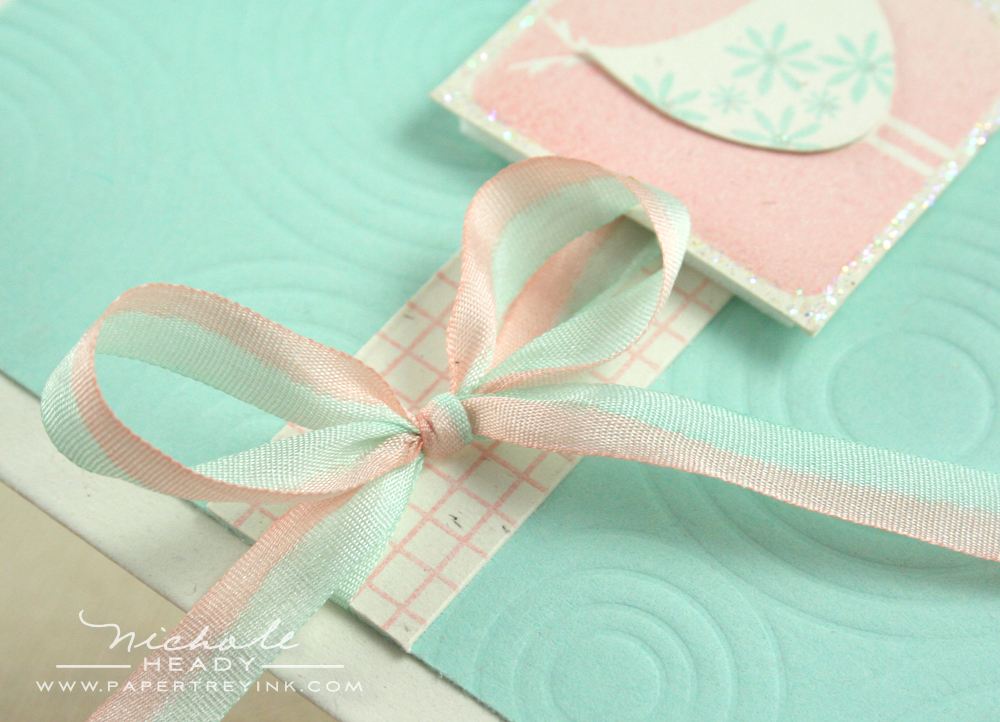
For the ribbon, I used the same technique from my Lily of the Valley post and colored along each side of the 3/8"silk ribbon with Copic markers. It looks so soft and delicate and really helps to tie in the color scheme.
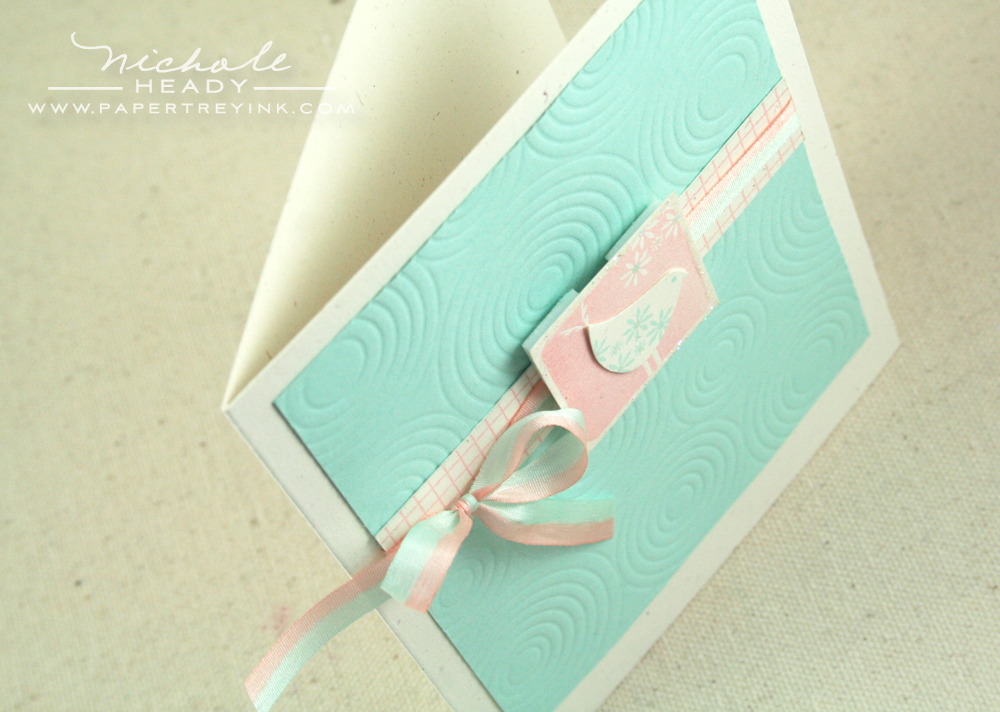
Last but certainly not least, I used the new Sunshine Impression Plate on the Aqua Mist background. I think this added detail totally made the project!
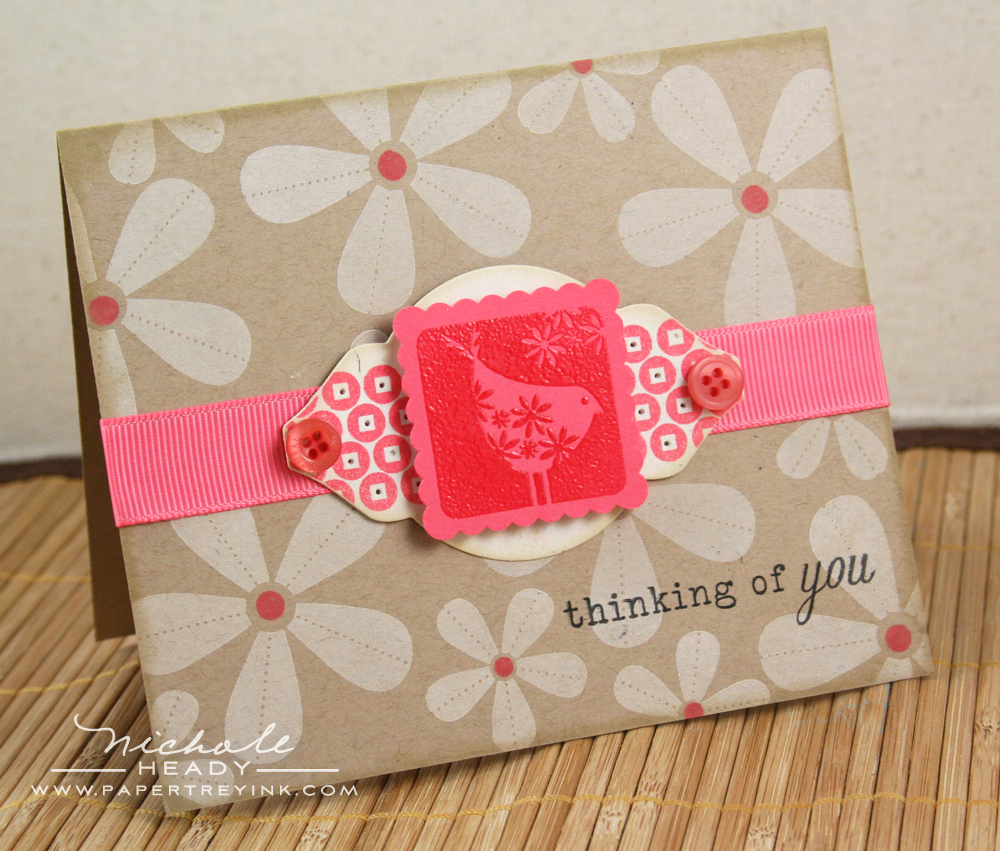
I have one last card for you today. This one is using a bird block image once again (but I can't help it! I love, LOVE these little birdies!)
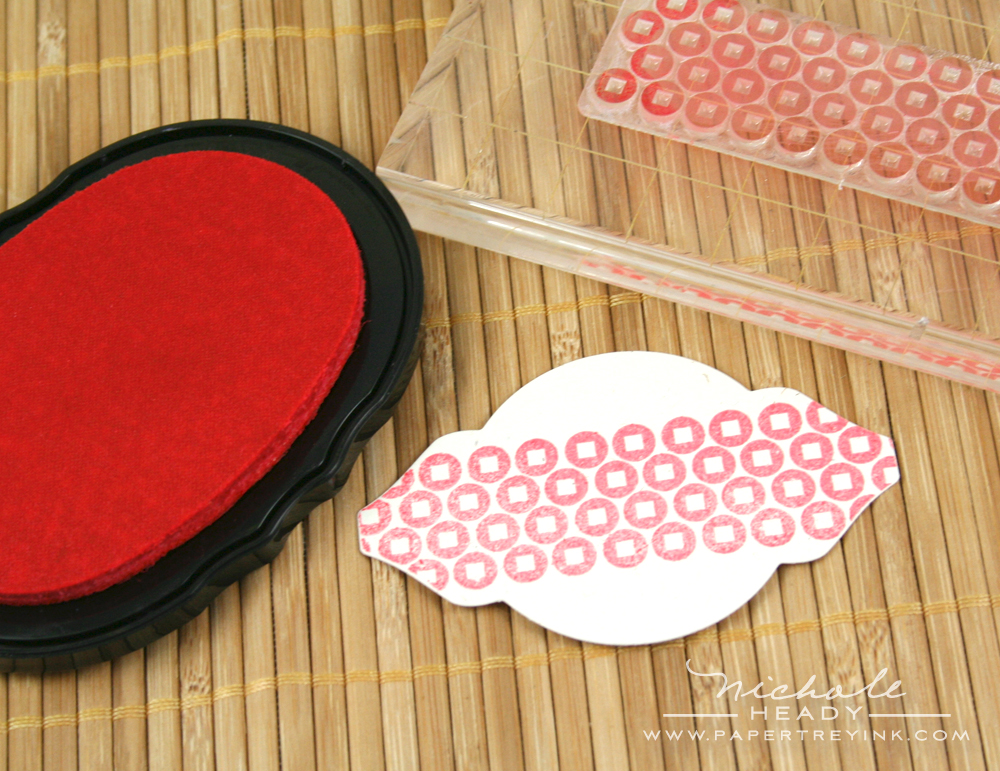
I started with the Mat Stack 2 die, cut from Rustic Cream cardstock. I stamped across the center of it with another of the background building strips from Background Basics: Geometrics using Berry Sorbet ink.
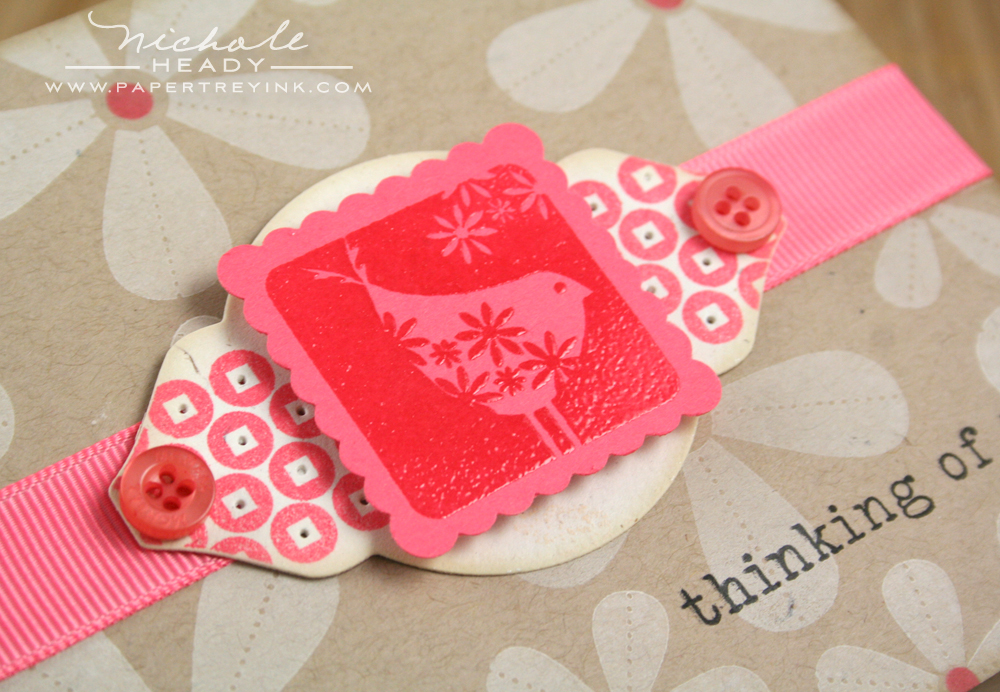
The bird block was heat embossed with Filigree Clear embossing powder on Berry Sorbet cardstock. I punched it out with the Super Jumbo Scalloped Square punch from Marvy.

On the Mat Stack, I ended up piercing a hole in the center of each of the circles that made up this pattern. This little detail really added a lot to the project.
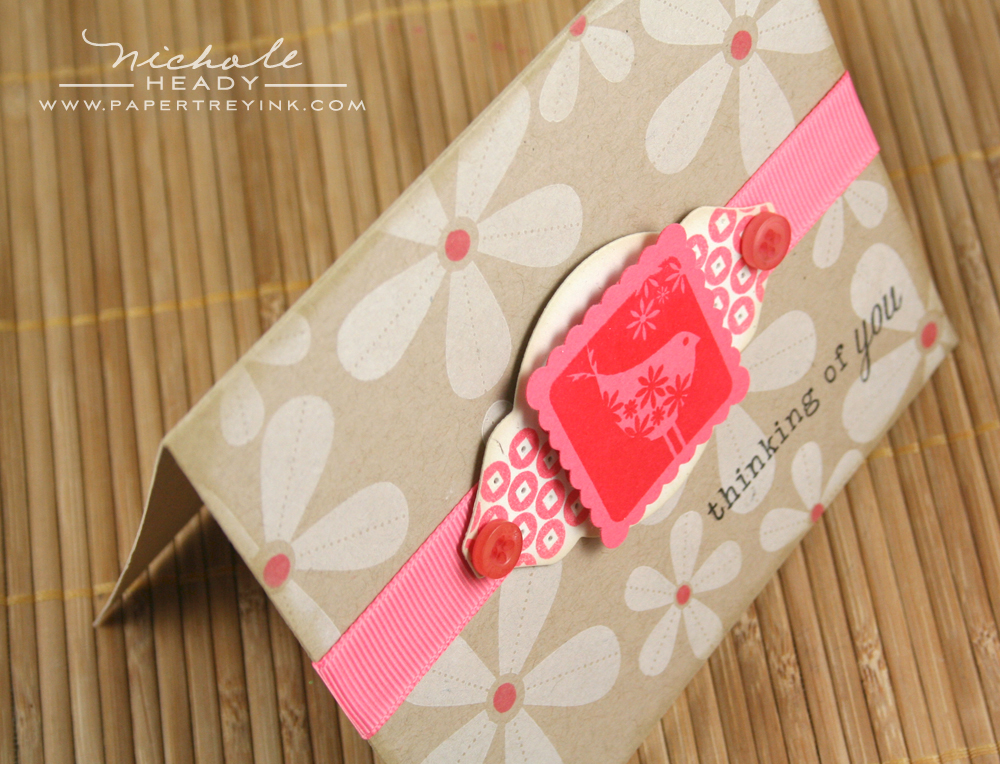
The background of the project is stamped with flowers from Beautiful Blooms II using Vintage Cream Ink. The sentiment is from Up, Up & Away, stamped in True Black.
Aren't you just crazy about the possibilities that both of these sets have? I know I will be getting a lot of use out of both of them! We would love to hear your thoughts about both of these new sets. As promised, I have a HUGE, over the top prize package for you to have a chance of winning!
- Take Three: Summer stamp set
- Background Basics: Geometrics stamp set
ALL of the May Release Dies & Impression Plates!
- Eyelet Lace Die
- Mat Stack 2 Die
- Up, Up & Away Die
- Clouds Die Set
- Fillable Frames #4 Die
- Linen & Canvas Impression Plate
- Sunshine Impression Plate
This prize package has a $90 value, so be sure to leave a comment so you can be entered to win! But hurry, this contest ends at 11:30pm EST TONIGHT! Only one comment per person please. One randomly selected winner will be announced on our May Release Winners page by midnight EST. Thanks for stopping back by today to catch a glimpse at this post! We hope to see you at the party tonight!

Maile Belles has even more projects to share with you using these new sets!
Alli Miles is showcasing Take Three: Summer on her blog today. You can see her other posts from this week HERE, HERE, HERE and HERE.
Melissa Bickford has a little something to share with her Background Basics: Geometrics set. You can see her other posts from this week HERE, HERE, HERE and HERE.
Beth Silaika delves into her new set, Get to the Point.
Lisa Johnson has some exciting things to show you with her new set, Just for You.
Heather Nichols is showing the possibilities of Fillable Frames #4 today.
Ashley Cannon Newell has THREE projects to share with you today using the new release products!

For complete supply lists and dimensions for all of today's projects, please CLICK HERE.
Leave a Reply