


Hello, friends! Welcome back for Day 5 of this fabulous March release! I told you this was going to be a fun month, and I hope I didn't disappoint! All of this new product just leaves me overflowing with creative juices!
Today I have the pleasure of introducing TWO more stamp sets to you. A fun floral set by Dawn McVey and a background set from little ol' me!

Delightful Dahlia is the latest compilation by Dawn McVey. It's graceful & elegant line drawings are the perfect thing for any flower lover. The images are detailed enough that they can be used as is or colored, the choice is yours!
The details.
- Delightful Dahlia will be available for purchase on March 15th.
- It will retail for $15.
- Delightful Dahlia contains a total of 15 stamps (3 flower images, 2 leaves and 10 sentiments.)
- There is a collection of four dies that coordinate with this set that will retail for $15. It includes dies for the two largest flowers along with the two leaves.
The second set, a background set, that I mentioned earlier is entitled Distressed Stripes. I designed these 5" long stripes to be used in a variety ways, from borders to background building. You can make your own plaids & ginghams to your heart's content! The slightly distressed finish gives these a warm character that brings style to any project!
The details.
- Distressed Stripes will be available for purchase on March 15th.
- It will retail for $15.
- Distressed Stripes contains a total of 7 stripe stamps (All 5" long and ranging from 1/8" to 3/8" wide.)
Now onto the projects!

This first project showcases classic Copic coloring with the large dahlia bloom.
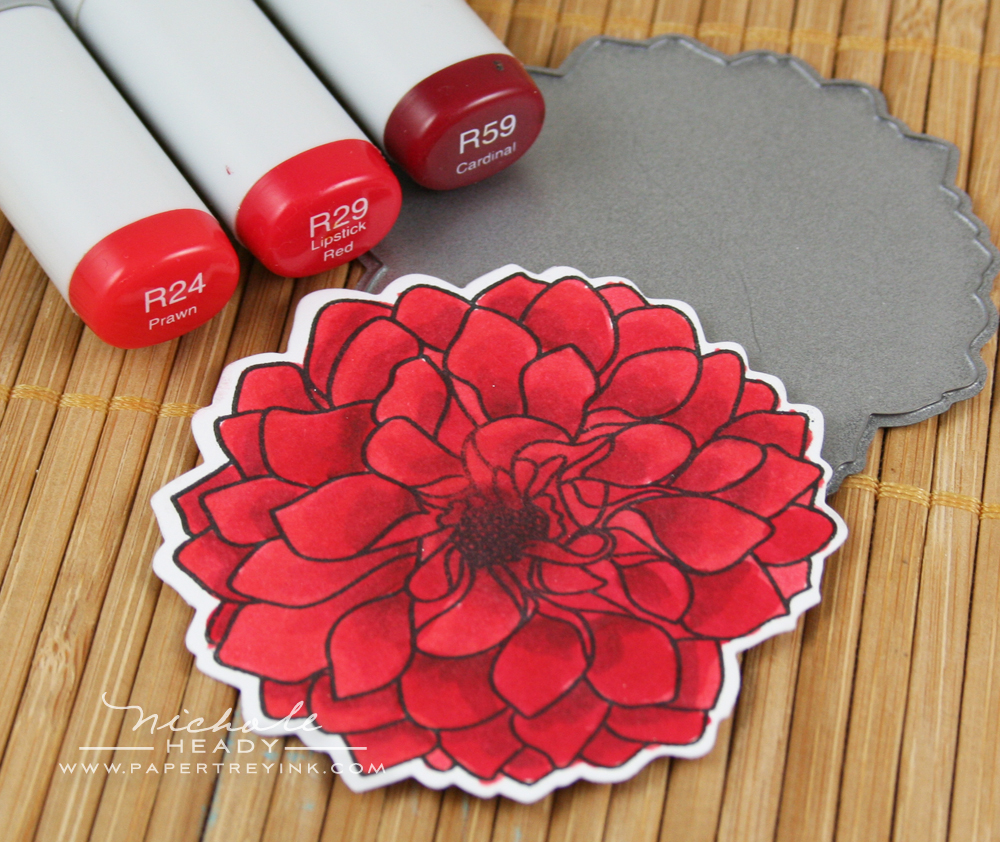
Before I even started, I die-cut the coordinating die from Stamper's Select White cardstock. I was then able to easily stamp the dahlia with Noir Palette ink. I chose to go with the Pure Poppy Copic Trio. I love the richness and vibrancy that was created with this combination for this image..
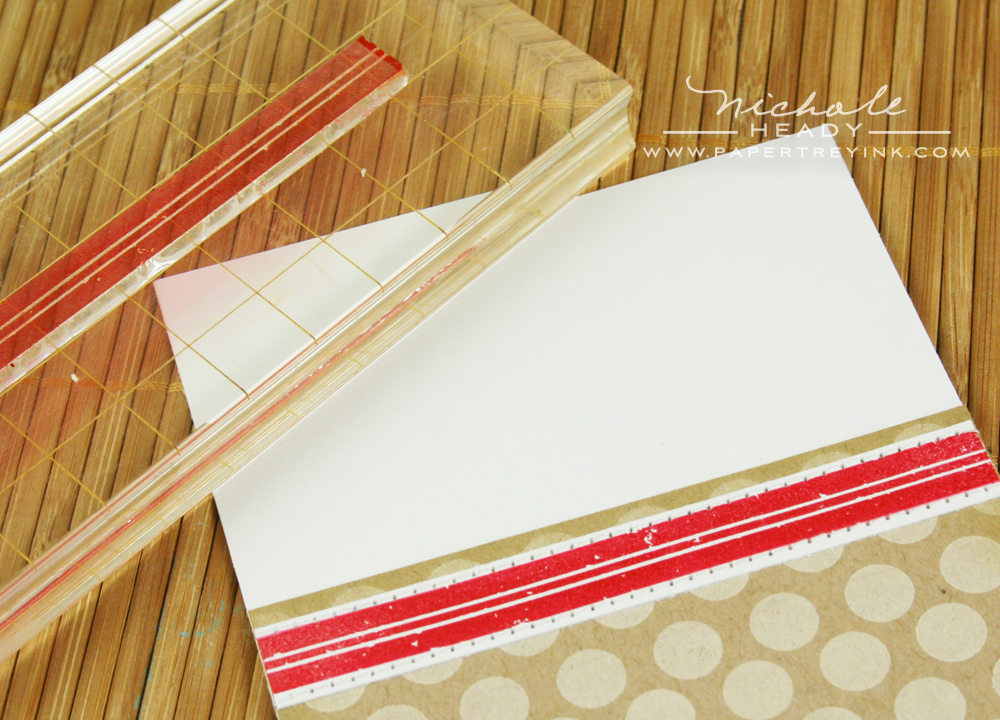
I used an image from the new Distressed Stripes set to create a border for my project. I trimmed the stripe into a narrow strip and stitched it into place with my sewing machine. I think the end result looks a bit like ribbon.
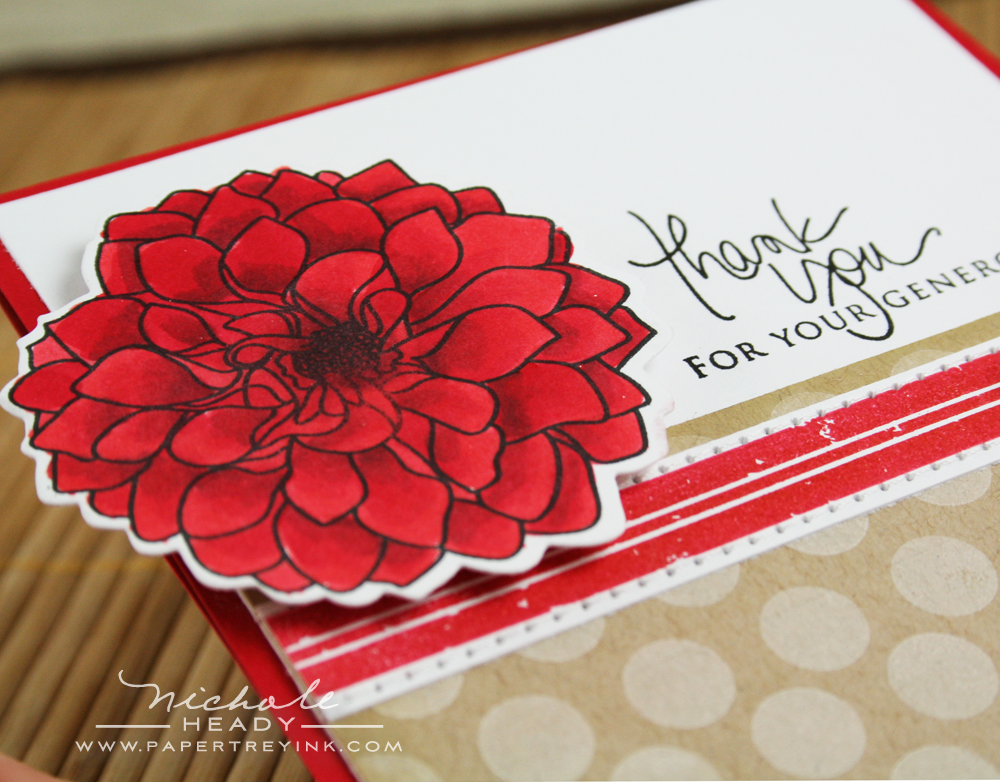
The finished flower was adhered in place using foam dimensionals to give it a bit more dimension.

The sentiment I chose to use was this one from Signature Greetings. I stamped it in black ink to echo the lines from the flower. Such a fun little project! I can image it done in lots of different colors!

(click the above image for a larger view)
Next, I had a little fun with vellum while showcasing the backgrounds that can be created when pairing both the small and the large dahlias from this set.
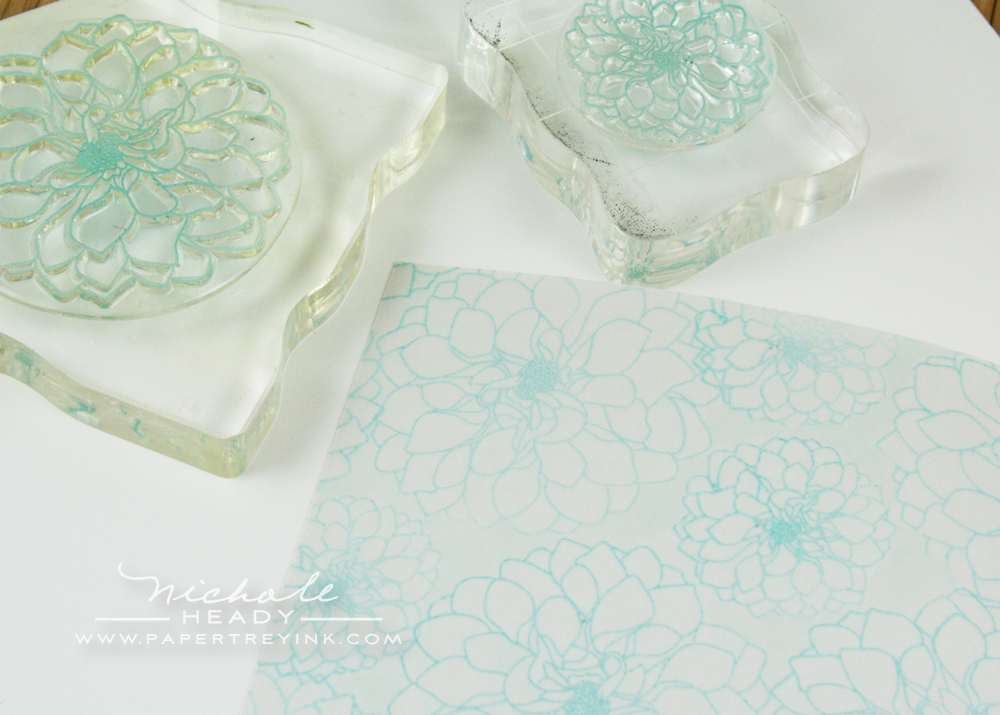
I cut a piece of our vellum cardstock to size and stamped it with the small and large dahlias using Hawaiian Shores ink.
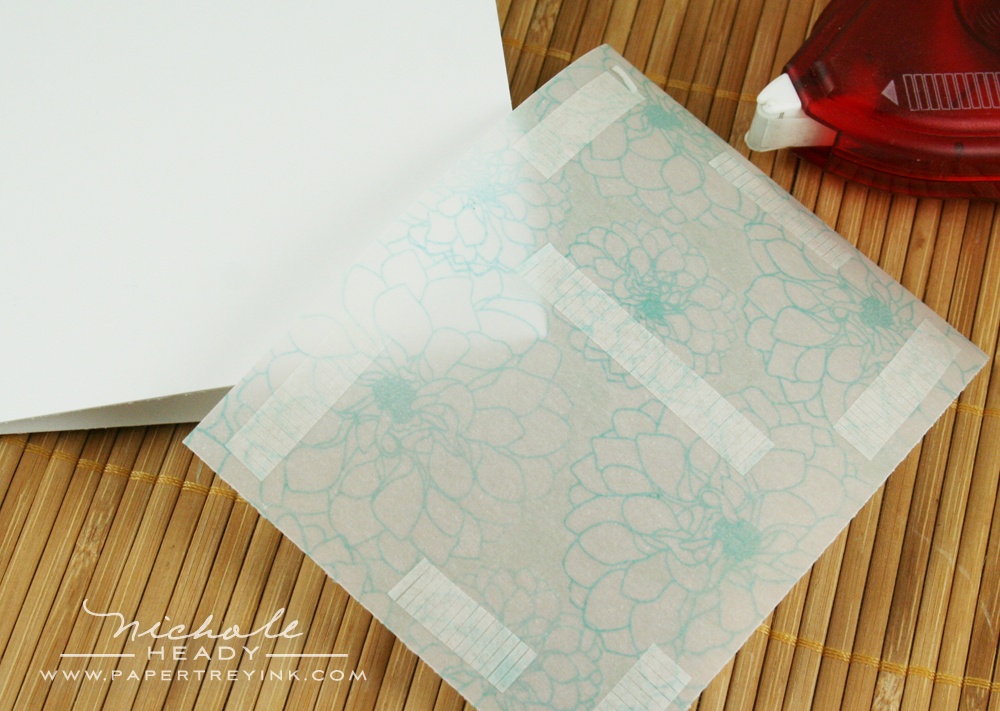
I allowed the ink to dry for a few minutes and applied tape runner adhesive to the stamped side of the vellum. Since I am adhering the vellum to a white cardbase, I don't need to worry about the adhesive showing through.

I stacked a two Hawaiian Shores buttons on top of one another to create an accent for the sentiment strip. They are just adhered together with glue dots. (FYI, I have now updated the Hawaiian Shores introduction post with button photos and comparisons) I also ran strips of 1/8" Scor-tape along the top and the bottom of the strip to adhere Prisma Glitter. I'm so happy with the simplicity of this project and look forward to making more in the future.
Next is a little project that's out of my comfort zone, but I had fun creating it and that's all that matters! It never hurts to just PLAY!
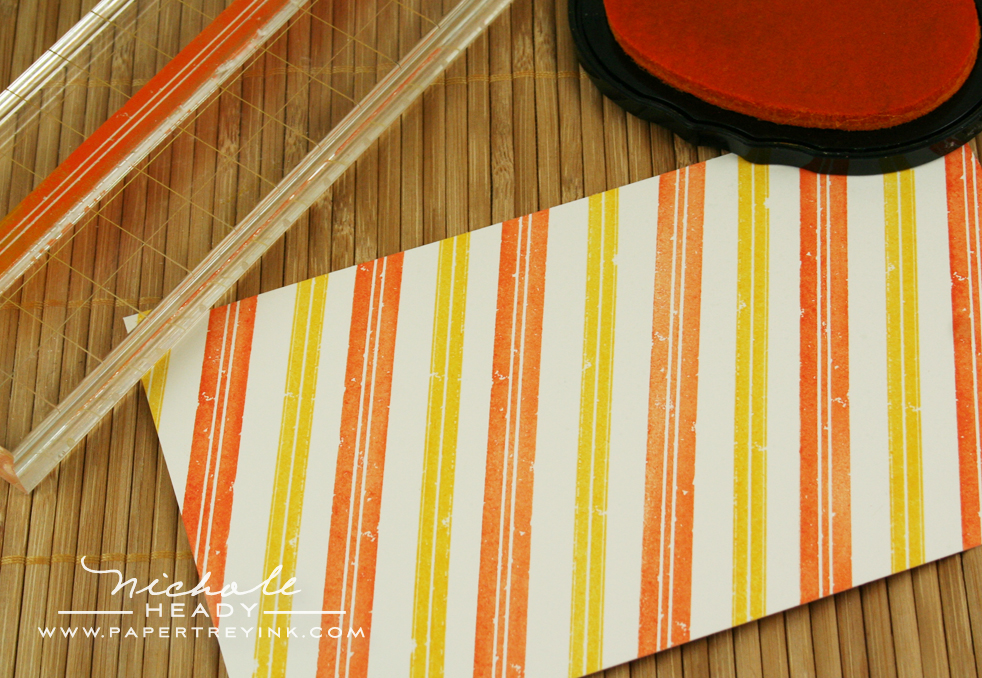
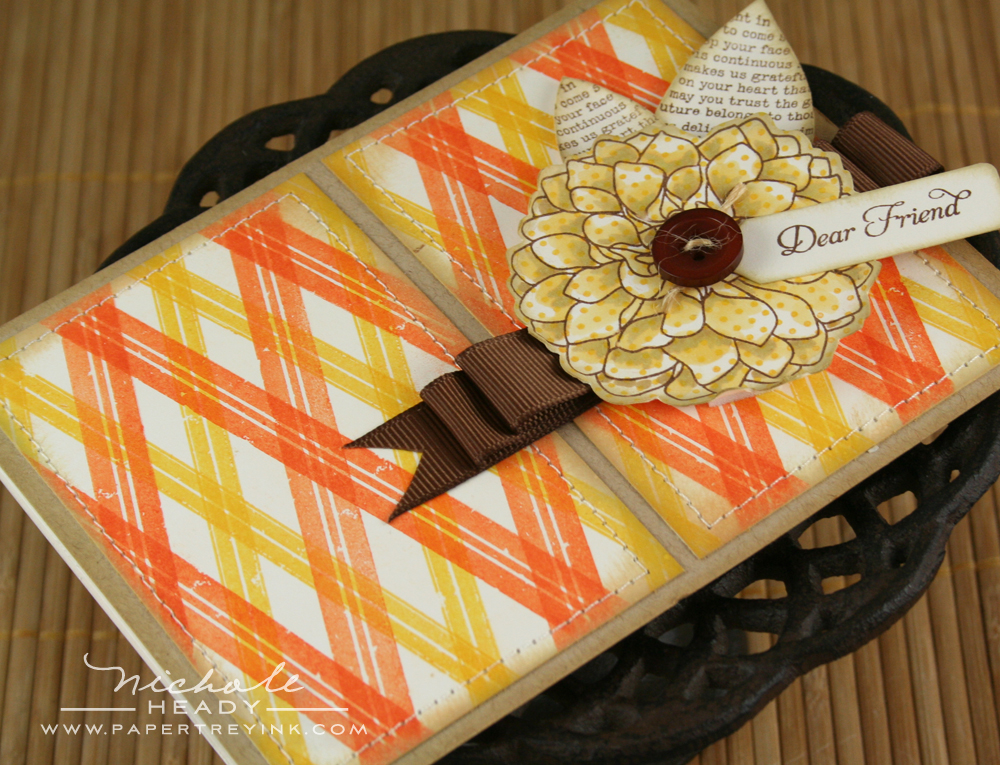
I wanted to create some plaid paper using the new Distressed Stripes set, so I did the first round of the stamped stripes on Vintage Cream cardstock, alternating Orange Zest & Summer Sunrise.
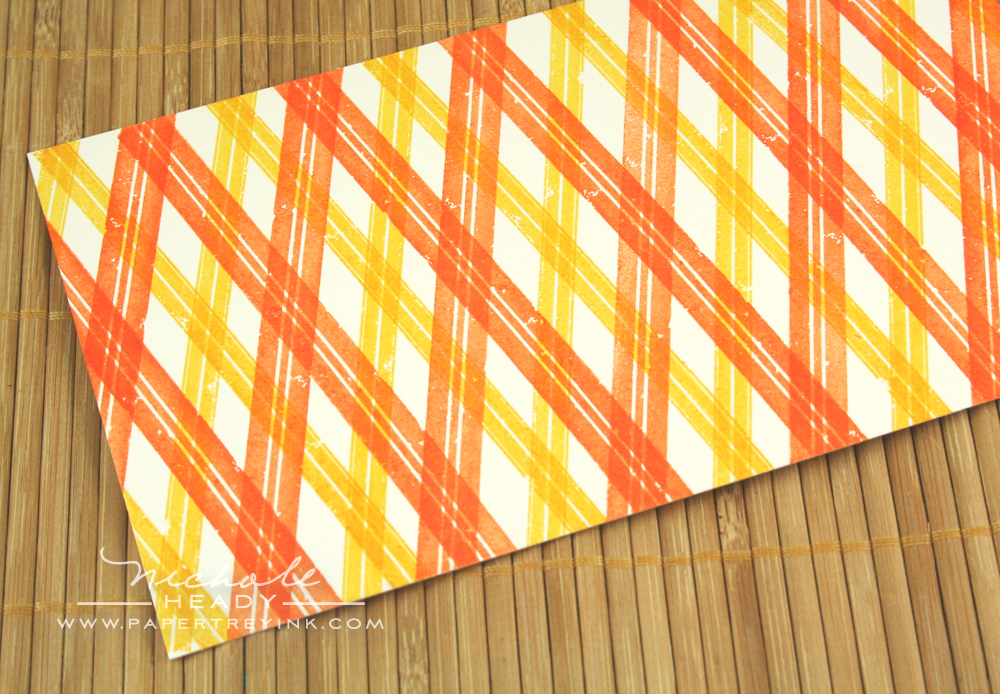
I then reversed direction and repeated.
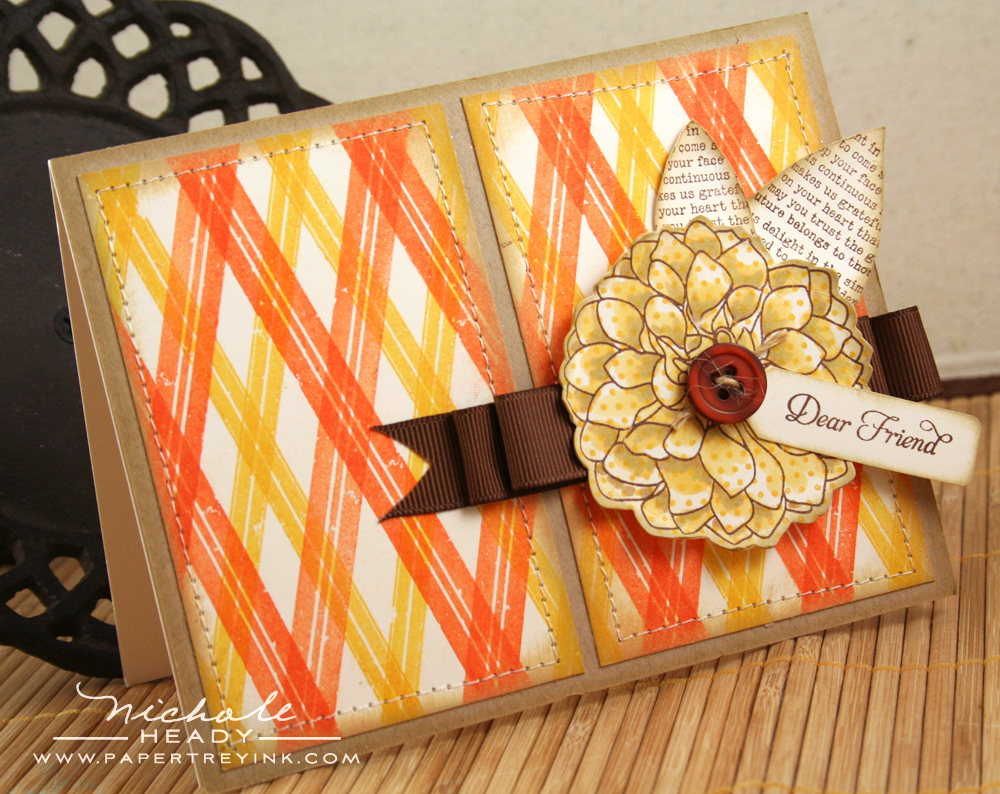
I cut the finished plaid paper into two panel, antiqued them with the Tea Dye Duo, following some stitching around their perimeters with my sewing machine.
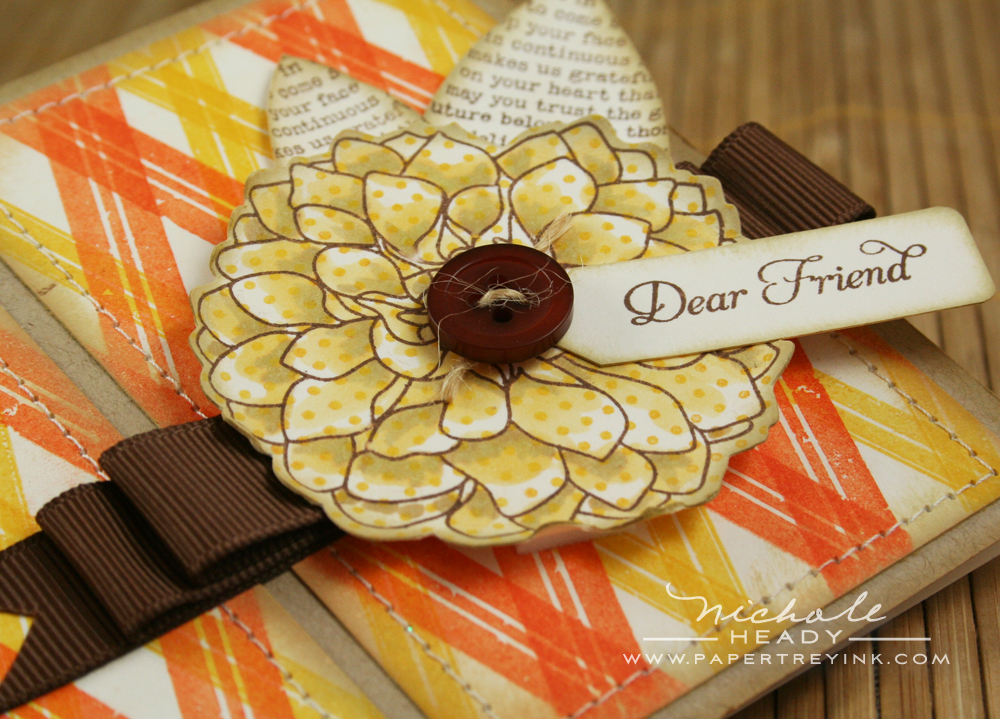
For the dahlia, I die-cut Vintage Cream cardstock and stamped the flower in Dark Chocolate ink. I then stamped the polka dots with Summer Sunrise ink. I went in with a few of my Copic markers and added some shading to the base of each dahlia petal. Loops of Dark Chocolate Grosgrain ribbon are underneath the flower to add balance to the project. The leaves are hand cut and stamped with Text Style II using Dark Chocolate ink. Quite a dramatic project, isn't it?

(click the above image for a larger view)
Here is a series of simple cards I created. Each of these cards took no more than five minutes to create, so if you are in the business of mass-producing, these are just the ticket!

Just a few simple supplies and steps is all it takes.
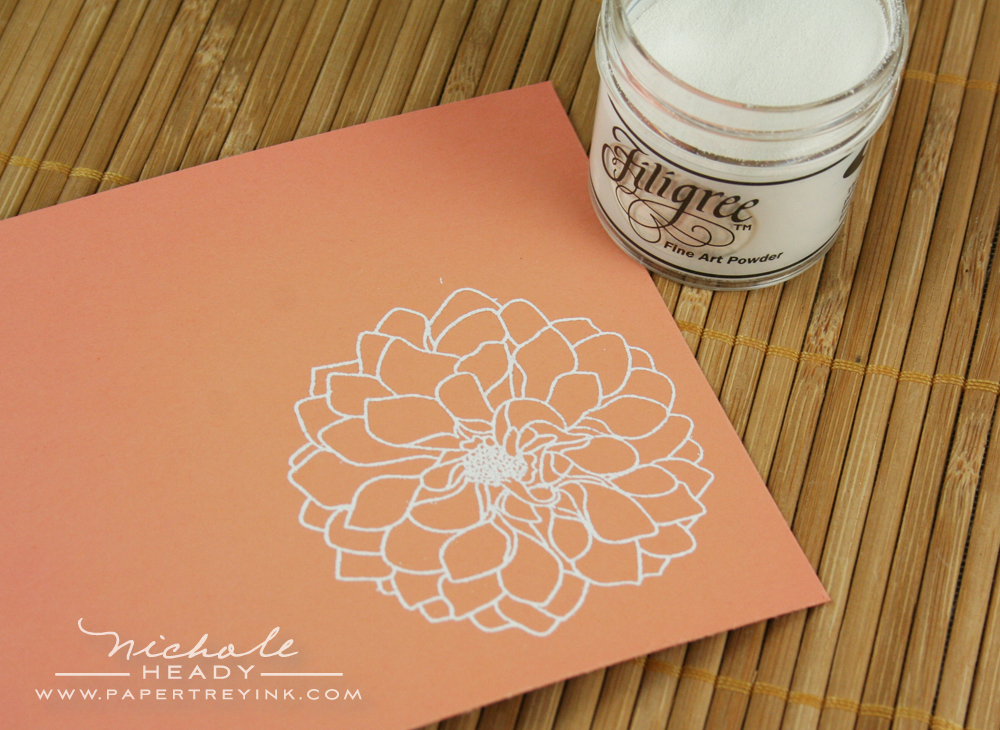
Stamp the flower in Versamark ink, followed by an application of Filigree Embossing powder. Heat to set.
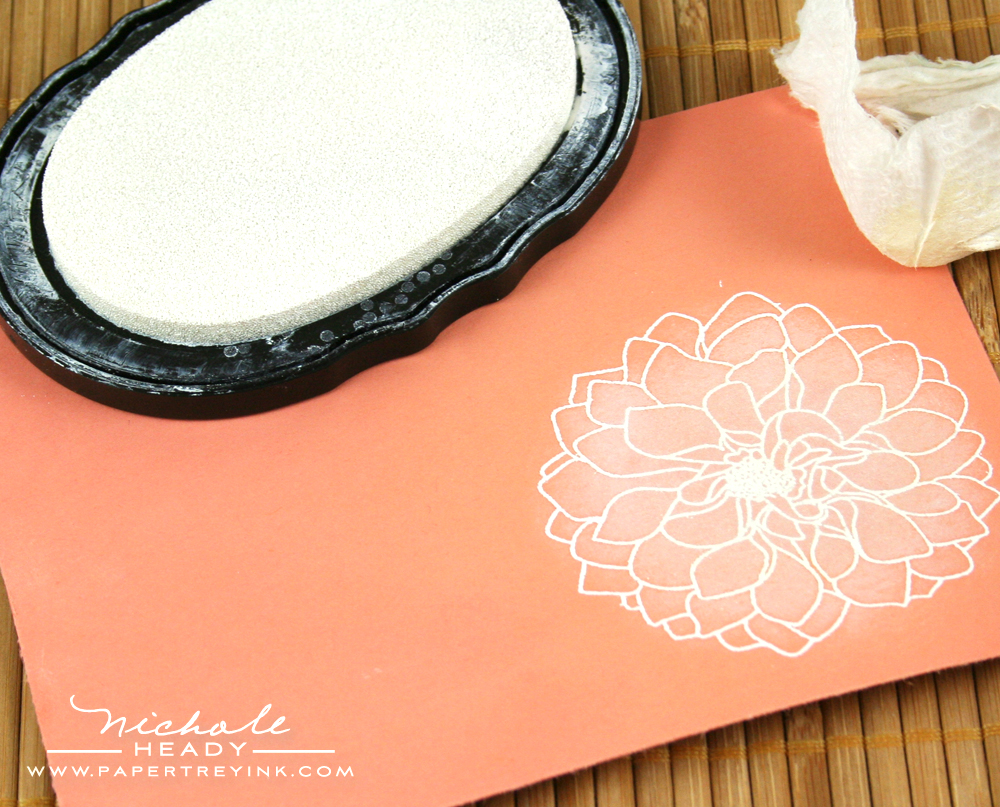
I then dabbed the corner of a paper towel in my Fresh Snow ink pad and rubbed it in a circular motion in the center of the flower. It adds definition, dimension and shading to a project without having to do any actual coloring.

(click the above image for a larger view)
The colors I worked with for my collection are (left to right)… Ripe Avocado, Spring Moss, Aqua Mist, Ocean TIdes and Melon Berry. It's like a feast for the eyes! :)
(click the above image for a larger view)
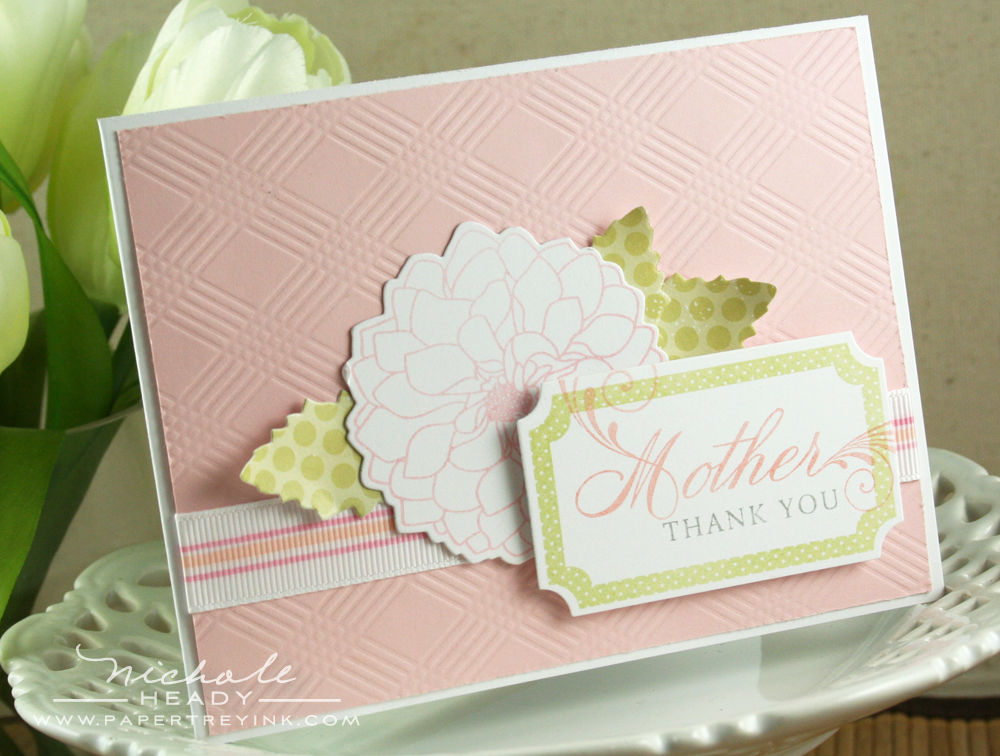
Lastly, this is a dainty little Mother's Day card I designed using the Delightful Dahlia set.

I combined it with last year's "Mother" set, perfect for the upcoming holiday.

I created my own striped ribbon and utilized our new Picnic Plaid Impression Plate, which turned out to be the perfect subject matter for a video! A little Impression Plate 101 among a few other tips and tricks! I hope you'll enjoy!
Aren't these sets just AMAZING? Can you imagine all the possibilities? We would love to hear your first impressions of these sets! Leave a comment today letting us know what you think and you could have a chance to win a fantastic prize package that will work SO cohesively together!
- Delightful Dahlia stamp set
- Delightful Dahlia die set
- Distressed Stripes stamp set
- Picnic Plaid Impression Plate
This AMAZING package has nearly a $60 value! This contest ends at 11:30pm EST, Sunday, March 14th, so be sure to leave your comment before then! One winner will be randomly selected. Only one entry per person please. The winner will be announced by midnight on our March Release Winners page.

Dawn McVey is showcasing even more with her new set. You can check out what she has done the rest of the week HERE, HERE, HERE, HERE and HERE!
Beth Silaika has created a project which reveals a bit more about her new set, Springtime Doodles.
Melissa Bickford has more to share using her new set, Background Basics: Botanicals.
Heather Nichols is showcasing this month's addition to her Fillable Frames Collection.
Kelly Purkey is joining us for one last month as our Distinguished guest designer! Be sure to stop by her bog and see what she has created with this month's stamp sets!

Complete supply lists and measurements for all five of today's projects can be found HERE.
Leave a Reply