


I am so excited to introduce today's set…it is something that I myself have wanted a long time in my own collection and I am looking forward to exploring its capabilities over the next few months.
Through the Trees is a collection of three large-scale tree images. Each of them was created in a very clean & simple style to allow you, the stamper, to add your own personal touches & techniques to make them your own. The large scale makes it easy to complete a card front with little embellishment. The companion sentiments are heartfelt and something you will enjoy using in conjunction with the tree images along with other images in your collection.
The details.
- Through the Trees will be available for purchase on January 15th.
- It will retail for $24.
- Through the Trees contains a total of 14 stamps (three tree images broken into 4 stamps, 3 companion images and 7 sentiments)
Are you ready to dive into the world of possibilities that this set holds? Let's begin!
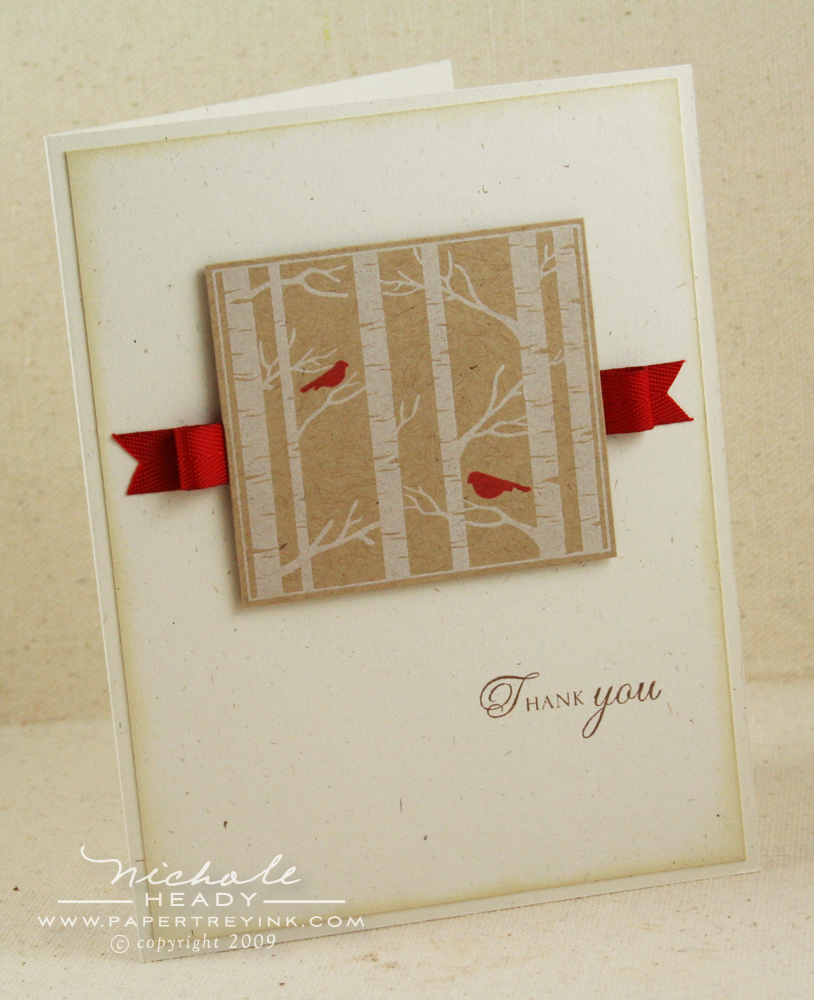
This first project is something I envisioned in my head when I designed this set. The rustic look of the white ink on kraft cardstock. The pop of red used in the birds and the ribbon. The small, subtle sentiment. And I am so thrilled that the execution turned out better than I imagined. (I just love it when things work out like that.) The card base is made from Rustic White cardstock. I added a mat layer of the same cardstock, lightly inked with Chamomile Tea Dye ink. I love the soft frame it provided.
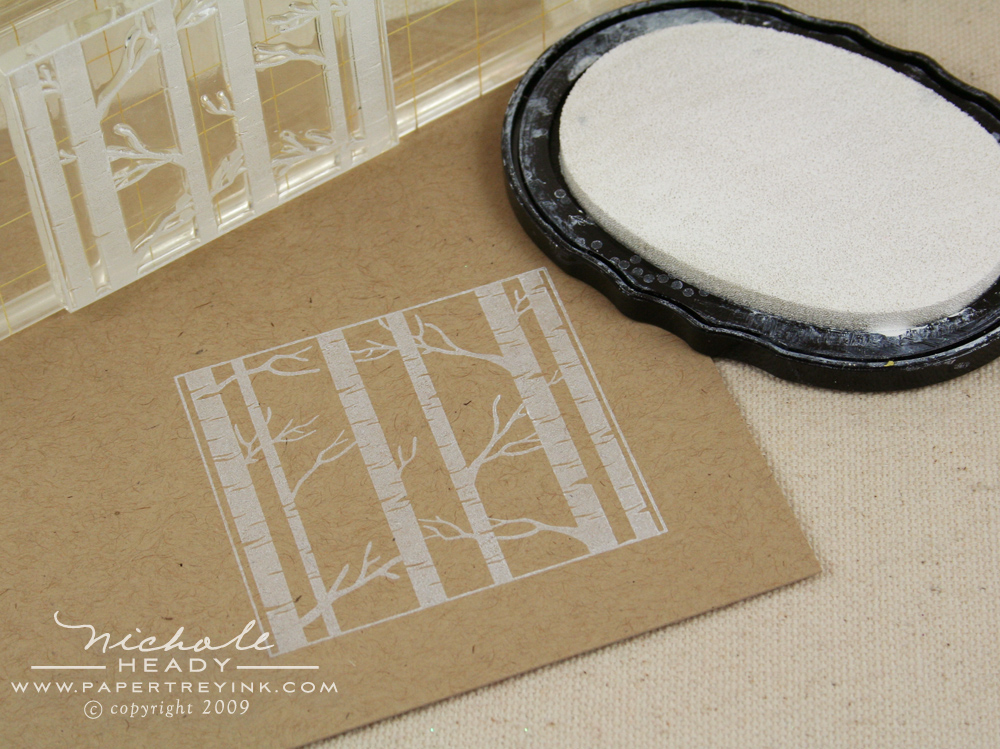
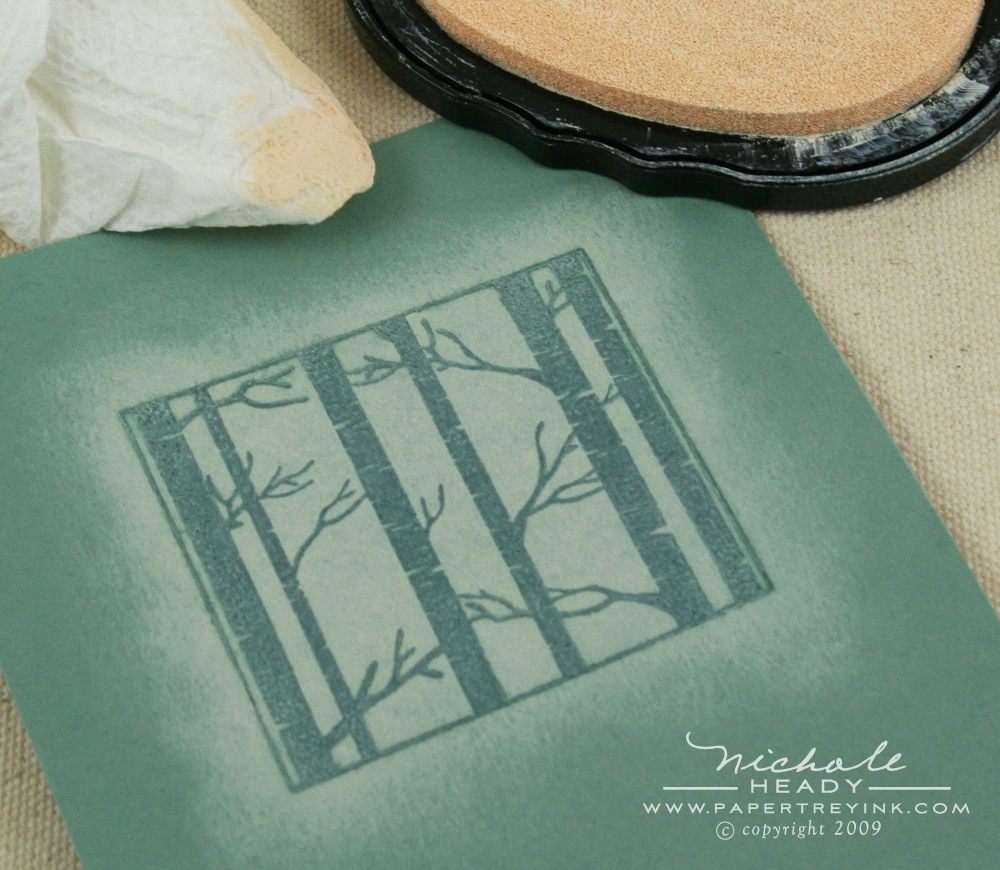
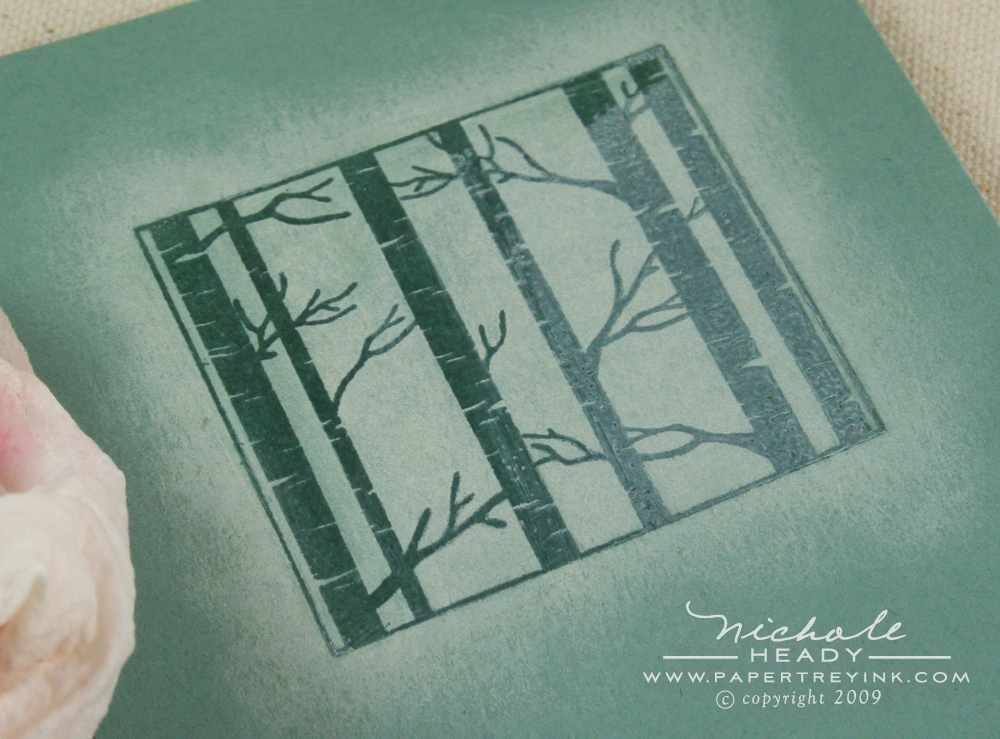
This image is what I have come to call "the birches", stamped here in Fresh Snow ink. If you look closely, there are small strokes that appear to be *carved* from the sturdy trunks. I was trying to imitate the look of wood-block printing that was popular so long ago. I love images that are in a block like this because they allow you to stamp, trim and go with a perfectly filled, balanced focal point.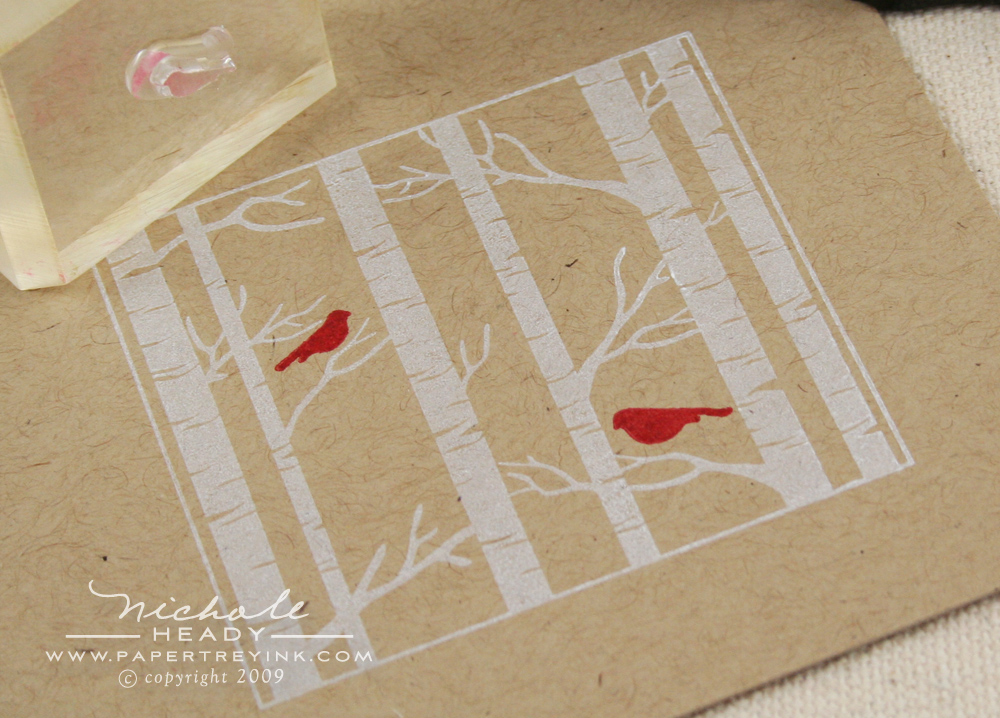
The small birds are two separate images that you can place any way you like within the trees in whatever color you desire.
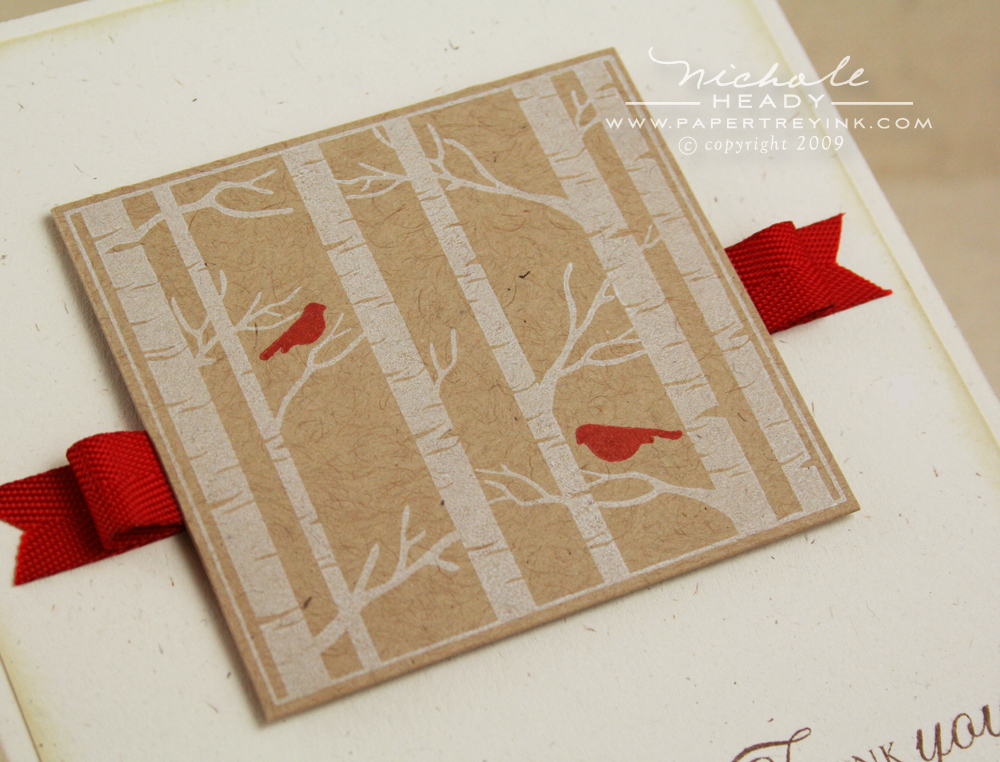
I trimmed the block out and adhered it to my card cover on top of some layered Pure Poppy Twill. The twill helps to reinforce the rule of threes that I like to follow. With the two red birds, a third pop of red was needed to make everything balanced and cohesive. Just *so* in love with this project and I hope you are too!
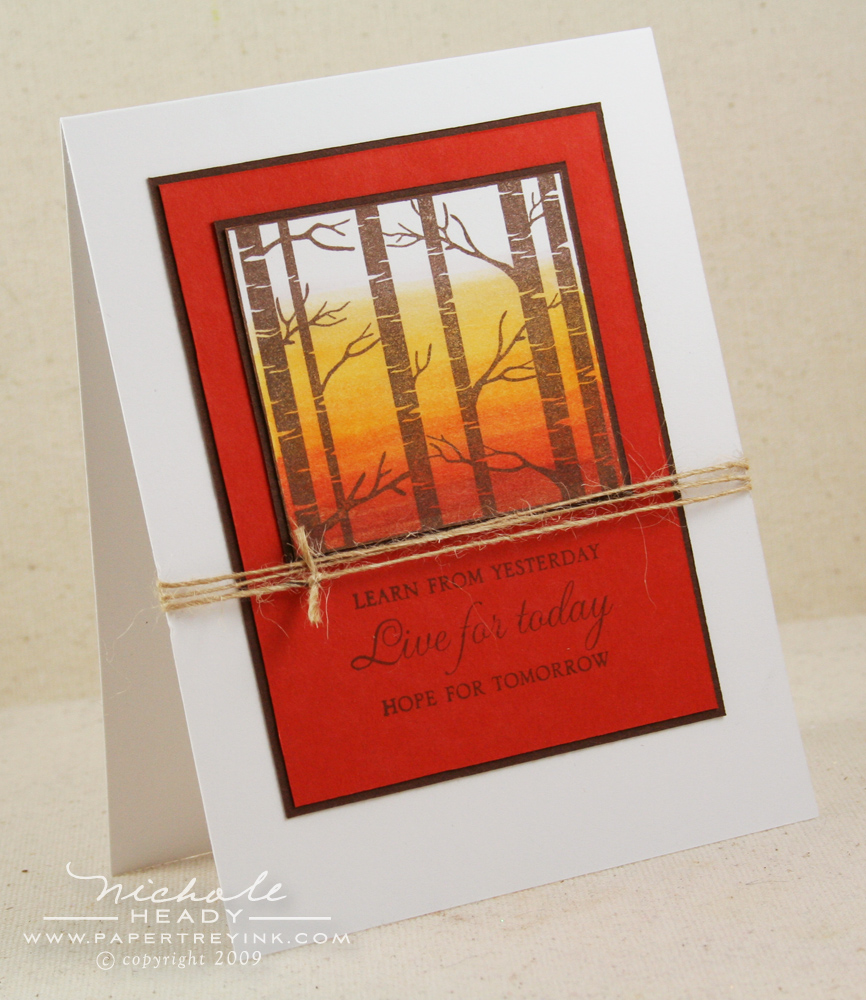
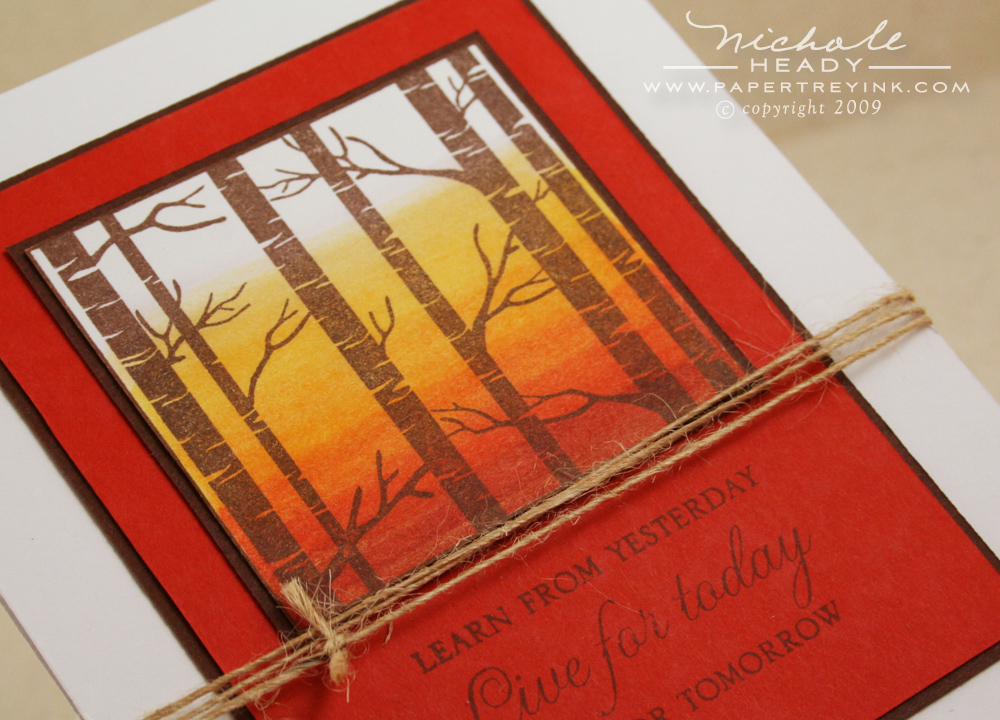
I love sunsets and the beauty they possess and this card pays tribute to that. Quite a different look from the first project, isn't it? This technique may look complicated, but it is really quite simple to execute.
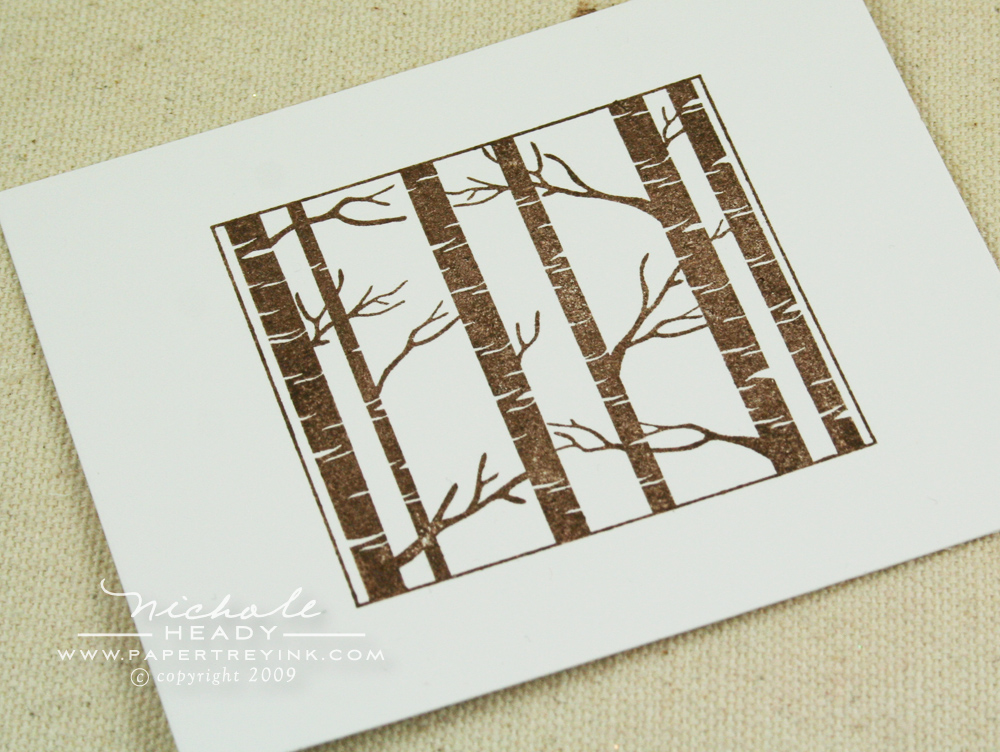
I stamped the birches in Dark Chocolate ink onto Stamper's Select White cardstock.
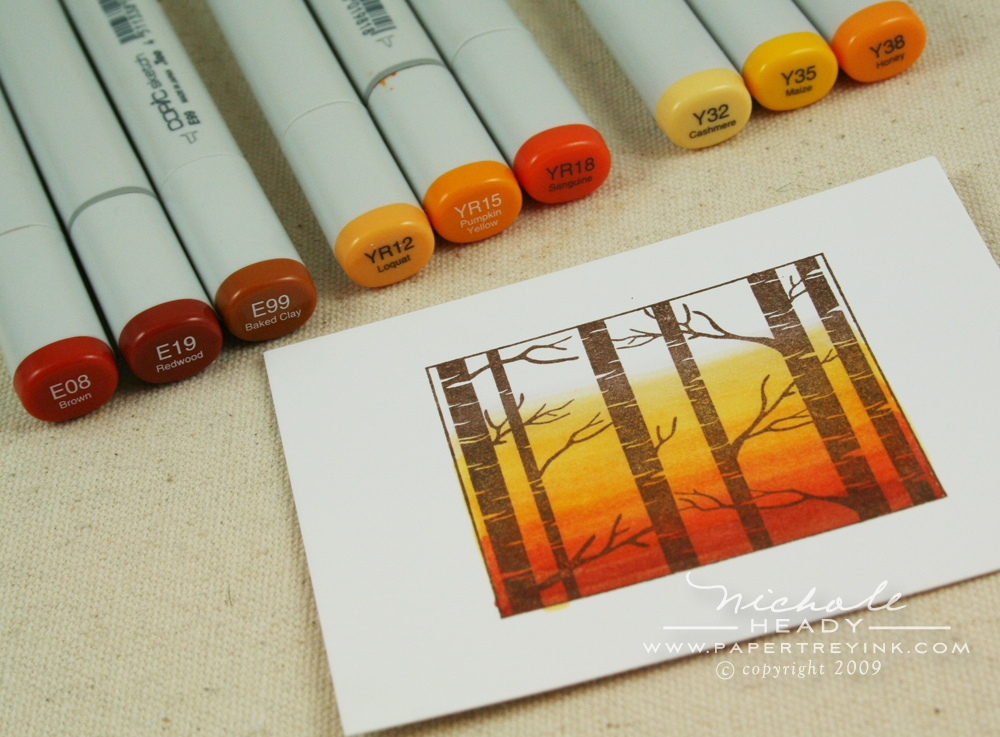
Copic markers are the key to this graduated color scheme. I used three of our Copic Trios, Terracotta Tile, Orange Zest and Summer Sunrise. Working from darkest at the bottom of the block to lightest at the top, I created stripes for each shade. I did a few strokes with my Colorless Blender at the very top to help blend in the yellow a bit and make it look more natural. A few wraps of Rustic Jute Button Twine finish off the project!
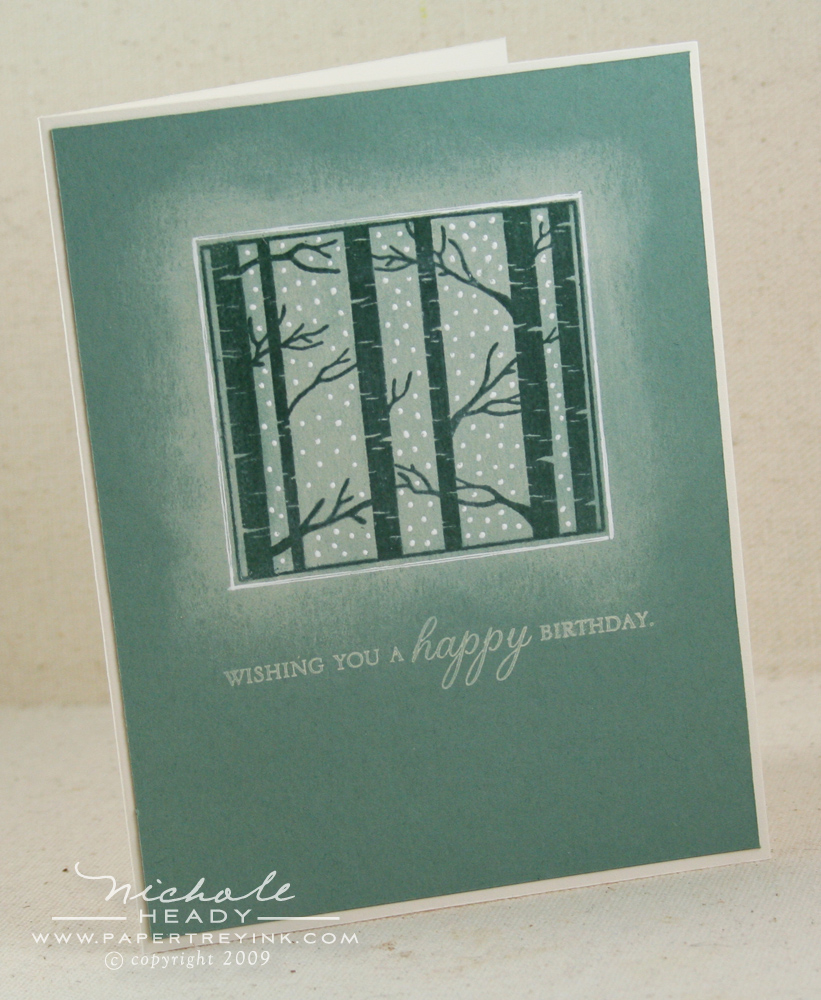
One of my favorite things about growing up in Maine was how beautiful a snowfall could be, especially from the windows of our cozy little house deep in the woods. I wanted to try to recreate that feeling from my childhood with this card.
I heat embossed the birches with Clear Filigree Embossing Powder onto Ocean Tides cardstock. I then used a slightly damp paper towel to apply Vintage Cream ink in small circular strokes on top of the image.
Using a clean portion of the same slightly damp paper towel, I carefully rubbed off the ink residue that remained on the embossed trees. Almost like a polishing action. You can see in the photo above that the trees on the left hand side have been polished up and the ones on the right have not.

To create my snowfall, I added small dots with my favorite white gel pen. I also used a ruler with the same pen to outline the birches. This project not only makes a wonderful winter birthday card, but could also work well for a holiday card if paired with a different sentiment.

This collection of cards features the same design, just utilizing various colors of cardstock. (From left to right, Scarlet Jewel, Terracotta Tile, Ripe Avocado, Ocean Tides and Spring Moss)
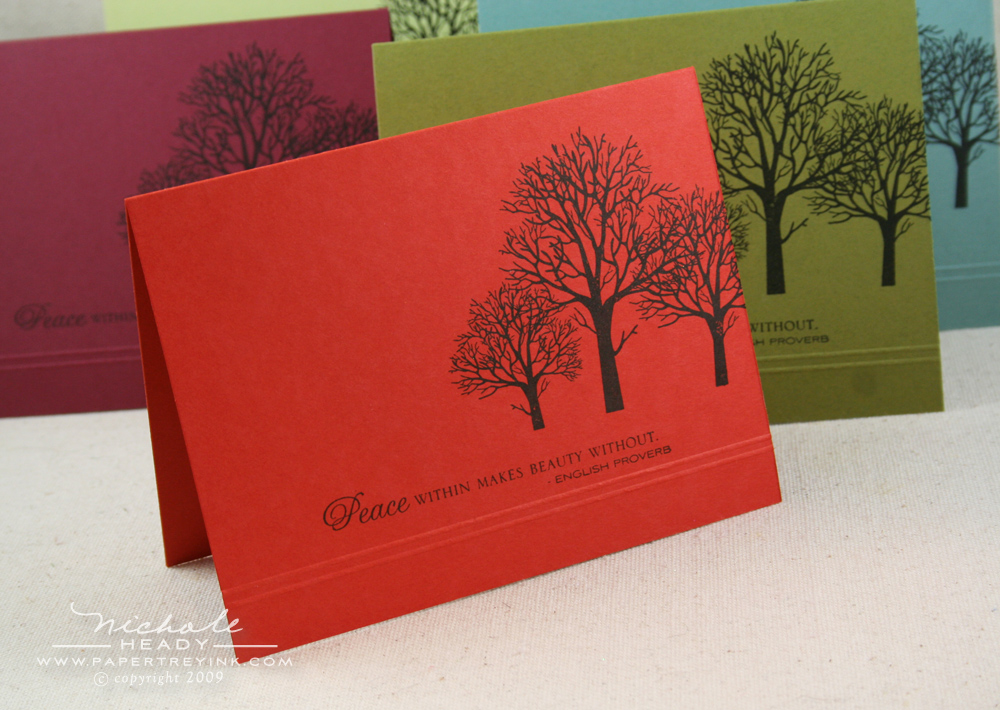
These cards feature what I like to call the "tree trio". To begin, I scored two lines approximately 1/2-inch from the bottom of the card using my Scor-Pal. The sentiment was stamped next (also from Through the Trees) using True Black ink. The tree trio was stamped off center, leading off the edge of the page. Super simple design, only taking me 15 minutes to create all five of these.
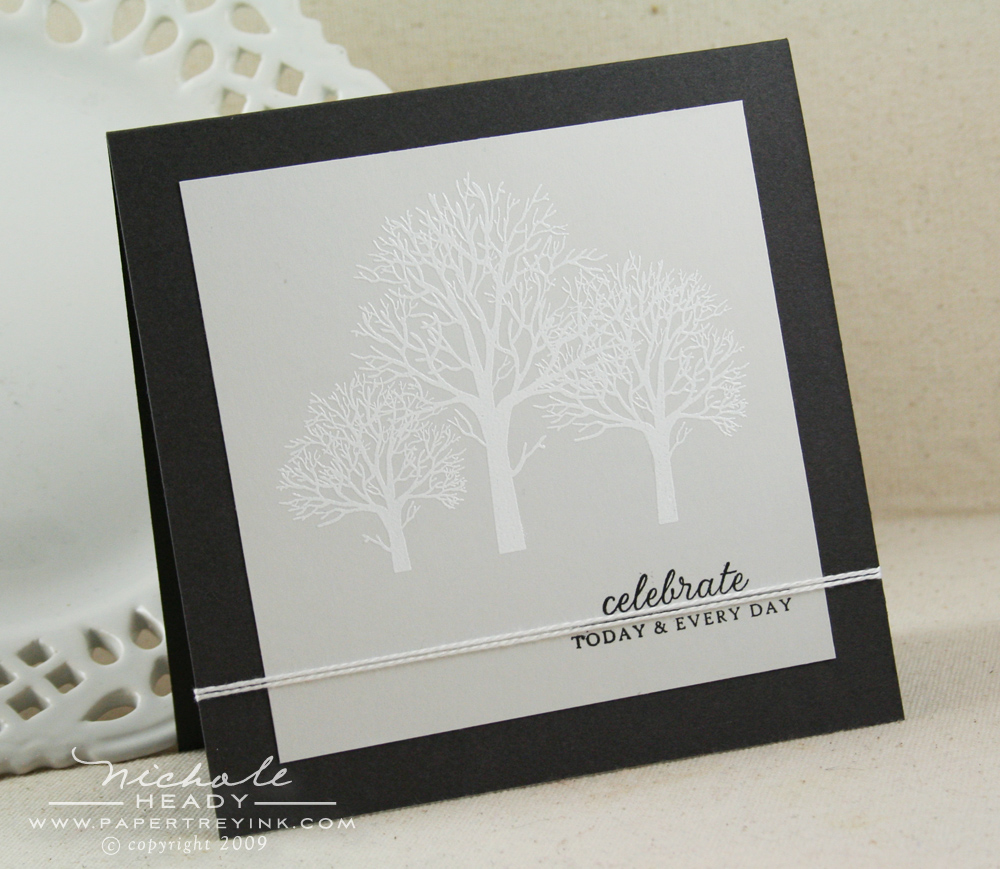
Here is the same tree trio heat embossed with White Filigree Embossing Powder on Soft Stone cardstock. I love how subtly the contrast is between the embossing and the cardstock. The 5×5 card base is created from Smokey Shadow Cardstock.
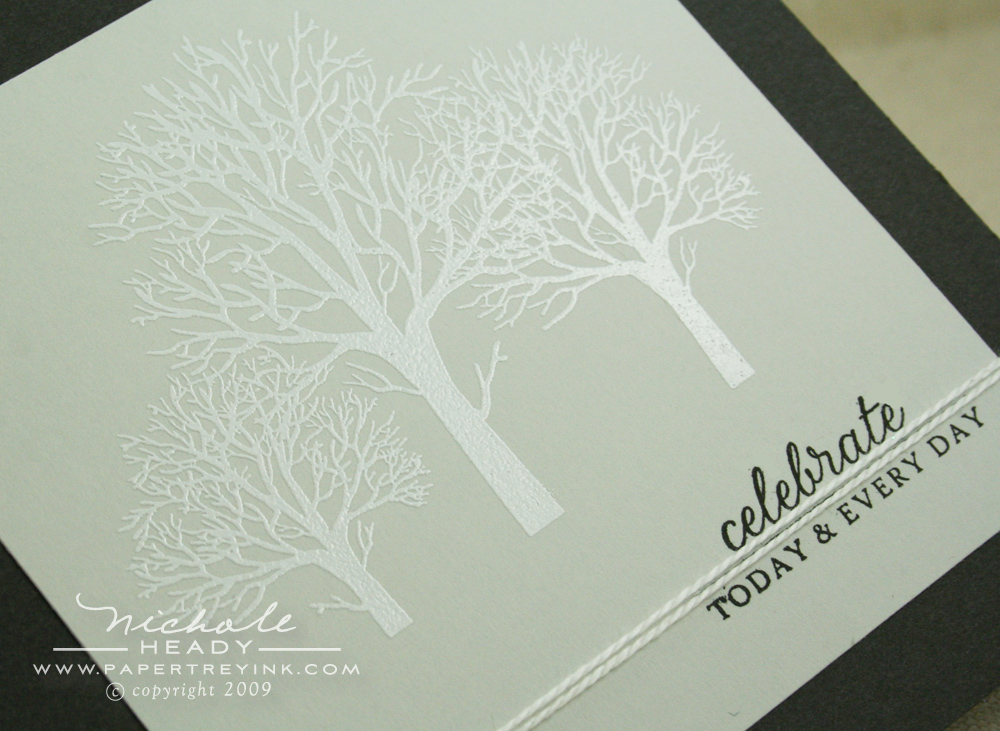
The sentiment is from Autumn Abundance, stamped in True Black ink. I wrapped the card front with white crochet thread to add a bit of texture and help ground the tree images. I think this would be a great masculine card!
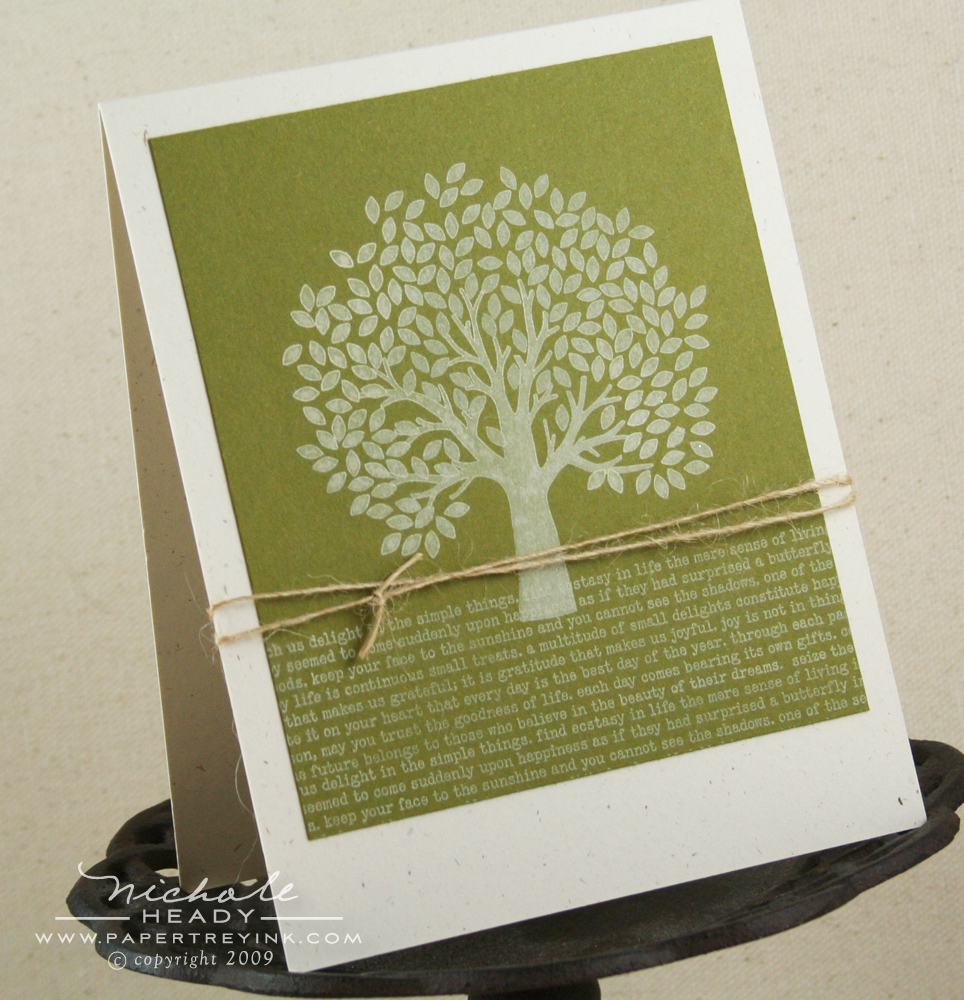
I got inspired by Ted Mattos' Guest Star Stamper entry last month and decided to try a card that was sentiment-free. This large tree image is something I have wanted for a very long time. Simple, clean & elegant.

The tree is actually in two parts, with the leaves being separate from the trunk. This will allow you to be use two colors, among other techniques. In this project I opted to stamp both portions in Vintage Cream ink onto Ripe Avocado cardstock. I used some of the typewriter text from Text Style II to ground the tree and make the overall project a bit more modern. A few wraps of Rustic Jute Button Twine is the last detail I added.
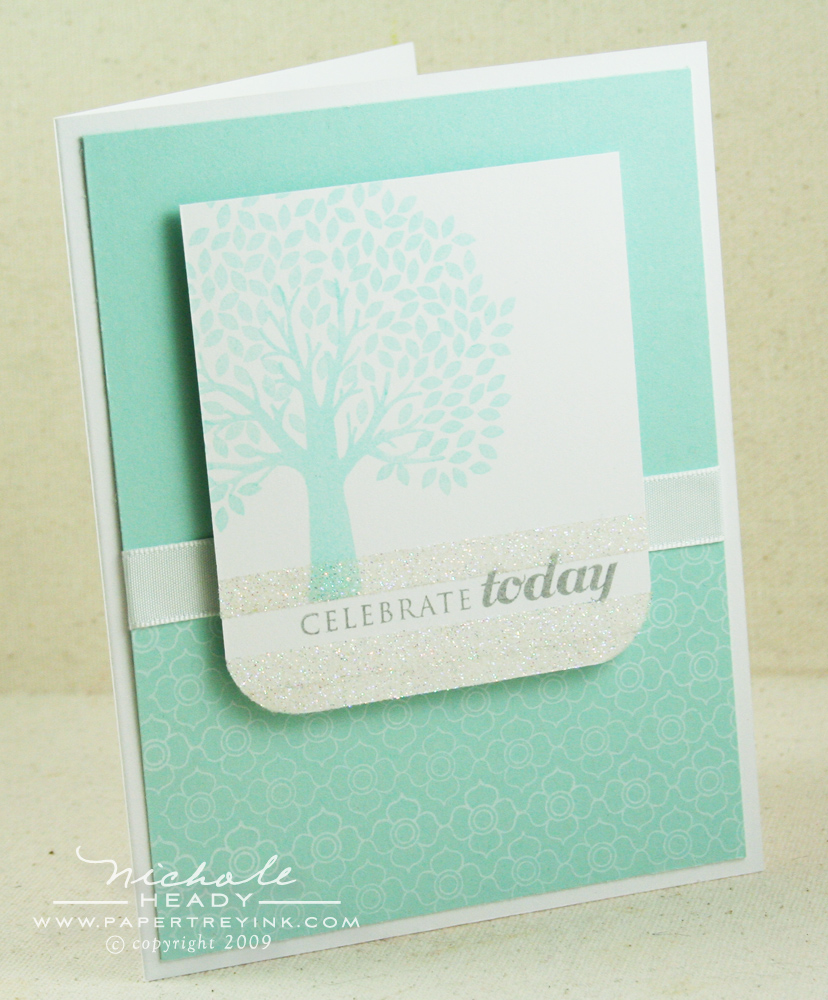
This last card is like a breath of fresh air to me, clean cool and crisp.
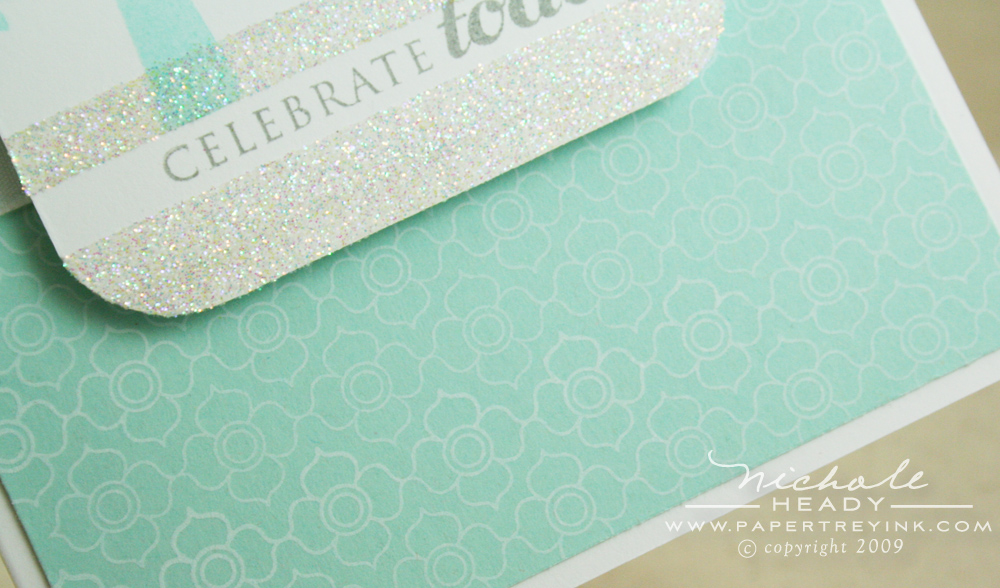
I stamped the new Background Basics: Petal Power in Fresh Snow ink onto the Aqua Mist card front. Don't you just love it!
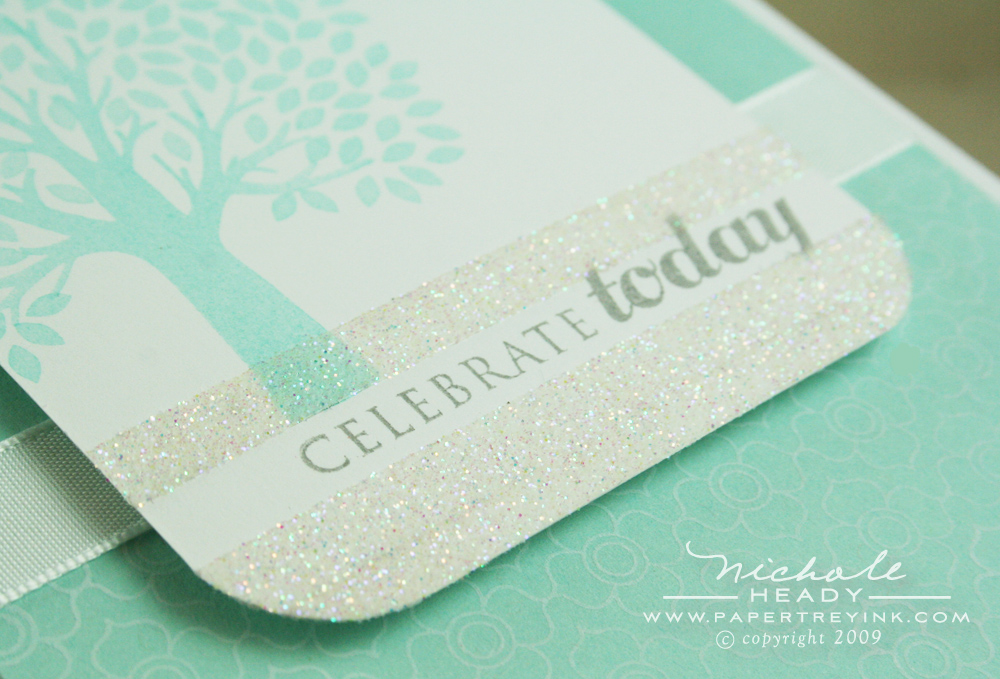
The tree is stamped in Aqua Mist ink for something a bit untraditional. It's also off center, which I like. The sentiment is from Cupcake Collection and it is stamped in Smokey Shadow ink. I used Scor-tape to add glitter above and below the sentiment. Love how this framed it out.
I am very confident that after seeing today's samples, you will agree that this set is a wonderful basic that you will find dozens upon dozens of uses for. Is there anything that you've seen today that you find especially inspiring? What will you do first when you get this set in your own hands? We would love to hear your thoughts! Just for sharing a bit with us,we have a fun prize package up for grabs!
- Through the Trees stamp set
- Background Basics: Text Style II stamp set
- Prisma Glitter
A prize package that will give you most of the tools needs to recreate today's projects! You have until 7am EST, Tuesday, January 12th to leave a comment here to be eligible to win. One winner will be randomly selected by noon EST the same day and officially announced on our January Release Winners page. Please play nice, only one comment per person.

Want to to see more of Through the Trees? Stop by Heather Nichols' blog today to see what she created using this set.
Dawn McVey is offering up another sneak peek of her new sets, Top Ten & Top Ten Additions.
Alli Miles is also featuring a project created with her new sets Daily Designs & Sentiments.
Kim Hughes is featuring a project that utilizes her new In Shape collection, Rock-a-bye Baby.
Our Click Simple Team members are also showcasing some sneak peeks of Kim's new templates (more about them later this week!).

For complete supplies & dimensions for all of today's projects, please CLICK HERE.
Leave a Reply