


Alli Miles has a knack of designing stamps that not only stay true to her hip modern style, but that incorporate a versatility that can't be matched. Her new introductions this month are no different.
Daily Designs is a set of eight tag frames & patterns that include a variety of small companion images, covering everything from Easter to Father's Day to Baby. You are all familiar with the ease of use you have found with our previous tag sets, such as Holiday Tags and Tags for Spring. Alli has now designed her very own comprehensive set that embodies a versatile mix with year-round capabilities.
The details.
- Daily Designs will be available for sale on January 15th.
- It will retail for $24.
- It contains a total of 25 stamps (8 tag images and 17 companion images.)
- All of the tag images coordinate with a 1.75" standard circle punch, our Fiskars scalloped circle punch and the Marvy (blue) super jumbo scalloped circle punch.
You can't have images without sentiments! Alli also designed a companion sentiment set that contains something for every season, holiday and event you can dream up!
The details.
- Daily Designs Sentiments will be available for sale on January 15th.
- It will retail for $15.
- It contains a total of 26 sentiments.
Alli has already been super busy this week posting some AMAZING quick & easy card samples (you can see them all HERE, HERE, HERE, HERE and HERE!) I decided to step a little outside of the box and create something a little different. I have two projects to share with you today, each with completely different looks, which emphasizes just how versatile this set can be!
(click above image for a larger view)
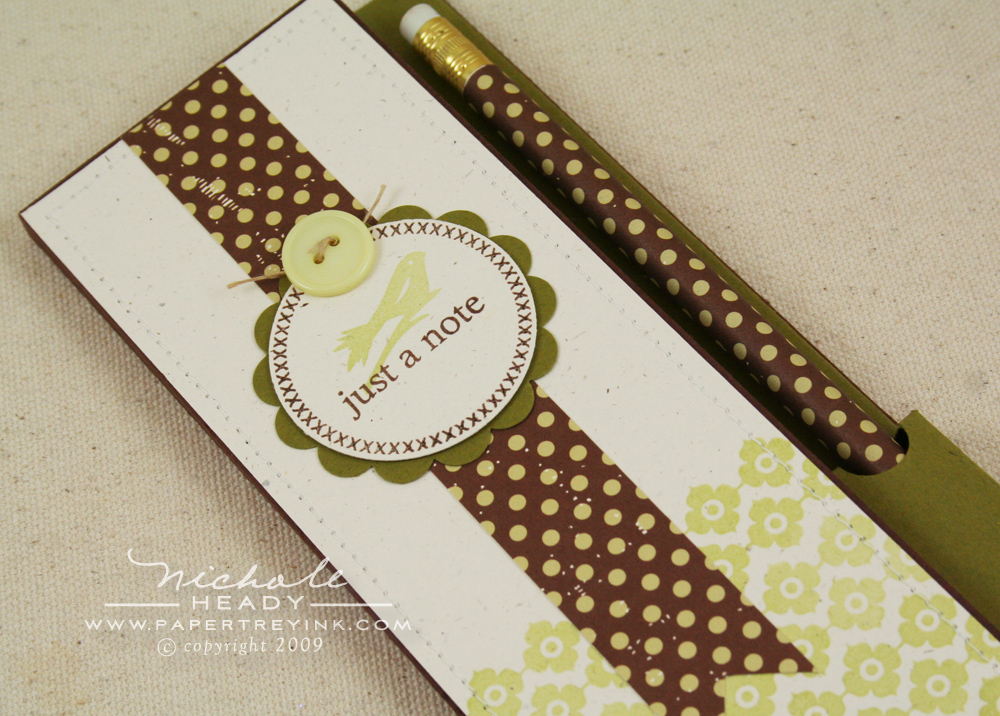
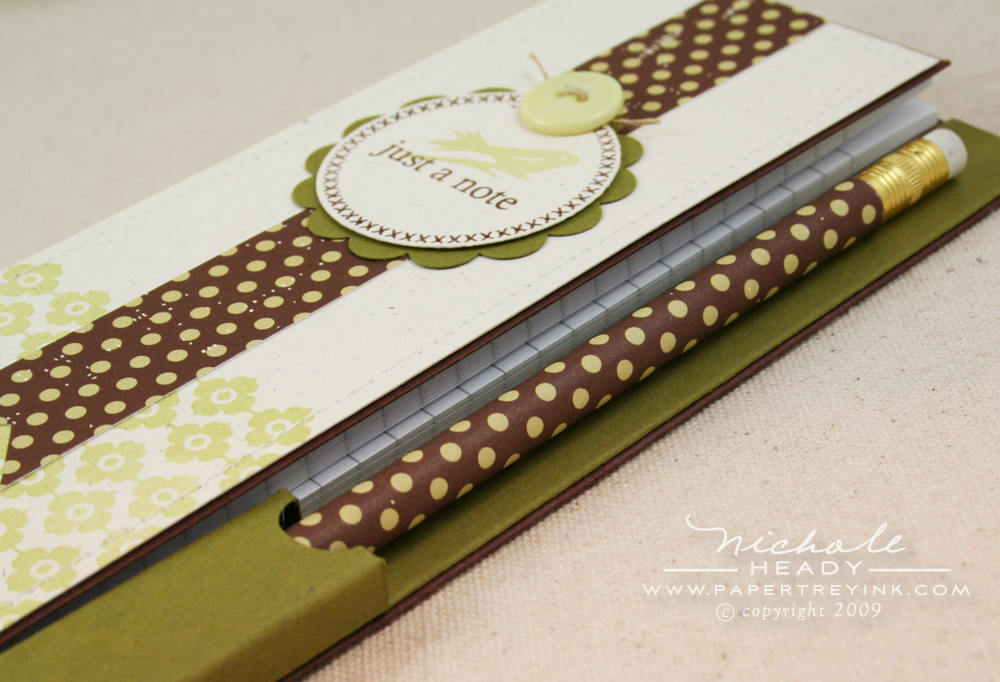
This first project uses two of my very favorite images from Daily Designs. A stylish bird on a branch and a stitched tag border. I also used a "just a note" sentiment that can be found in Daily Designs Sentiments.
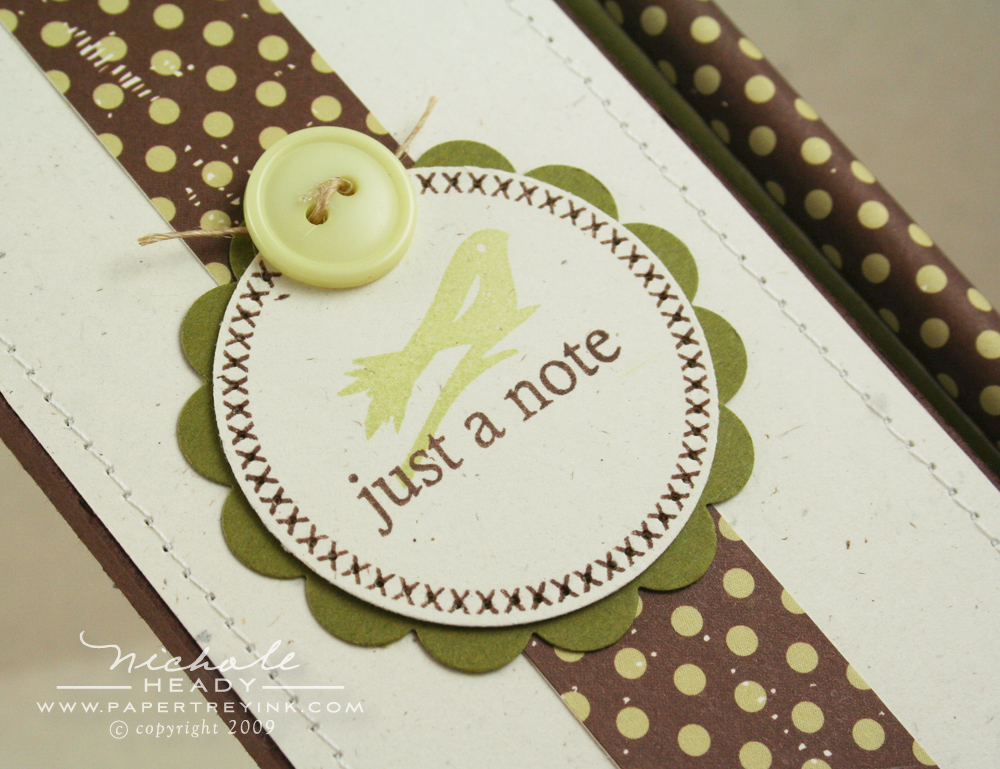
The bird is stamped in Spring Moss ink, with the stitched border & sentiment being stamped in Dark Chocolate. I pierced a small hole with my paper piercer in the center of each stitch of the border to add a bit more detail. The image was punched out with my 1.75" circle punch and matted with a scalloped circle punched from Ripe Avocado cardstock. A vintage Spring Moss button tied with Rustic Jute button twine was added to the top for a little texture and dimension.
(click above image for a larger view)
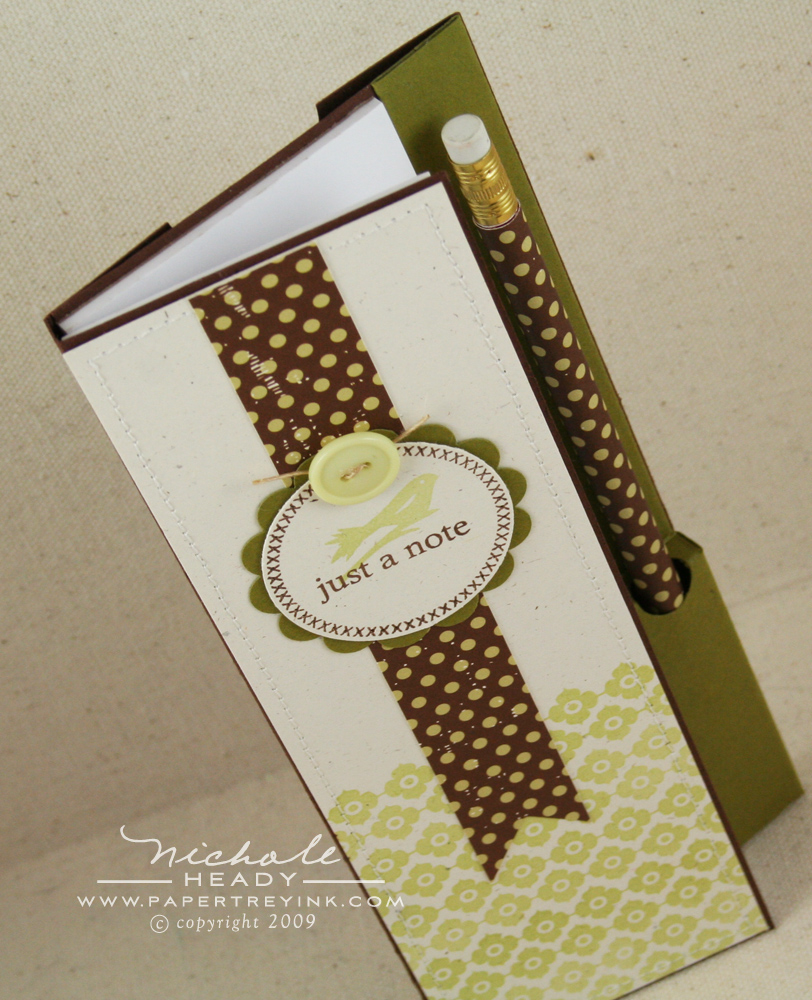
This notepad project has a little bit of a fun twist. I love to make these little notepads as gifts but I am always left scratching my head as to how to incorporate a pencil or pen and keep everything practical and professional looking. After a few hours of fiddling, I finally developed a notepad cover that integrates a special holding place for a writing instrument!
And because I love all of you SOOOO much, I even drew up the template and formatted it as an easy to print pdf so you can make your own versions of this too!

Click the link below to download my notepad cover & pen holder template!

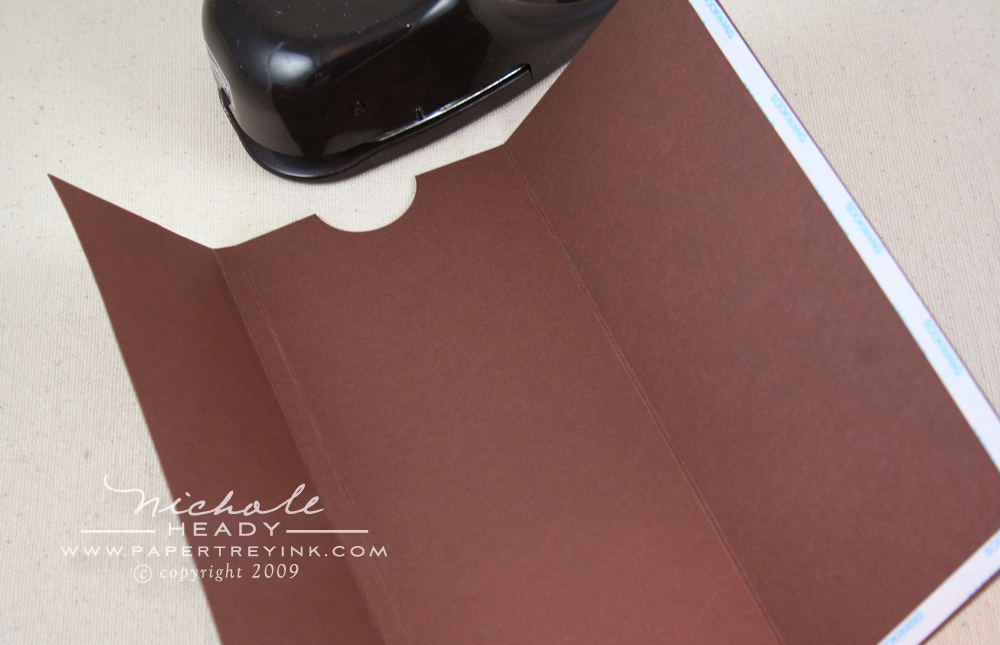
Here's a quick run down of just how easy this is to recreate in your own studio! First, print the box template onto your desired cardstock. Cut & score according to the template.
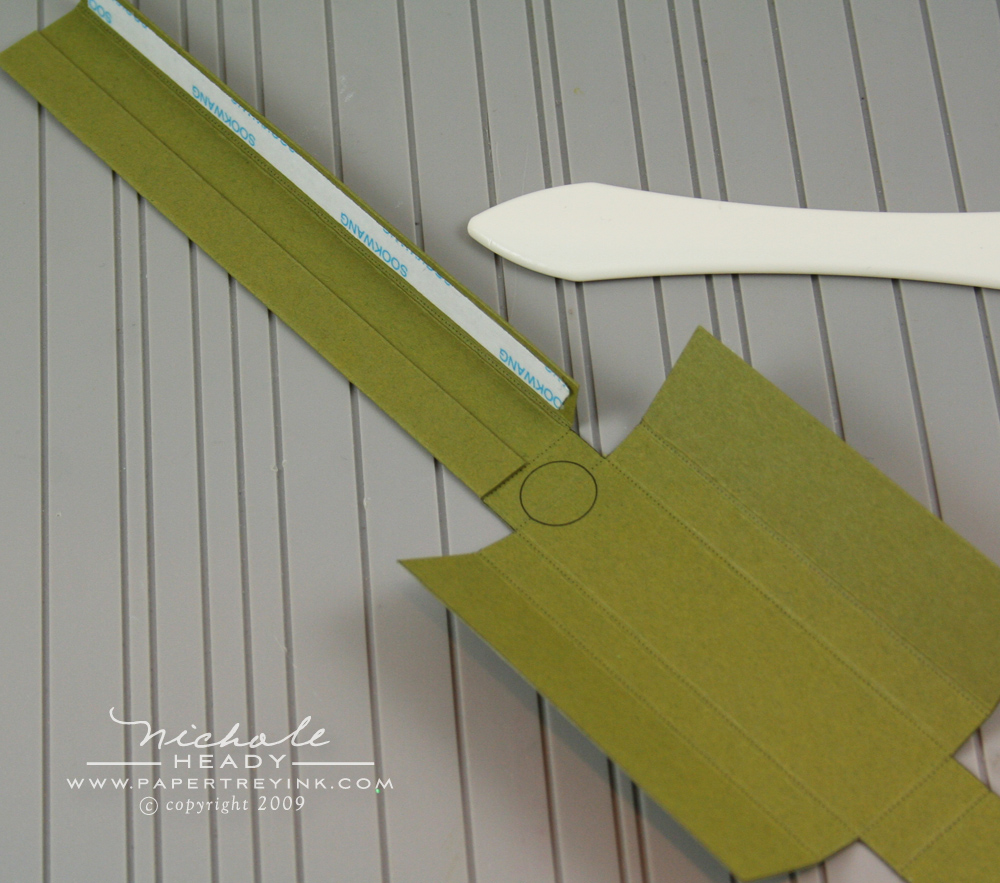
Adhere the long top tabs over onto the back of the template using Scor-tape or another sturdy adhesive. This is an important step to do first, because this needs to be done in order for you to be able to punch the circle necessary for the pen insert.
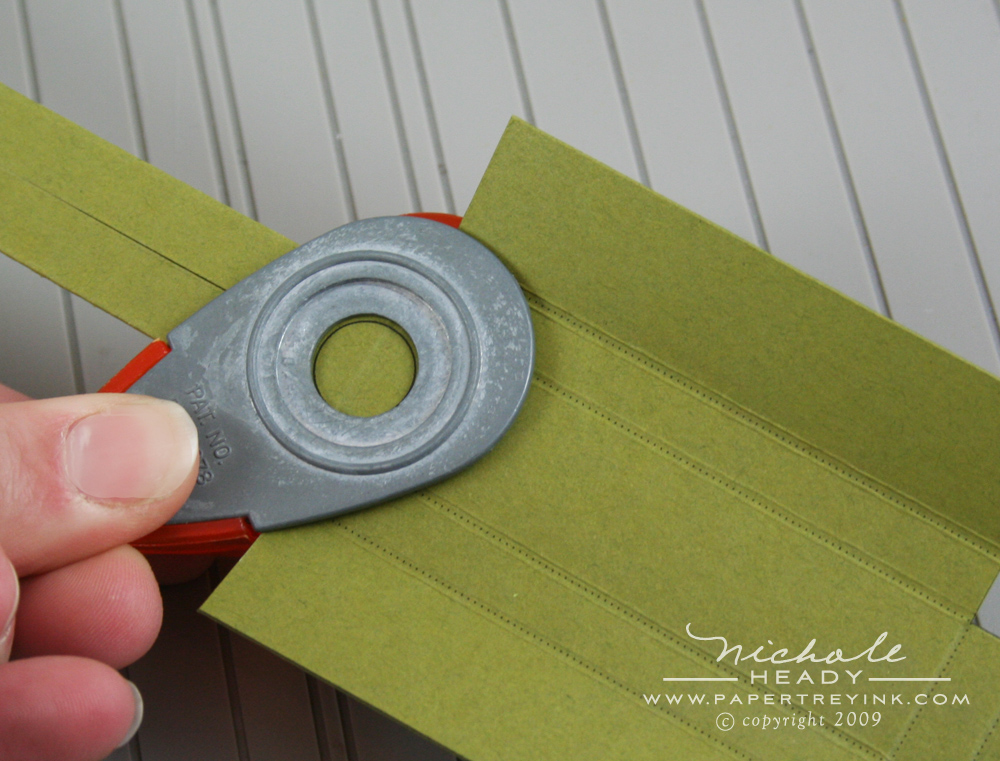
After folding in the top two tabs, invert a 1/2" circle punch and punch out the opening where indicated.
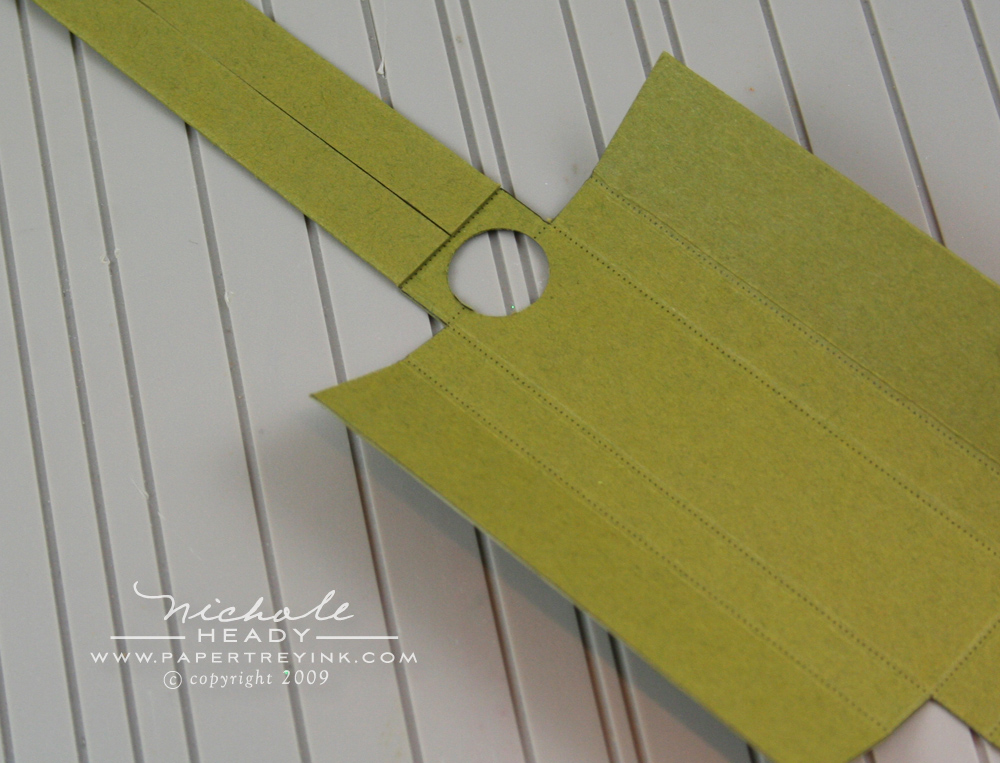
You will end up with something that looks like this.
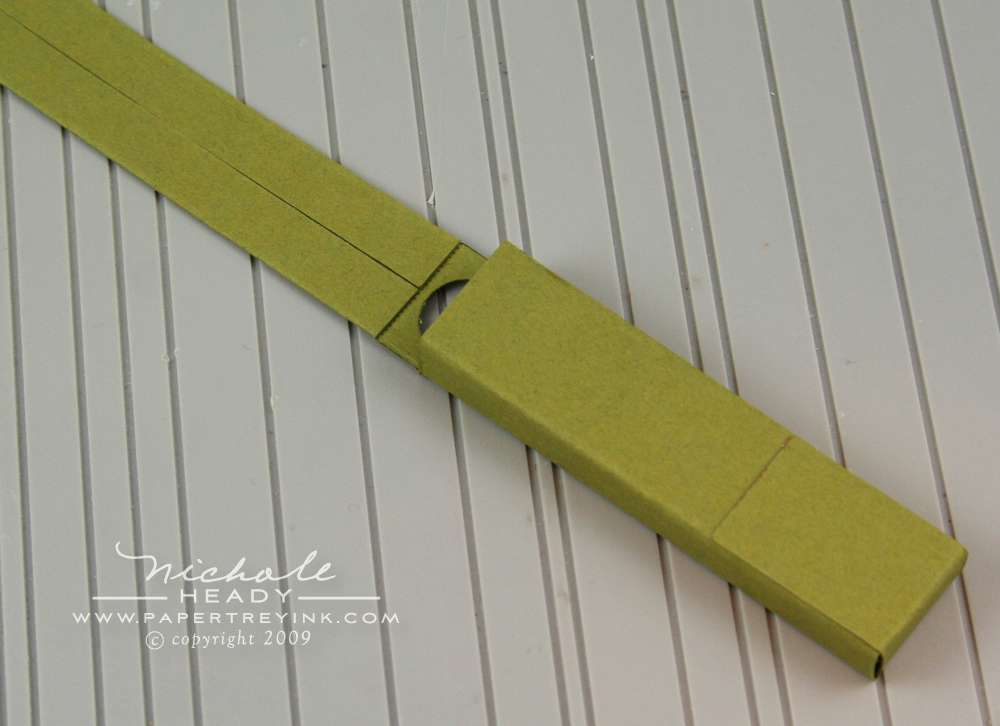
Fold and adhere the two side tabs in to form the box sides, followed by the bottom tab to complete the box.
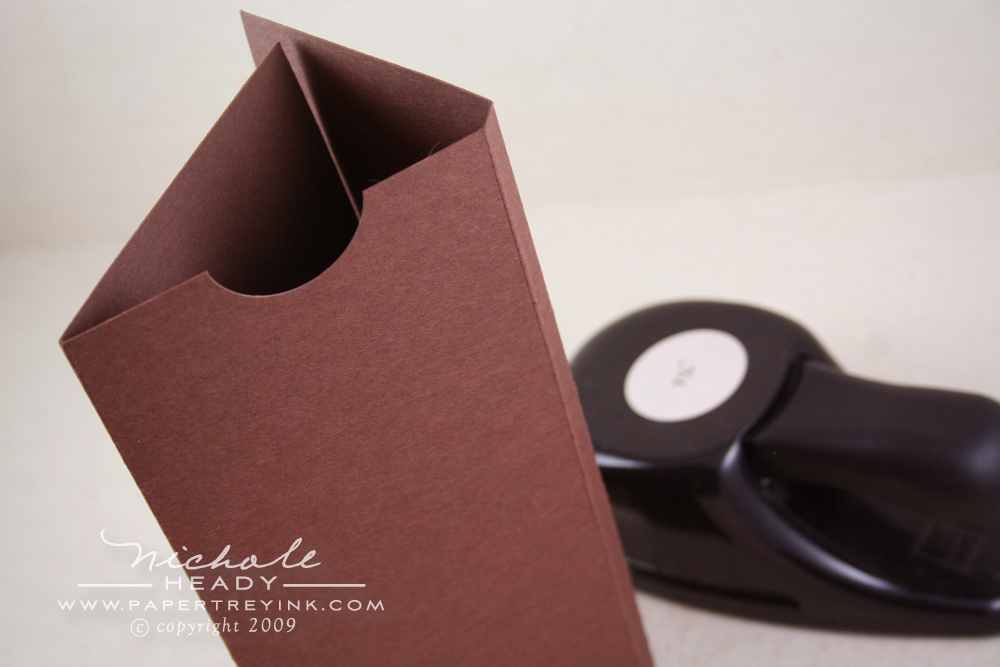
Measurements for scoring & cutting the actual notepad cover are included in the download above. I like it because it incorporates an extra section that creates a pocket for storing important papers, such as a small calender, receipts, appointment cards or anything else you can think of.
I used a 1.25" circle punch to create a notch in the back before I adhered the two edges to the center to form the pocket.

After adhering as indicated in the above photo, I added two of our notepads, one to the front cover and one to the back cover. You'll notice that the pen holder adheres nicely in place right next to the notepad.
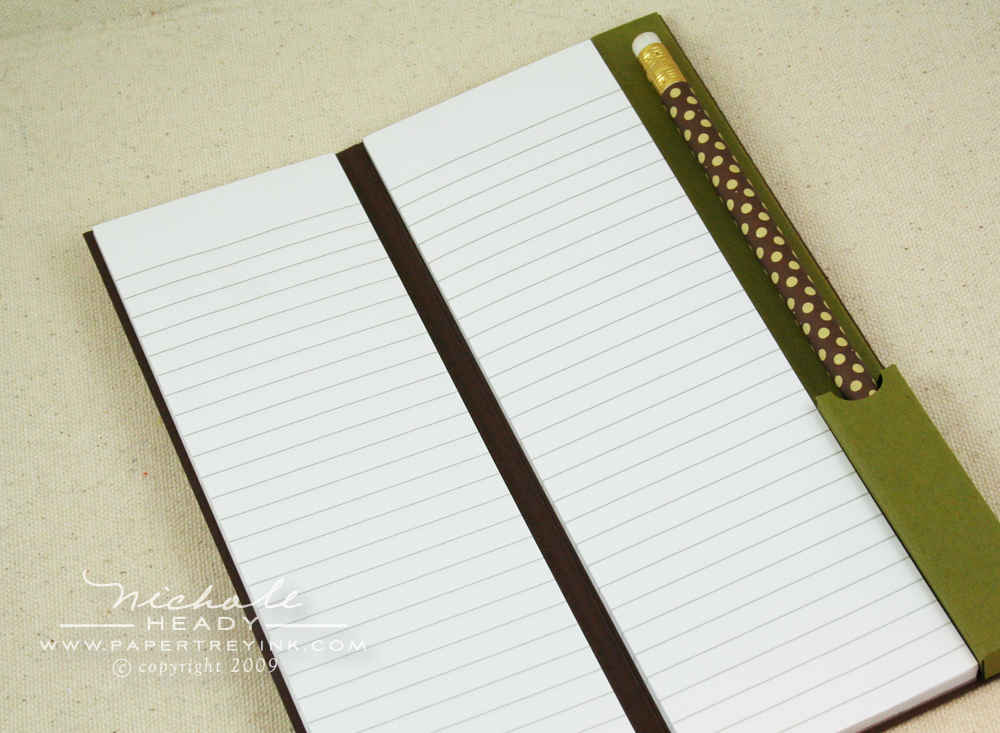
A pencil or pen will now tuck perfectly into the designated spot!
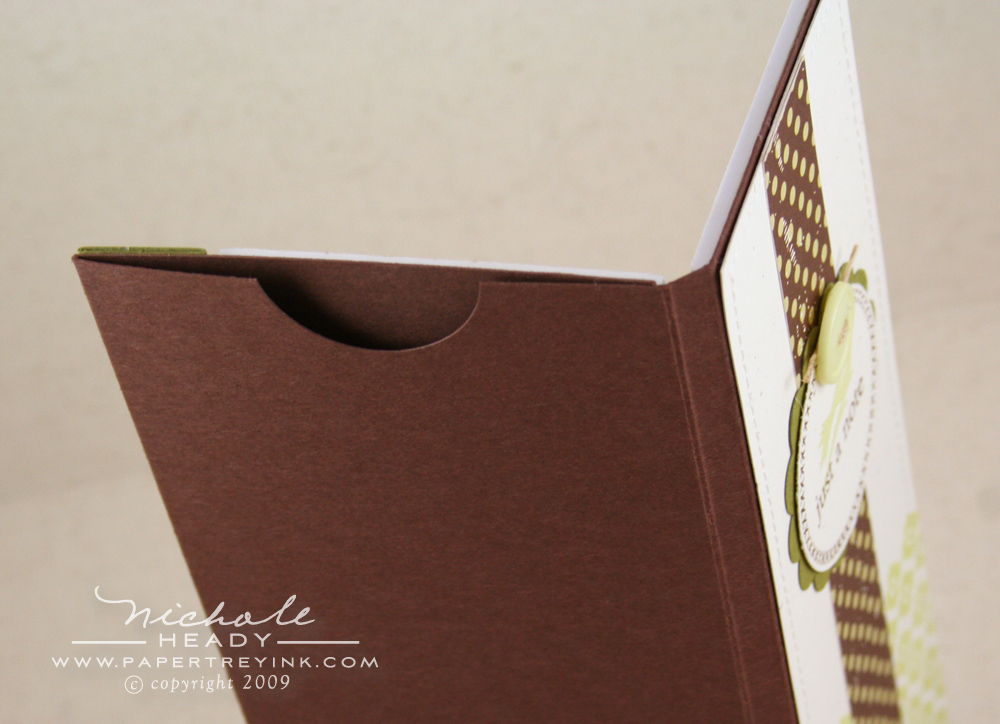
A bit of embellishing is to the cover is all that is needed to complete this project!
(click above image for a larger view)
One more note, I was able to create a matching pencil with a little modge podge and a few clothespins. I found that a 1" strip of our patterned paper, cut to the length of the pencil you are covering is usually a perfect size. Cover the back of the papr with modge podge and use several clothespins to hold the seam down in place while it dries. Once the modge podge is completely dry, the pencil can be sharpened normally.

(click above image for a larger view)
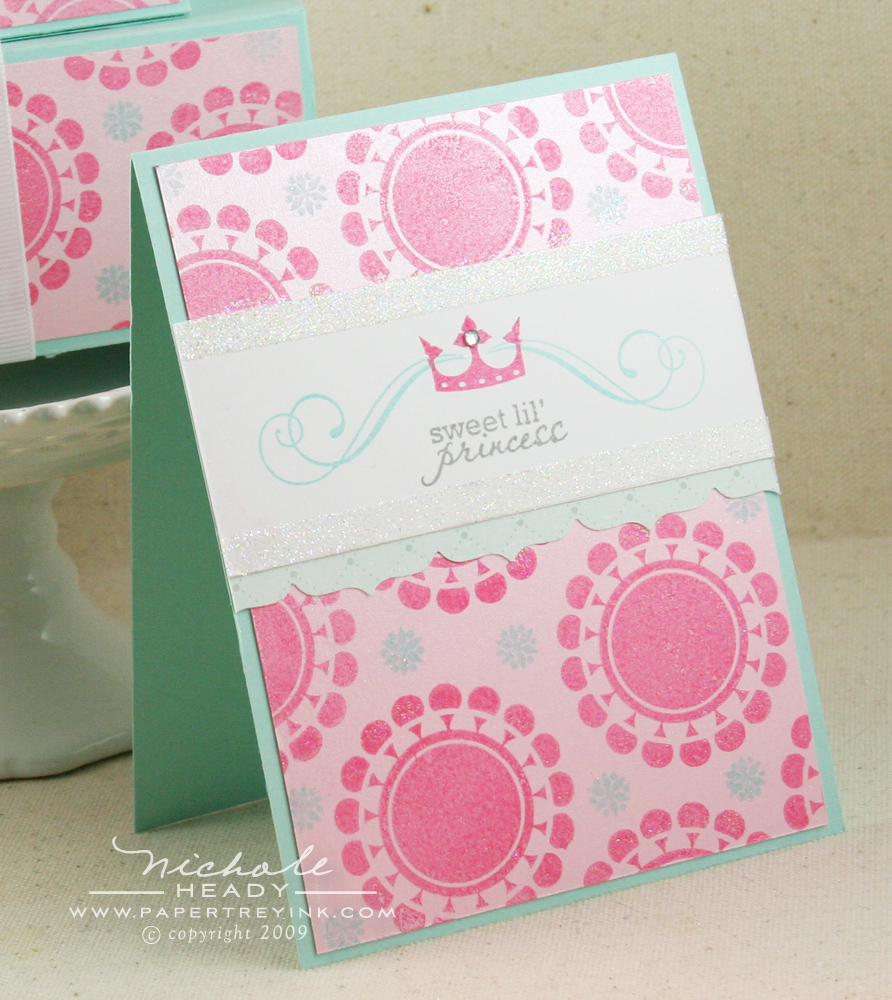
My second project is in a completely different style than the first. It's girly, shimmery and sparkly all at the same time, perfect for any little girls in your life!
(click above image for a larger view)
It was hard to capture all of the shimmer in a photograph, so you'll have to use your imagination a bit! This card layers our new pink shimmer cardstock (see post below) and aqua mist for a fun and vibrant color scheme!
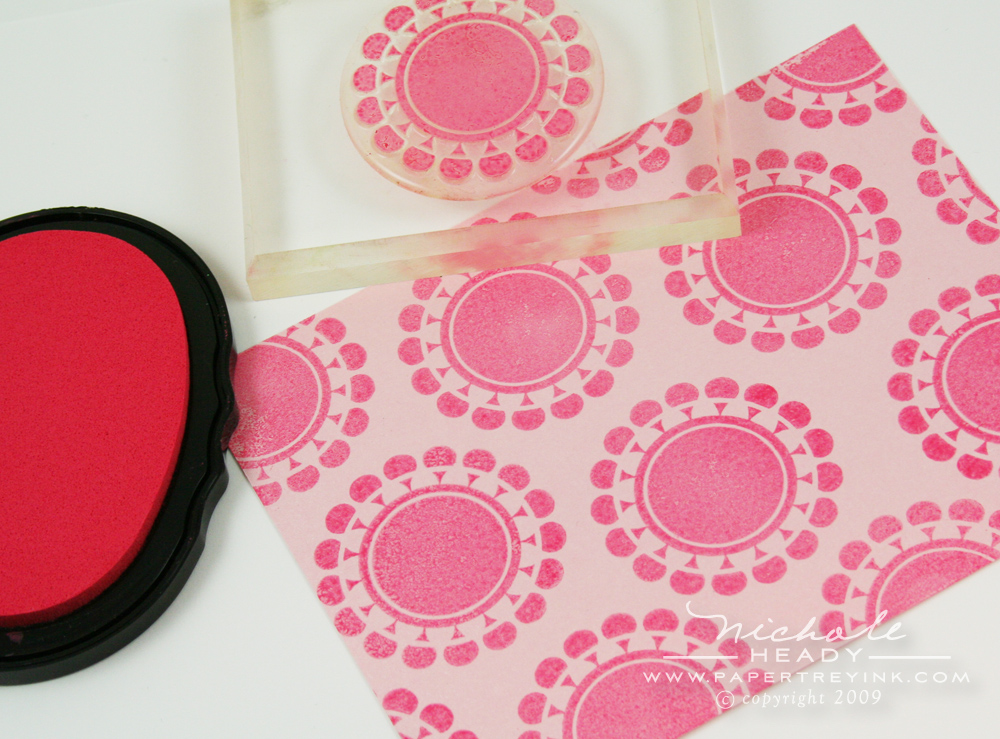
To create the fun background, I started with our pink shimmer cardstock. This tag image from Daily Designs reminded me a bit of a flower, so I decided to use it by itself to build my pattern. I stamped it repeatedly using Hibiscus Burst ink. The contrast of the slight chalkiness you get with the pigment ink compared with the shimmer of the cardstock is too pretty to describe in words!
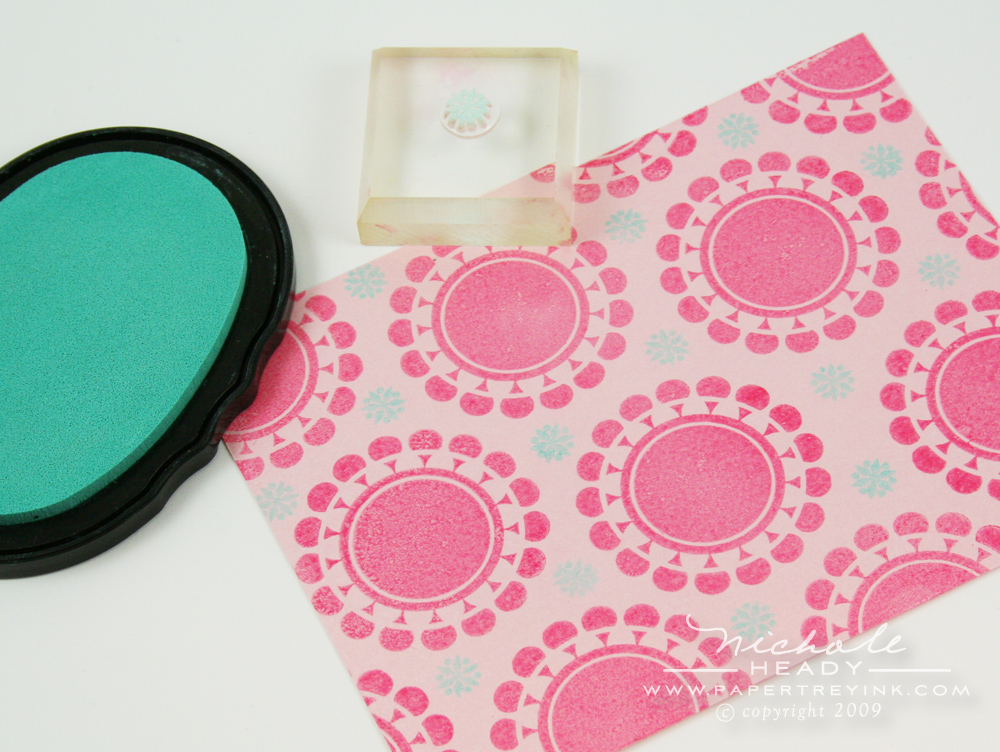
I followed up with a small floral image also from Daily Designs, stamped in Aqua Mist intermittently around the pink flowers.
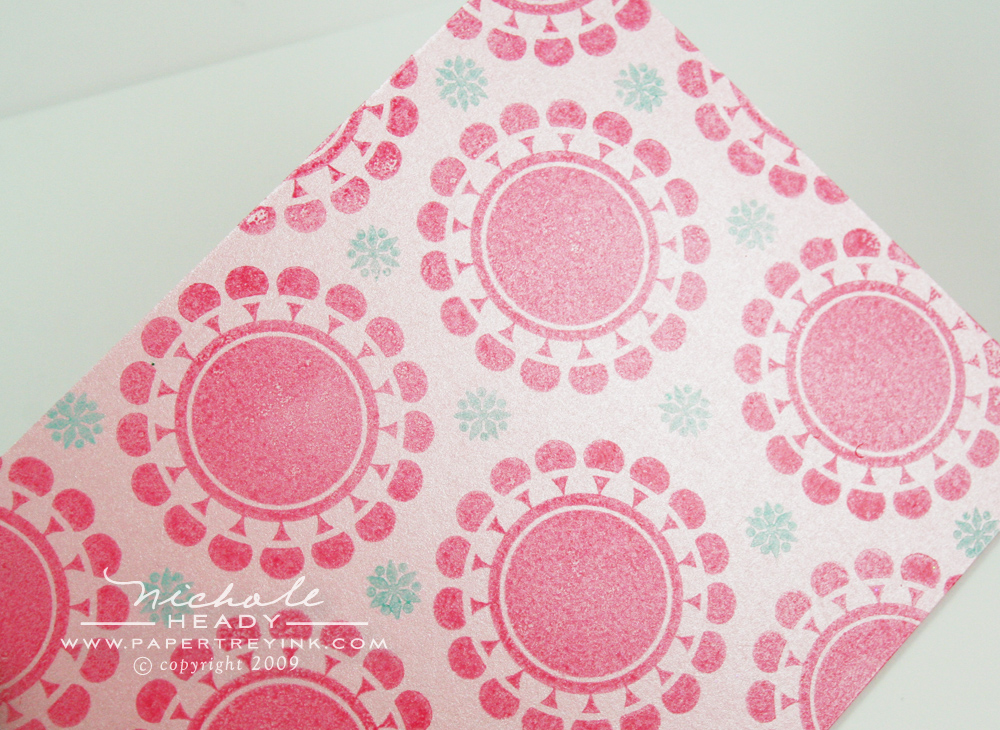
The completed shimmery pattern is just stunning in real life!
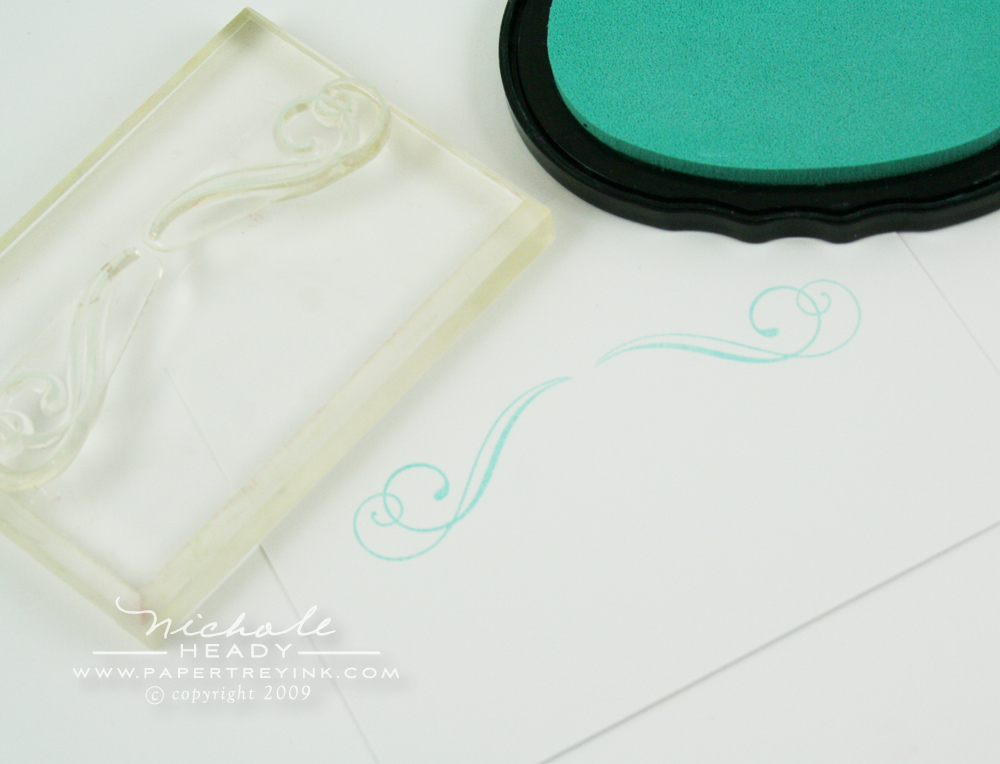
For the focal point on the card I stamped two of the flourishes from Fancy Flourishes using Aqua Mist ink. As a tip, don't be afraid to put both flourishes on the block at the same time to ensure perfect placement and symmetry.
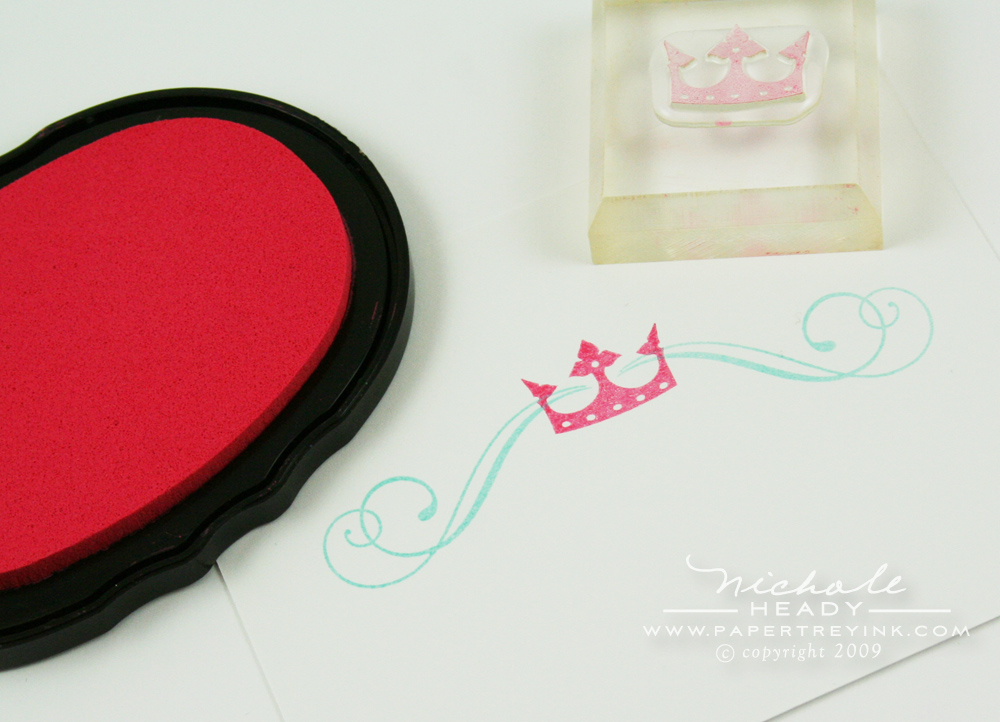
I then stamped this crown image, alos from Daily Designs, with Hibiscus Burst ink. The reason why I showed you this process for the focal point was to emphasize that even these small companion images can become a show stopper if you layer them over larger framing elements.
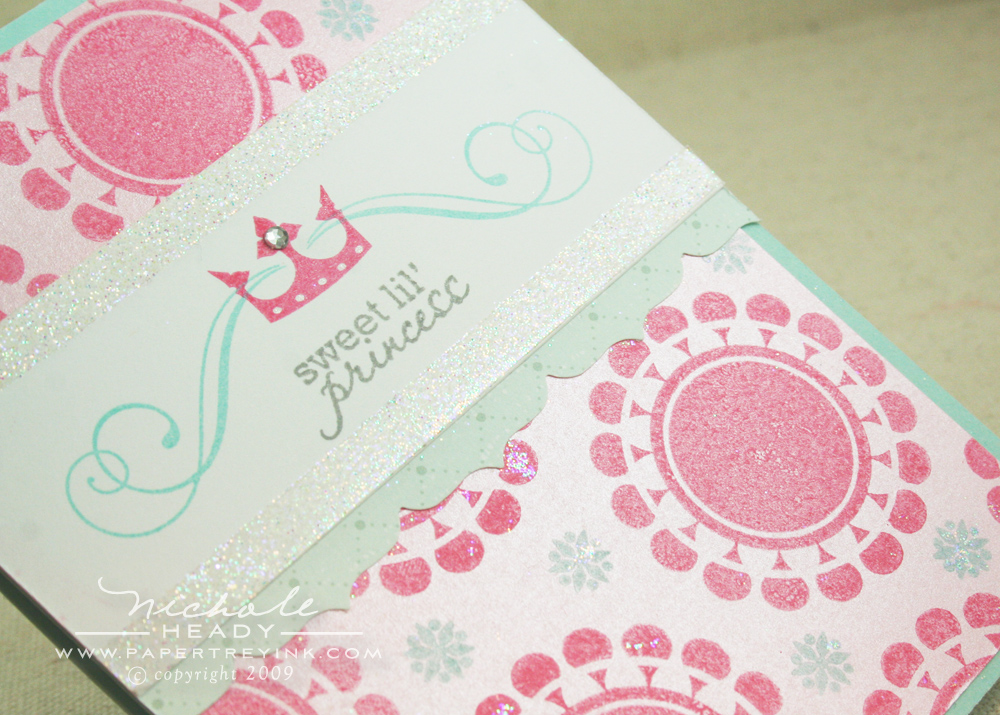
I added glitter borders above and below the princess focal point using Scor-tape and Prisma Glitter. All of the sparkle really adds amazing detail to this project.
(click above image for a larger view)
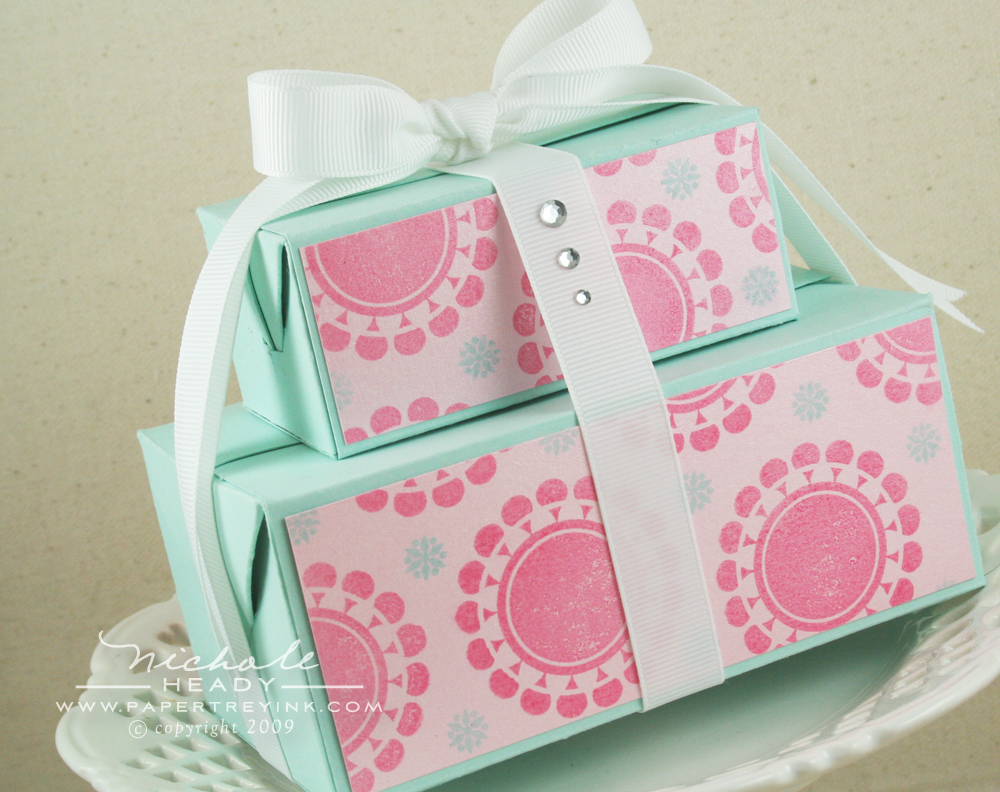
Presentation of a gift for your little princess could not be complete without some super cute packaging! I used the NEW! Back to Basics Box template (available tonight) to create this pretty stack of packages.
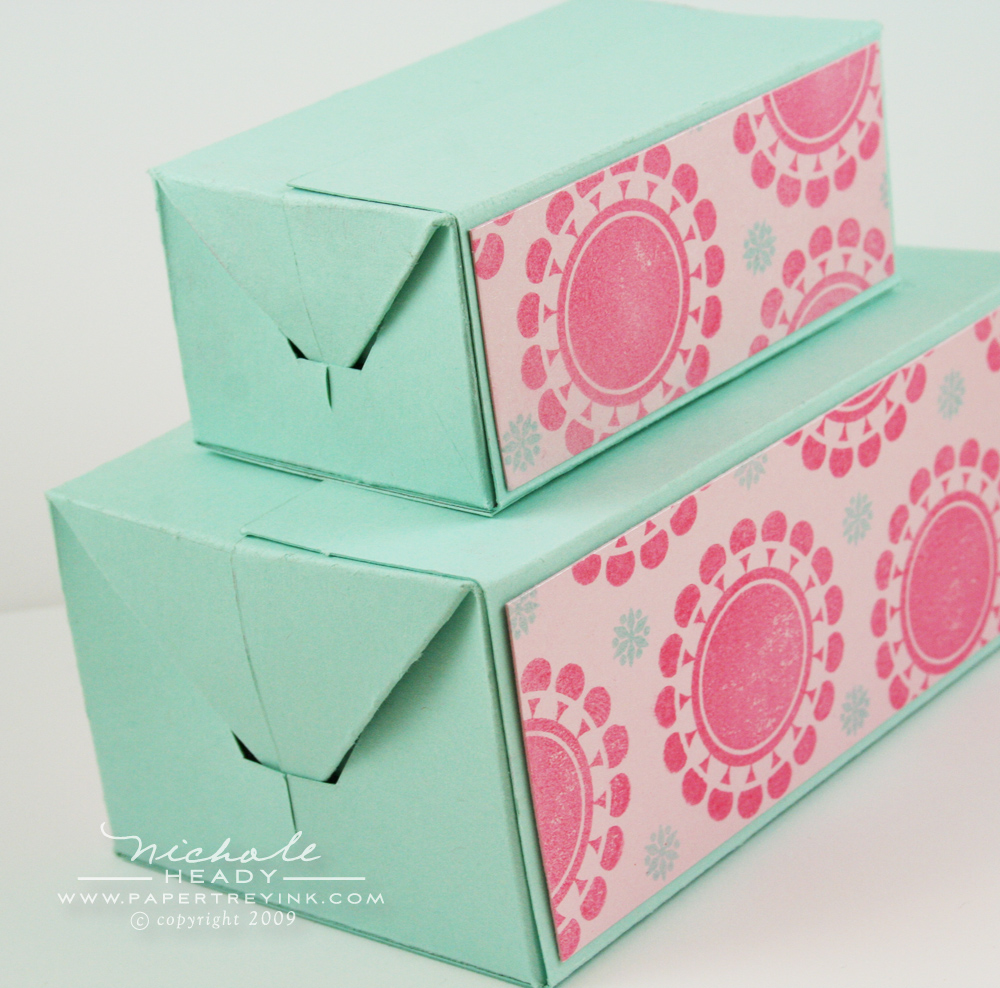
There are actually three sizes of boxes included with this Click Simple template package, so you can use them individually or stack them for a bigger impact.
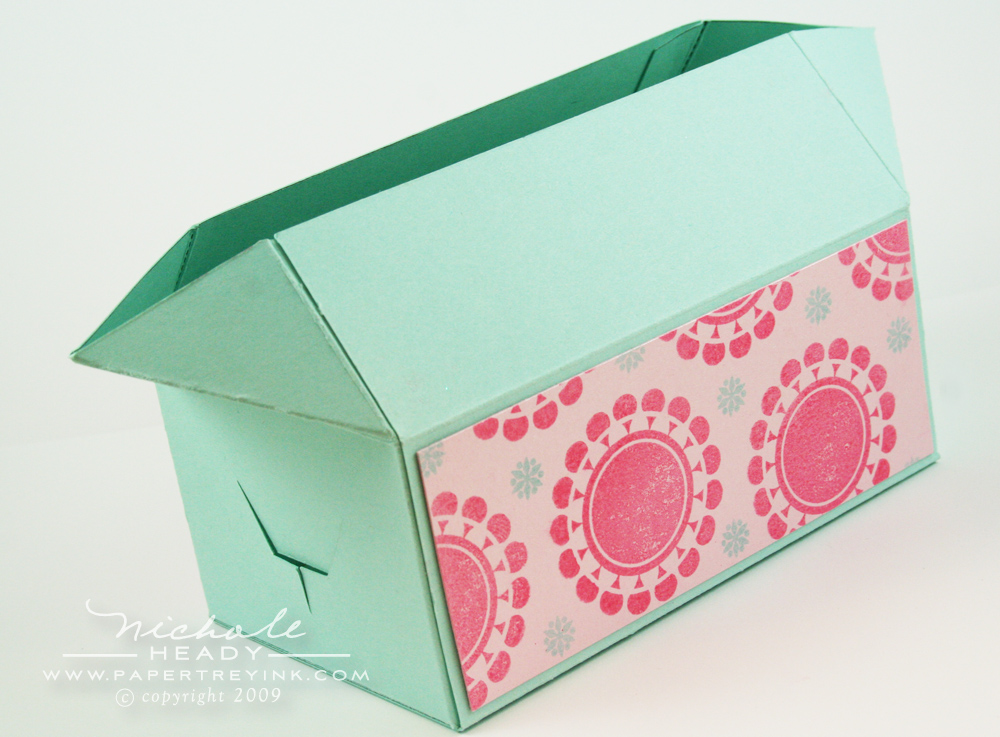
These boxes are as easy as 1-2-3 to put together, and you don't even need to worry about a closure. The integrated sizes fold down and tuck into a specially designed slot.
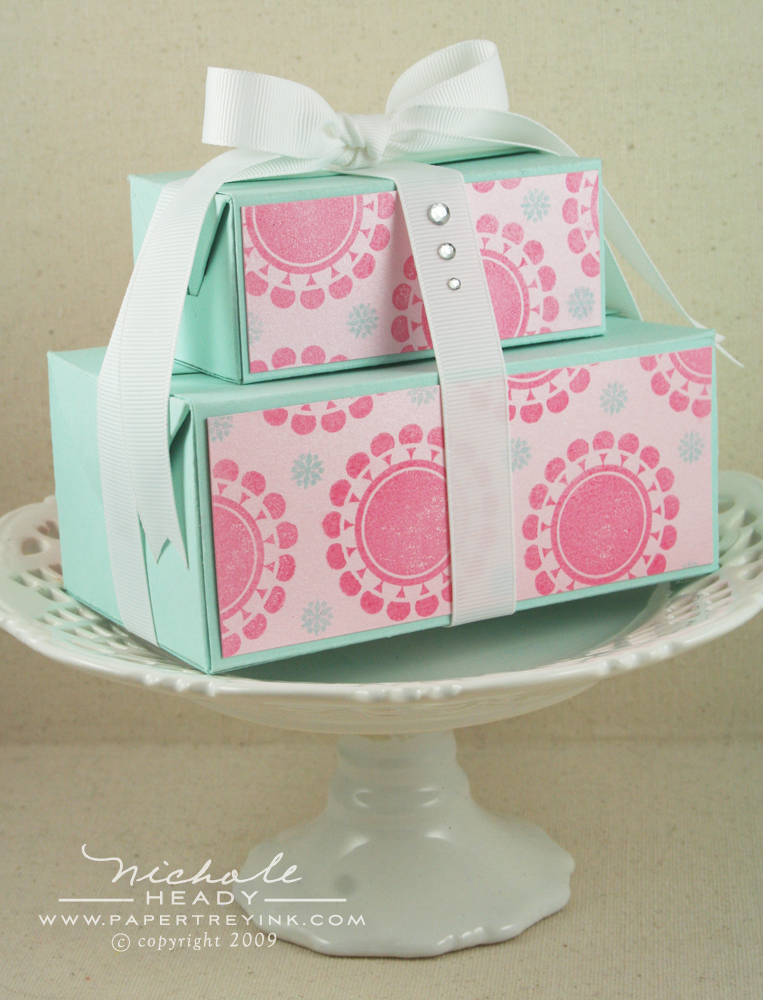
With the addition of some pretty ribbon and some bits of the background paper created for the card, I have a stunning package to present to the birthday girl!
Weren't today's projects so fun? I had a blast with these
sets, and I know you will too once you get them into your hot little
hands! What kinds of projects do you think you'll create with these
sets? Do you think there is anything here that you'll try to
recreate? We would love to hear from you! Just for sharing a bit with
us,we have a fun prize package up for grabs!
- Daily Designs stamp set
- Daily Designs Sentiments stamp set
- Background Basics: Petal Power stamp set
- pink & blue shimmer cardstock
A prize package that will give you a great start in recreating
today's projects! You have until 11:30pm EST, tonight, Thursday, January 14th to
leave a comment here to be eligible to win. One winner will be
randomly selected and officially announced on
our January Release Winners page just before the release at midnight. Please play nice, only one comment per person.

Want to to see more of Daily Designs & Sentiments? Stop by Becky Oehlers' blog today to see what she created using these sets.
Alli Miles is also featuring a project created with her new sets Daily Designs & Sentiments.
Kim Hughes is featuring a project that utilizes her new In Shape collection, Rock-a-bye Baby.
Dawn McVey is offering up another sneak peek of both her new sets, Top Ten & Top Ten Additions.
Our Distinguished Guest Designer, Jessica Witty, is sharing projects she created with all of this month's goodies!

Vintage Bird Notepad
Stamps: Daily Designs, Daily Designs Sentiments, Background Basics: Petal Power (all available January 15th)
Ink: Spring Moss, Dark Chocolate
Paper: Rustic White, Dark Chocolate, Ripe Avocado, Turning a New Leaf patterned paper pad (polka dots)
Other: Papertrey Notepads, 1.75" circle punch & scalloped circle punch (EK Success), Spring Moss Vintage Button, Rustic Jute Button Twine, sewing machine, paper piercer
Finished Size: 3-3/8" x 8-1/8"
Lil' Princess Ensemble
Stamps: Daily Designs, Daily Designs Sentiments (both available January 15th) Fancy Flourishes
Ink: Hibiscus Burst, Aqua Mist, Smokey Shadow
Paper: Pink Shimmer, Aqua Mist, Stamper's Select White, Pretty Pastels patterned paper collection (used in blue border piece)
Other:
1/4" Scor-tape, Prisma Glitter, Rhinestones (KaiserCraft), Crest Border Punch (Fiskars), Fresh Snow Grosgrain Ribbon, Back to Basics Box Templates
Finished Size: 4.25" x 5.5" (card), 5" tall x 5.25" wide (box tower)
Leave a Reply