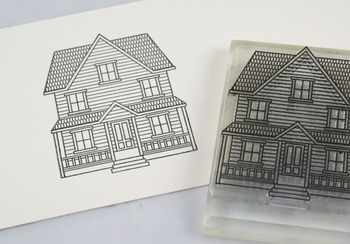
Every once in a while I design a set which ends up having a real connection to me and who I am as a person. Our new set, Boards & Beams happens to be once of those sets. Home is extremely important to me, and has been my entire life. I remember every detail & feeling associated with every home I’ve ever had. Little pieces that I carry within me wherever I go. This set features two homes, one to represent rural country living and one to signify the city life. Tonight I have used the country home image, inspired by my own home. (I will share a project using the city home later on this week!) This set includes several sentiments that are perfect compliment to the images! There are also a few home "accessories" that allow you to personalize your home! Today I am going to share with you a few tips to keep in mind when using these accessories!
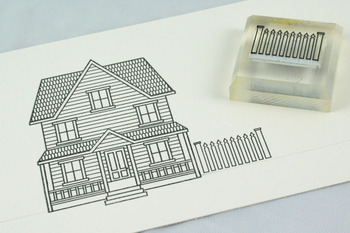
This is the first part of a picket fence. Notice that it has two fence posts with the individual pickets filling in between. To begin building your fence, it is easiest to draw a pencil line across your cardstock where you want the bottom of the fence to fall. This makes it easier to line the sections up.
…………………………………………………………………………….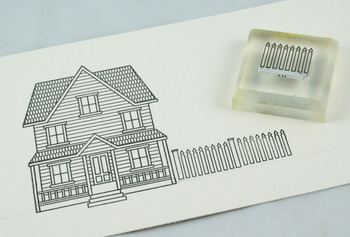
This is the second section, featuring only the pickets, no posts. It is VERY easy to just line it up with the pickets from the first section and build onto your fence!
…………………………………………………………………………………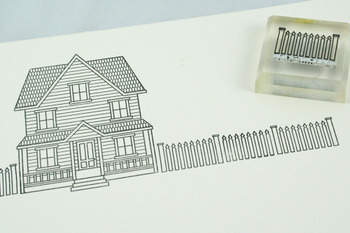
Here I have repeated the first section with posts. The combination of the two images makes for a seamless fence. And because of the way they are broken down, you can make fences as long or as short as you like!
………………………………………………………………………………..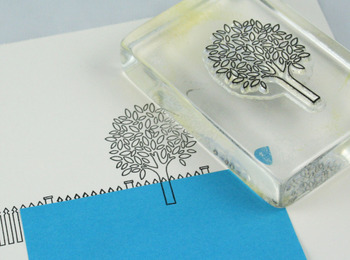
Recognize this tree? It is taken from our popular Father Knows Best set, but reduced to half the size, making it the perfect scale to compliment the houses in this set! You can use the trees along on either side of house to "landscape" or you can add them behind the fence. It is effortless to mask the fence for the tree. Just stick a post it note onto the fence, lining up the top along the bottom edge of the pointed pickets. Stamp your tree and you are good to go!
……………………………………………………………………….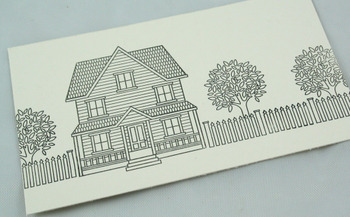
Here is my completed scene. Notice how I varied the "height" of the trees easily, since I was masking and the bottoms were being omitted.
………………………………………………………………………….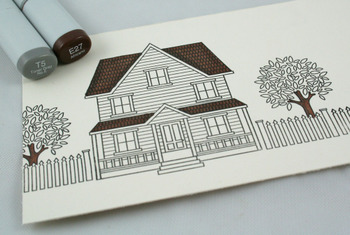
I decided to use Copic markers to color my image. I started with the roof & tree trunks using E27 (Africano) and doing a little shading with T5 (Toner Gray No. 5).
……………………………………………………………………………….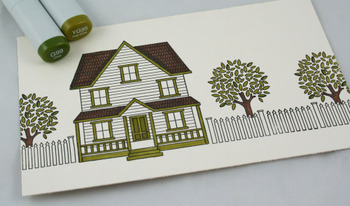
Next up was the greens. I used YG95 (Pale Olive) for the trim of the house & tree leaves. I went back in with G99 (Olive) to add a little contrast to a few leaves in the trees.
……………………………………………………………………..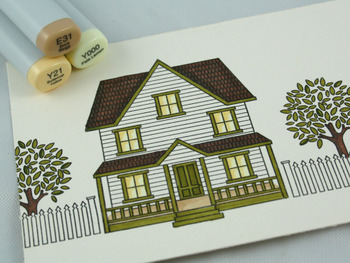
I wanted a warm glow for the windows, so I used Y21 (Buttercup Yellow) to create some shading and than colored over that with Y000 (Pale Lemon). I used E31 (Brick Beige) to color the floor of the front porch.
………………………………………………………………………….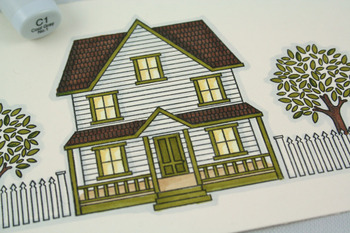
I found C1 (Cool Gray No. 1) to be the perfect shade of gray when adding just a tad of shadow along the bottom edge of each piece of siding to emphasize the "white" siding I wanted to create. I also added a heavy application under the eaves and the right side of the window casings. I also used it to outline the trees and fence posts to help create some definition.
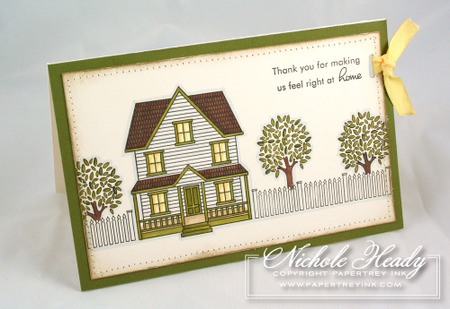
My completed image created the perfect backdrop for one of my favorite sentiments in this set, "Thank you for making us feel right at home". This is one of ELEVEN sentiments included in this versatile set! I distressed the edges of the Vintage Cream cardstock a bit with Frayed Burlap Distress ink & followed up with a little roughing up with my fingernail. I stitched it onto an olive green mat and adhered everything in place on a Vintage Cream card base. I used the slot punch from Making Memories to create a space for a bit of Lemon Tart Twill Tape. I thought this helped to bring out the warmness I had accomplished with the windows of the house. I dabbed a bit of the distress ink onto the ribbon too to make it look a bit more vintage. I hope you enjoyed today’s peek! Tomorrow I will be introducing our latest innovations in building backgrounds! You won’t want to miss it!!!
………………………………………………………………………………
Visit Lisa Johnson’s blog to see what she has been up to and congratulate her on her first stamp set!
Taylor used the same image from Boards & Beams to make some adorable gift wrap!
…………………………………………………………………………
Stamps: Boards & Beams
Ink: Noir Black Palette Ink
Paper: Vintage Cream cardstock from Papertey, Olive cardstock from Bazzill
Other: Copic markers, slot punch from Making Memories, Frayed Burlap Distress Ink from Ranger, Lemon Tart Twill tape from Papertrey, sewing machine


Leave a Reply