


Alli Miles has designed one of THE most amazing flower sets I have ever had the opportunity to work with and I am SO excited to be able to carry it within out Papertrey line!
One of my favorite images from the set is Alli’s version of a chrysanthemum (referred to as "mum" for the remainder of this post!). I love, LOVE, love the detail. It could take on several different styles depending on how you used it, whether it be trendy, classic or vintage. It can be left alone as an outline image or colored in to add detail. The choice is yours! I have a really fun project to share with you today, but be sure to stop by Alli’s blog as well because she has even more to share with you!
Today’s project integrates two of my favorite hobbies. You already know that I love to stamp. But the second pass time is not something I have ever really talked about on here very much and that is sewing. I love to make Hannah dresses among dozens of other things. My mother did a lot of sewing when I was growing up and I also enjoyed honing my skills while particpating in 4H. Paula, an older woman in our small town, allowed girls to come to her home once a week for sewing lessons. Oh, I just LOVED it! One of the things that she taught me to make was a very simple, no pattern purse. I have made it dozens and dozens of times, mostly for gifts.
With sewing becoming so popular in paper crafting, I thought I would challenge you to take your stitching knowledge a step further and integrate fabric. Sewing on fabric uses basically the same technique as paper, and if you can sew in a basic straight line, YOU can make this purse! Really! Form start to finish it will only take about an hour! (This post will seem a little lengthy, but I just wanted to make sure I was thorough in my instructions!)
Don’t forget, you can click on any of the photos for a larger image!
WHAT YOU NEED
sewing machine & thread (even the Janome Sew-Mini will work!)
iron & ironing board
pins
1 yard fabric
ribbon
THE FABRIC

To make the basic purse, you or course need fabric. I picked up basic muslin for just under a dollar a yard. When doing any sewing project you want to wash & dry the fabric, then press it smooth with a steam iron. By doing this simple step first, you will be able to throw your completed purse in the washing machine in the future with no worries! Cut two rectangles of fabric measuring 12.5 x 18 inches. Set aside one for later and lay out the other one in front of you, nice and flat. I got out one of Papertrey’s new April colors, Summer Sunrise, and stamped the mum repeatedly all over the fabric.
…………………………………………………………………………………………………………….

I then stamped the mum again, only using the other April color, Lemon Tart. (More details about both the new colors tomorrow!) One of the benefits of our Palette Hybrid Ink Pads, is that they are permanent on fabric and their vibrancy on that type of medium is just amazing!
……………………………………………………………………………………………………………

To fill in some of the empty spaces, I followed up with a small leaf image using Landscape Palette ink. I stamped some of them in pairs and some singular. Just mix it up and have fun!

…………………………………………………………………………………………………………..
My fabric was now complete! With the fabric only being 12.5 x 18, it’s not much bigger than 12×12 cardstock, so it’s like creating a One Sheet Wonder, just in a more permanent form!
…………………………………………………………..
CREATING THE PURSE

1. To begin creating the purse, you want to fold the rectangle in half, right sides together.
……………………………………………………………………………………………………………

2. Next, you want to sew a simple straight seam up each side of the rectangle, forming a big "pocket"!
……………………………………………………………………………………………………………

3. With your iron, press the side seams you just created "open". This will help your finished seams to be nice and crisp (similar to scoring cardstock!).
………………………………………………………………………………………………………….

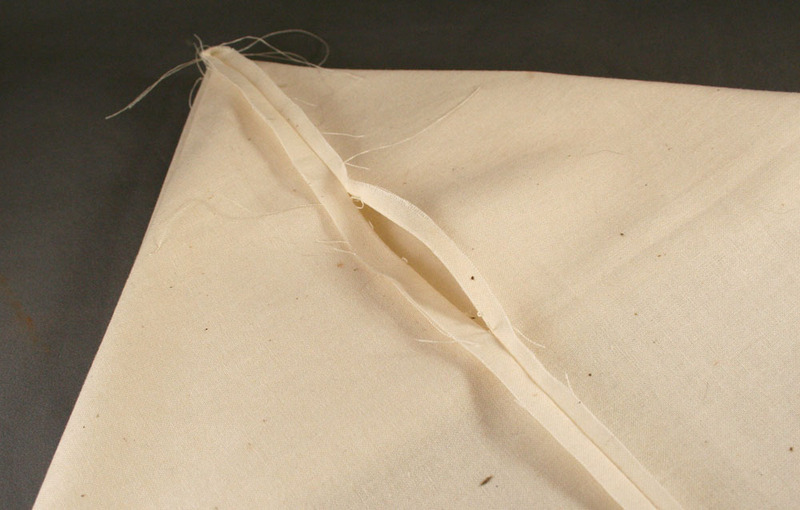
You want to create a pointed corner of your purse when you press the seam. After pressing both side seams, the pocket you created in step 2 would look more like this from the side.
……………………………………………………………………………………………………………

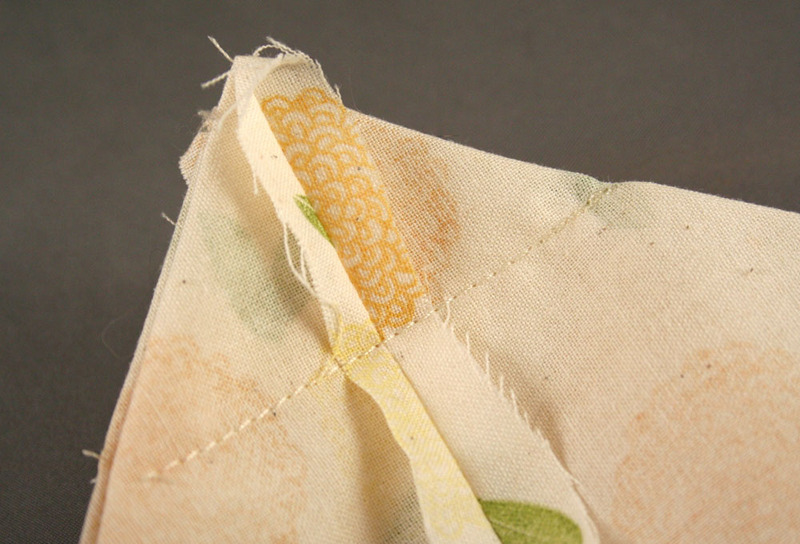
4. Next, you want to stitch across the corner you just pressed. You want to do this about 2 inches from the point. Again, a very easy straight stitch!
……………………………………………………………………………………………………………

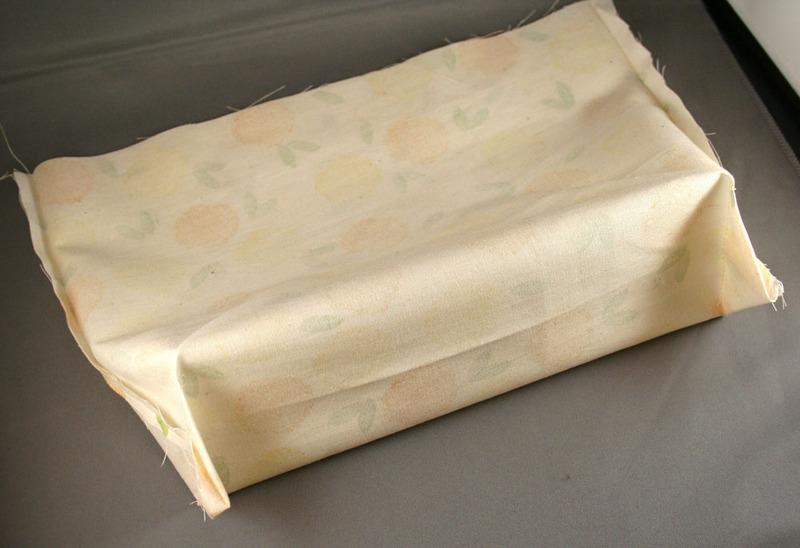
After performing step 4 to both corners, the bottom of your purse is beginning to take shape. It will look like this.
…………………………………………………………………………………………………………….

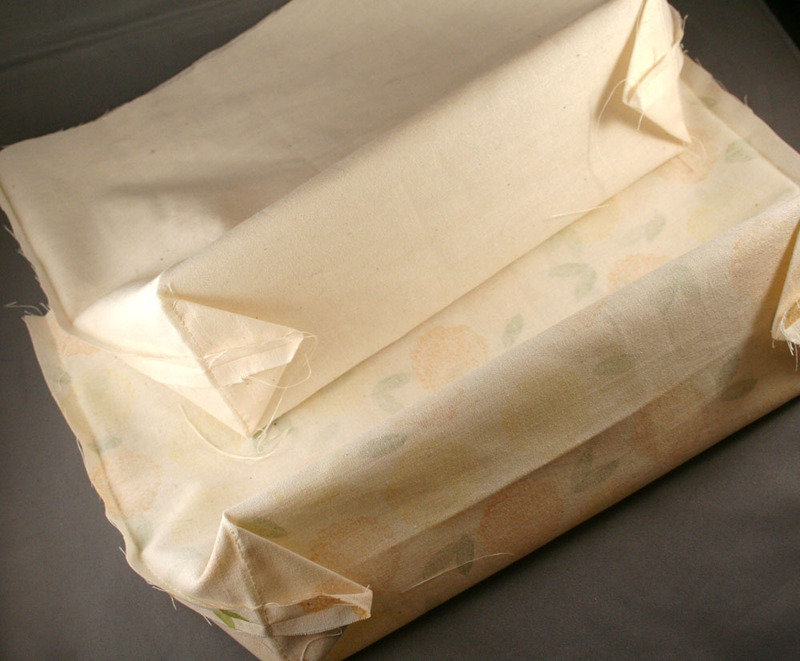
5. Press your corner seams inward, so that both corners are pointing towards each other.
……………………………………………………………………………………………………………

6. You want to repeat steps 1-5 with the second rectangle you set aside earlier, creating the lining for your purse. The only thing you will do differently is to leave an opening towards the middle of one of the side seams. The opening will be necessary later on in the process.
…………………………………………………………………………………………………………….

You will end up with two inside out purses, one outer & one lining.
…………………………………………………………………………………………………………….
ASSEMBLING THE PURSE
 7.
7.
Cut two pieces of Summer Sunrise Grosgrain Ribbon 15 inches long.
…………………………………………………………………………………………………………..

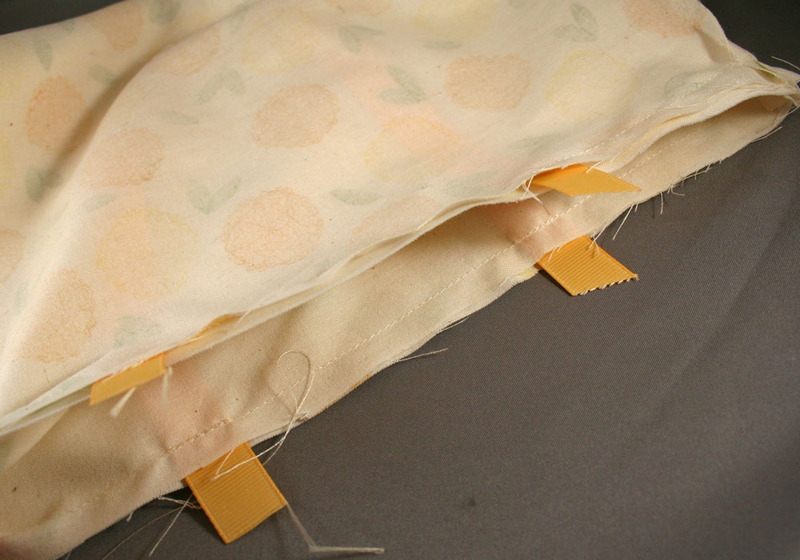
8. Beginning with the plain muslin lining, turn it right side out and press all the seams. Pin the ribbon in place for handles. Be sure that at least 1 inch of ribbon extends above the top edge of the purse. You will pin one handle on each side.
……………………………………………………………………………………………………………

9. Insert the lining into the outer purse (the outer purse still being inside out). I have rolled back the edge of the purse just slightly to demonstrate which sides should be together. When inserting it, be sure that the side seams line up!
…………………………………………………………………………………………………………..

10. Stitch a simple straight seam around the top of the purse. You want to start at a side seam and go all the way around, ending where you started. You will be stitching all three layers together. The outer purse, the handles & the lining.
……………………………………………………………………………………………………………

11. Next, you want to pull the lining out from the outer purse and find the opening you left in it’s side seam.
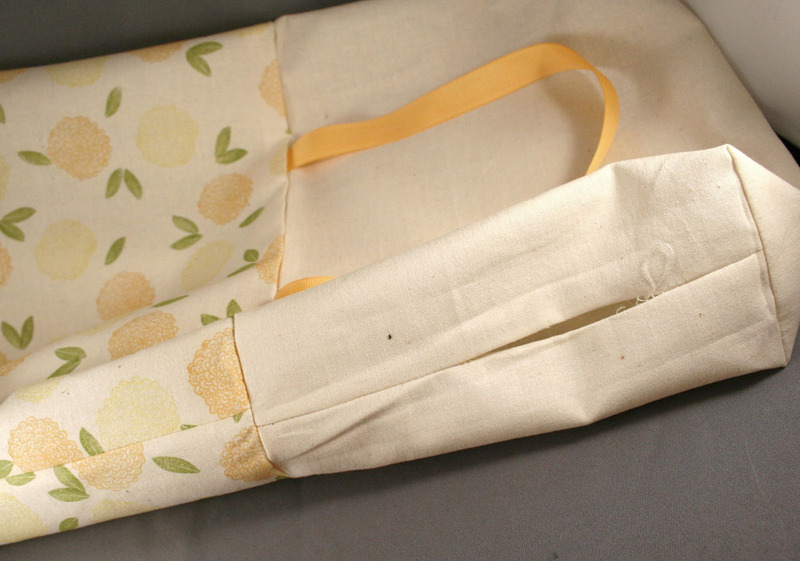
………………………………………………………………………………………………………….
12. Simply pull the purse back out through this opening, which will turn it right side out. You will notice that the lining & outer purse are all now one big piece!
…………………………………………………………………………………………………………..
13. Fold the lining down into the outer purse and press all of your seams so they are nice and crisp. Do a few little whipstiches by hand with a needle & thread to close up the opening in the lining’s side seam.
…………………………………………………………………………………………………………

14. As one final finishing touch, I like to add a topstitch around the top edge of the purse. It makes it look more finished and it helps to maintain a crisp edge.
……………………………………………………………………………………………………………
THE ENSEMBLE

……………………………………………………………………………………………………………
Of course I had to make a little matching card! I cut the mum out and raised it on a foam dimensional within a simple square focal point. I think it looks really classy to have both items match perfectly!
CARD SUPPLES:
STAMPS- Polka Dot Basics & Garden of Life from Papertrey Ink
INK- Summer Sunrise, Lemon tart & Landscape Palette inks
PAPER- Summer Sunrise, Lemon Tart & Stamper’s Select White
OTHER- Summer Sunrise Grosgrain Ribbon
A CONTEST
Sooooooo, this little purse is PERFECT for spring and one of YOU will win it! Just comment on this post before noon EST, Monday, April 14th. All you need to do is tell me all about your favorite purse and you will have a chance to win! Good luck!
CHECK OUT WHAT TAYLOR DID!
Taylor has a little sneak peek of Papertrey’s April release as well! Stop by and visit her today to see what she’s been up to!
Leave a Reply