It has been nearly 48 hours since our latest release, and WOW, what an overwhelming response we have had! It says a lot when we receive notes from customers (who haven’t even gotten their orders yet!), thanking us for even designing this set. What a heart-warming validation for all the effort & thought invested in this set of images!
Did you notice the tip sheet we compiled for Butterfly Kisses? If not, you can find it here. If you scroll down to the very end, you will see what I like to call my "Punch Lines". Since I design all of my images to coordinate with punches, I like to have this list to refer to when creating. Now you can benefit from the list, without having to do any time-consuming experimentation yourself! Also within this list are 10 fun things to do with Butterfly Kisses! One of which is to create a mask and create your own custom patterned butterfly with all the bits& pieces we have included for you in the set. I thought I would show you step by step how quick and easy this can be!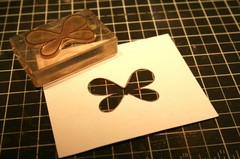
1. Stamp outline onto scratch paper. Cut just inside the outline with a craft knife.
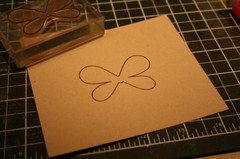
2. Stamp outline on your project cardstock (here I am using kraft).
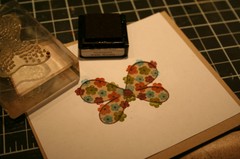
3. Adhere mask to project using re-positionable adhesive. Stamp your desired pattern within the mask. (Note: for the centers of my flowers I inked one single dot from the polka dot butterfly overlay. If you look in the upper-left corner, I have left an inked version for you to see. This was so easy to do since these are acrylics!)
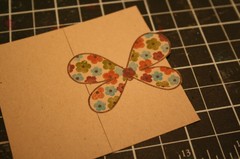
4. Remove mask and admire your work!
I also did some "fancy" cutting for this project…
1. Use straight edge & craft knife to cut line, omitting the areas where the wings "over hang".
2. Remove straight edge and cut around outside of wings with craft knife.
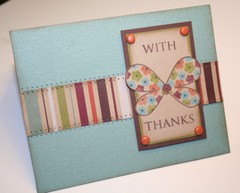
And here’s the finished project! It was a little outside my comfort zone with the colors and distressing, but I am pretty happy with the results! Speaking of results, Amy Rysavy has been working hard over in the Papertrey Ink Pad gallery! There were some hold-ups with the shipment of her set and she just received it yesterday afternoon and she already created three samples for us! Two of them can be seen here, with third being added this weekend! So be sure to come back and visit! We have some special things in store for all of you in the coming weeks. (There was a little hint at the end of yesterday’s post, did anyone catch it?) I’ll keep you posted!


Leave a Reply