Welcome to Day 1 of the Papertrey Ink November Countdown! I am so excited it’s time to start the countdown for the wonderful products we have prepared for you this month. We are still celebrating all things Christmas and Winter and are delighted by all of the possibilities! Let’s dive right in to our darling Simply Snowmen, shall we?
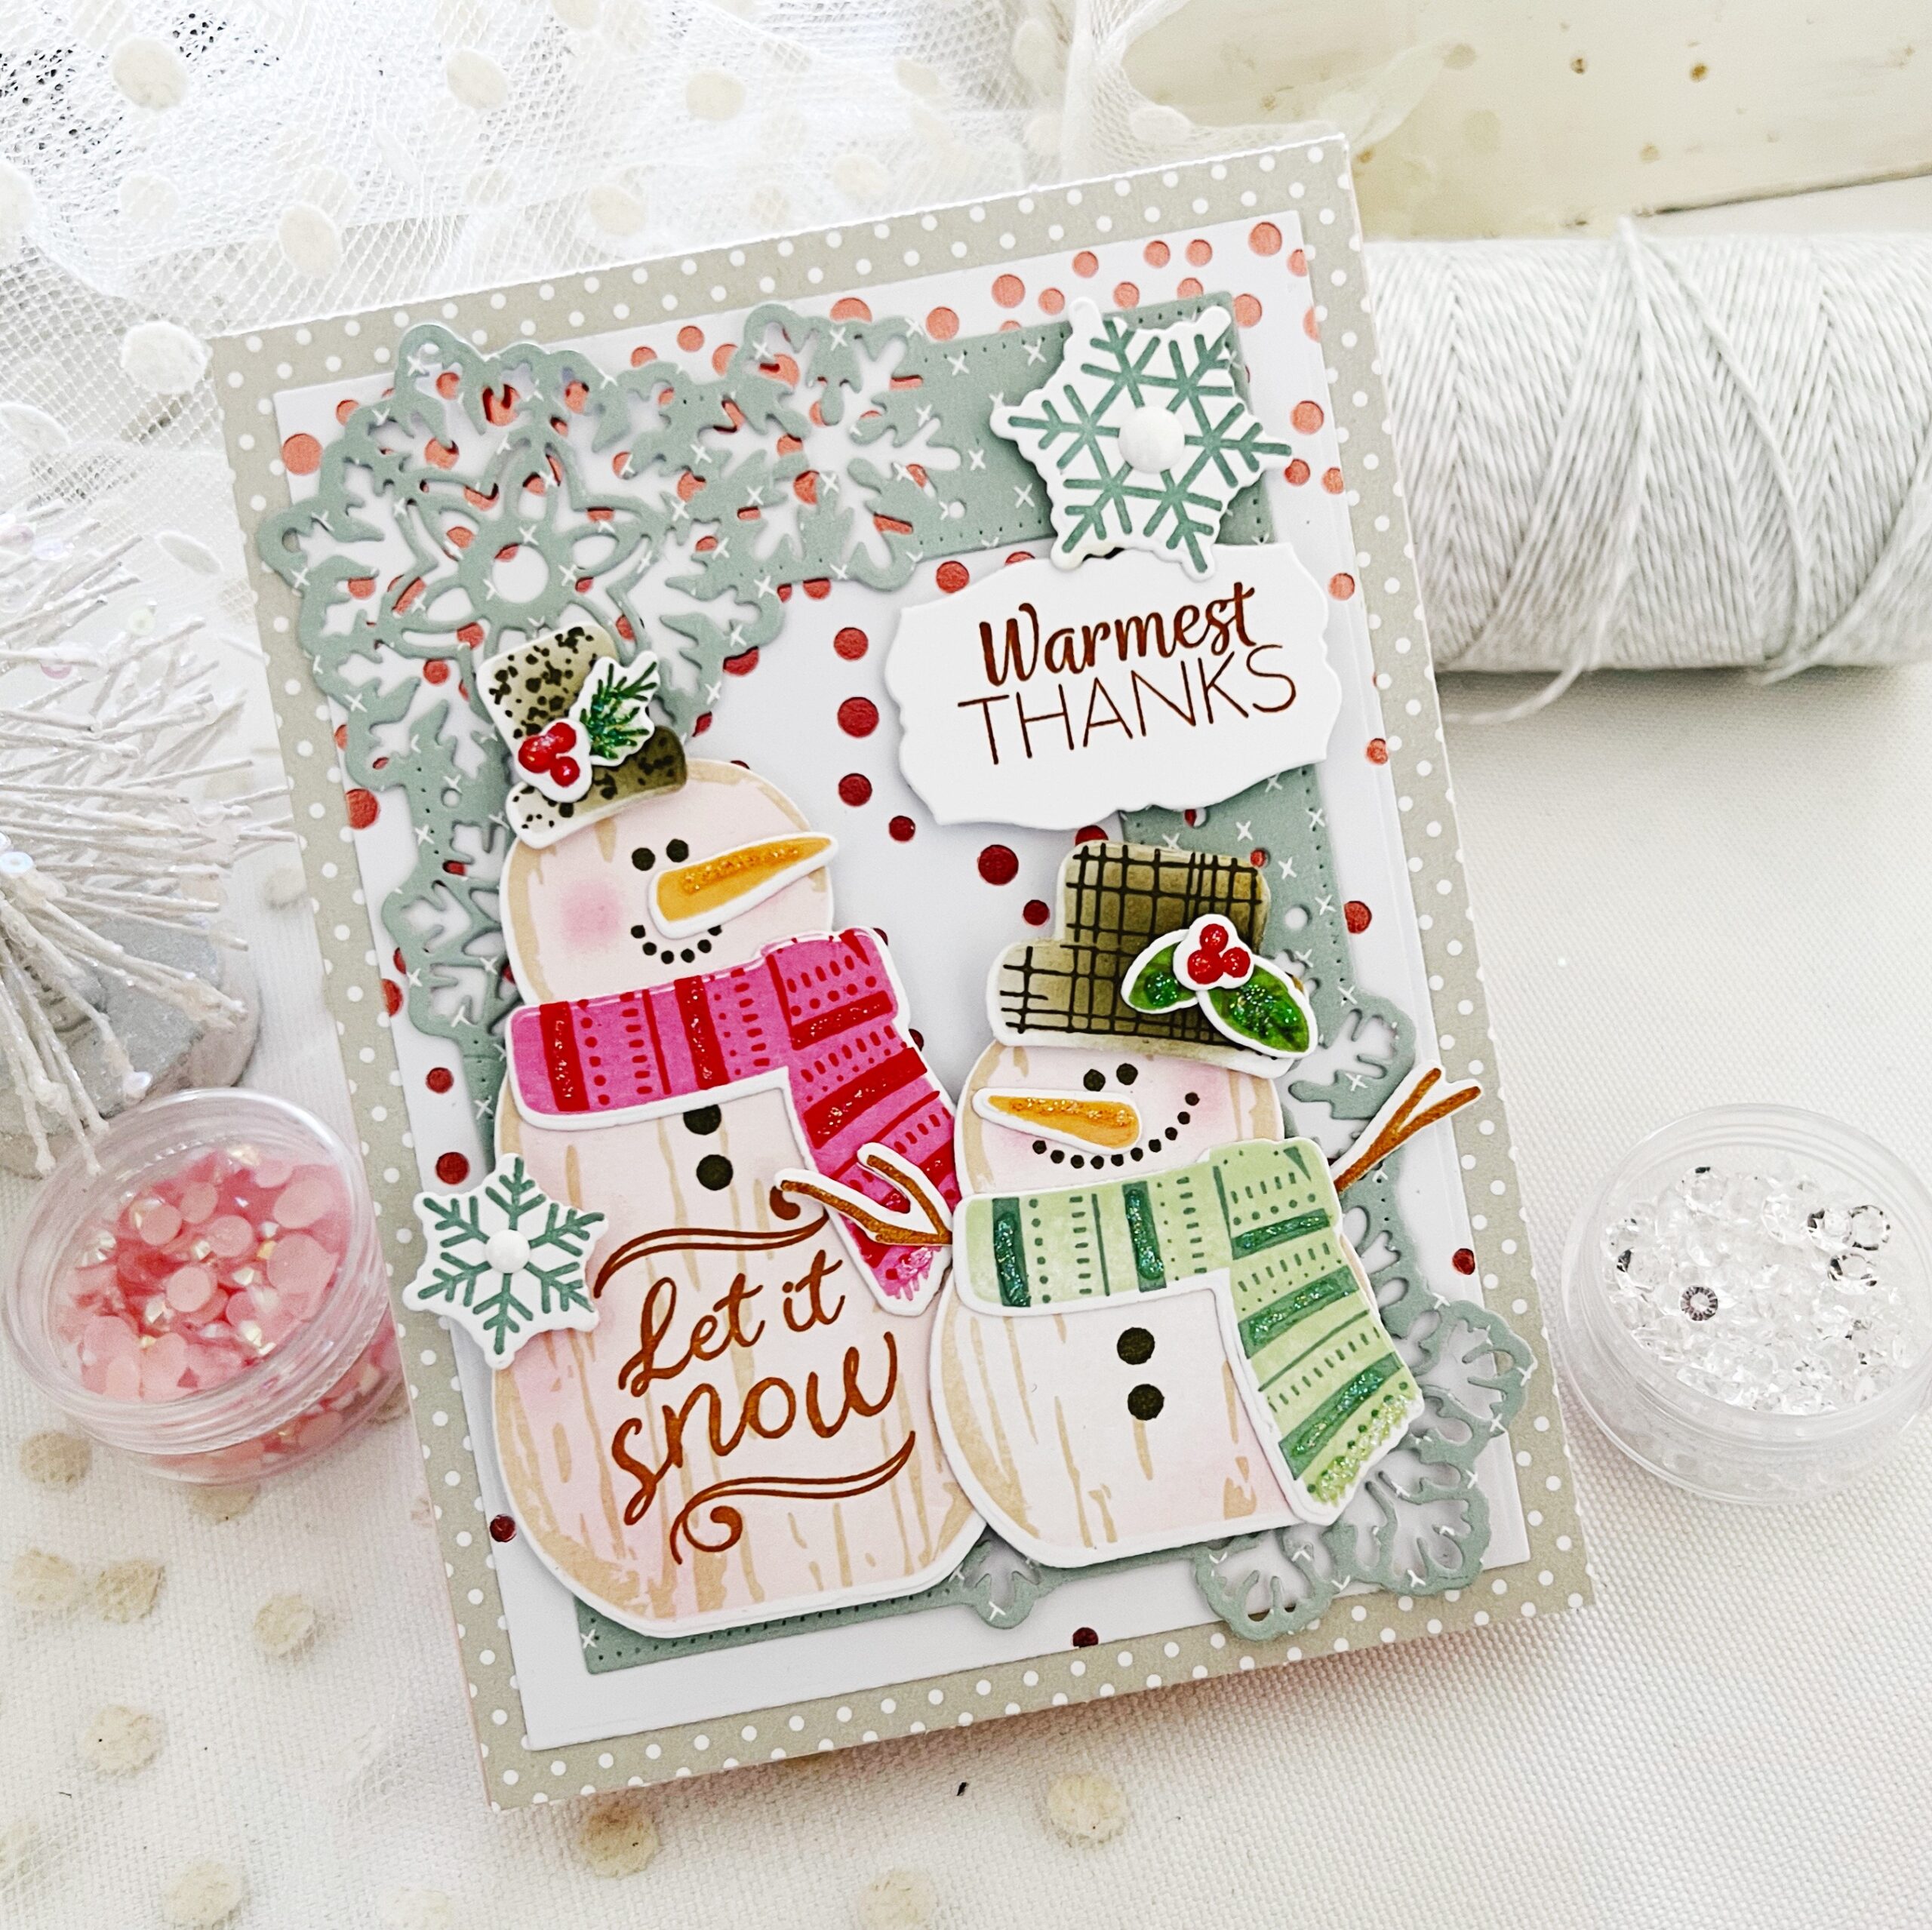
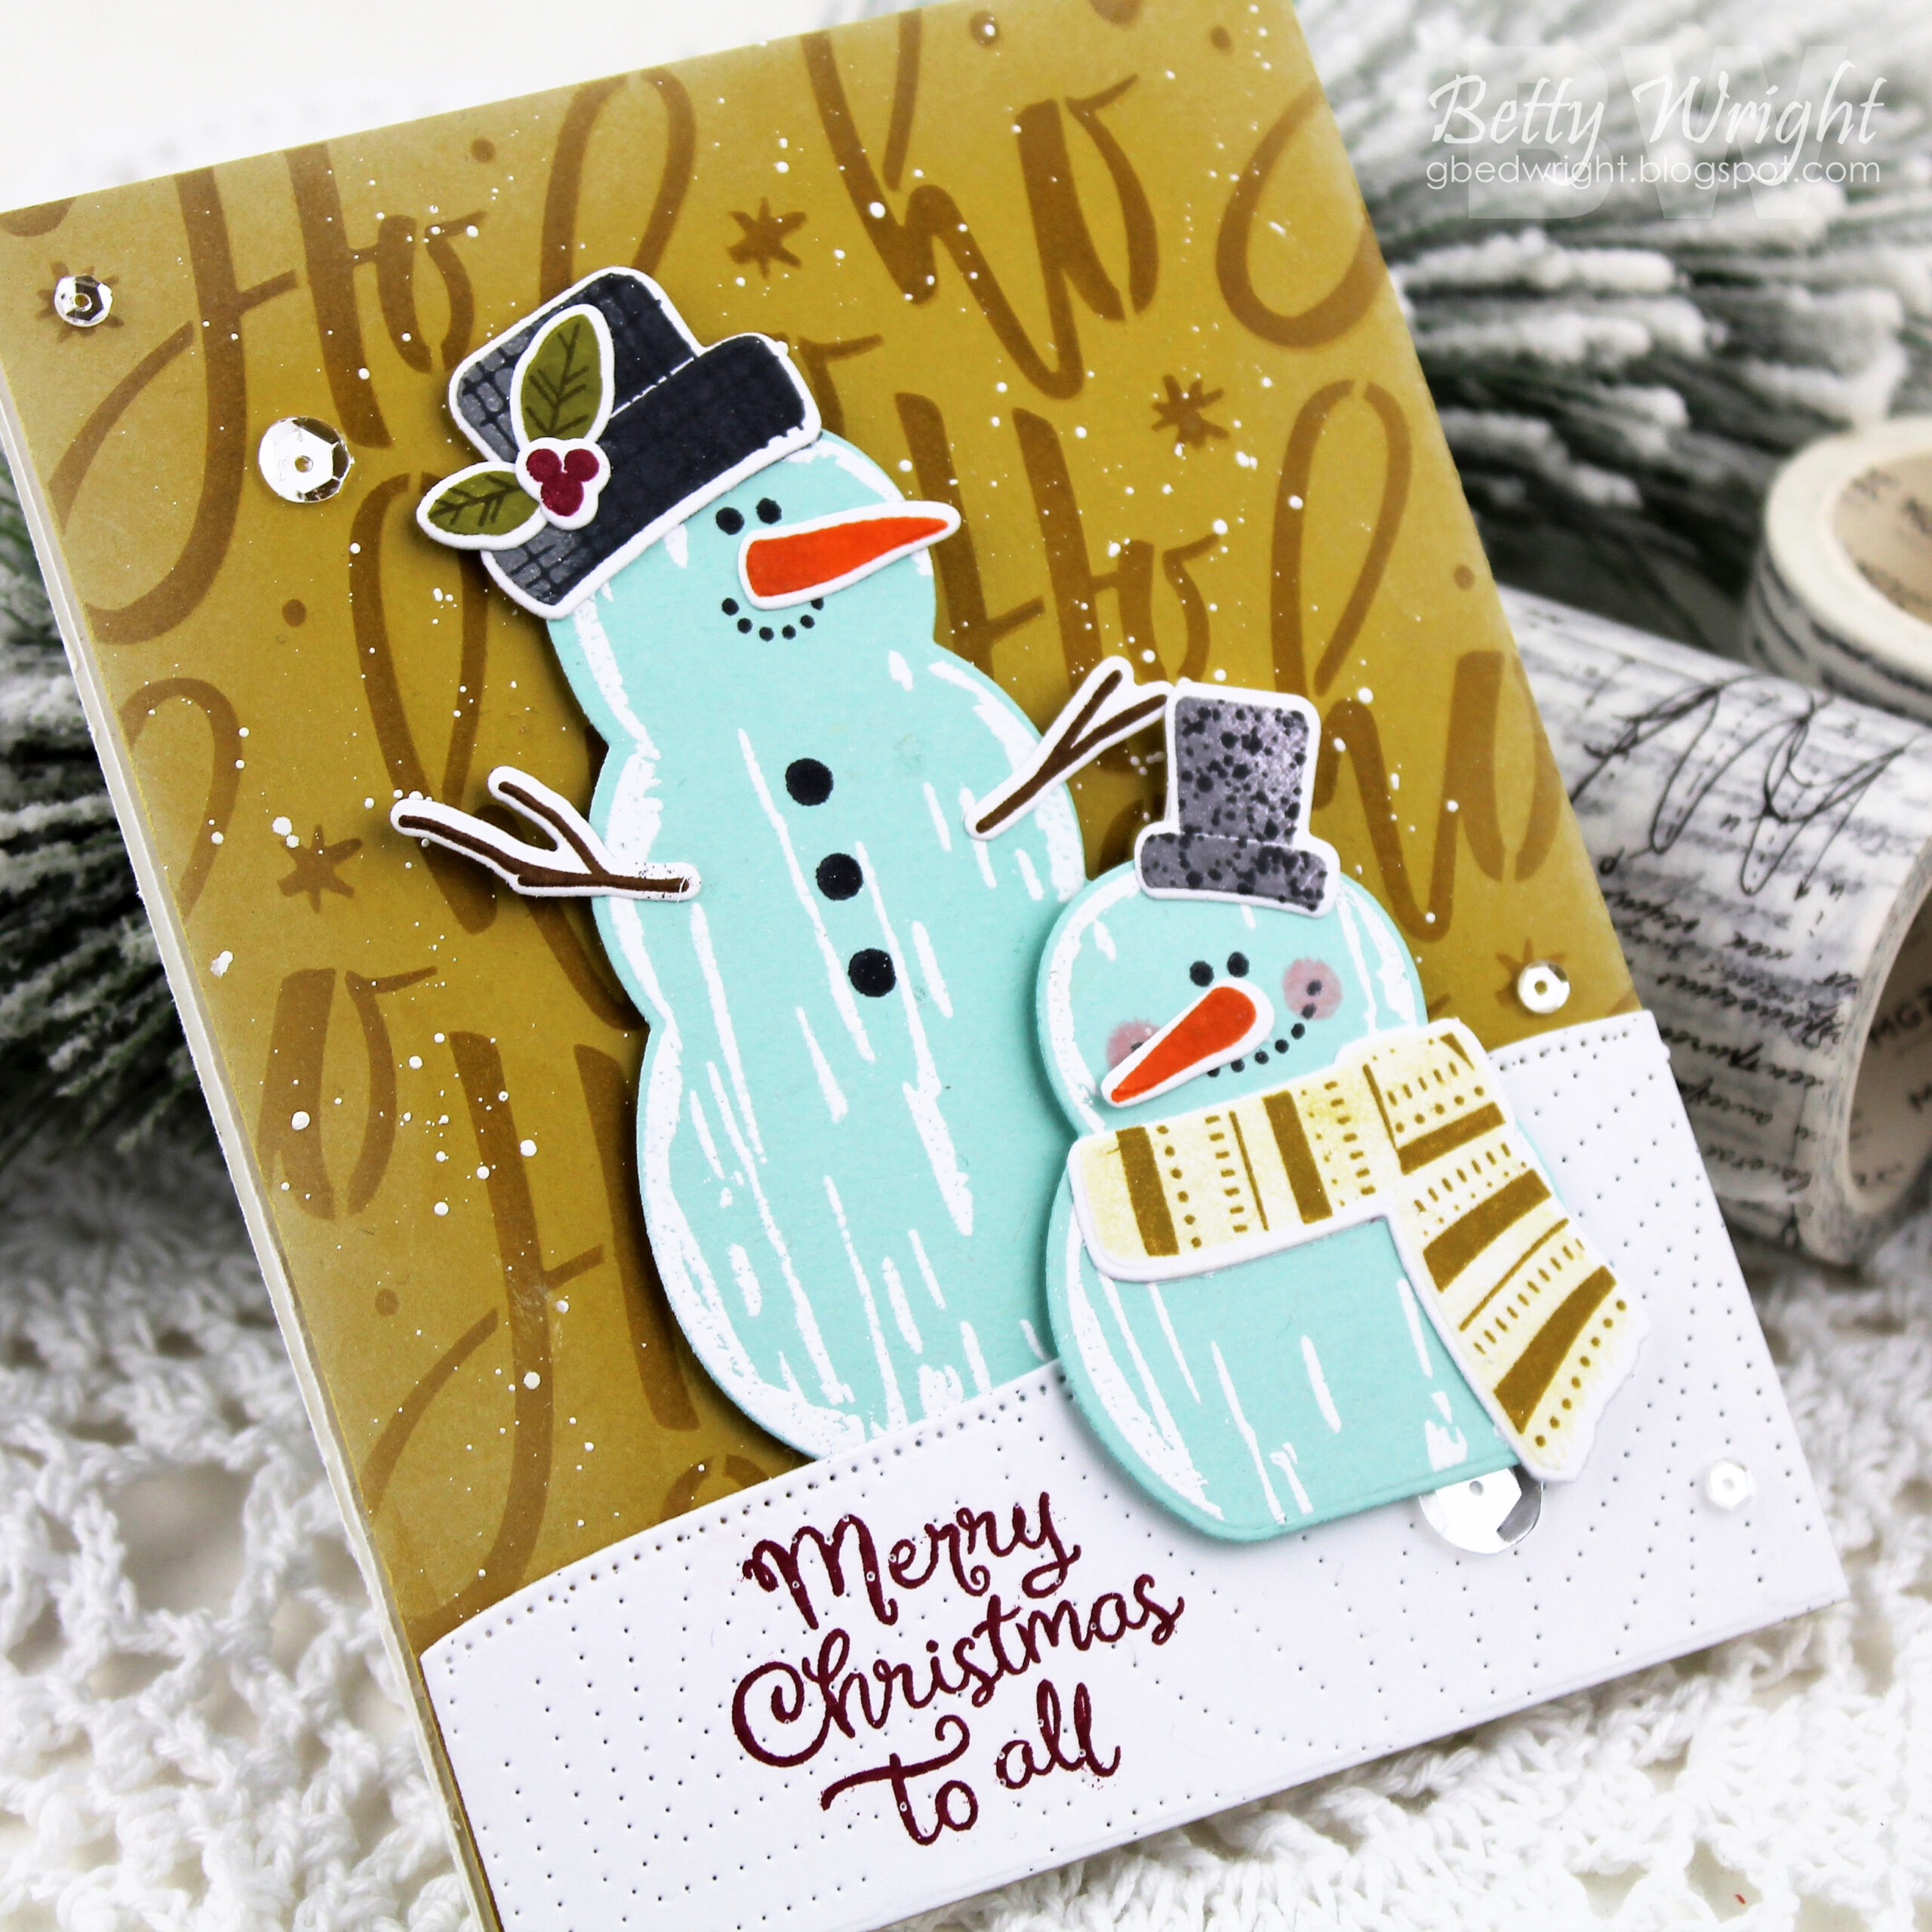
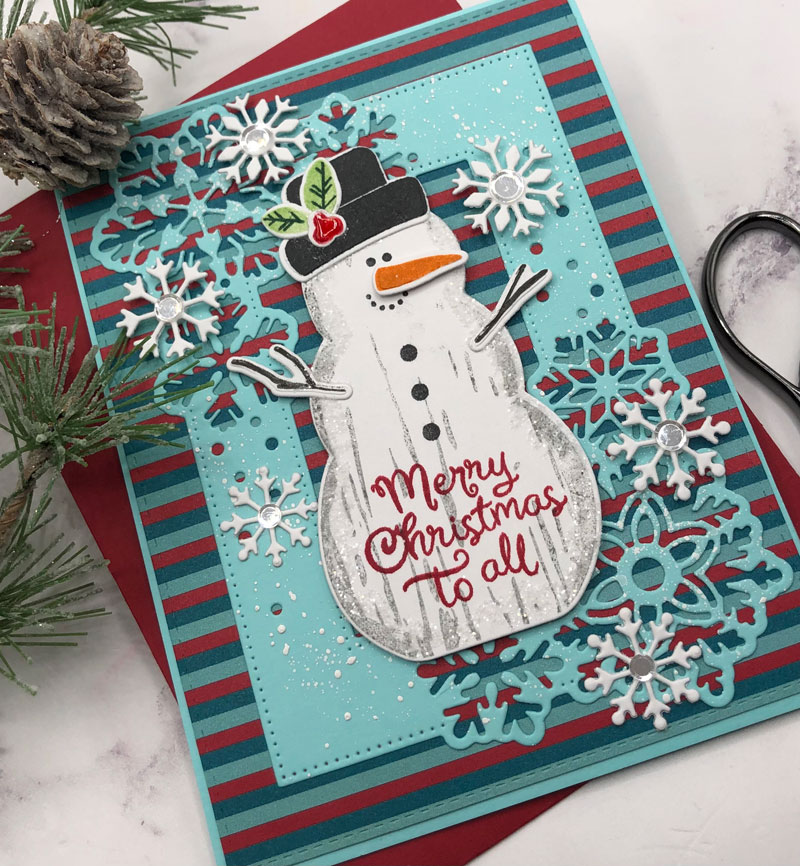
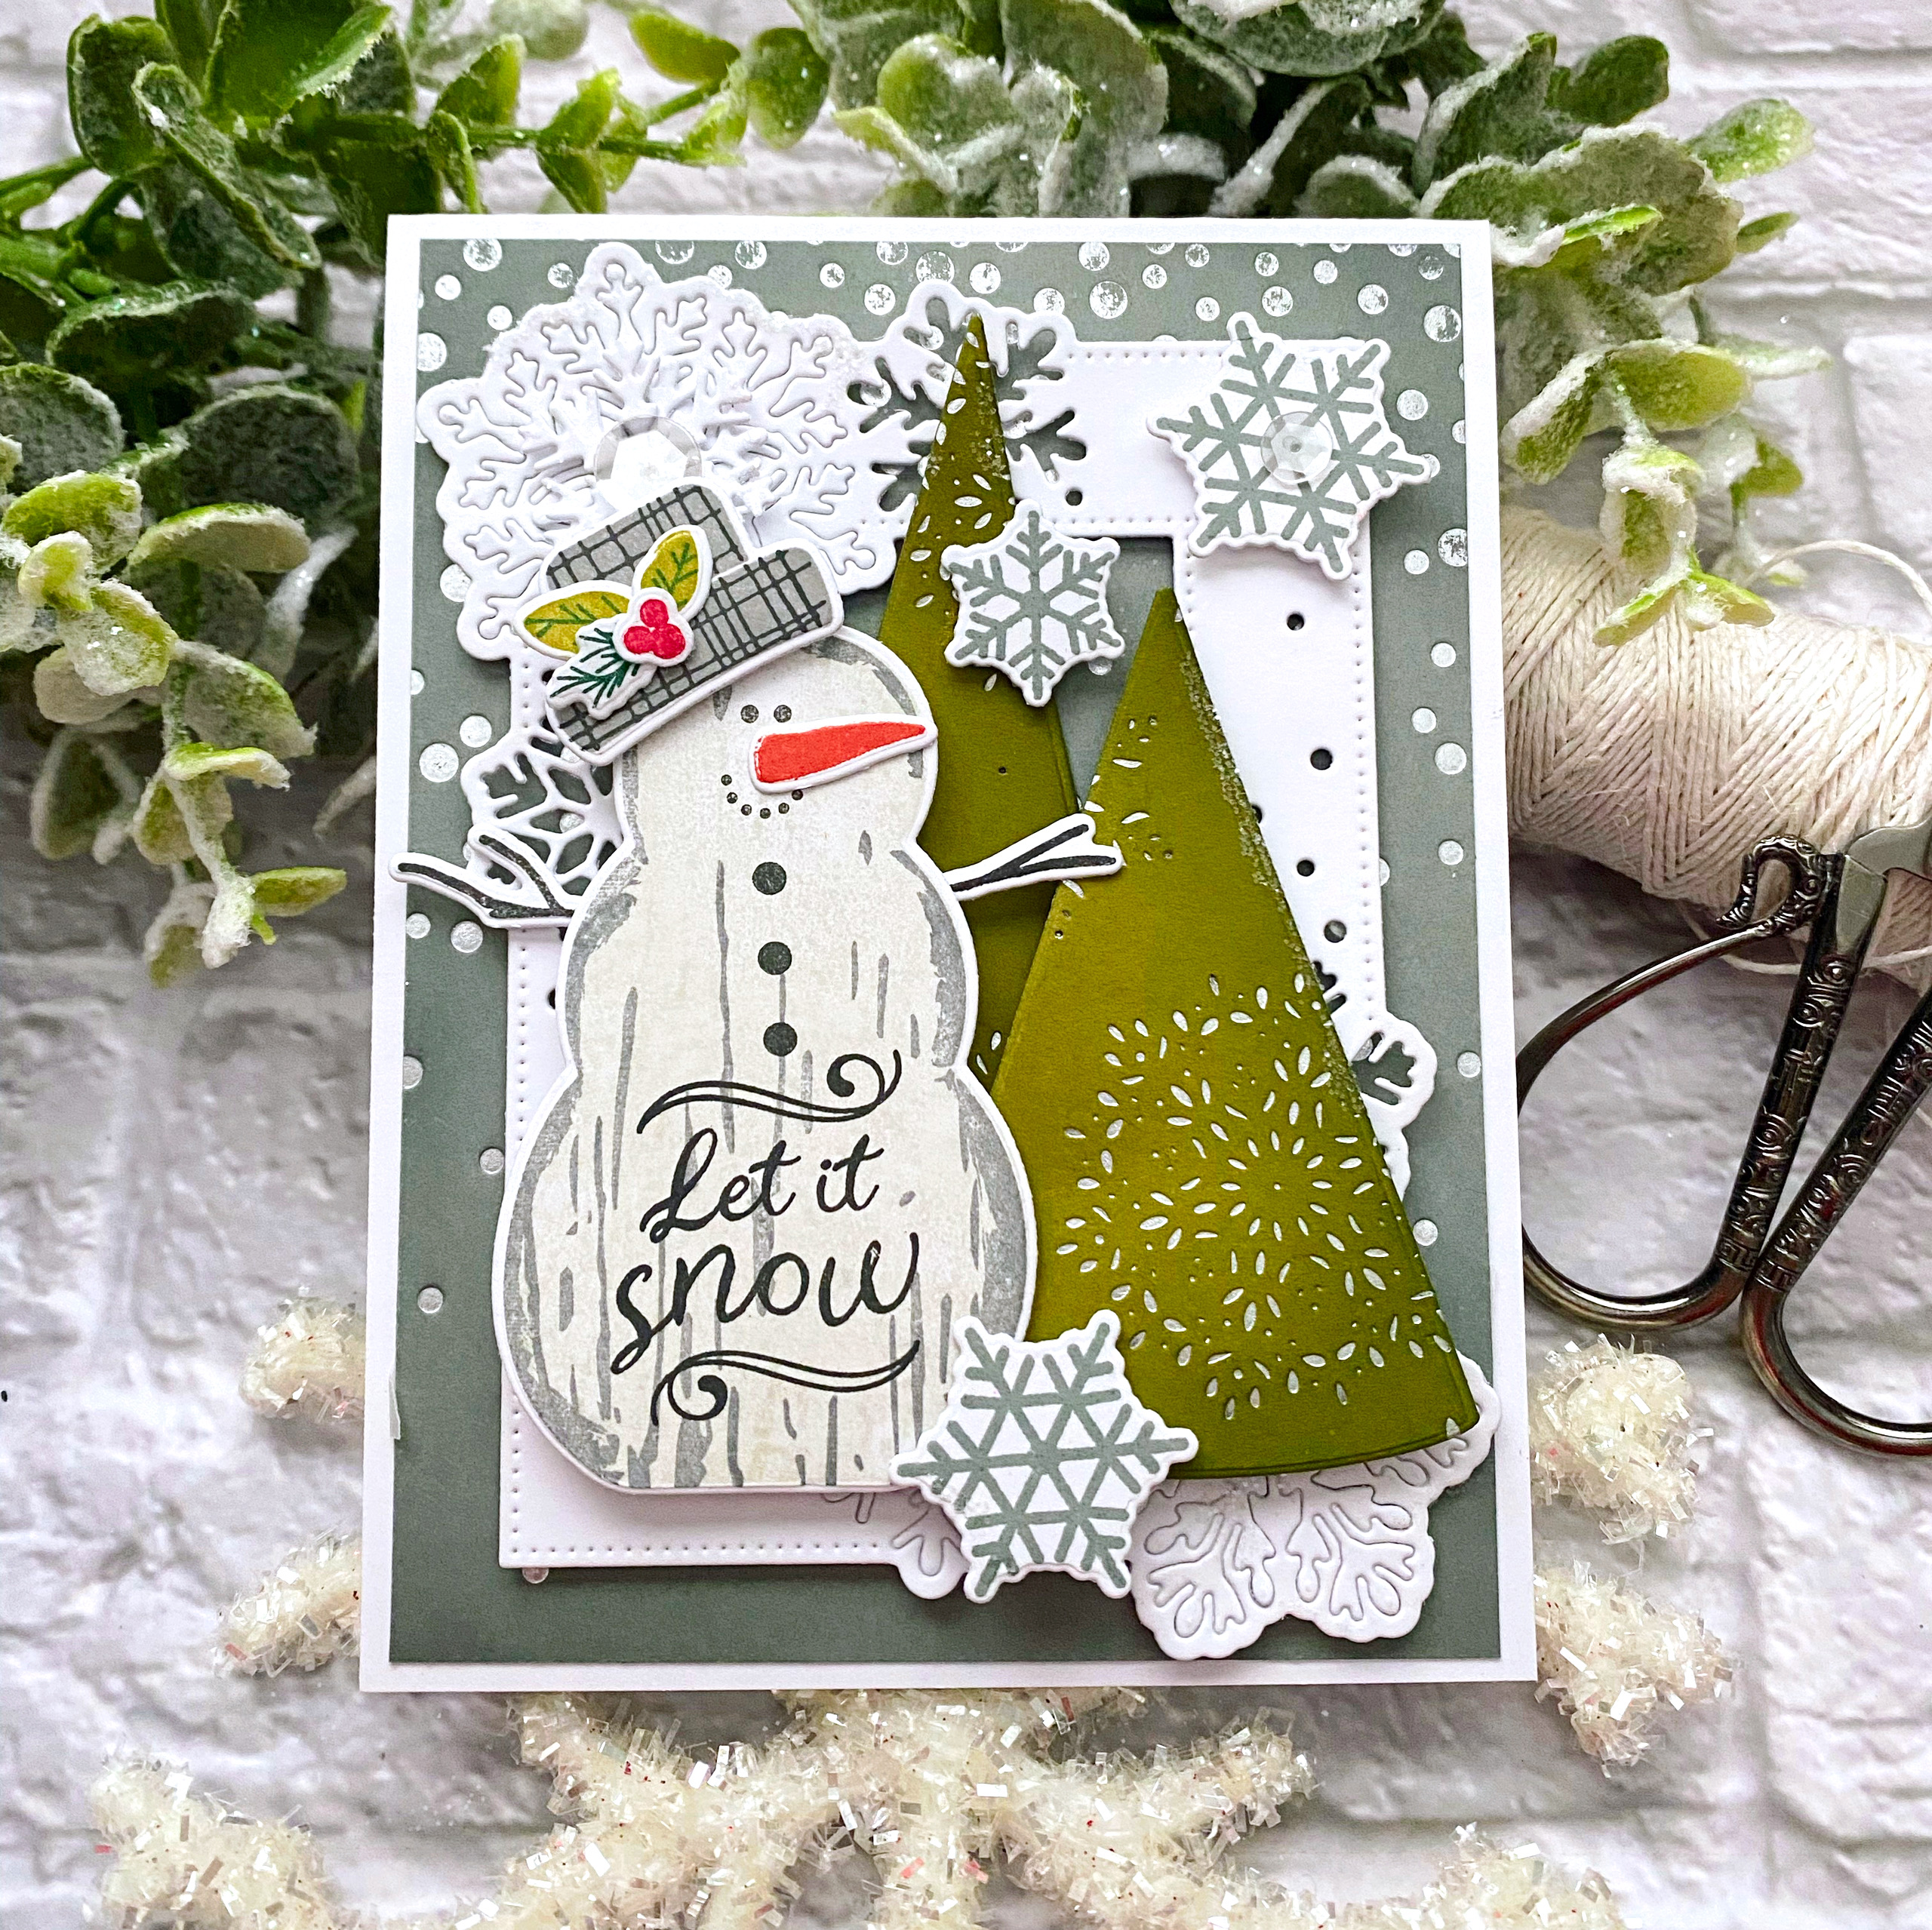
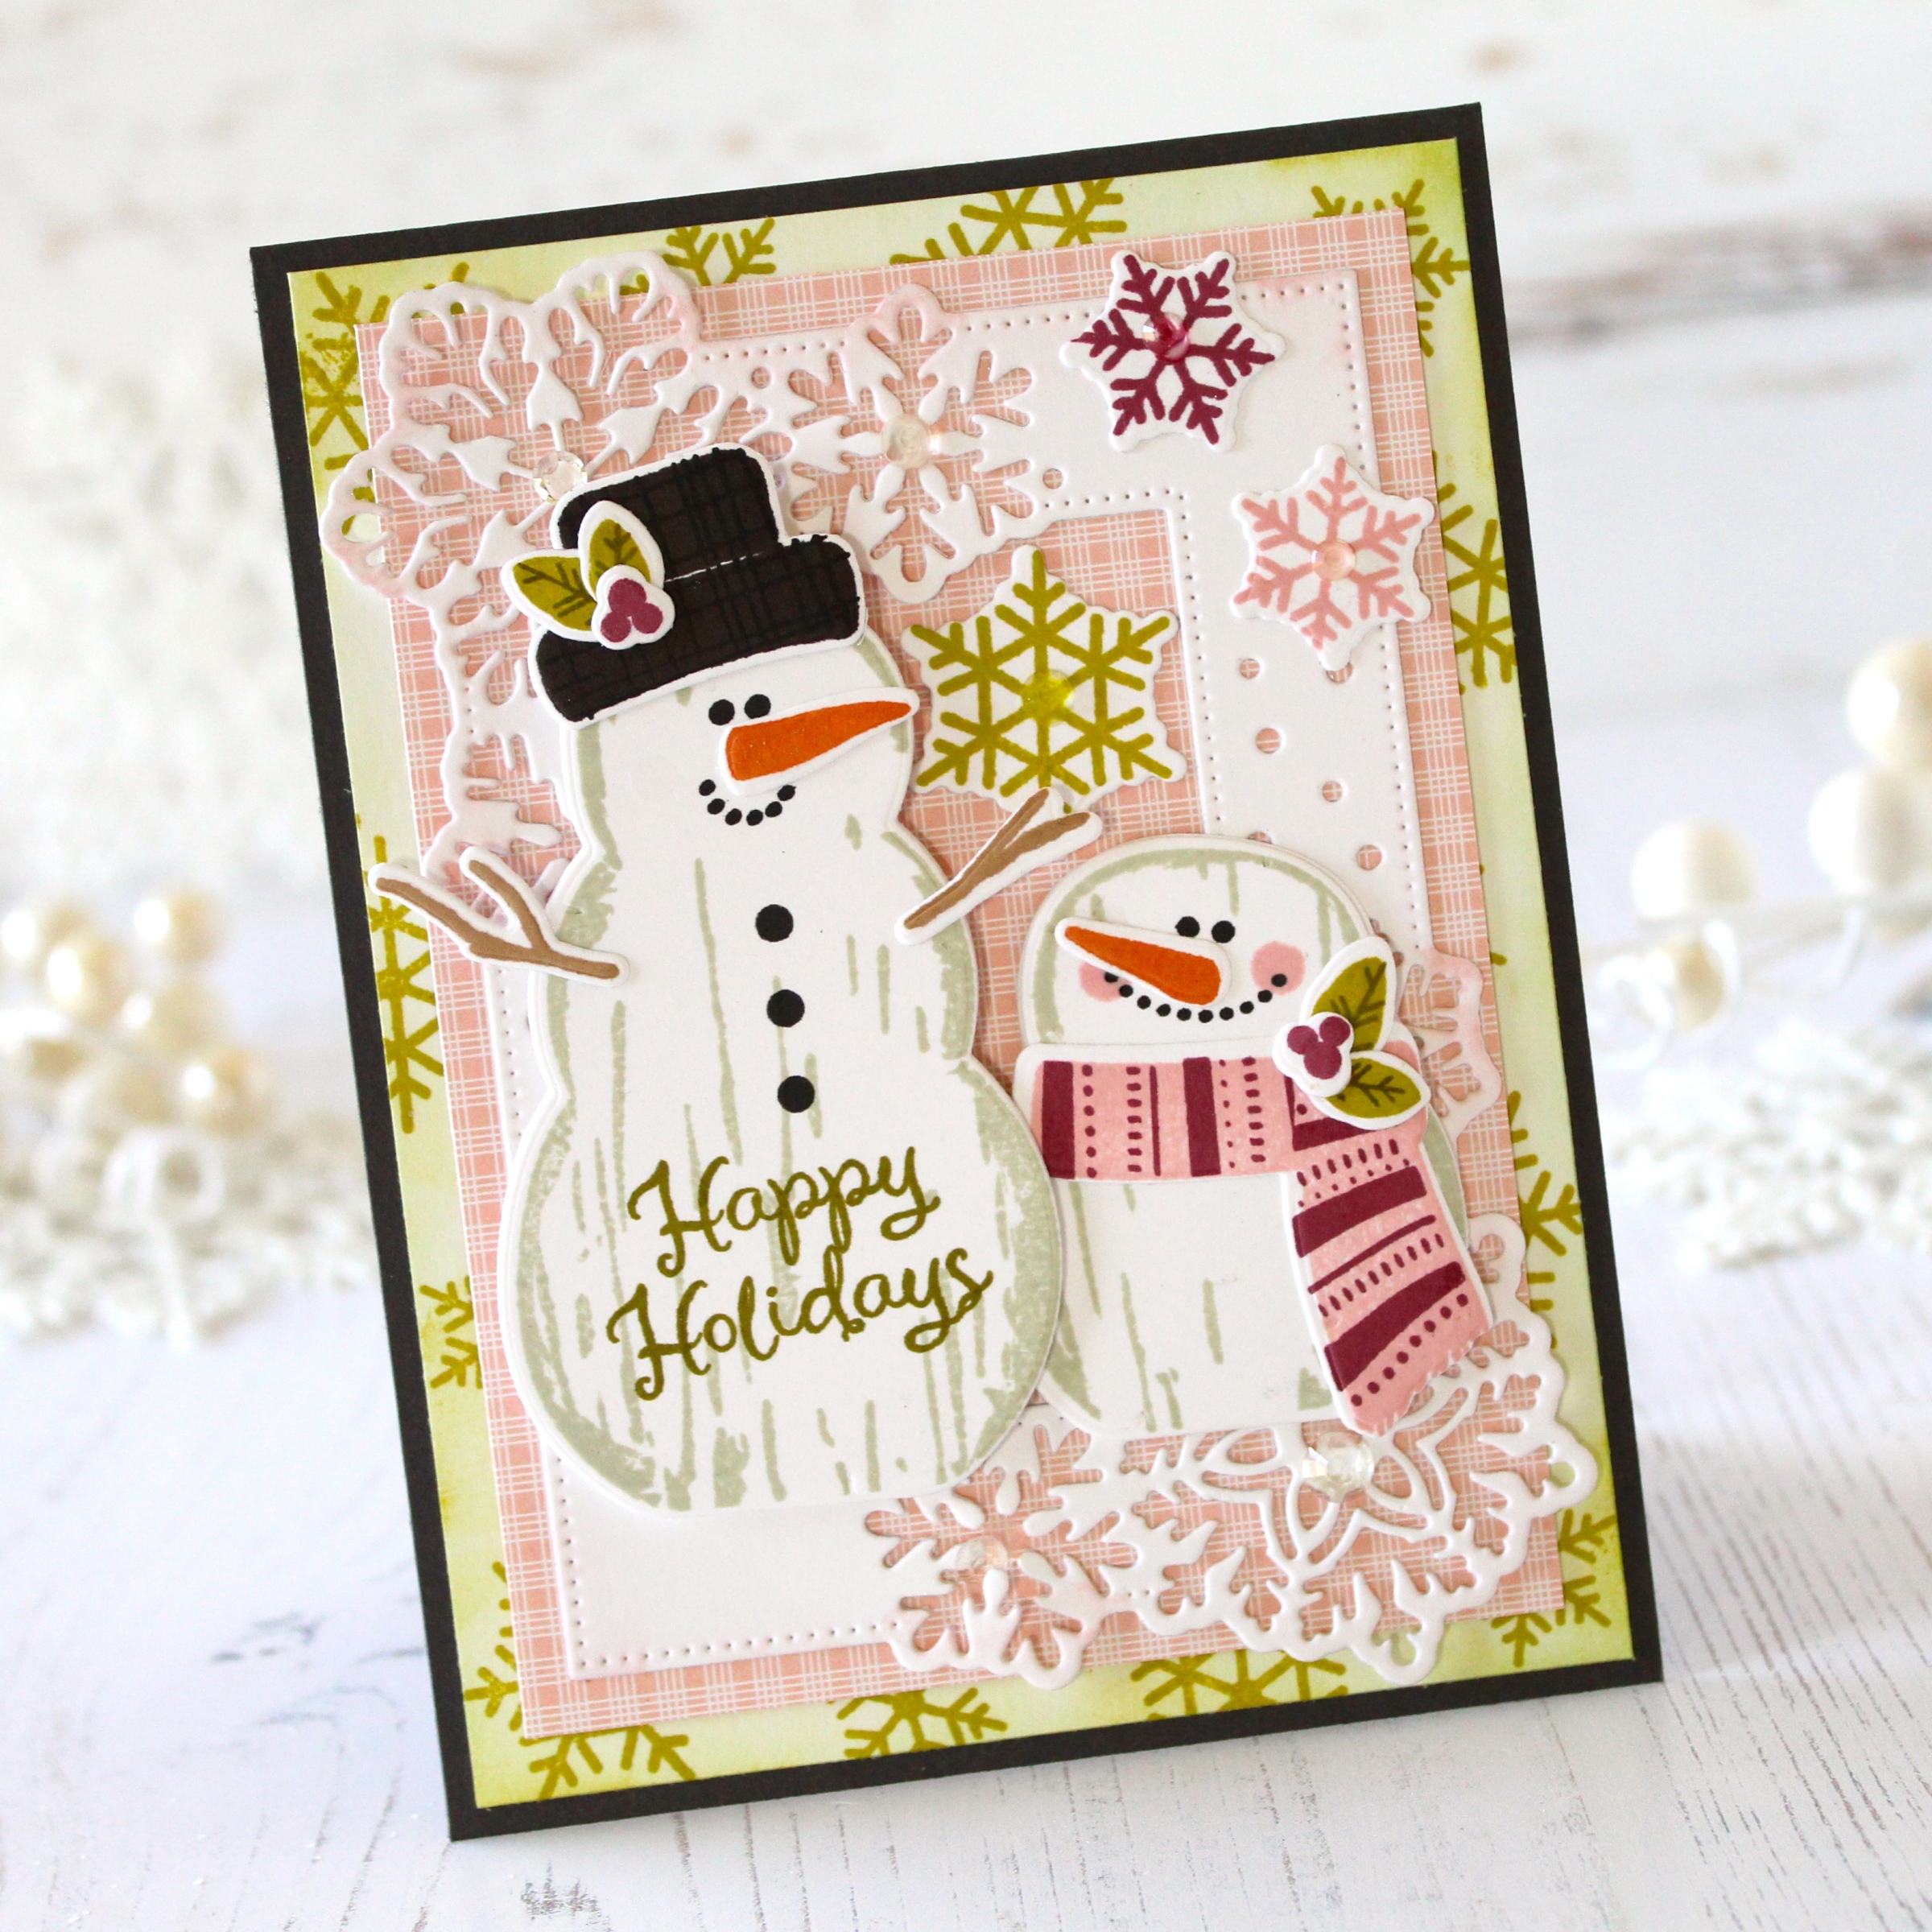
Our Simply Snowmen come in two different sizes and are just as jolly as can be! With mix and match scarves, faces, carrot noses, hats, arms, sentiments, and berries, you’ll love dressing up your sweet balls of snow.
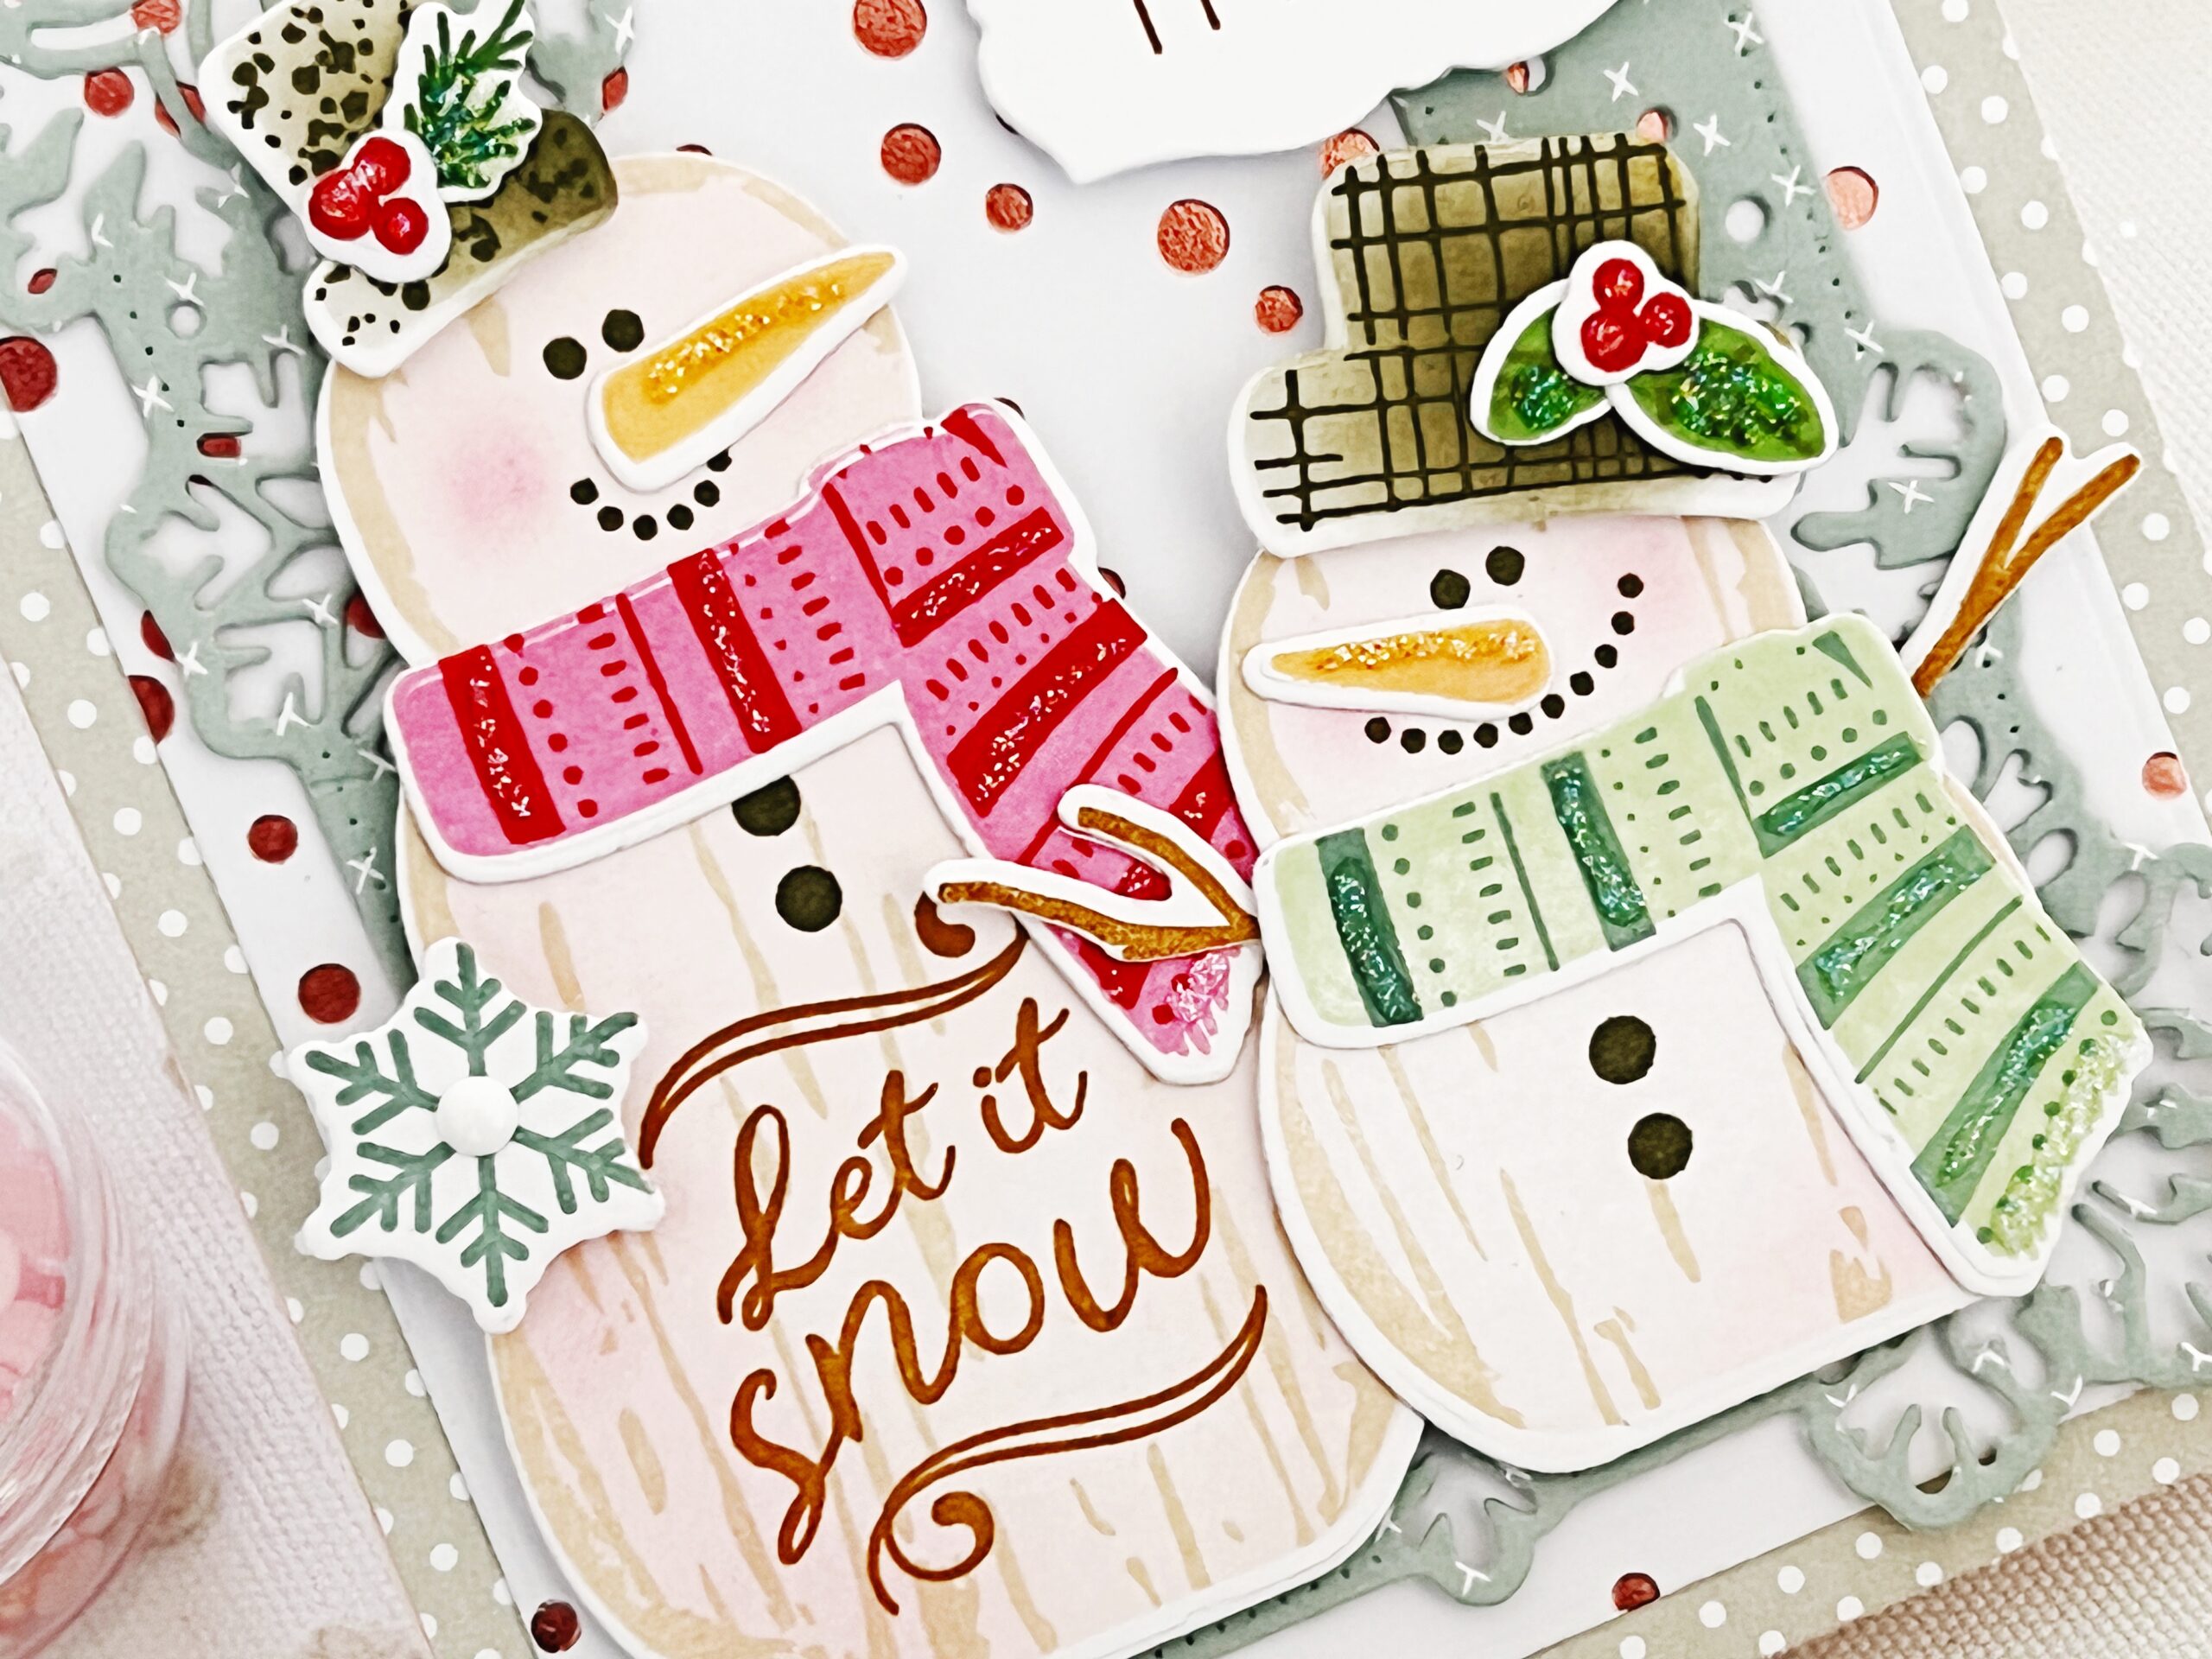
I paired my snowmen together, stamping a sentiment at the base of one of my little guys, and dressing them both up in their entirety. The scarves can be stamped in a solid color, cut from patterned paper or felt, and stamped with the fun striped image included in this set. The same goes for the tiny hats you’ll find inside. I adore the plaid pattern and speckles. Do you have a favorite yet?
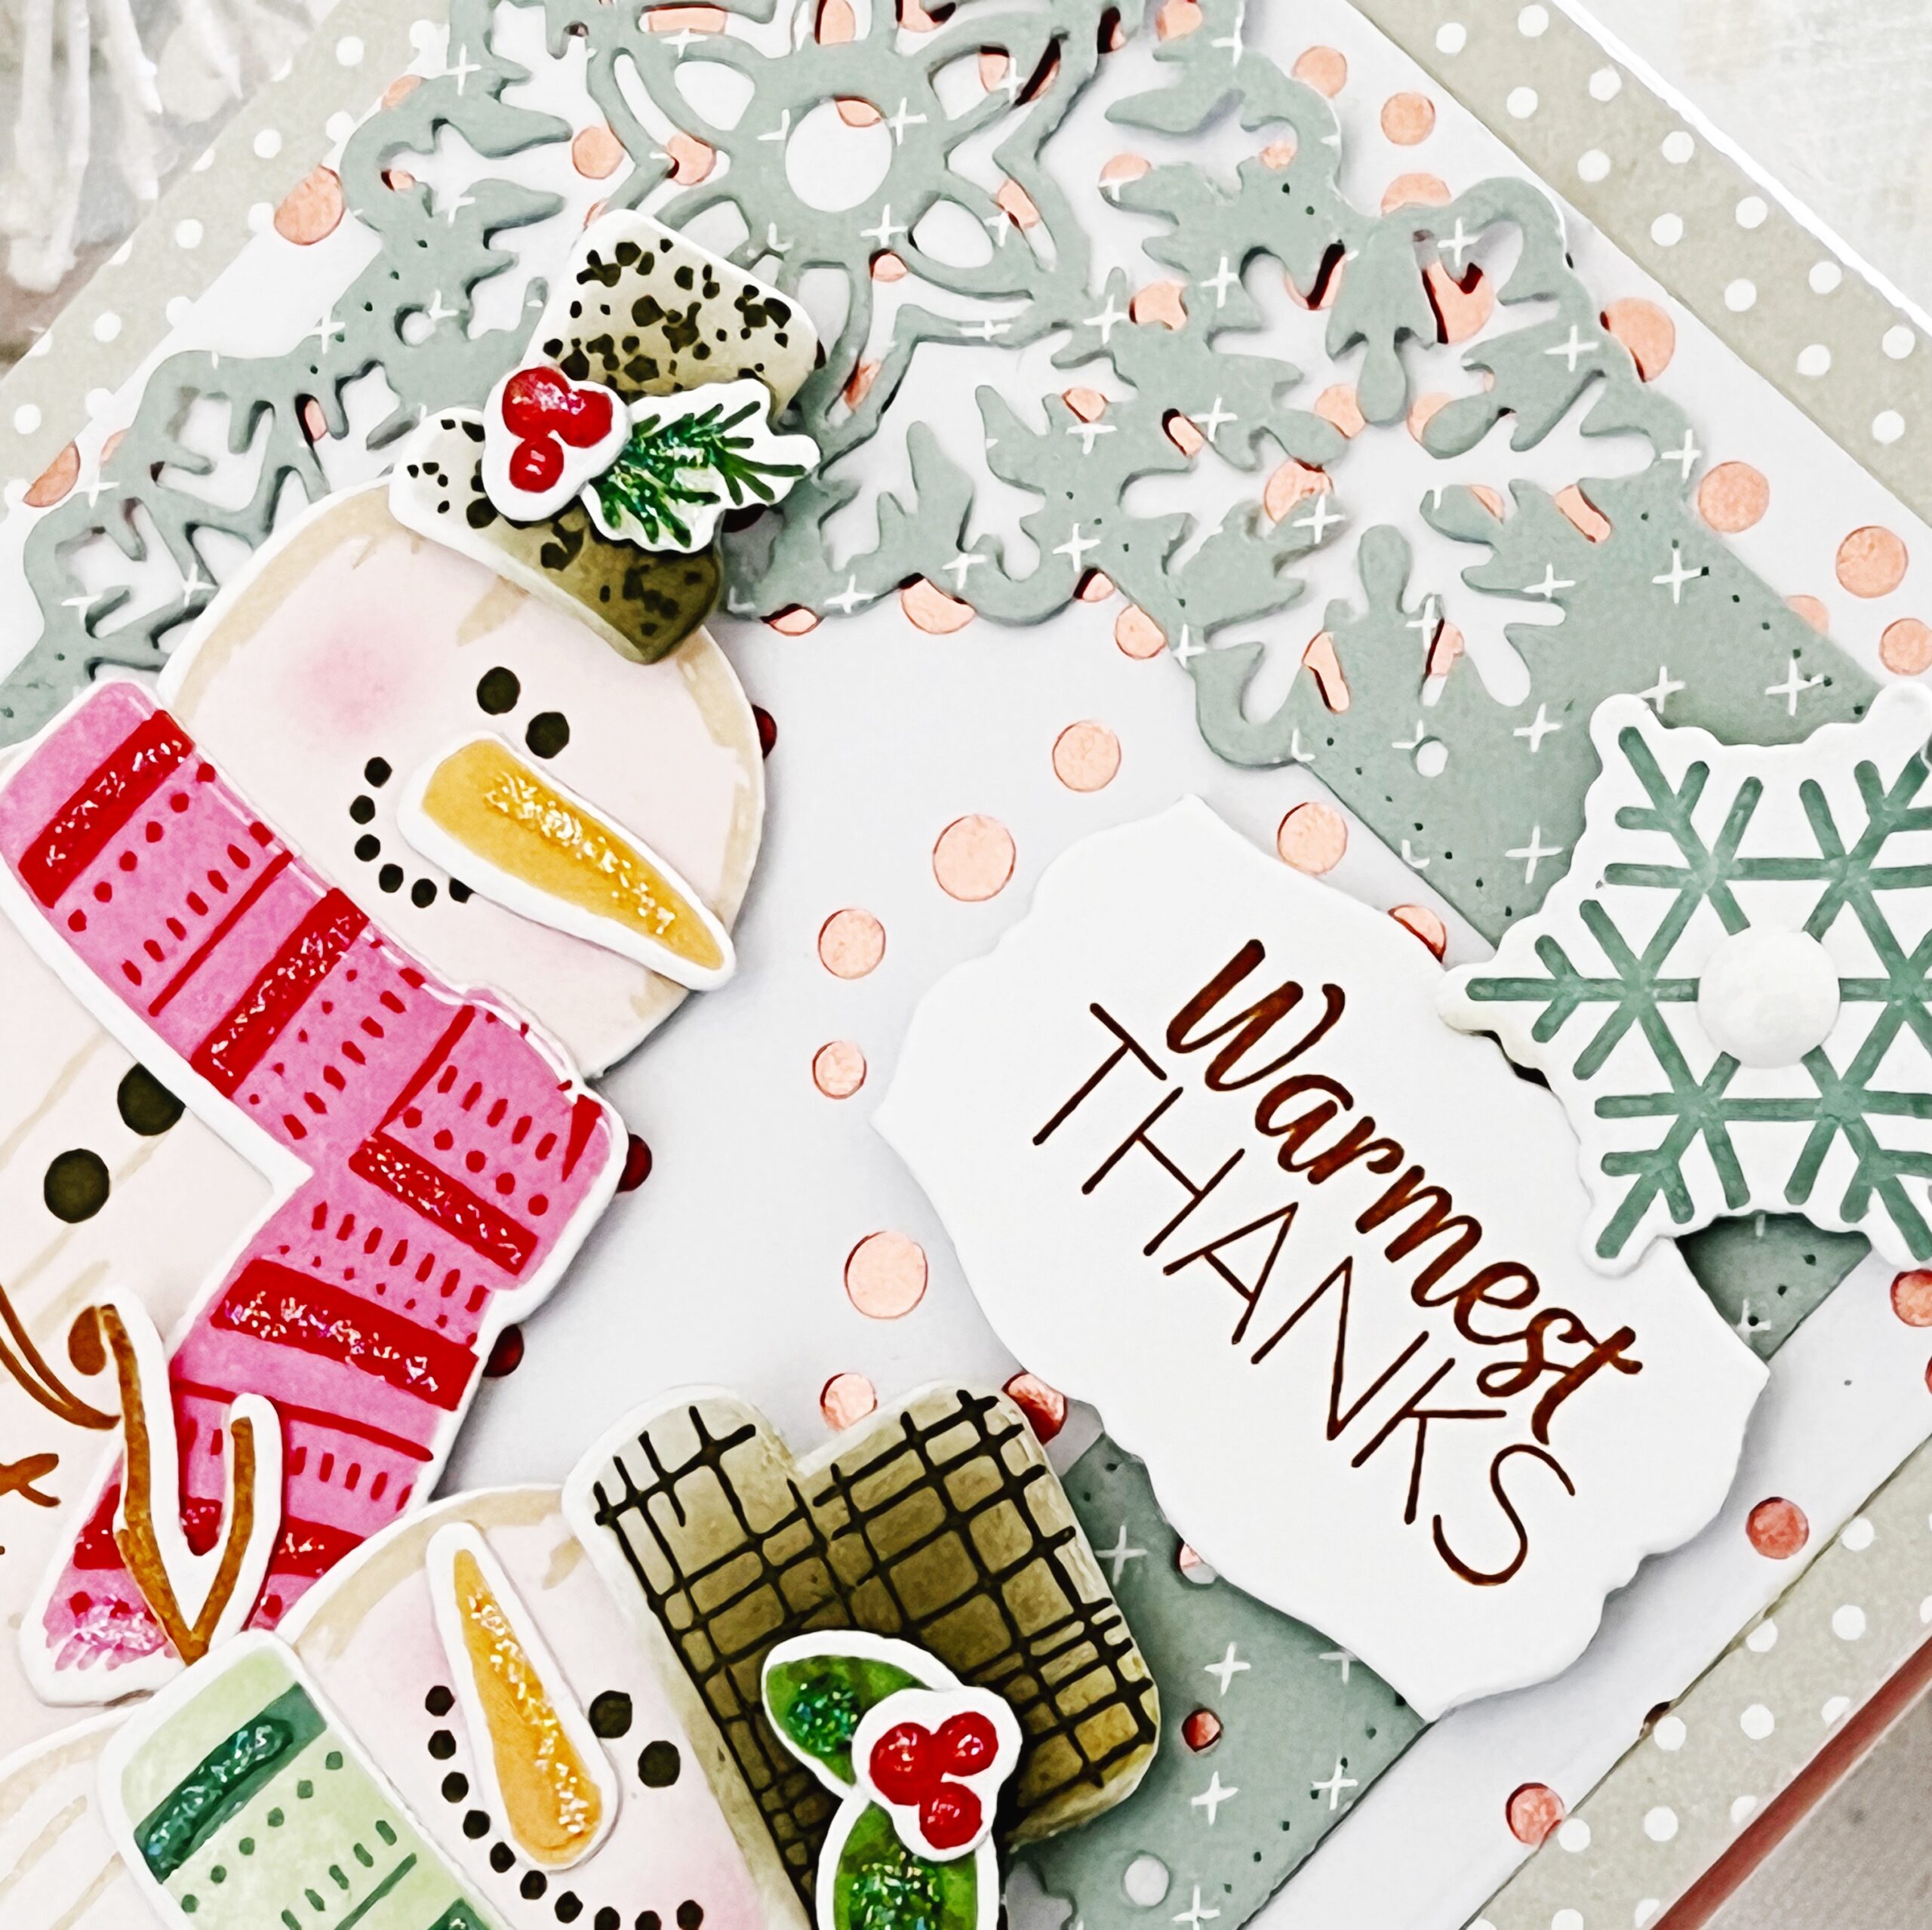
I layered my charming snowmen over our new Snowflake Fun Frame die, die cutting it from a very subtle, coordinating patterned paper. This frame is over the top cute! I could use it on every, single one of my Christmas and winter themed cards. Another new favorite and must have is the gorgeous Cascading Dots Hot Foil Plate which I used as my background. What a gorgeous pattern these dots make….similar to falling snow. I used a white cardstock base with pink foil over the top and am in love.
Such a great way to kick off our November Countdown, don’t you think? Sit back and enjoy what our designers have ready to share with you. You’ll be head over heels in love with our new Simply Snowmen stamp set and dies.
Supplies Used:
STAMPS: Simply Snowmen, Just Sentiments: Warmth
INK: Hibiscus Burst, Pure Poppy, Mint Julep, Ocean Tides, Olive Twist, New Leaf, Orange Zest, Honey Nut, Ripe Avocado, Sweet Blush
PAPER: Sweet Blush, Stamper’s Select White, Bitty Big Soft Stone
DIES: Simply Snowmen, Snowflake Fun Frame
OTHER: Cascading Dots Hot Foil Plate, pink foil, patterned paper, Stickles glitter, enamel dots

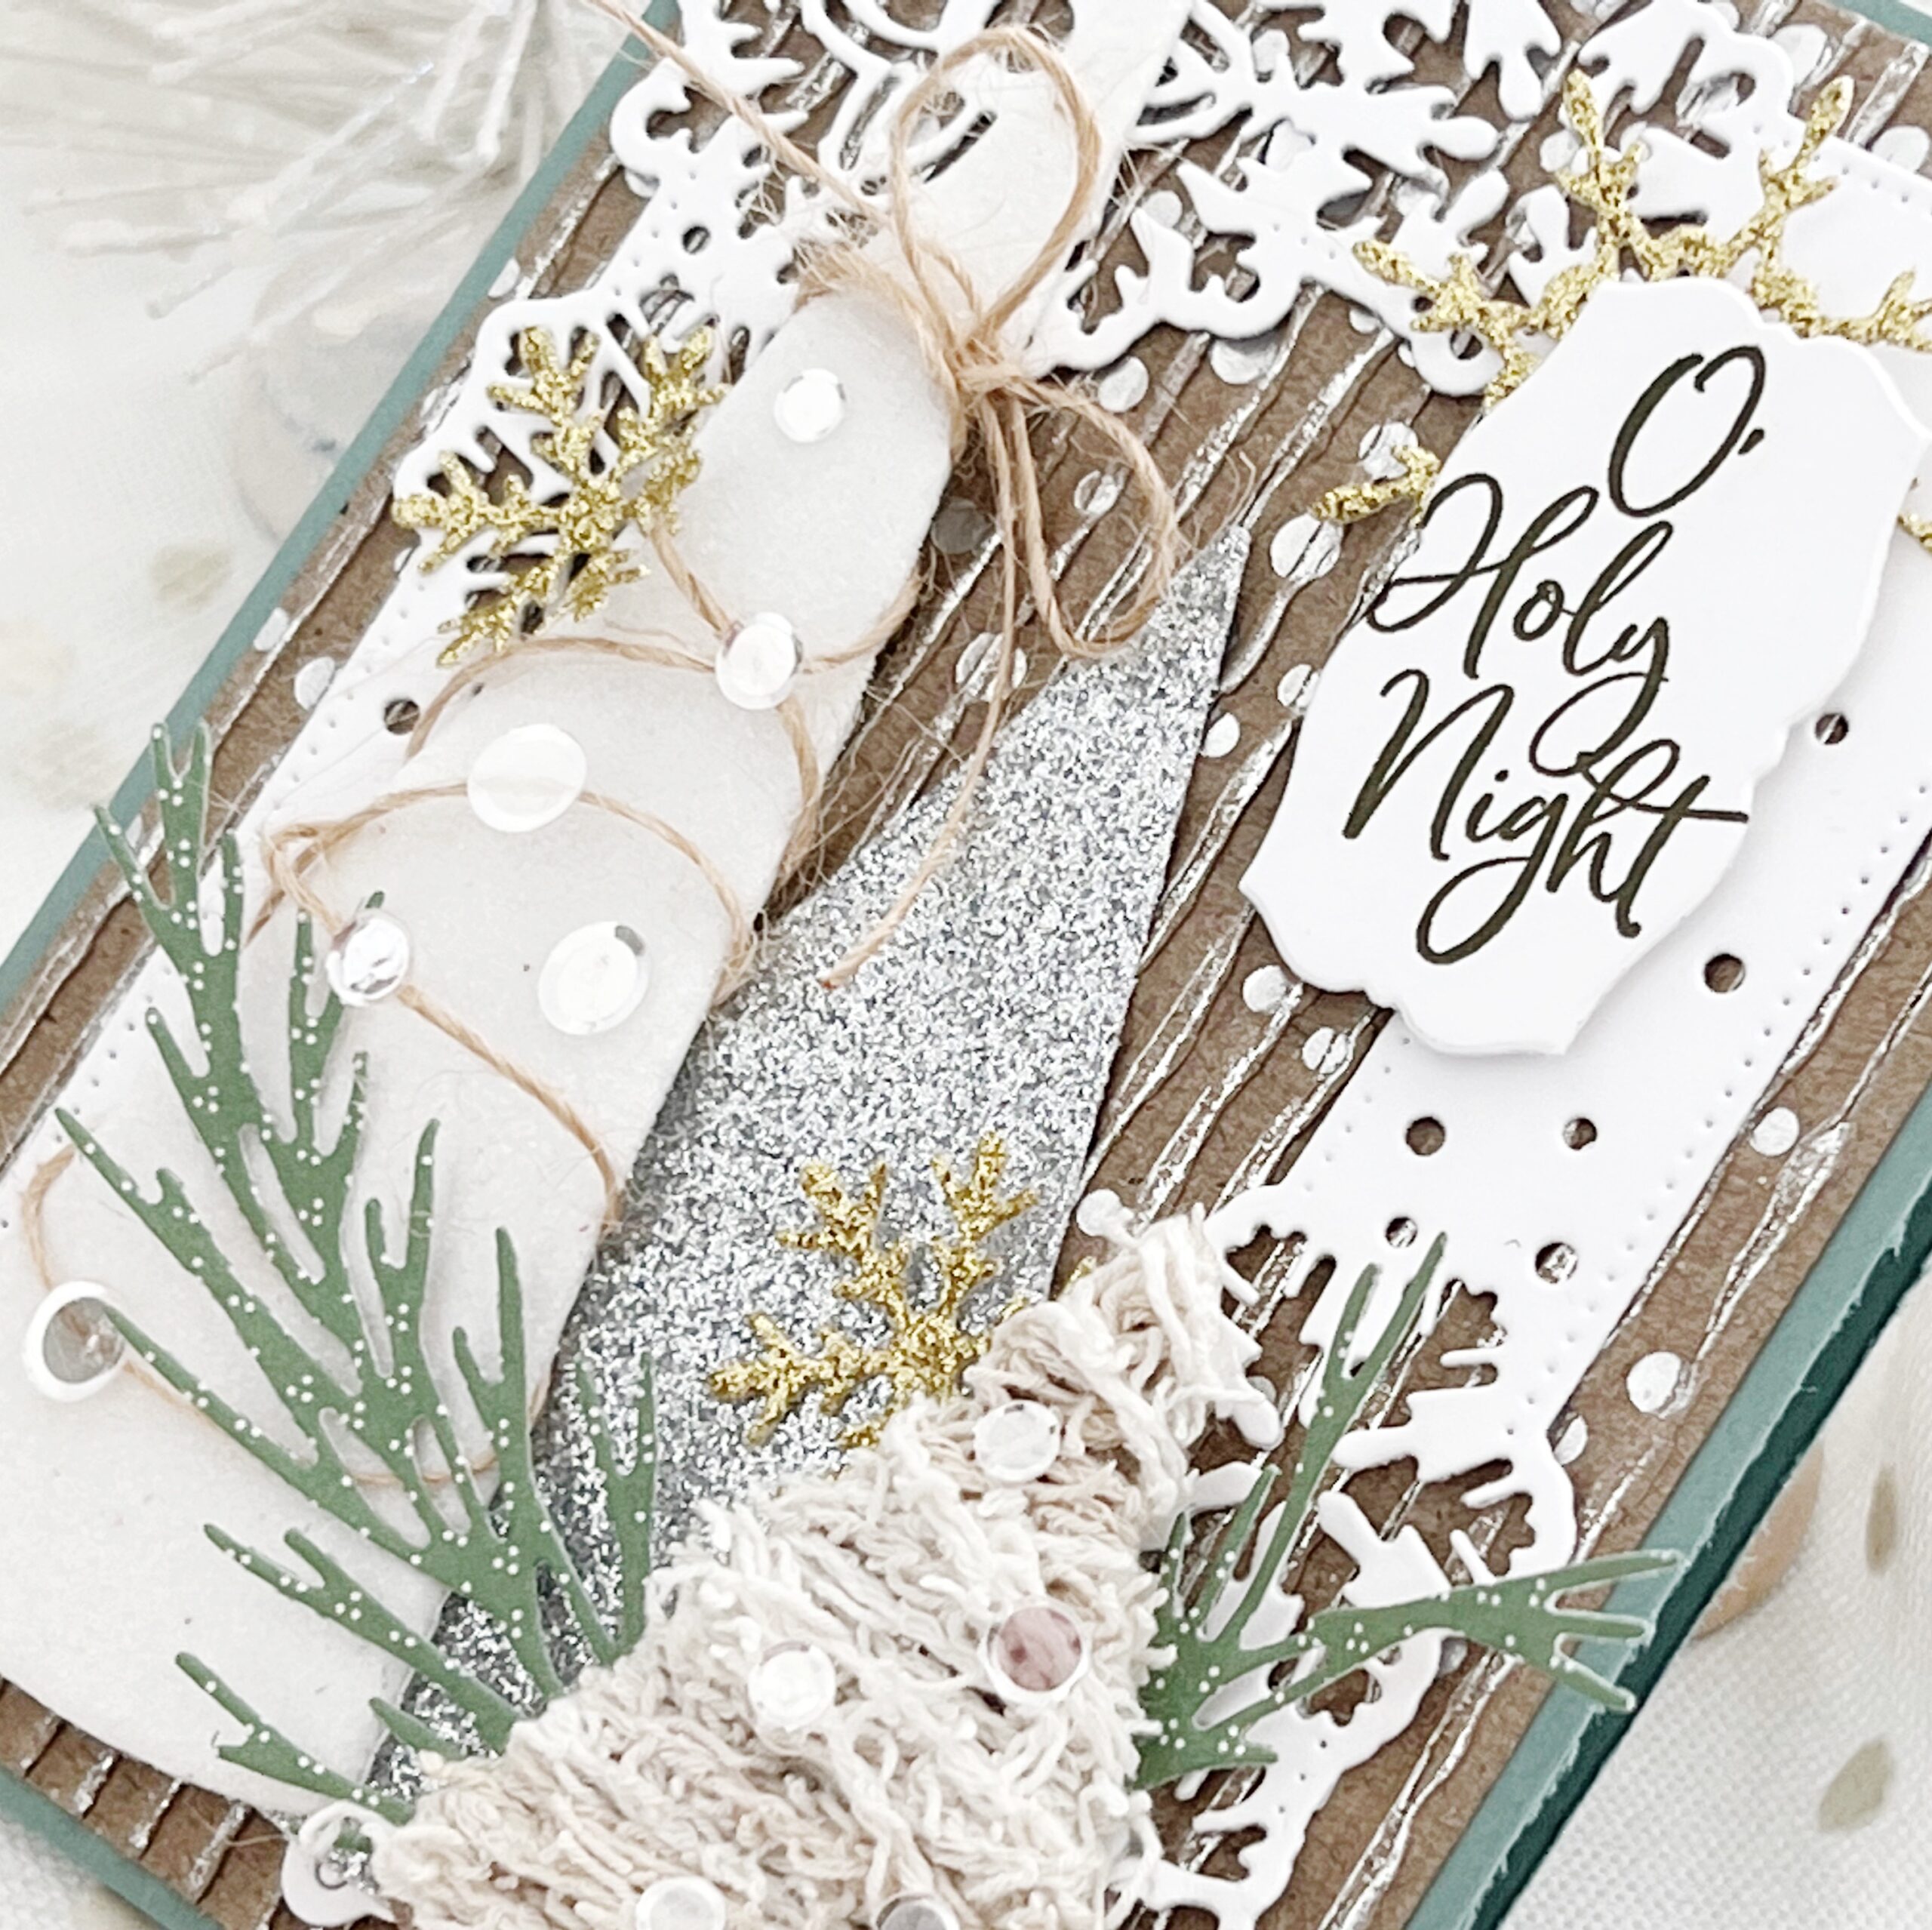
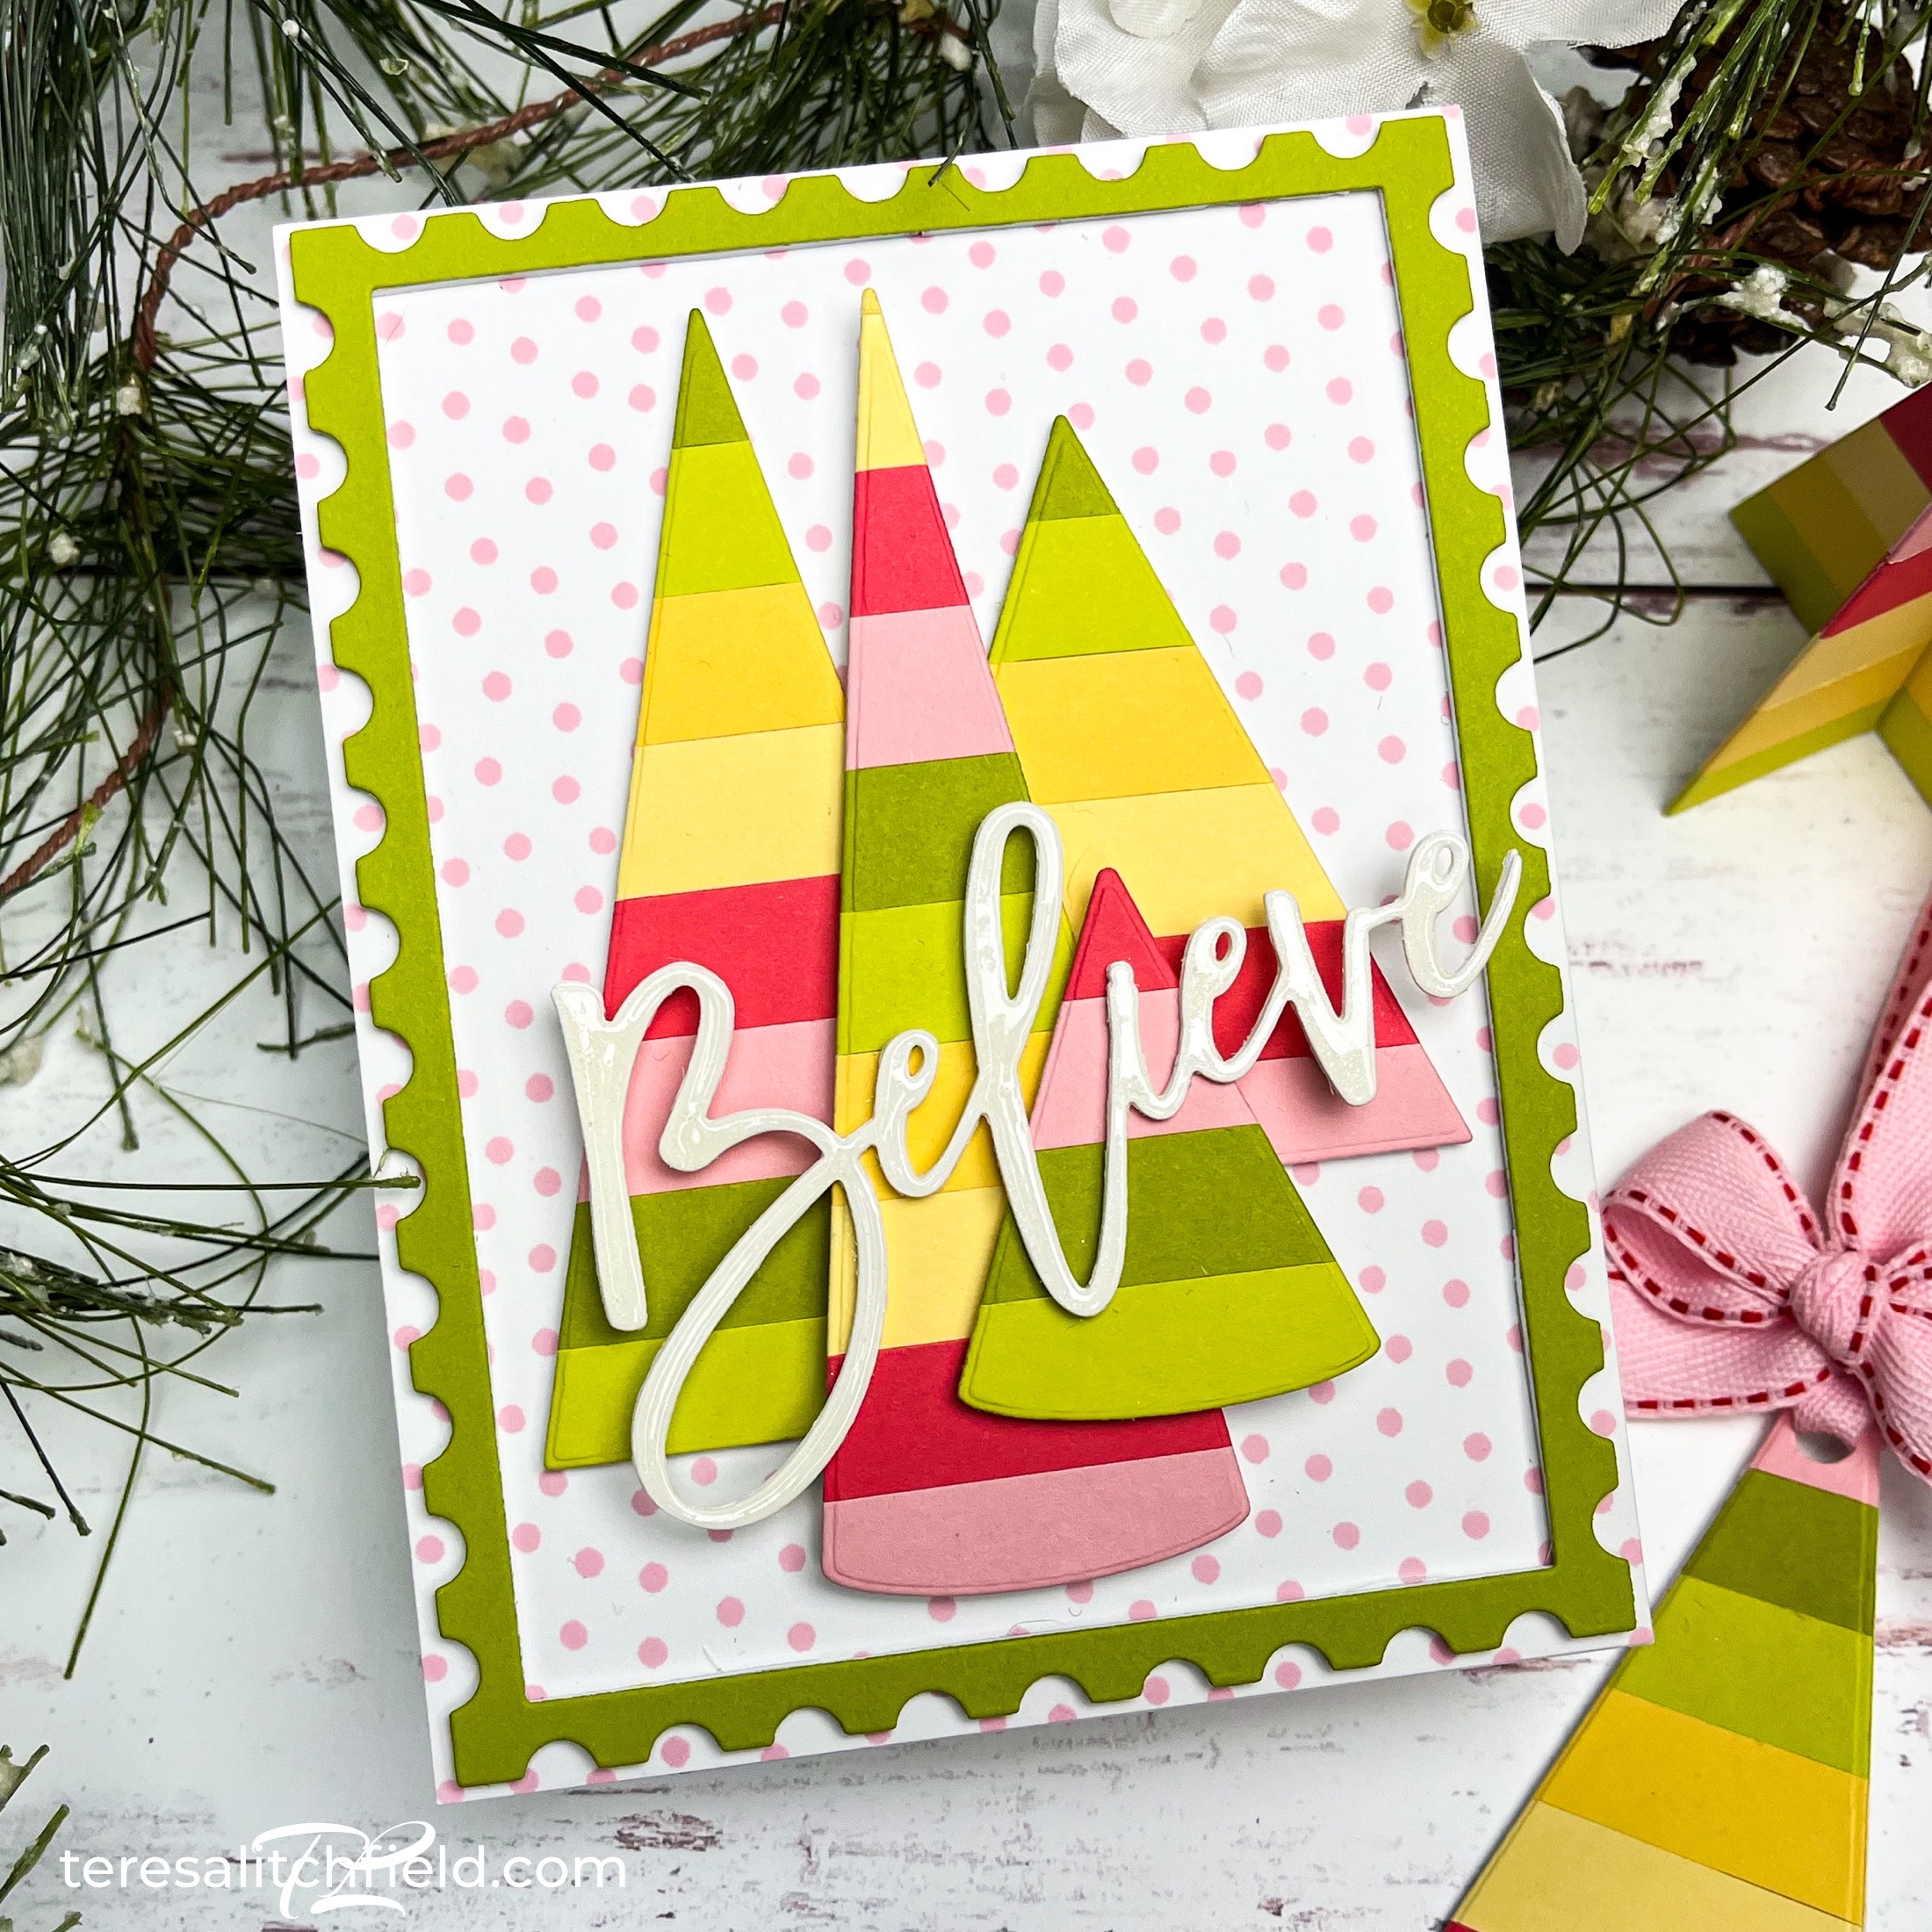
Next up today are the delightful Simple Trees dies. Don’t let the name fool you….while these trees are simple in shape, they hold so many creative possibilities within them. Just think of all of the different things you can do with these dies and the many different elements you can use to cut them from. Patterned paper, corrugated cardstock, glitter foam and cardstock, felt, vellum, fabric, etc.
I die cut mine from white glitter foam and then wrapped it in twine and added ornaments using Moonshine Sequins. Another is cut from silver glittered cardstock. And my smallest tree is cut from heavy cardboard and wrapped with yarn, with more Moonshine Sequins used as ornaments. So quick and easy with a powerful punch!
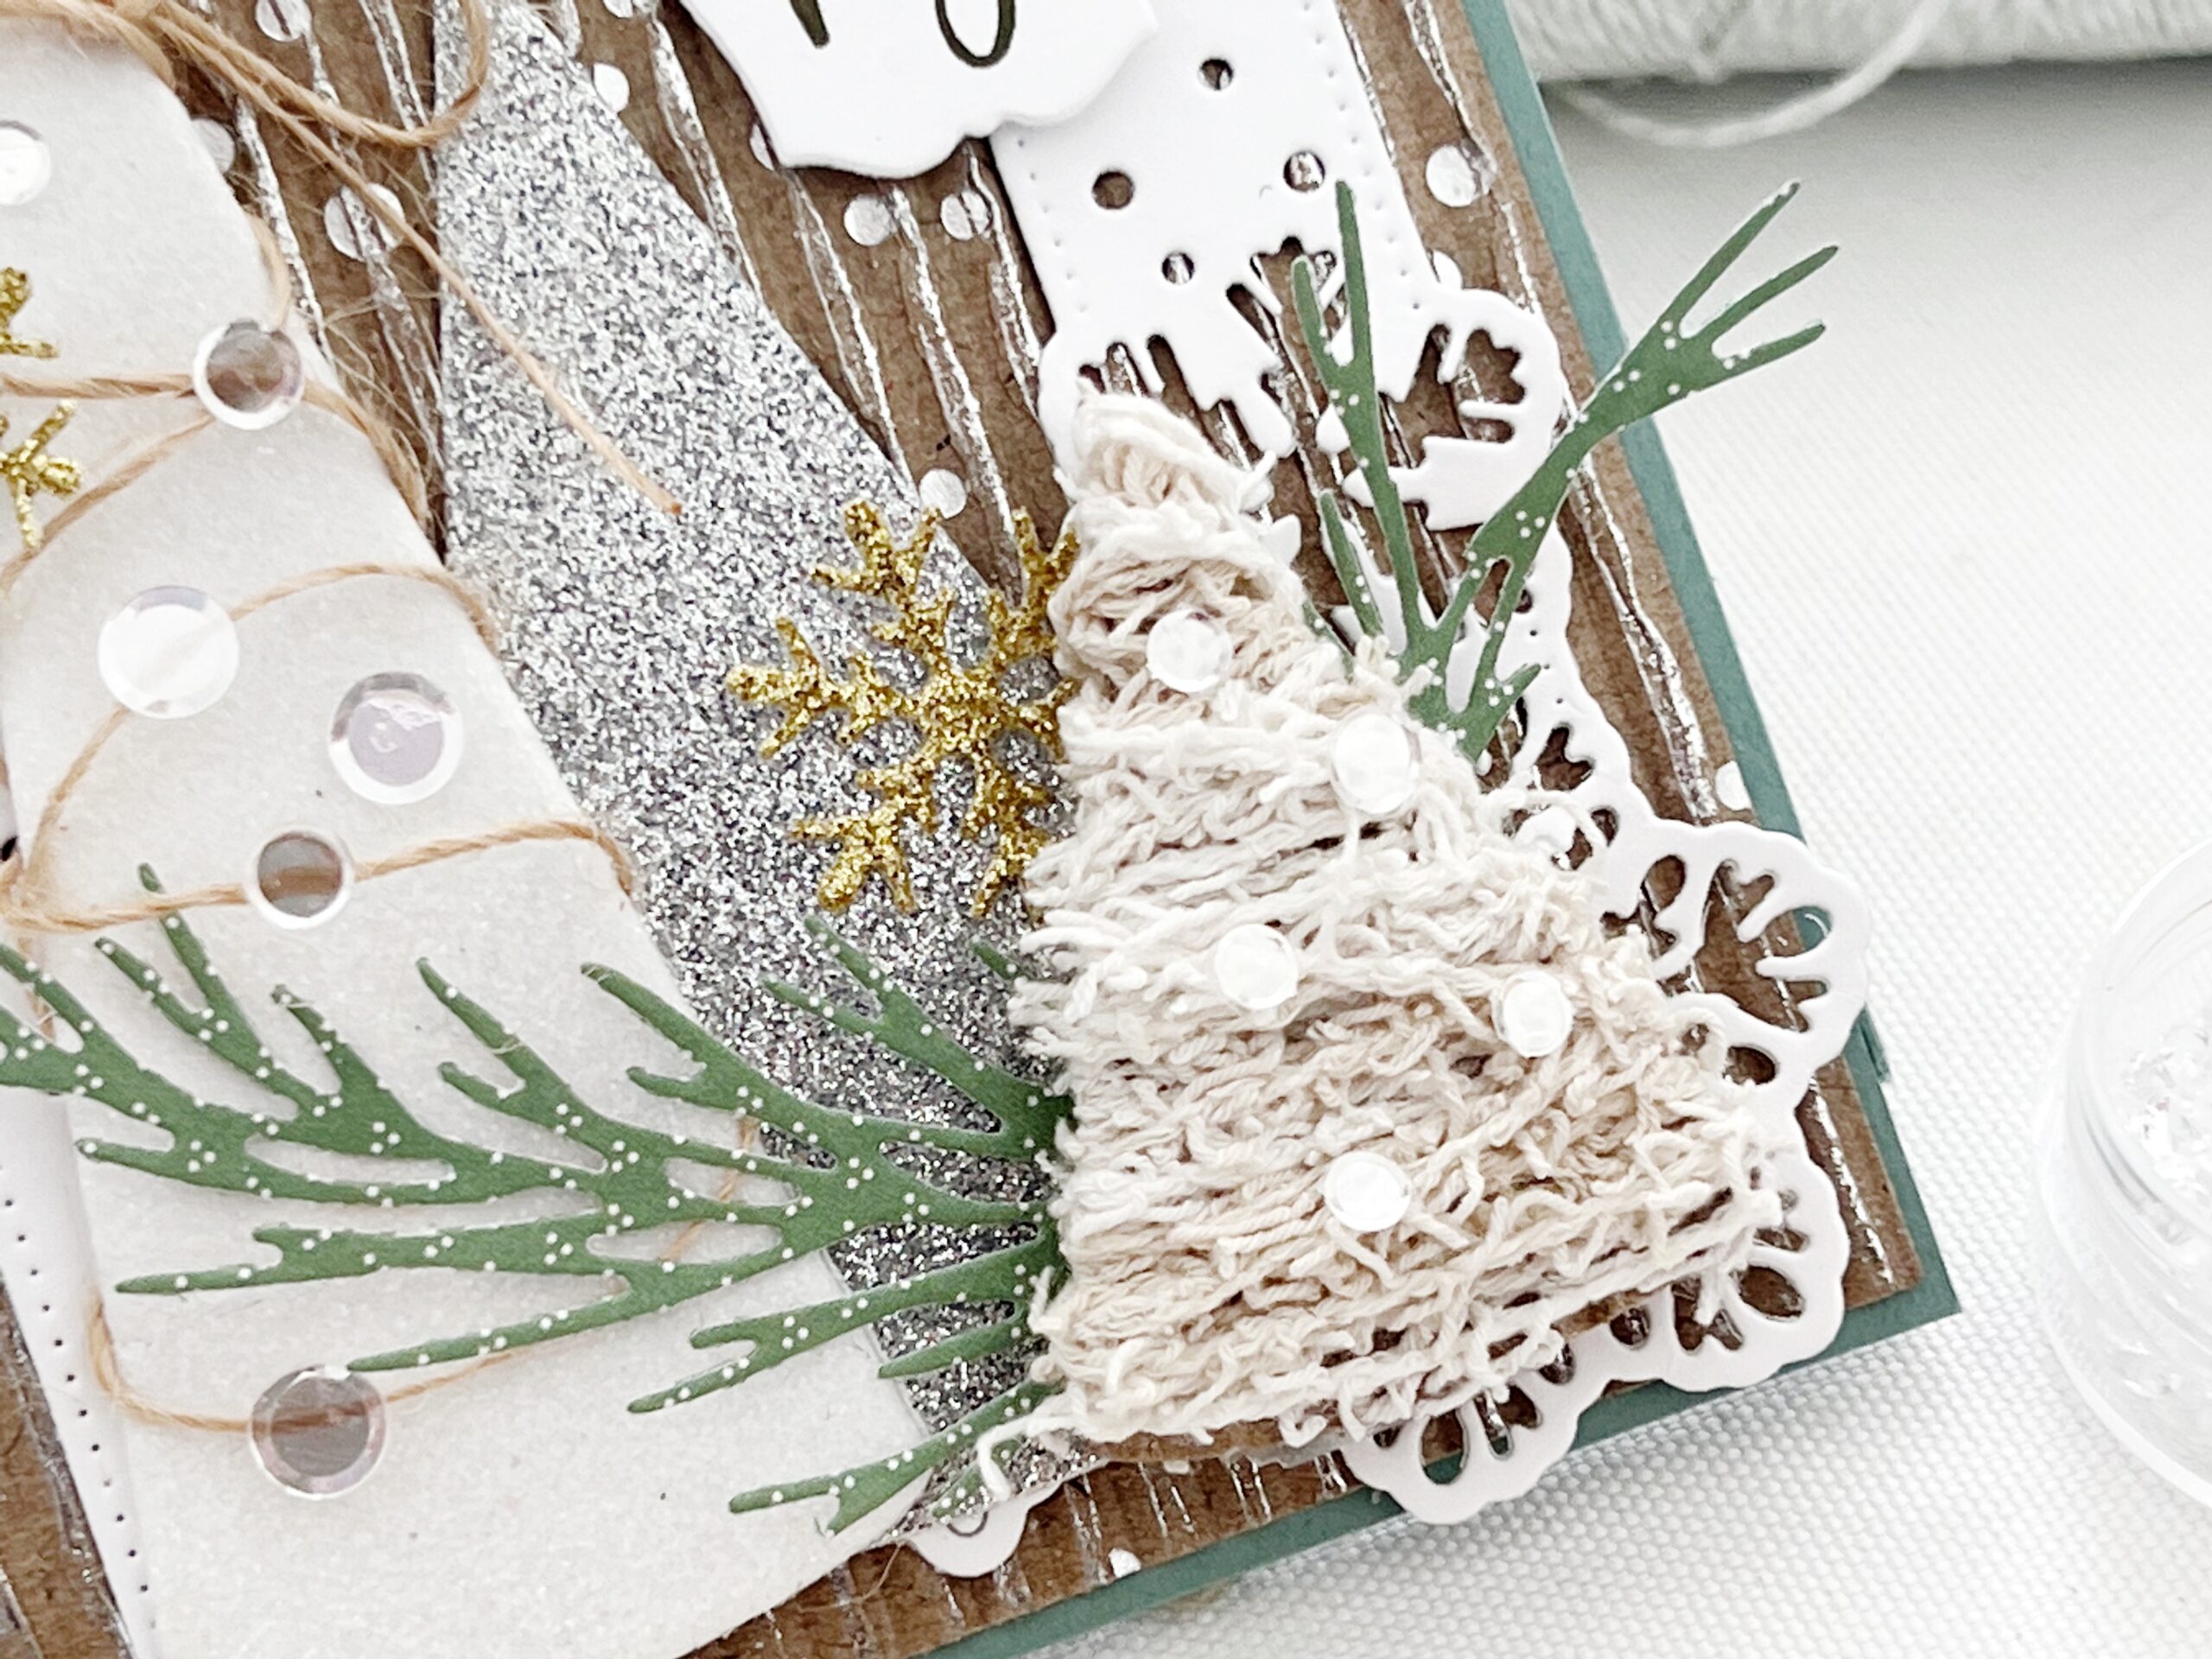
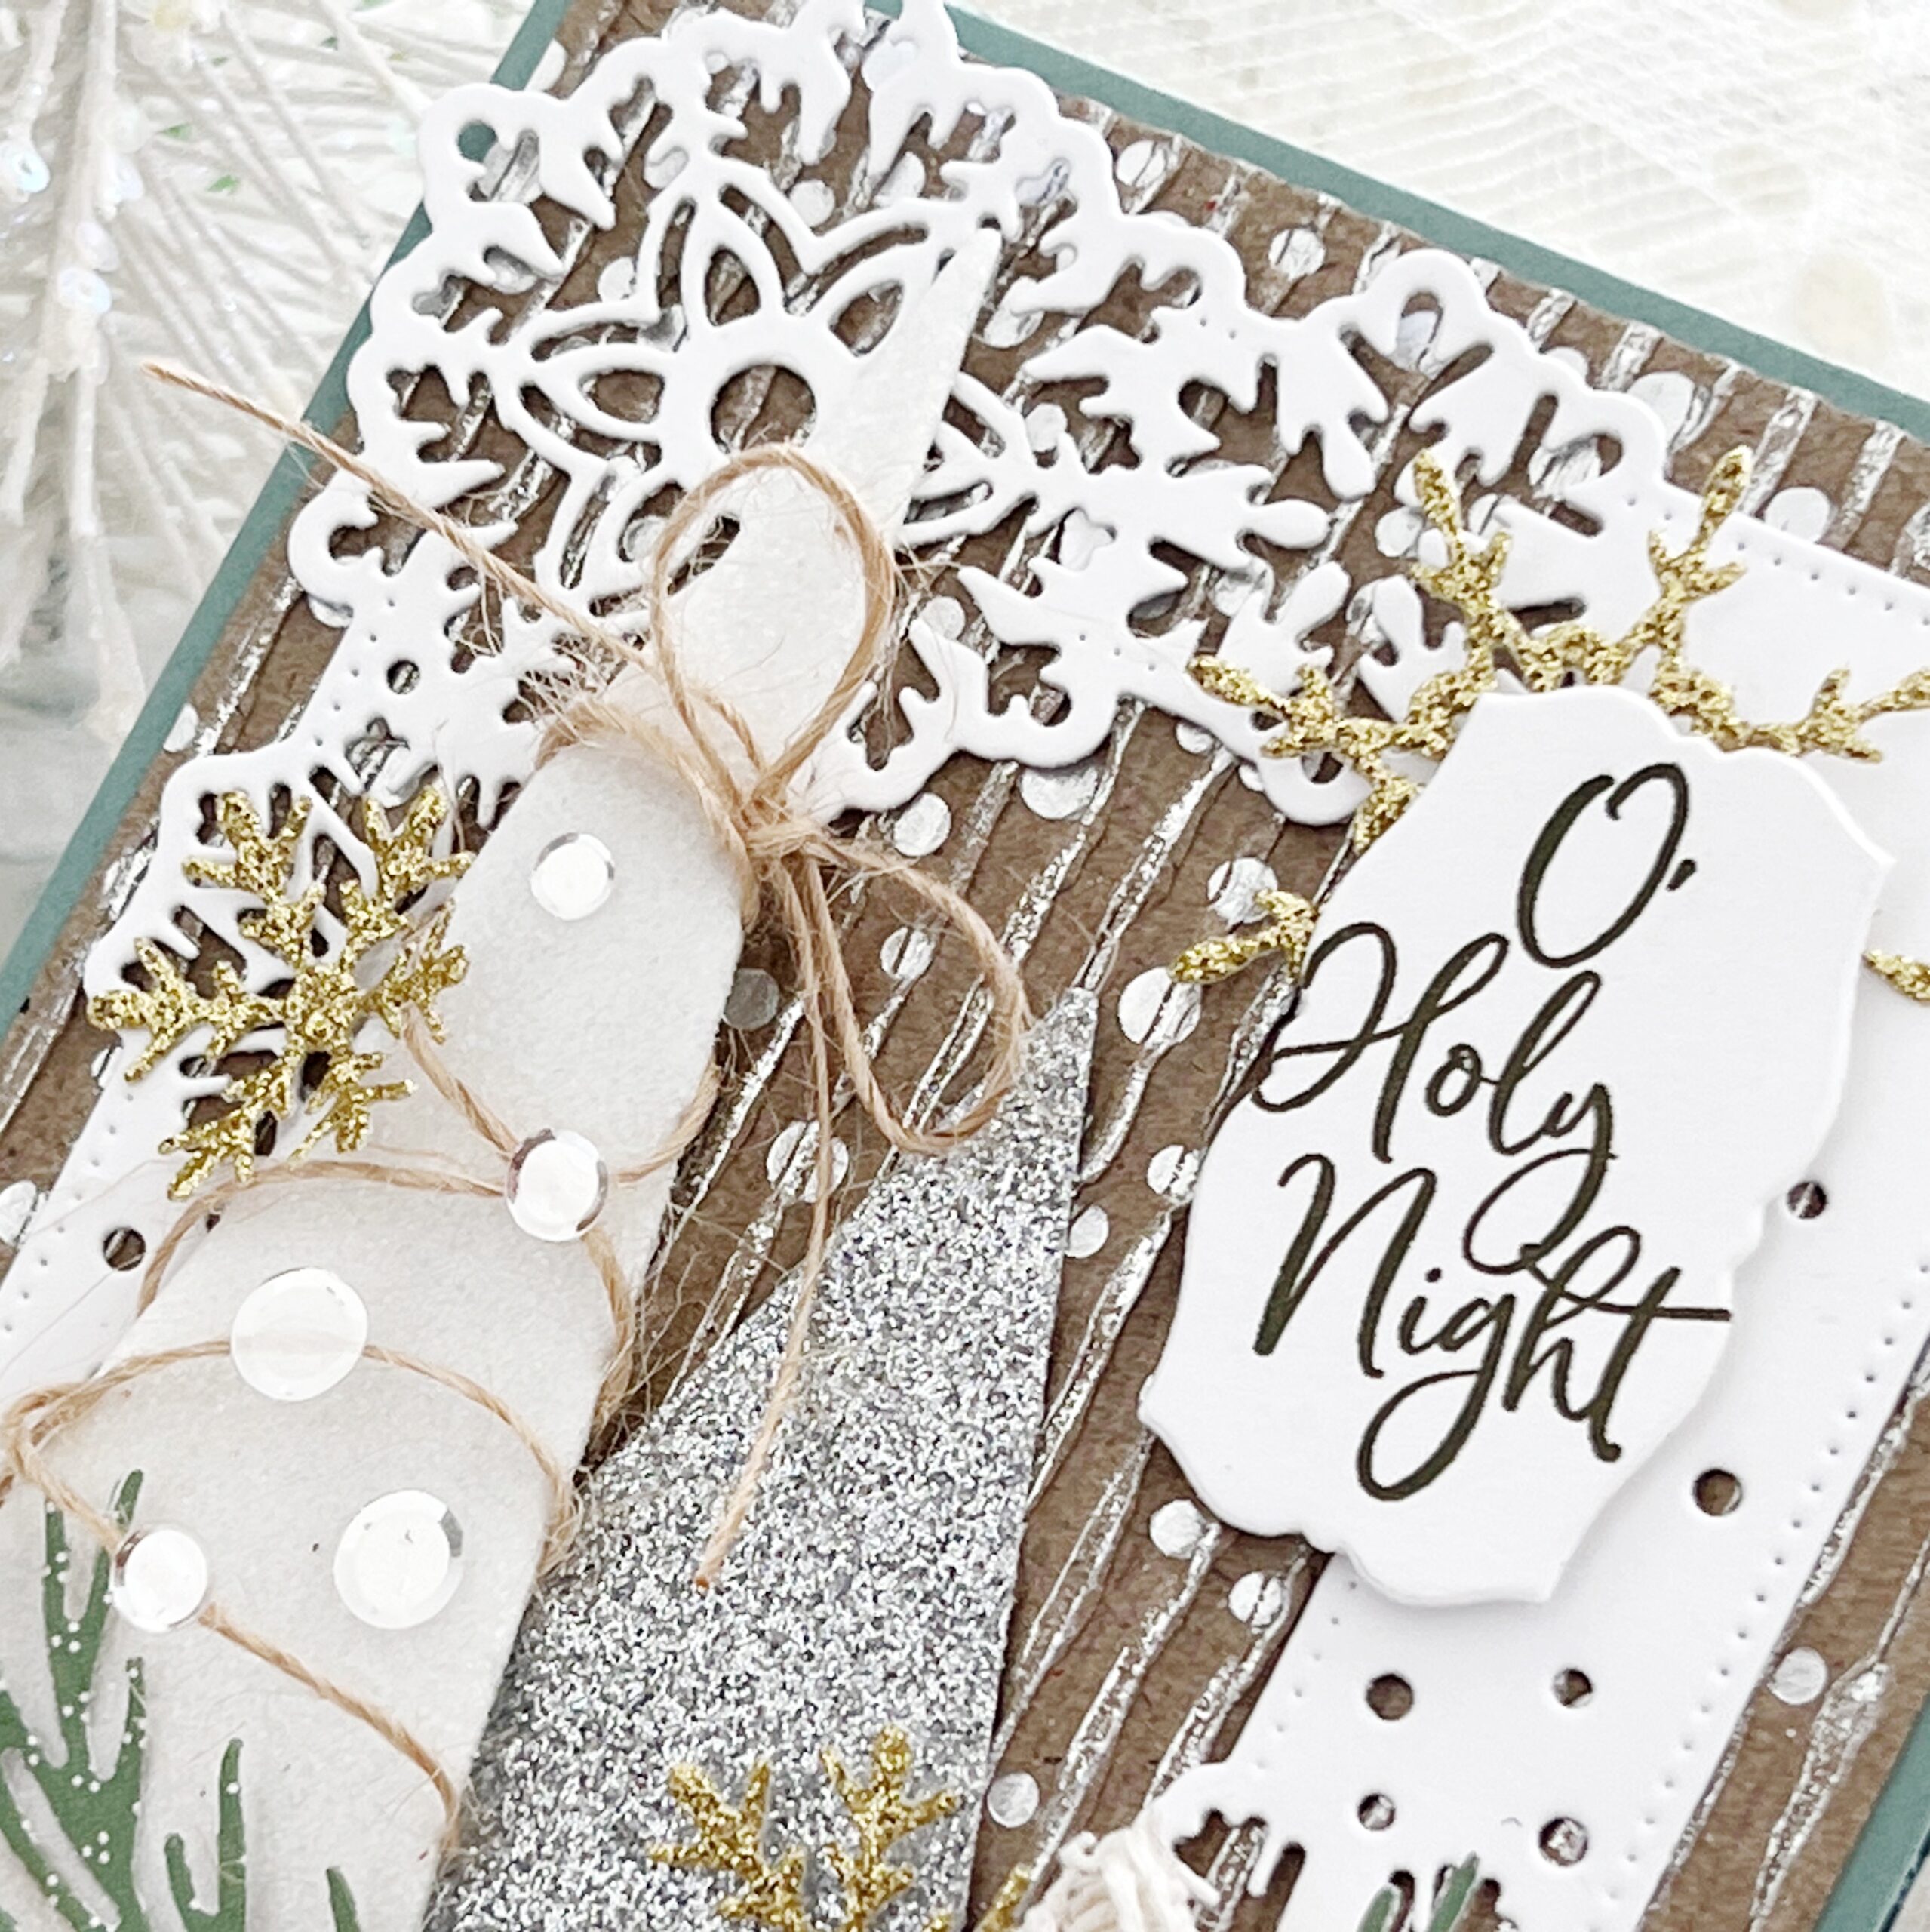
Once again I used the Snowflake Fun Frame die behind my trees, cut from stark white cardstock. I wanted to try my Cascading Dots Hot Foil Plate over corrugated cardstock to see what the results would be, and I love them. I used silver foil which not only transferred onto the dots, but down the corrugated ridges as well. Such fun results which add to the metallic, wintertime feel of my card.
Supplies Used:
STAMPS: Just Sentiments: He is Born
INK: Olive Twist
PAPER: Ocean Tides, Stamper’s Select White
DIES: Simple Trees, Snowflake Fun Frame
OTHER: Cascading Dots Hot Foil Plate, silver foil, corrugated cardstock, silver glitter cardstock, white glitter foam, yarn, twine, gold glitter cardstock, patterned paper


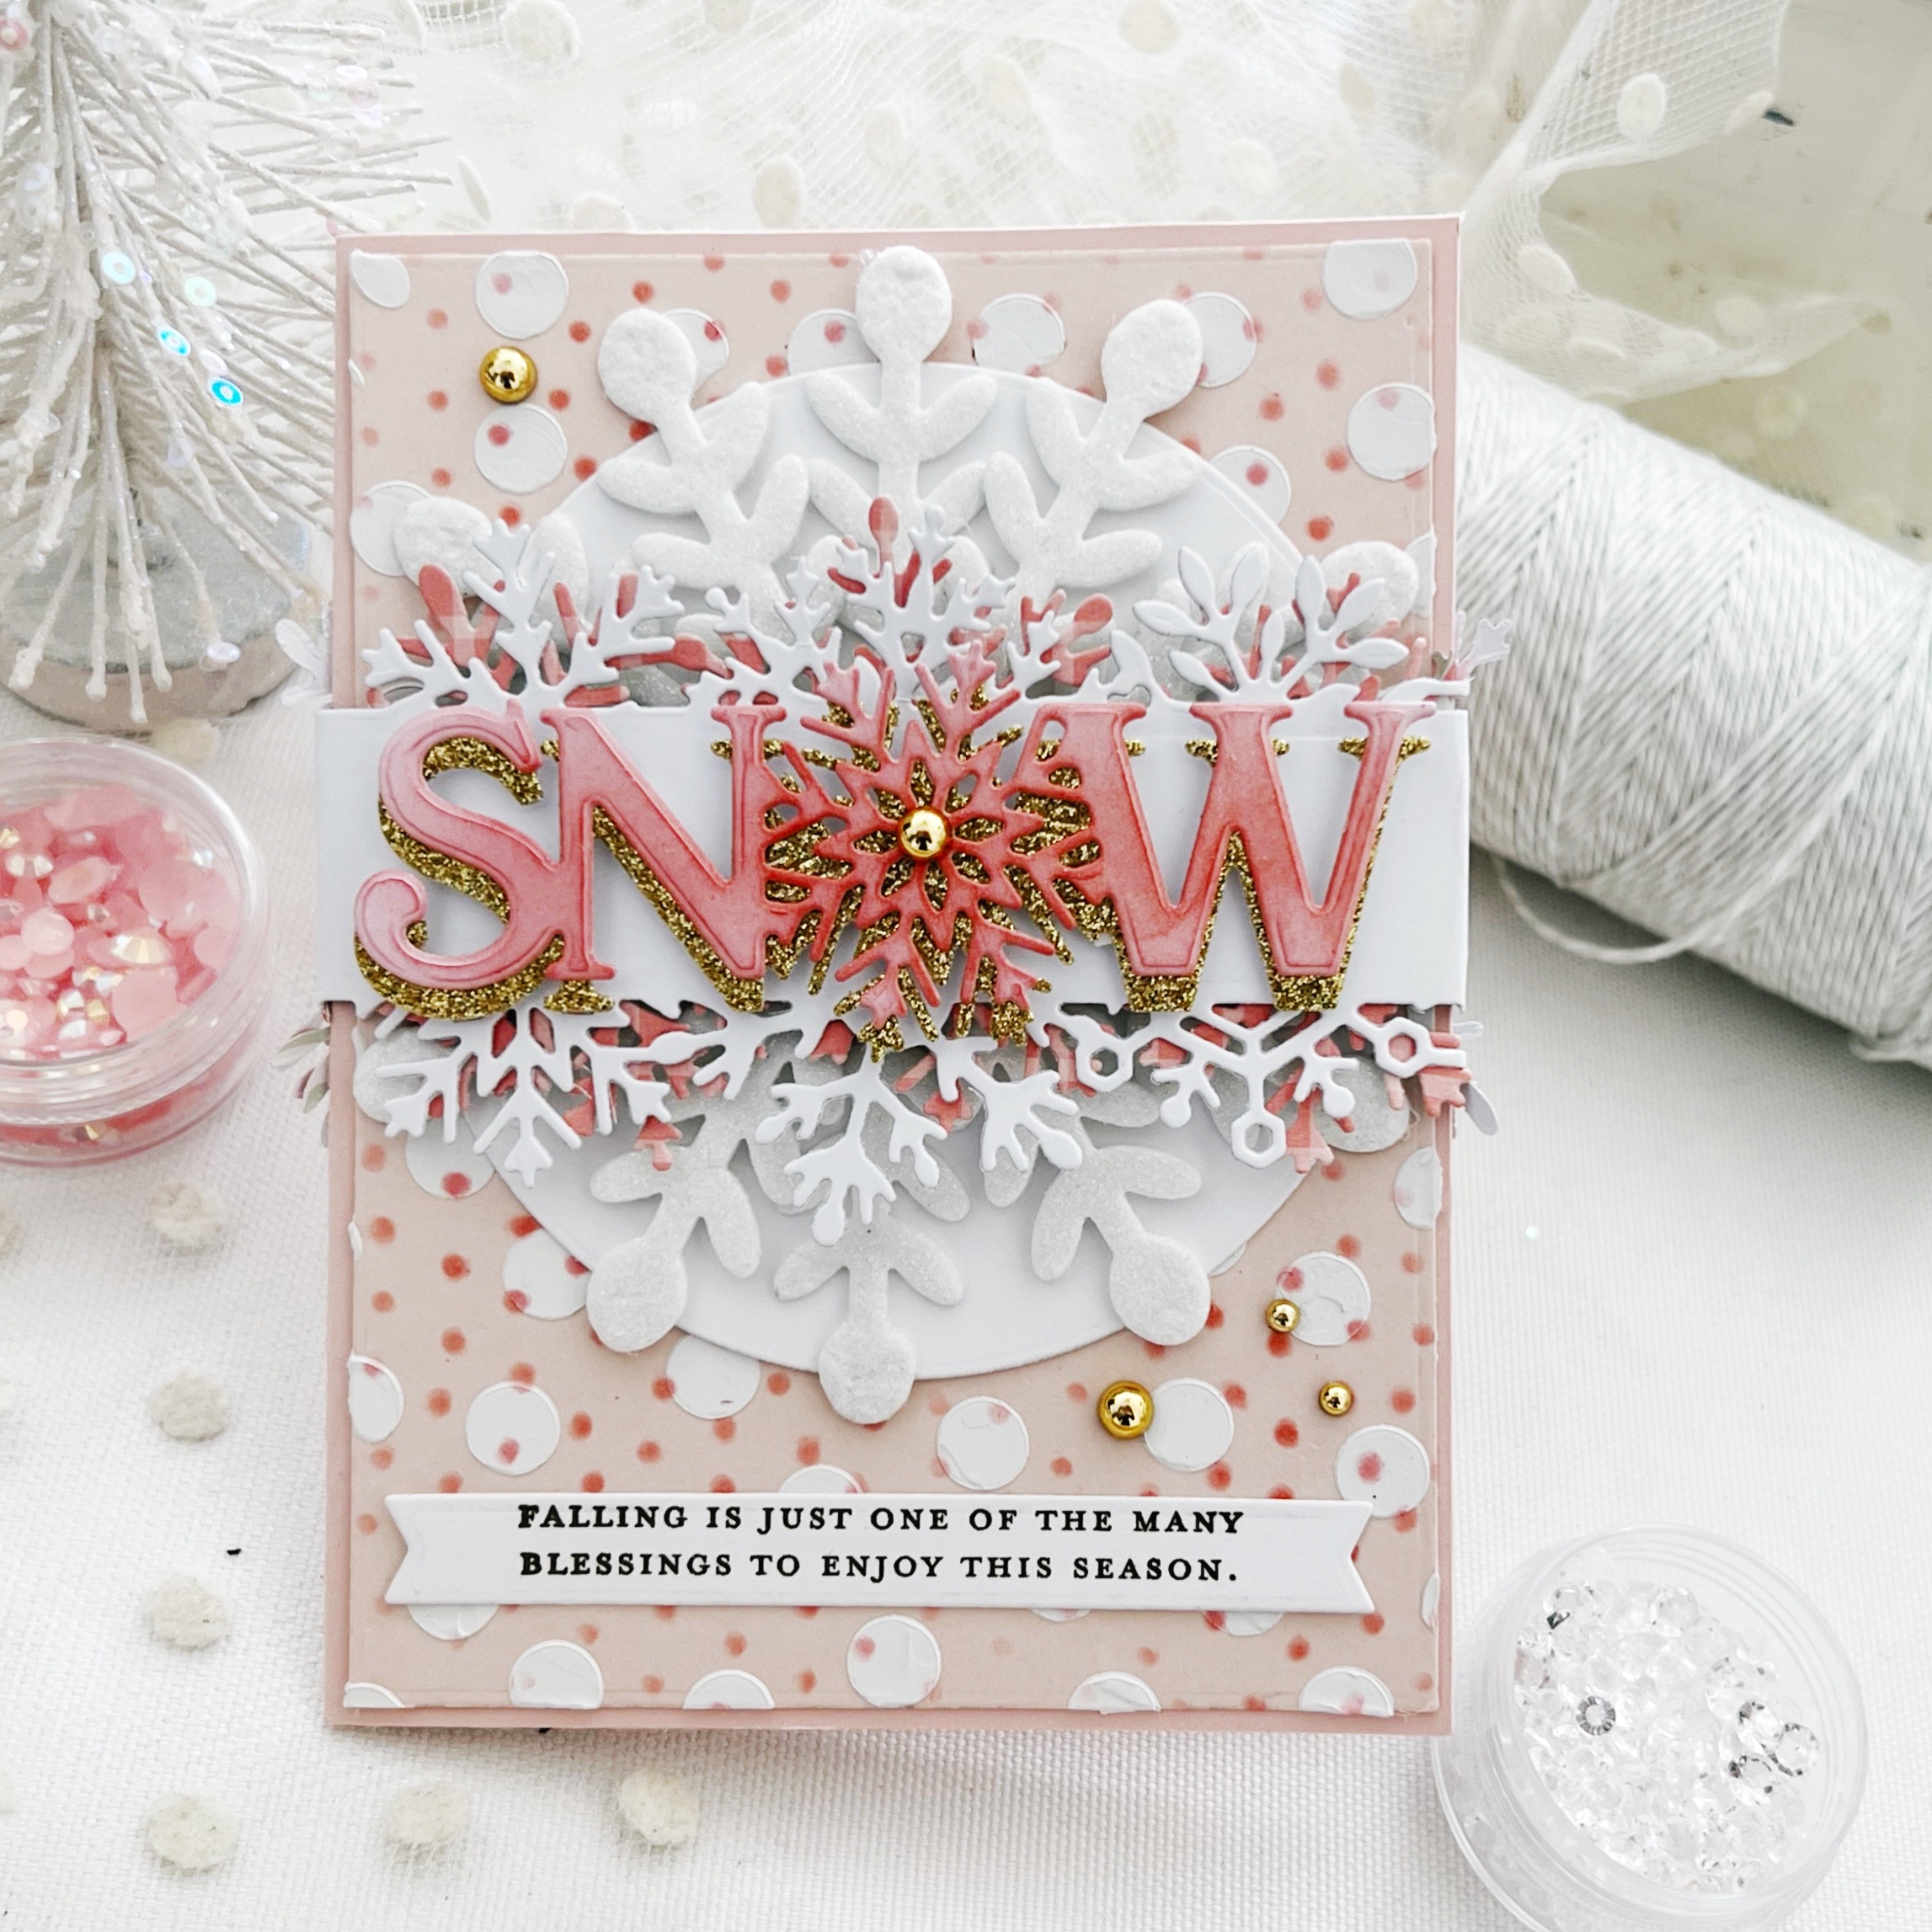
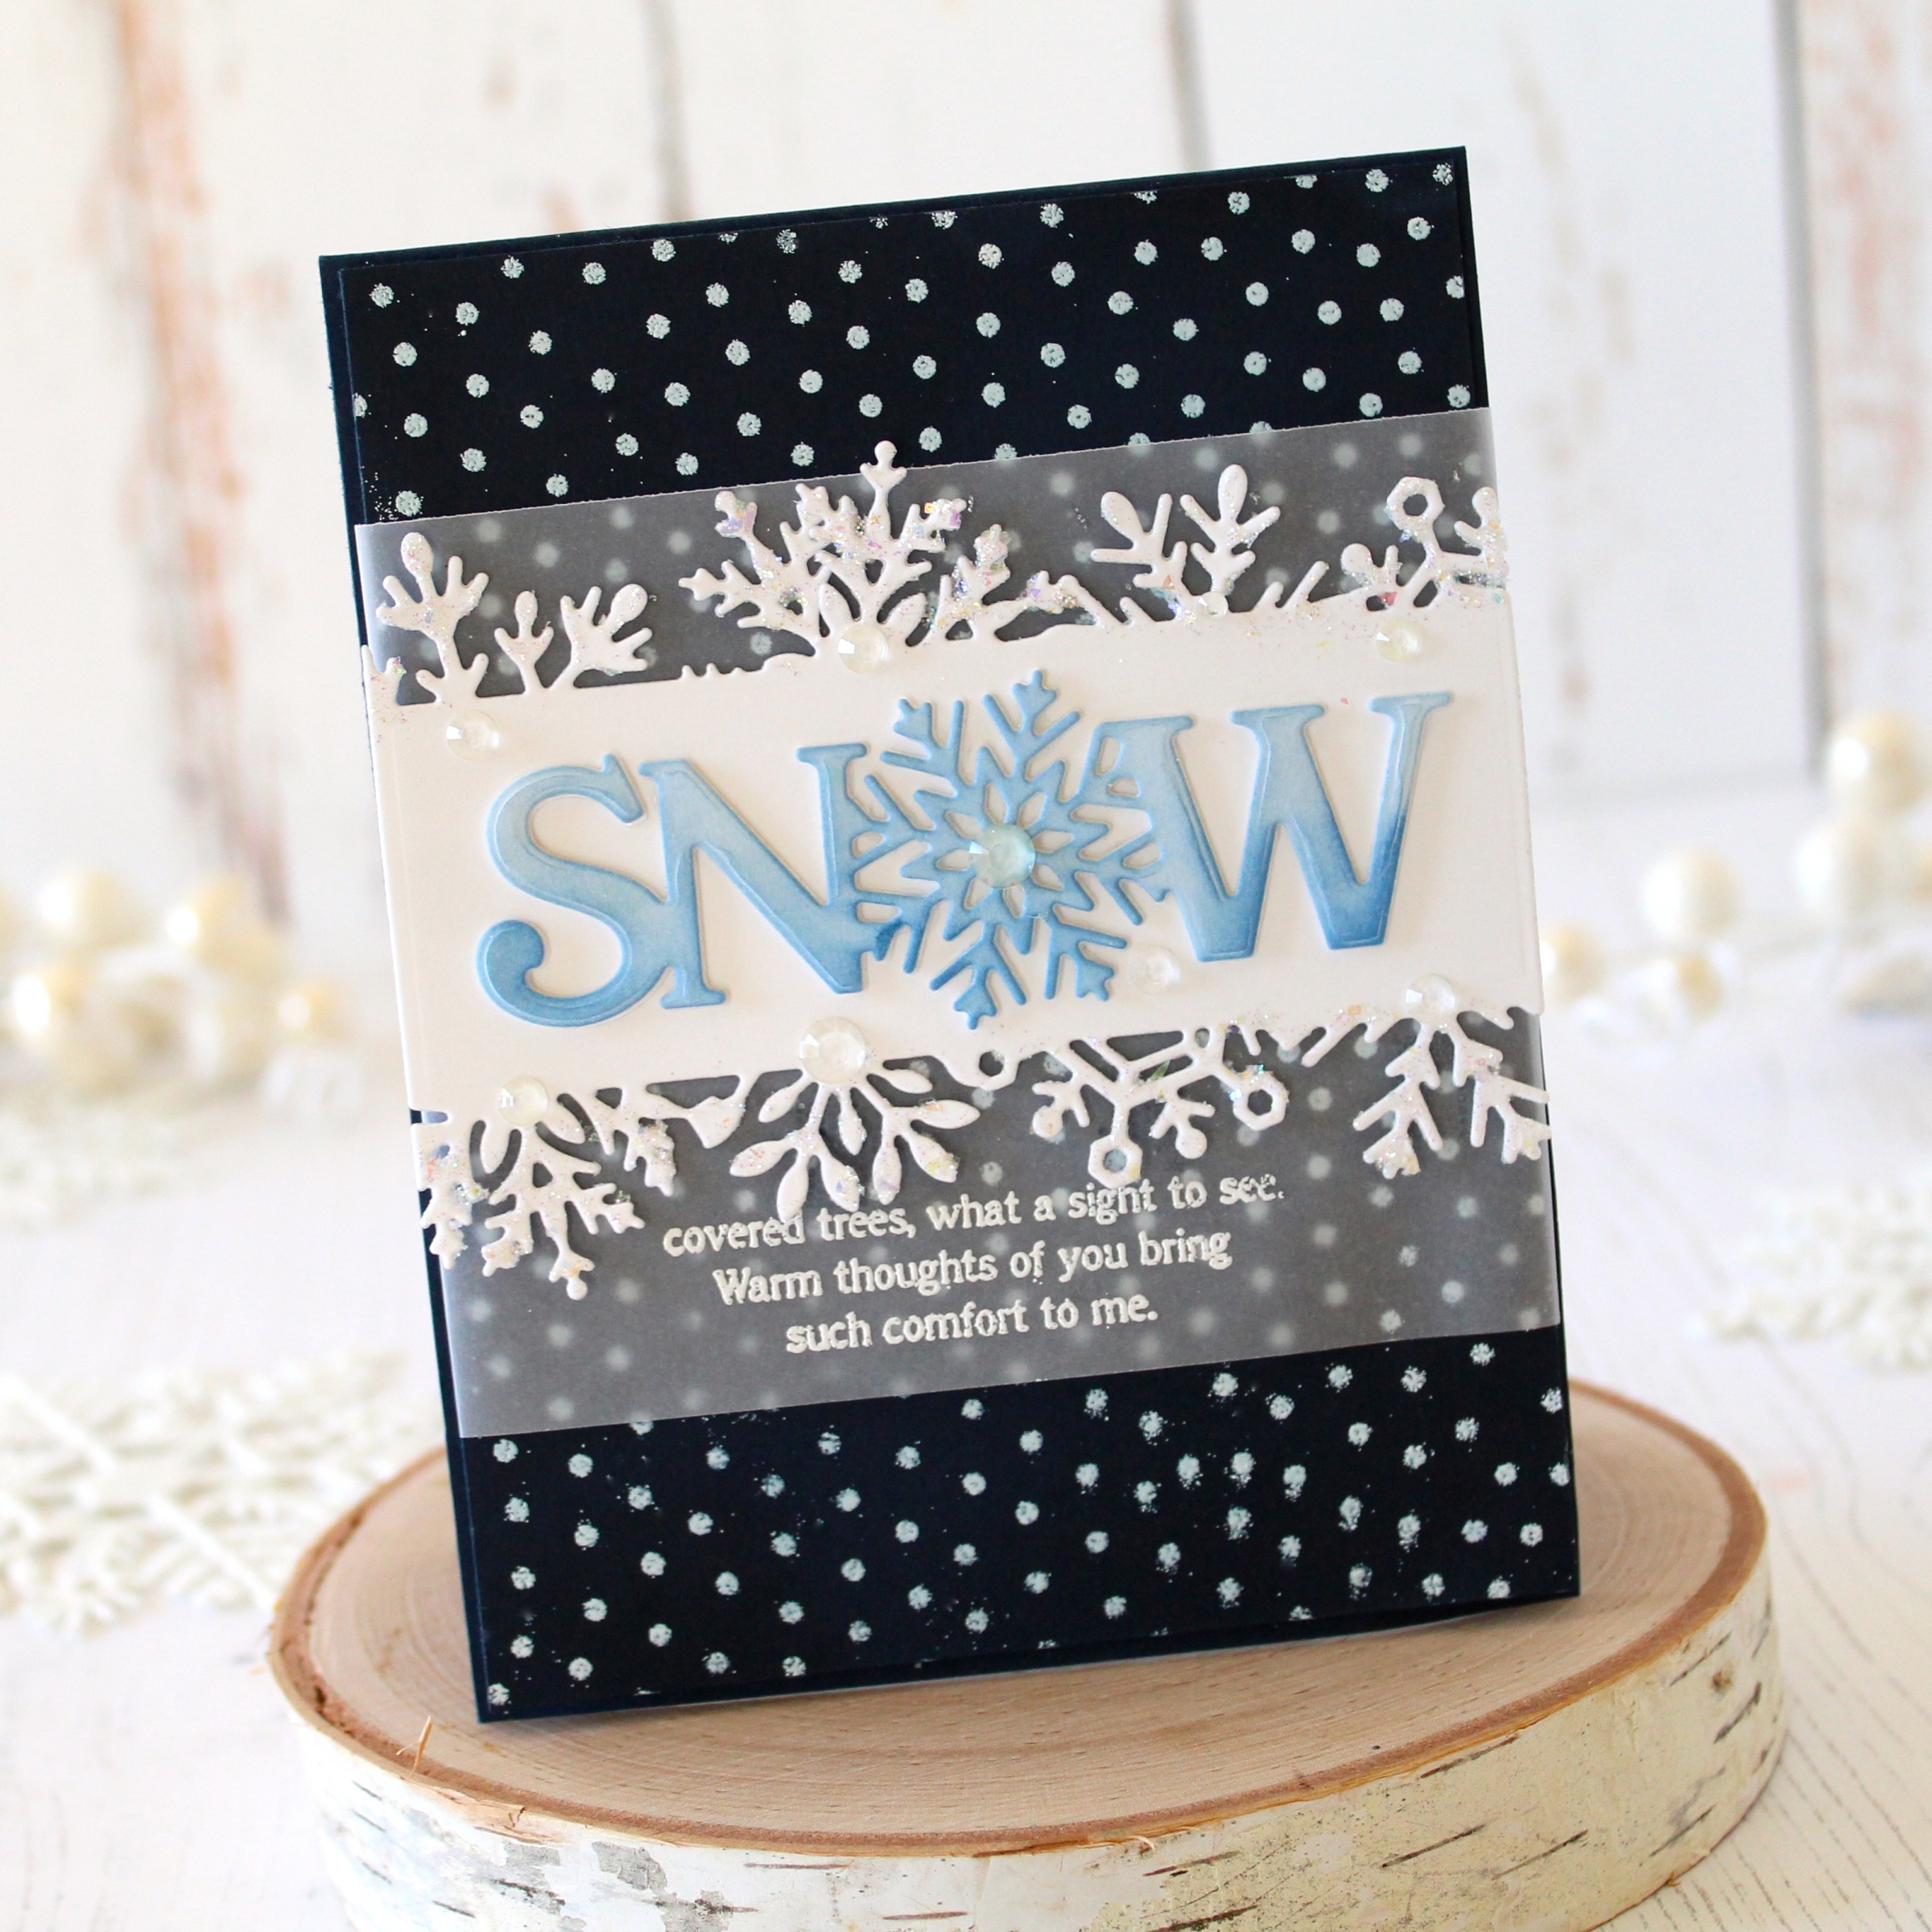
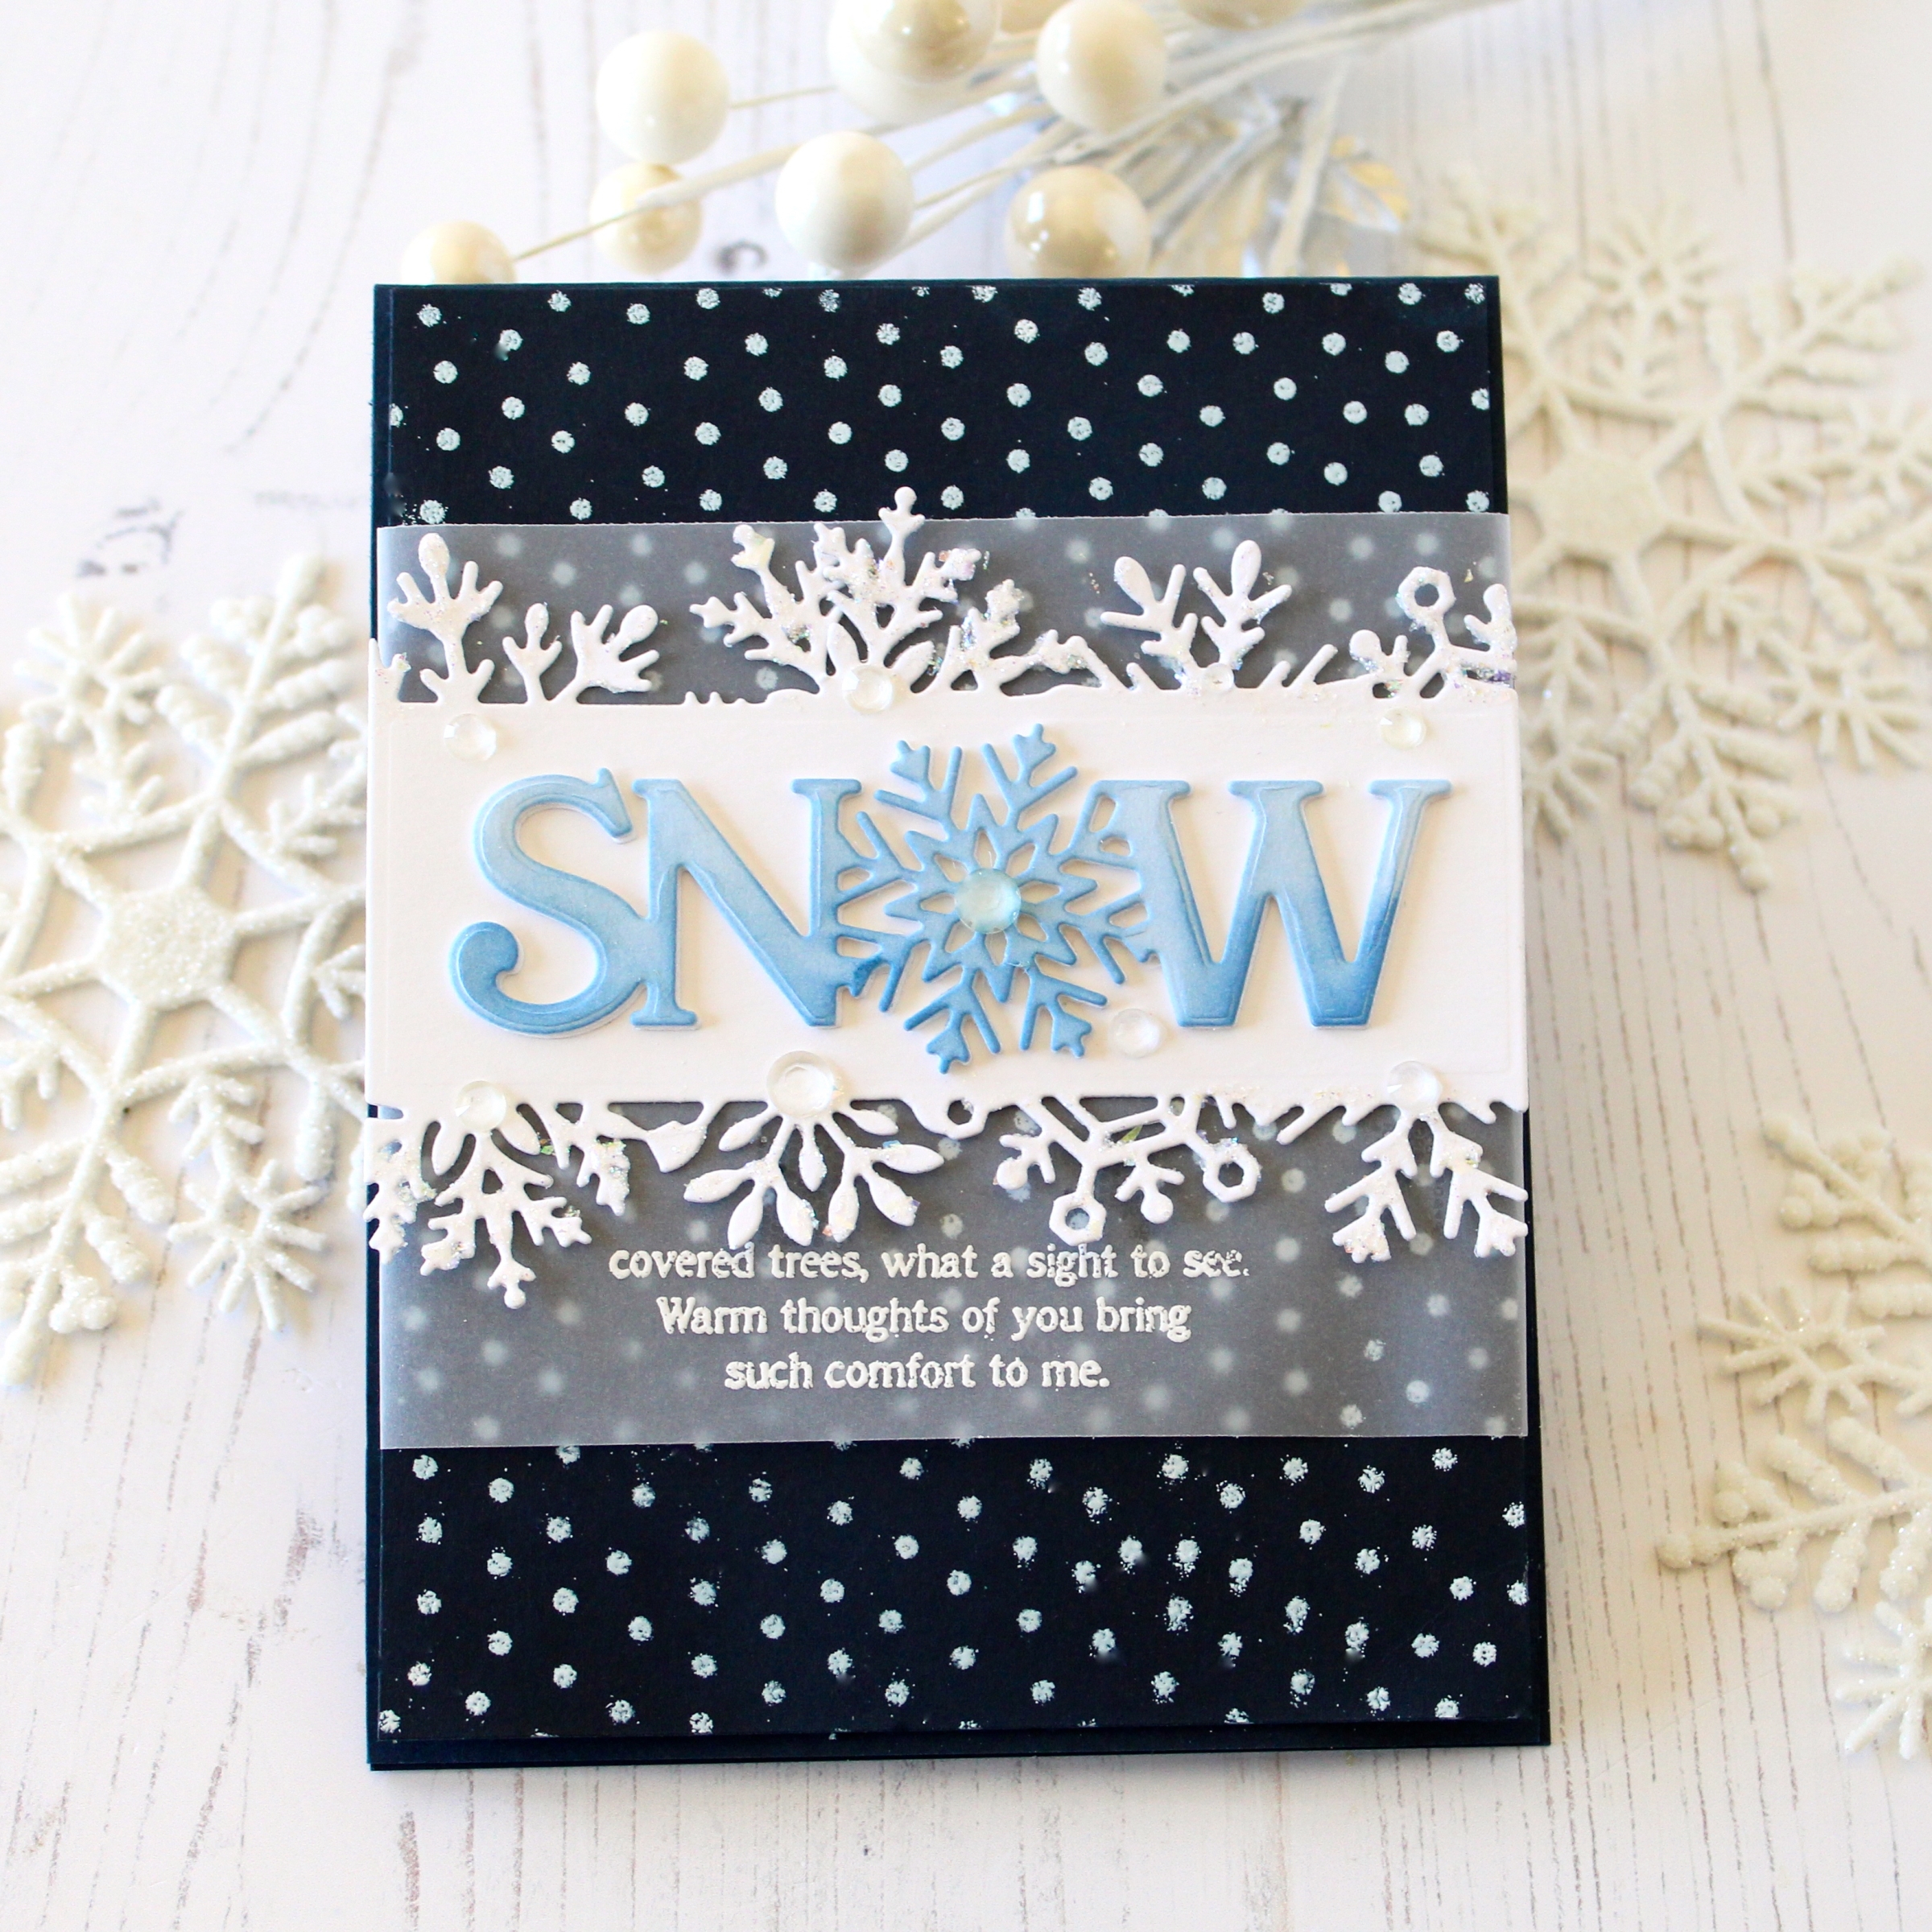
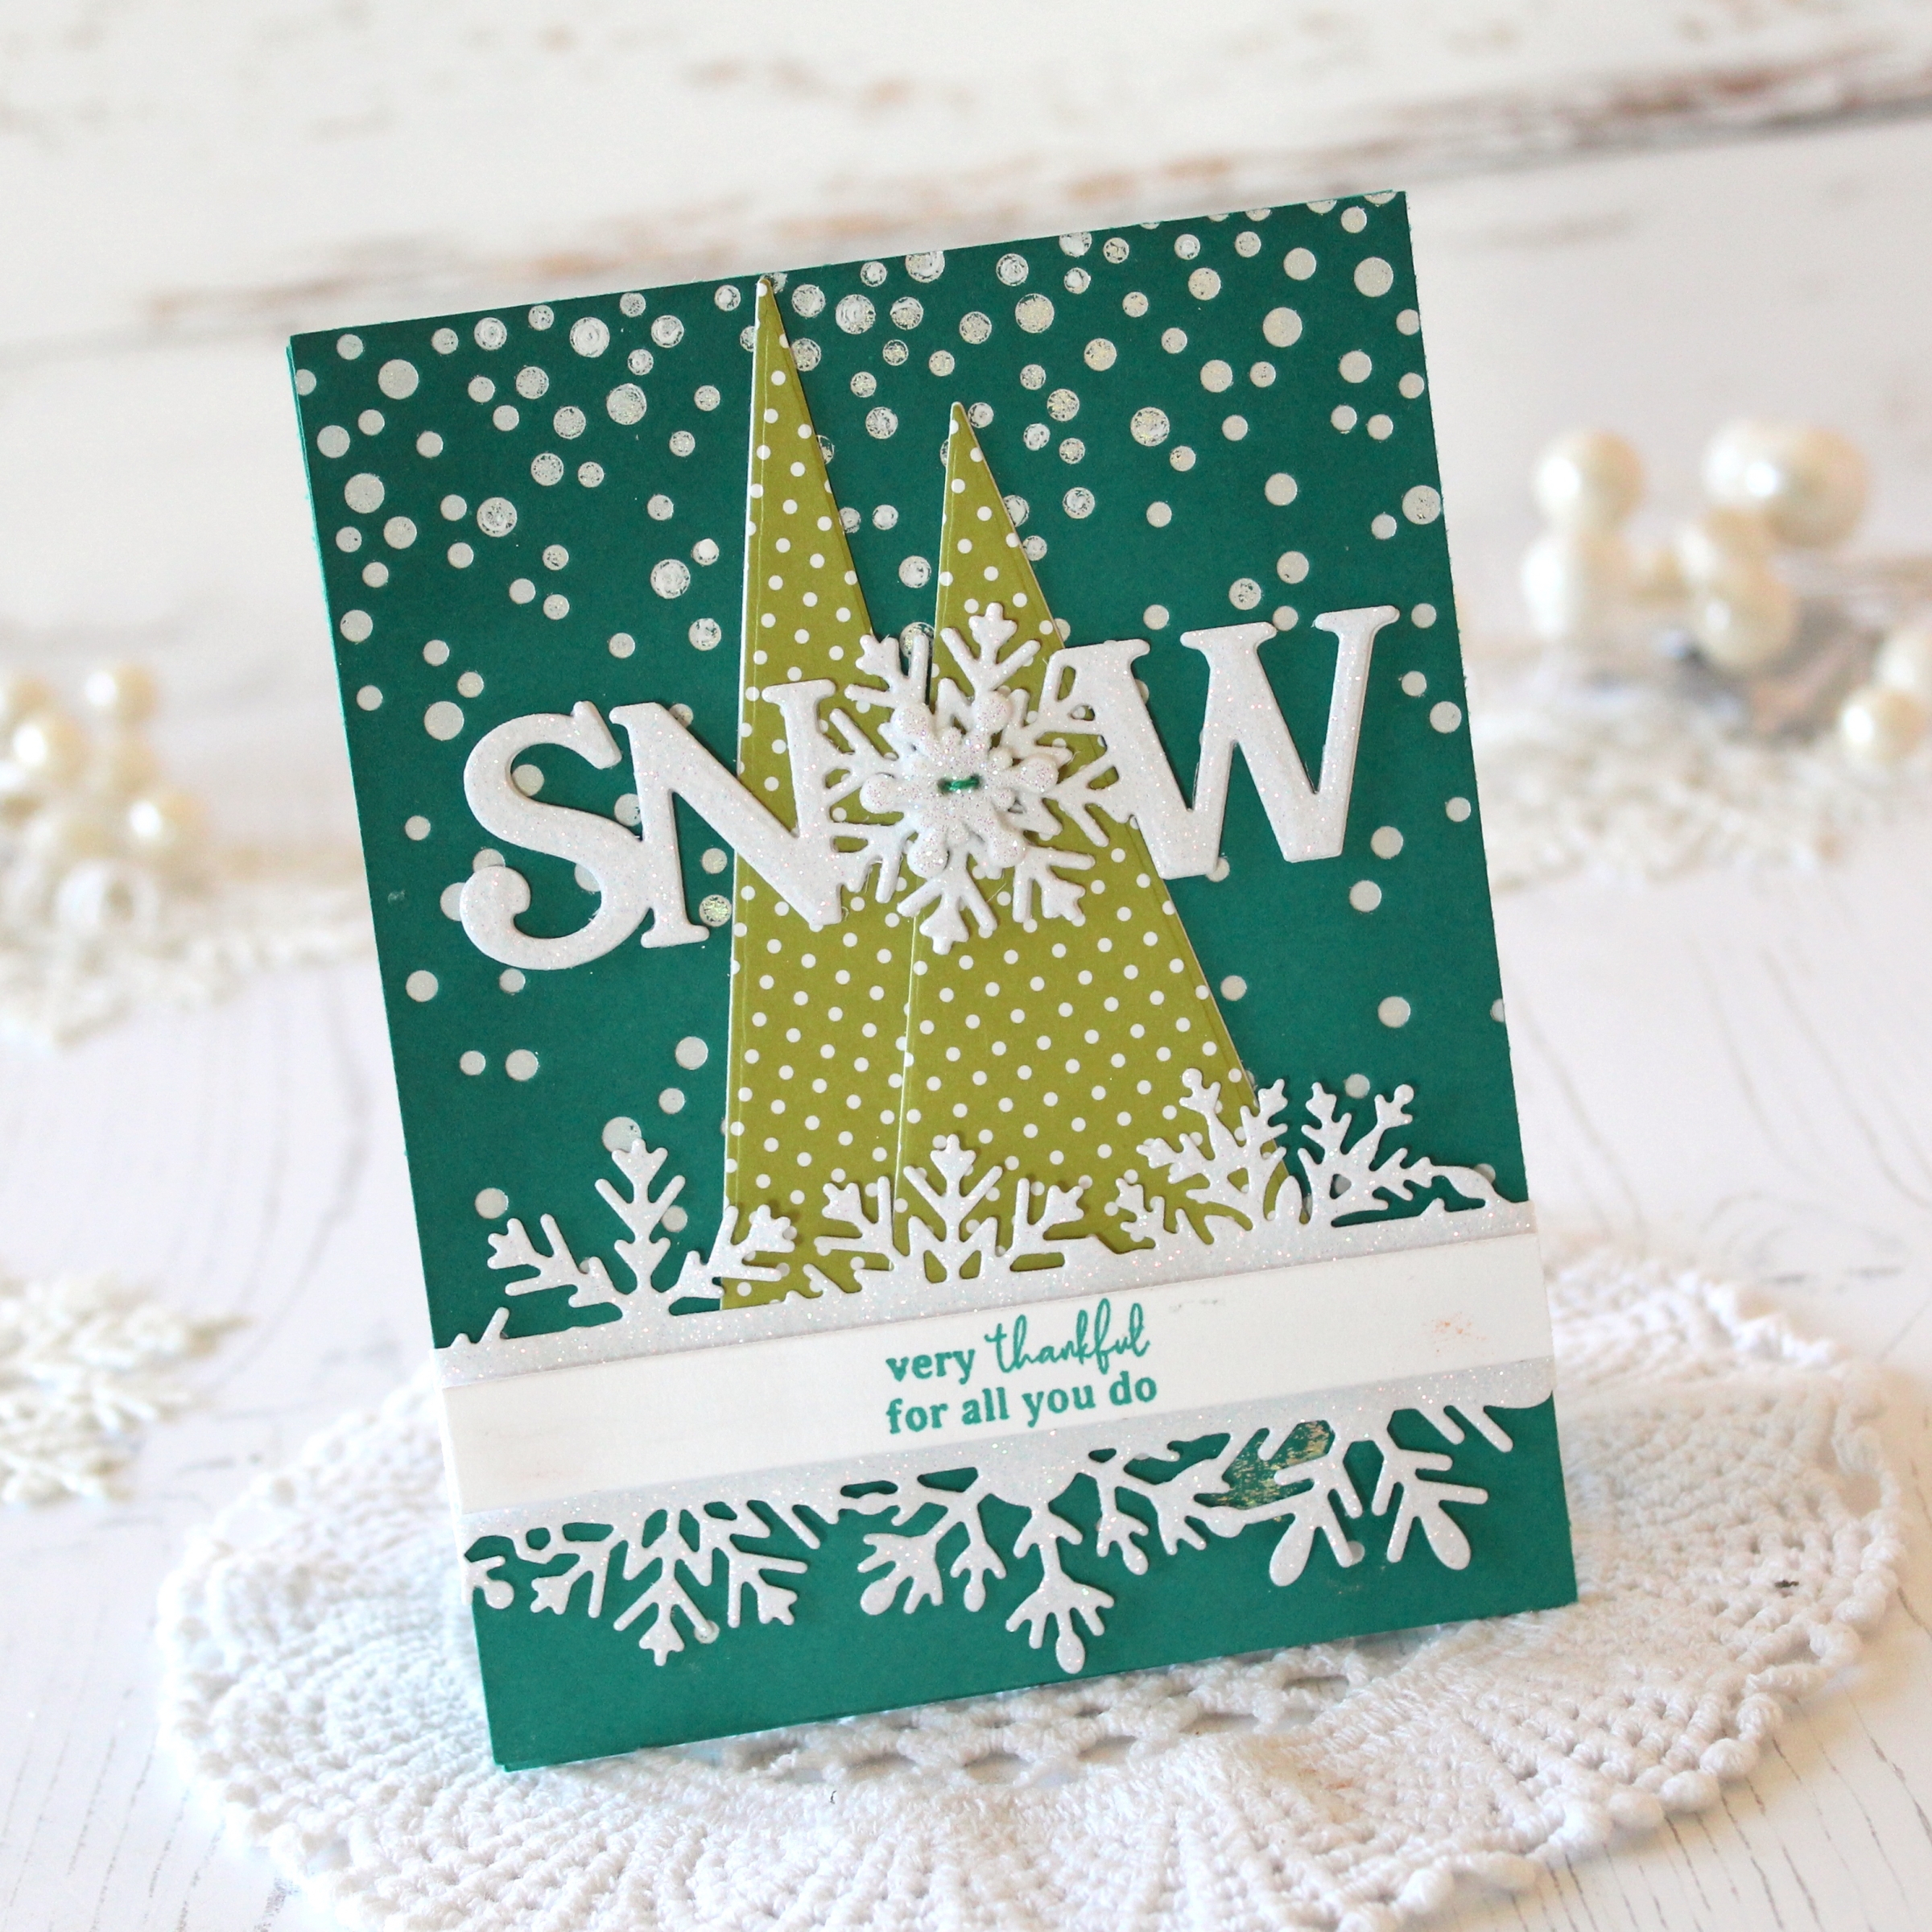
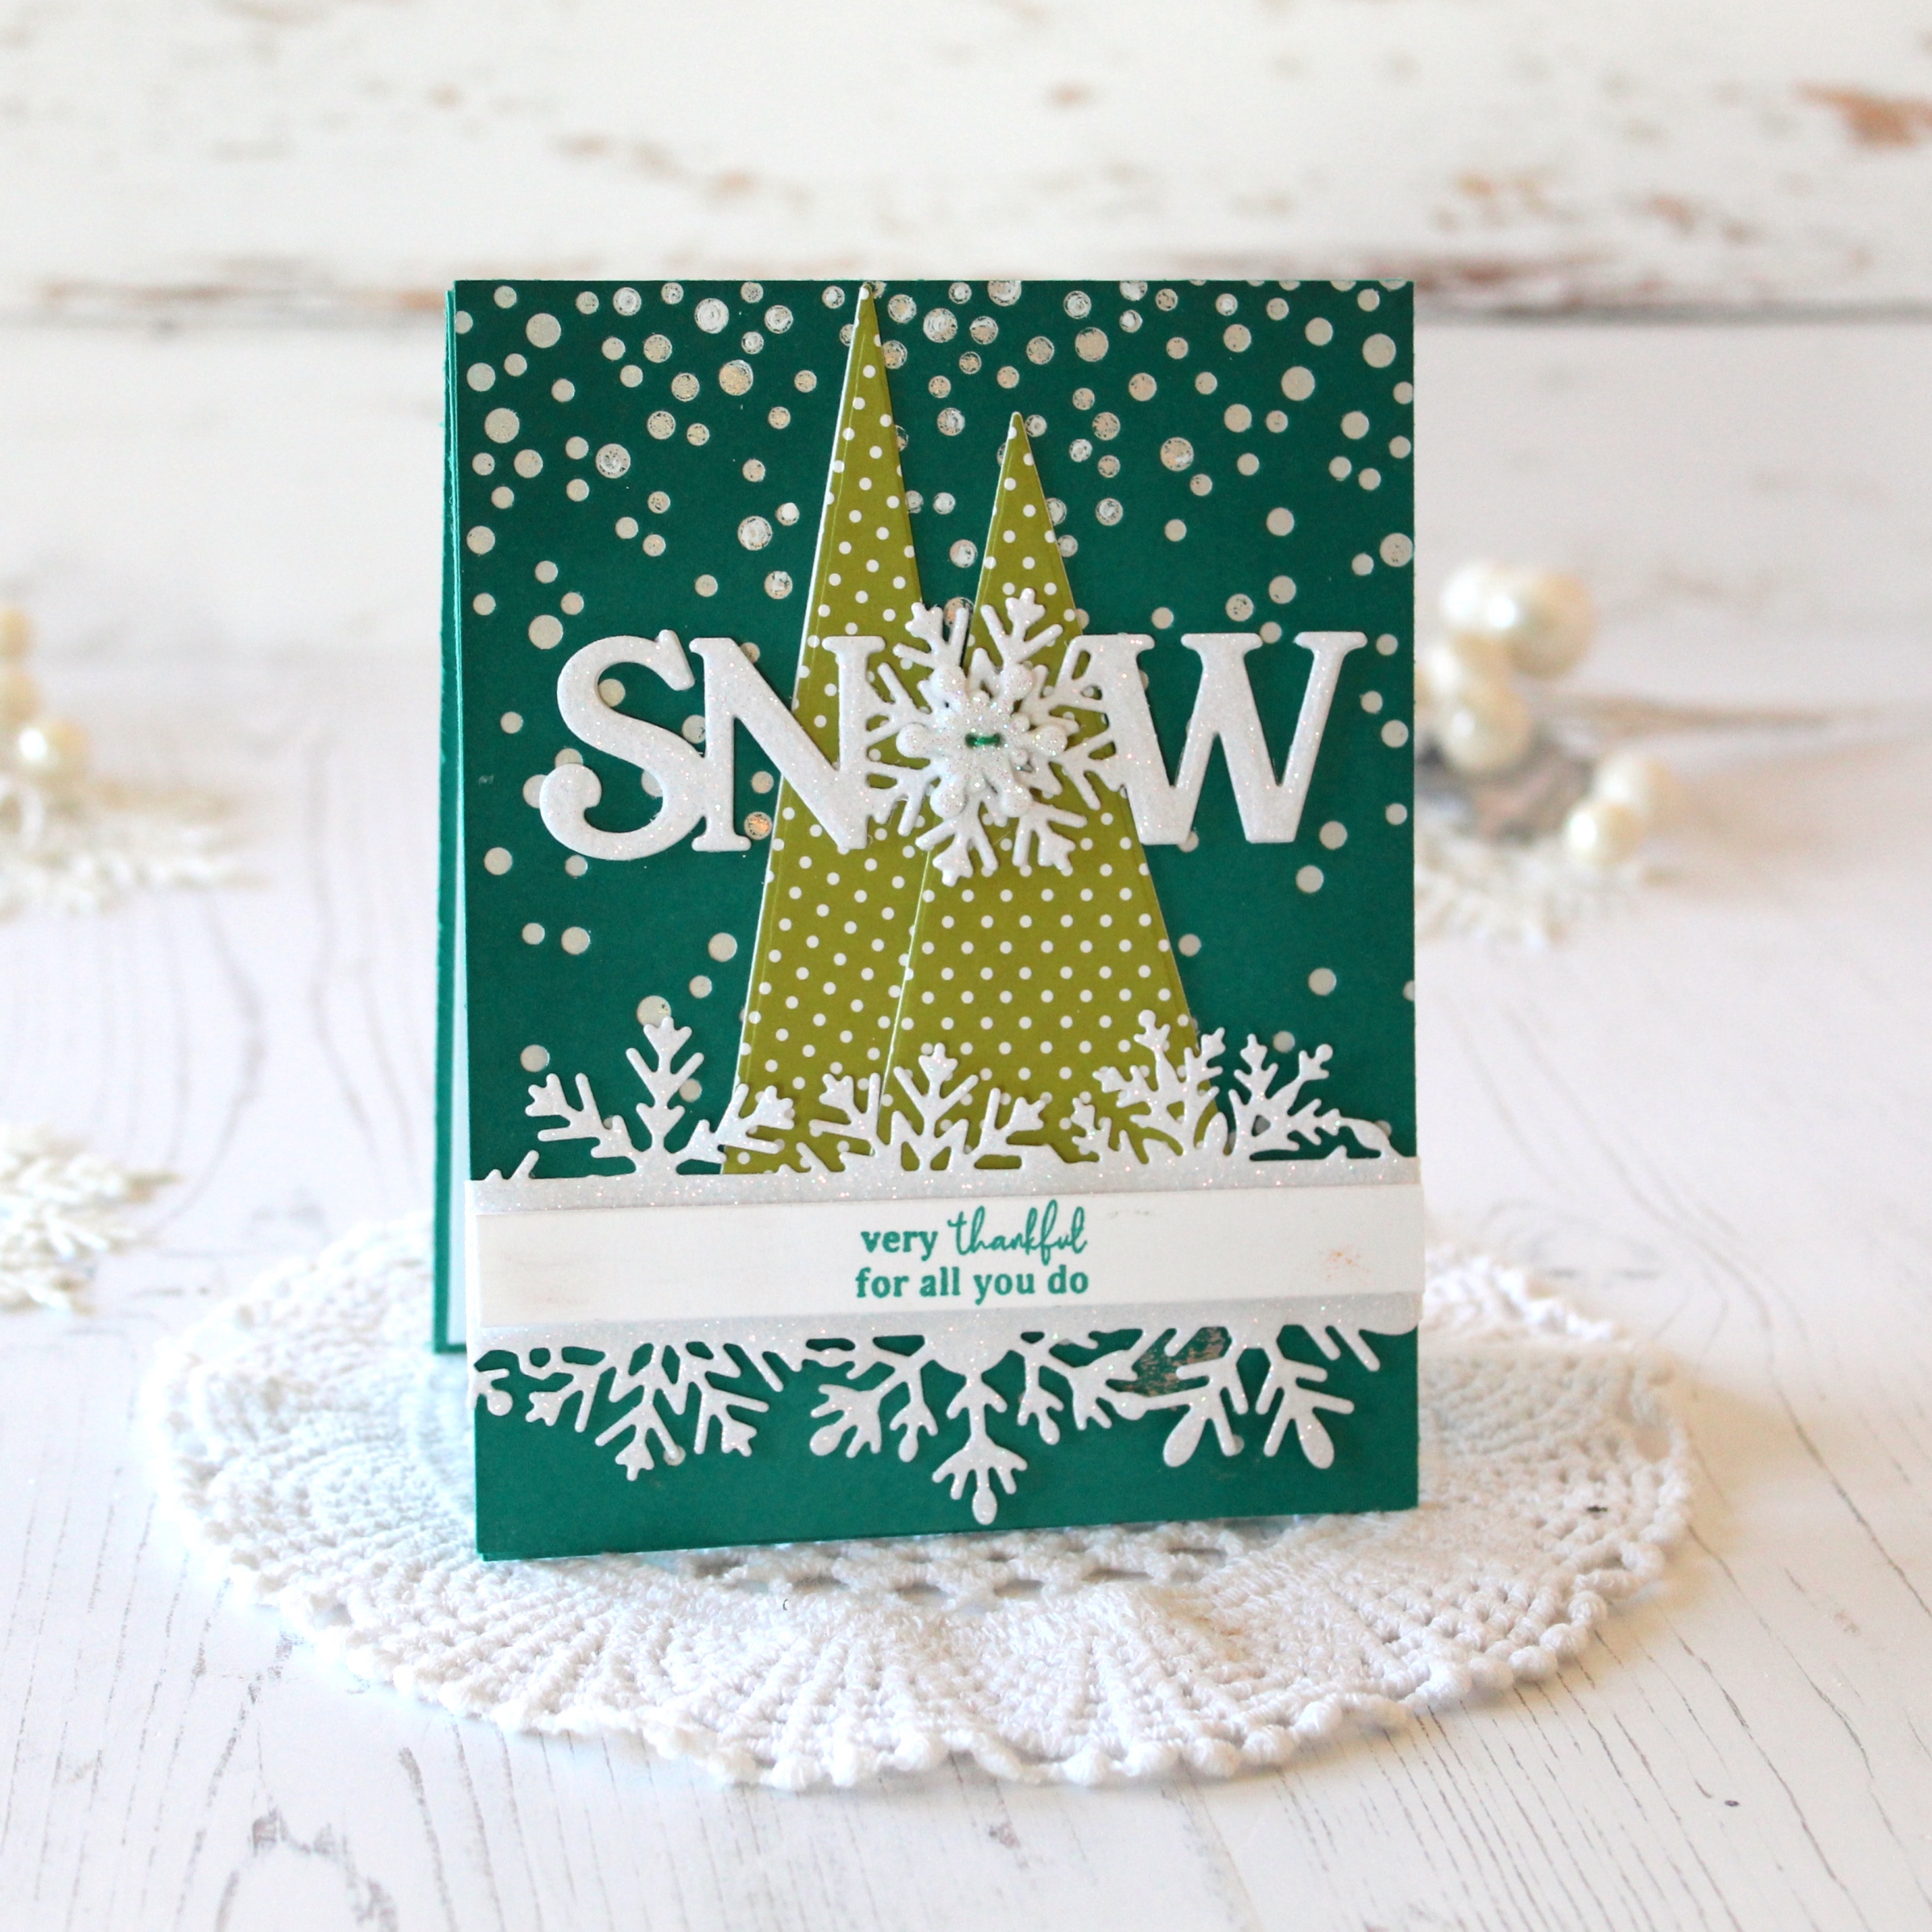
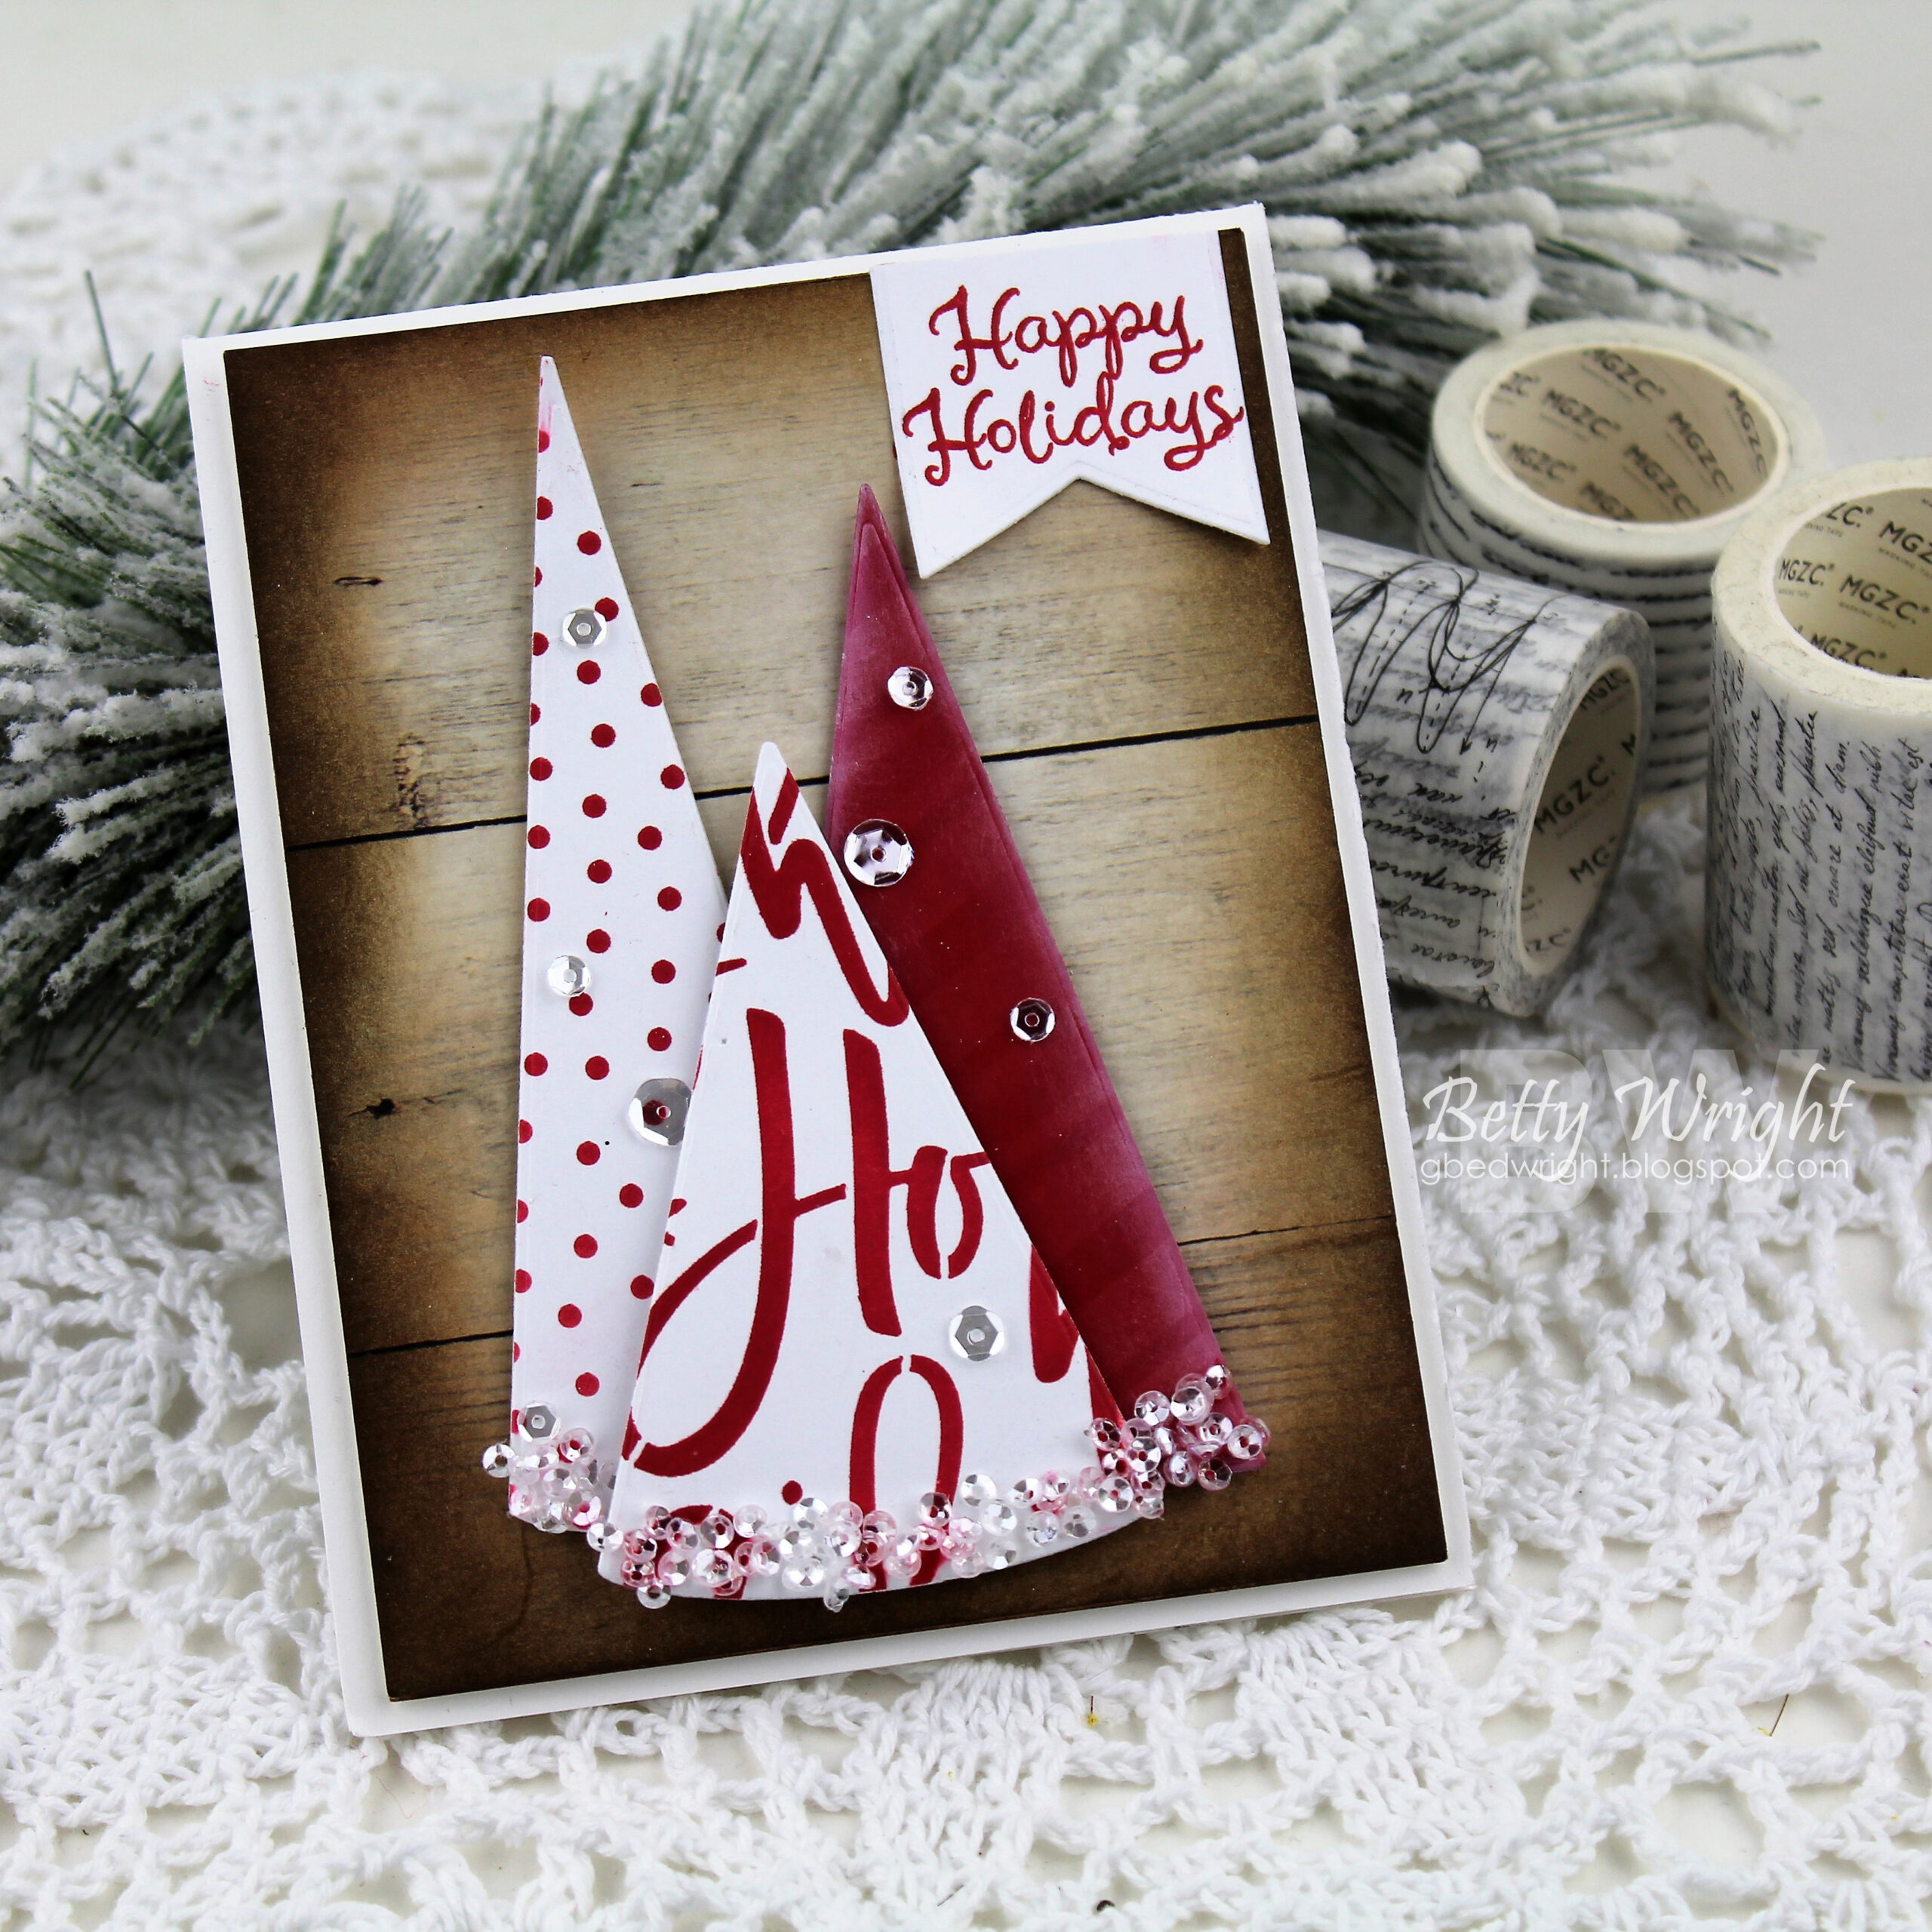
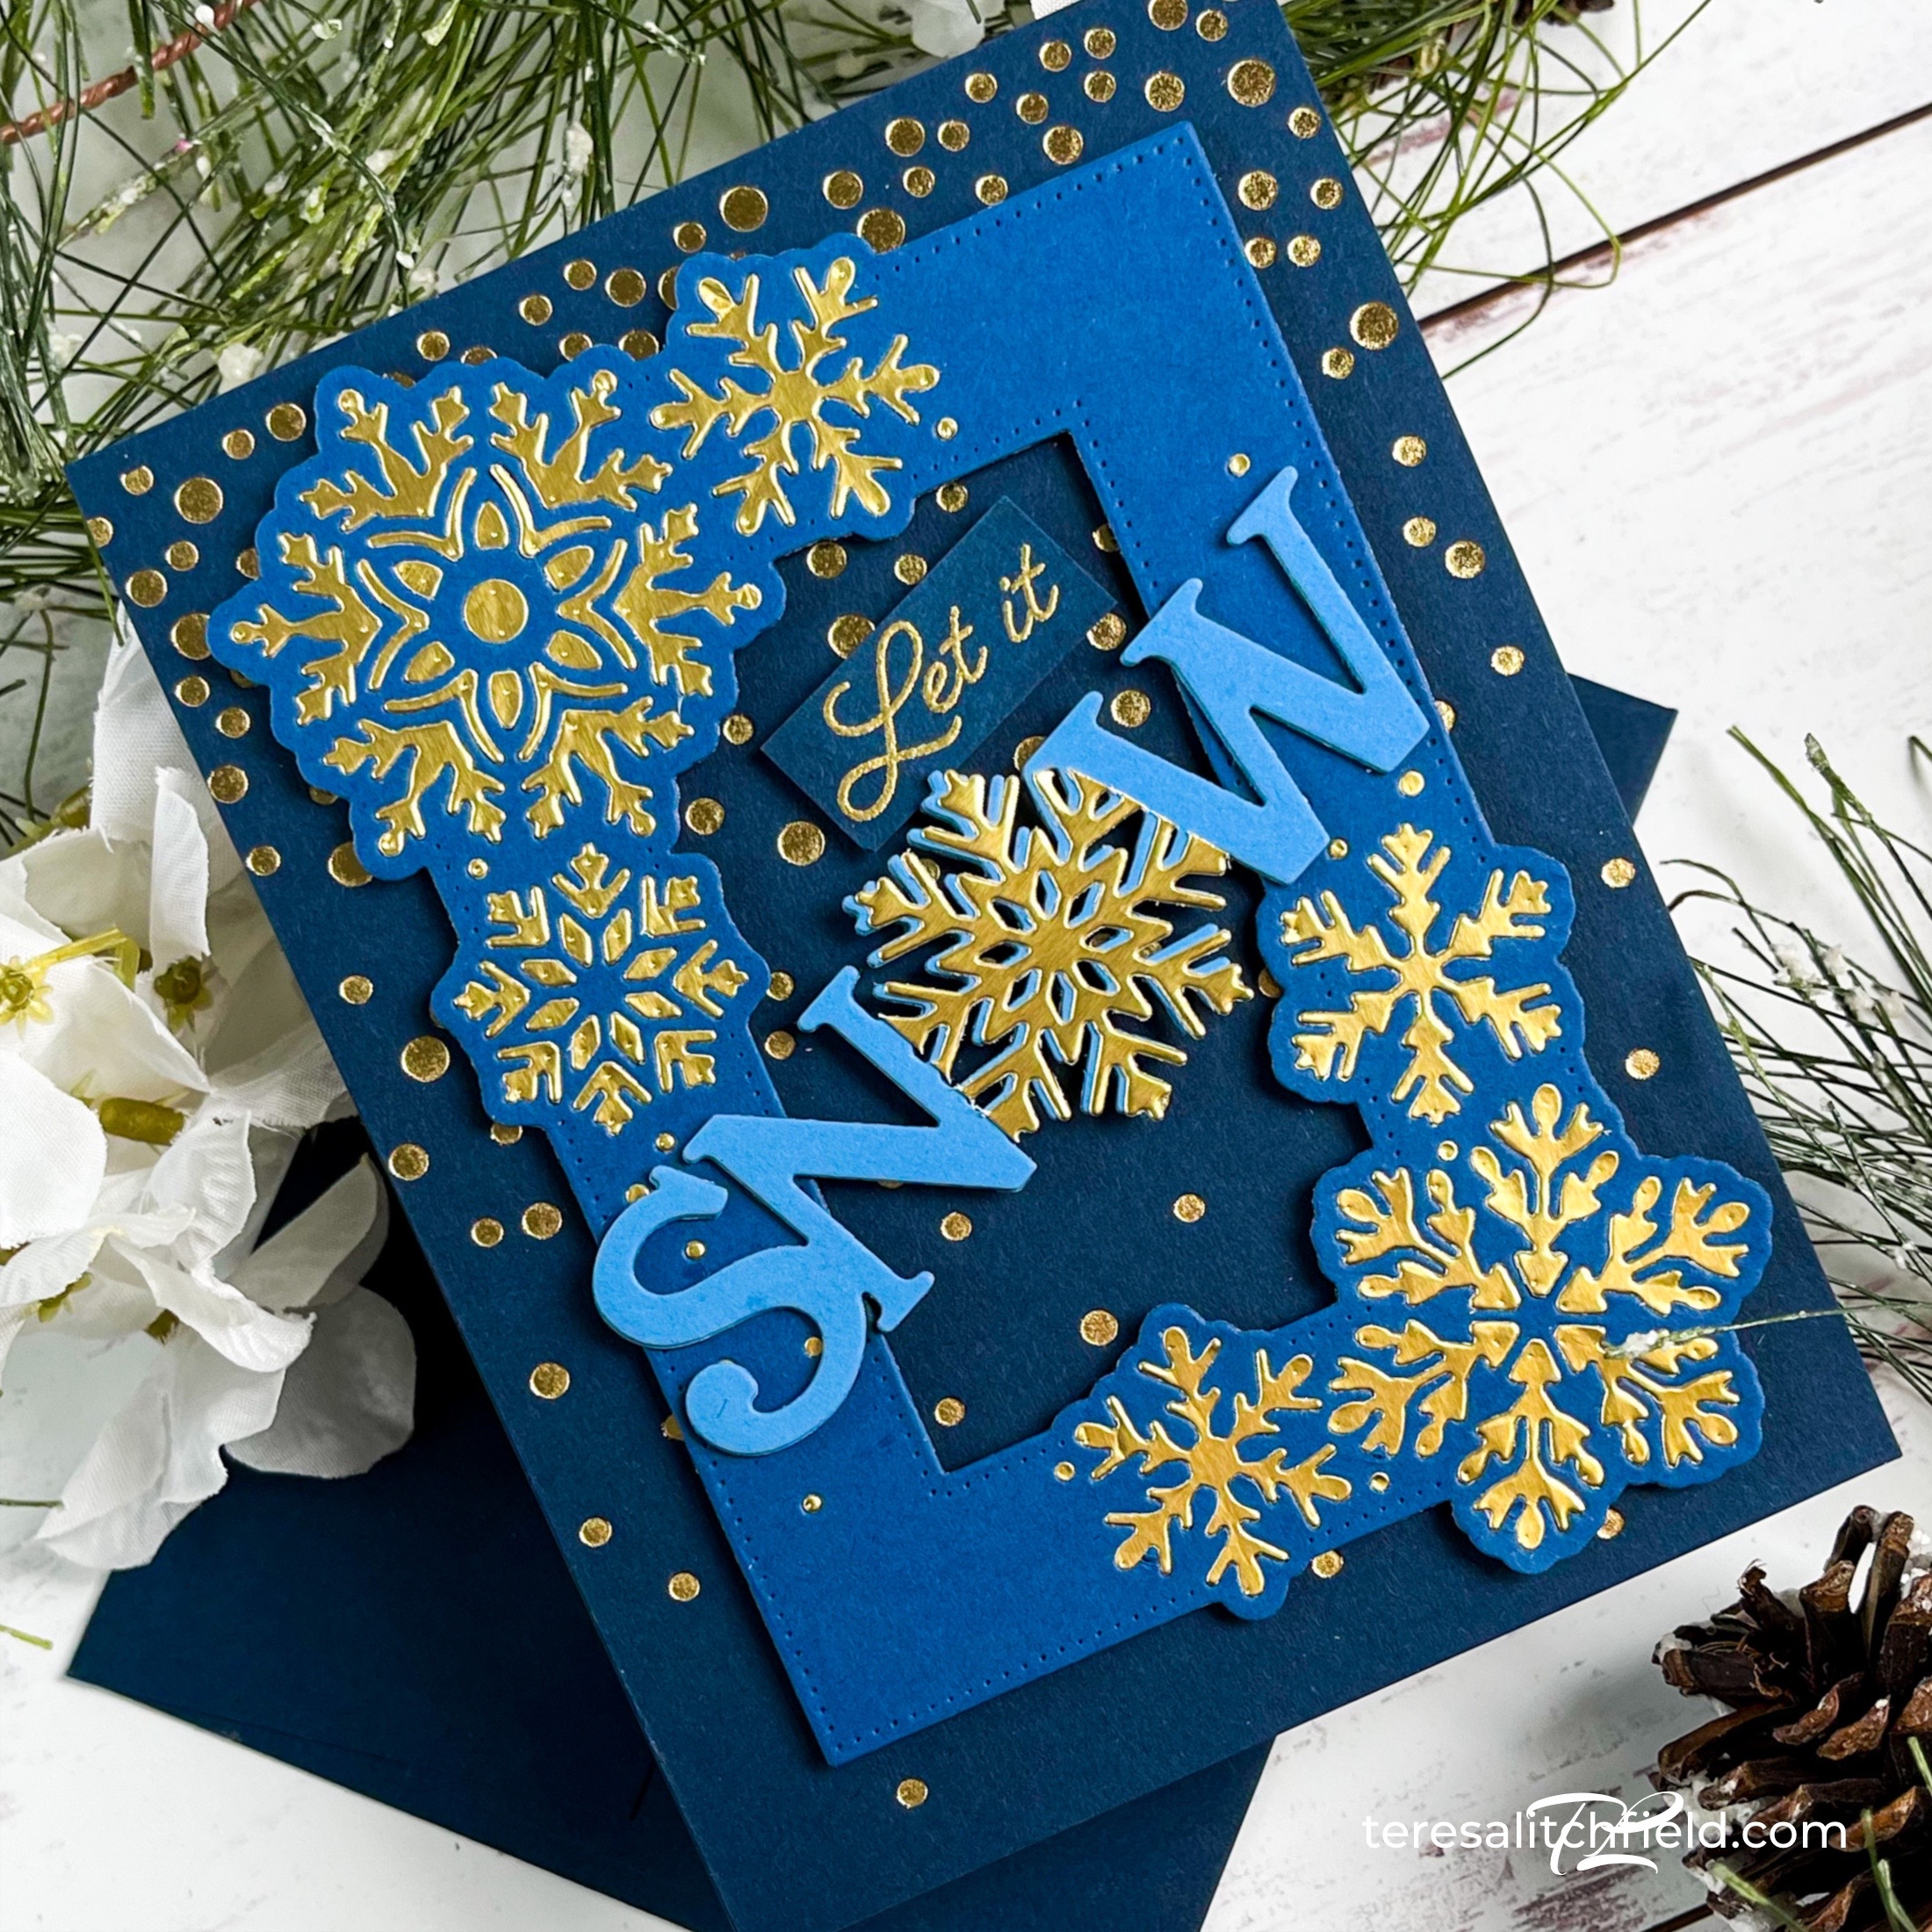
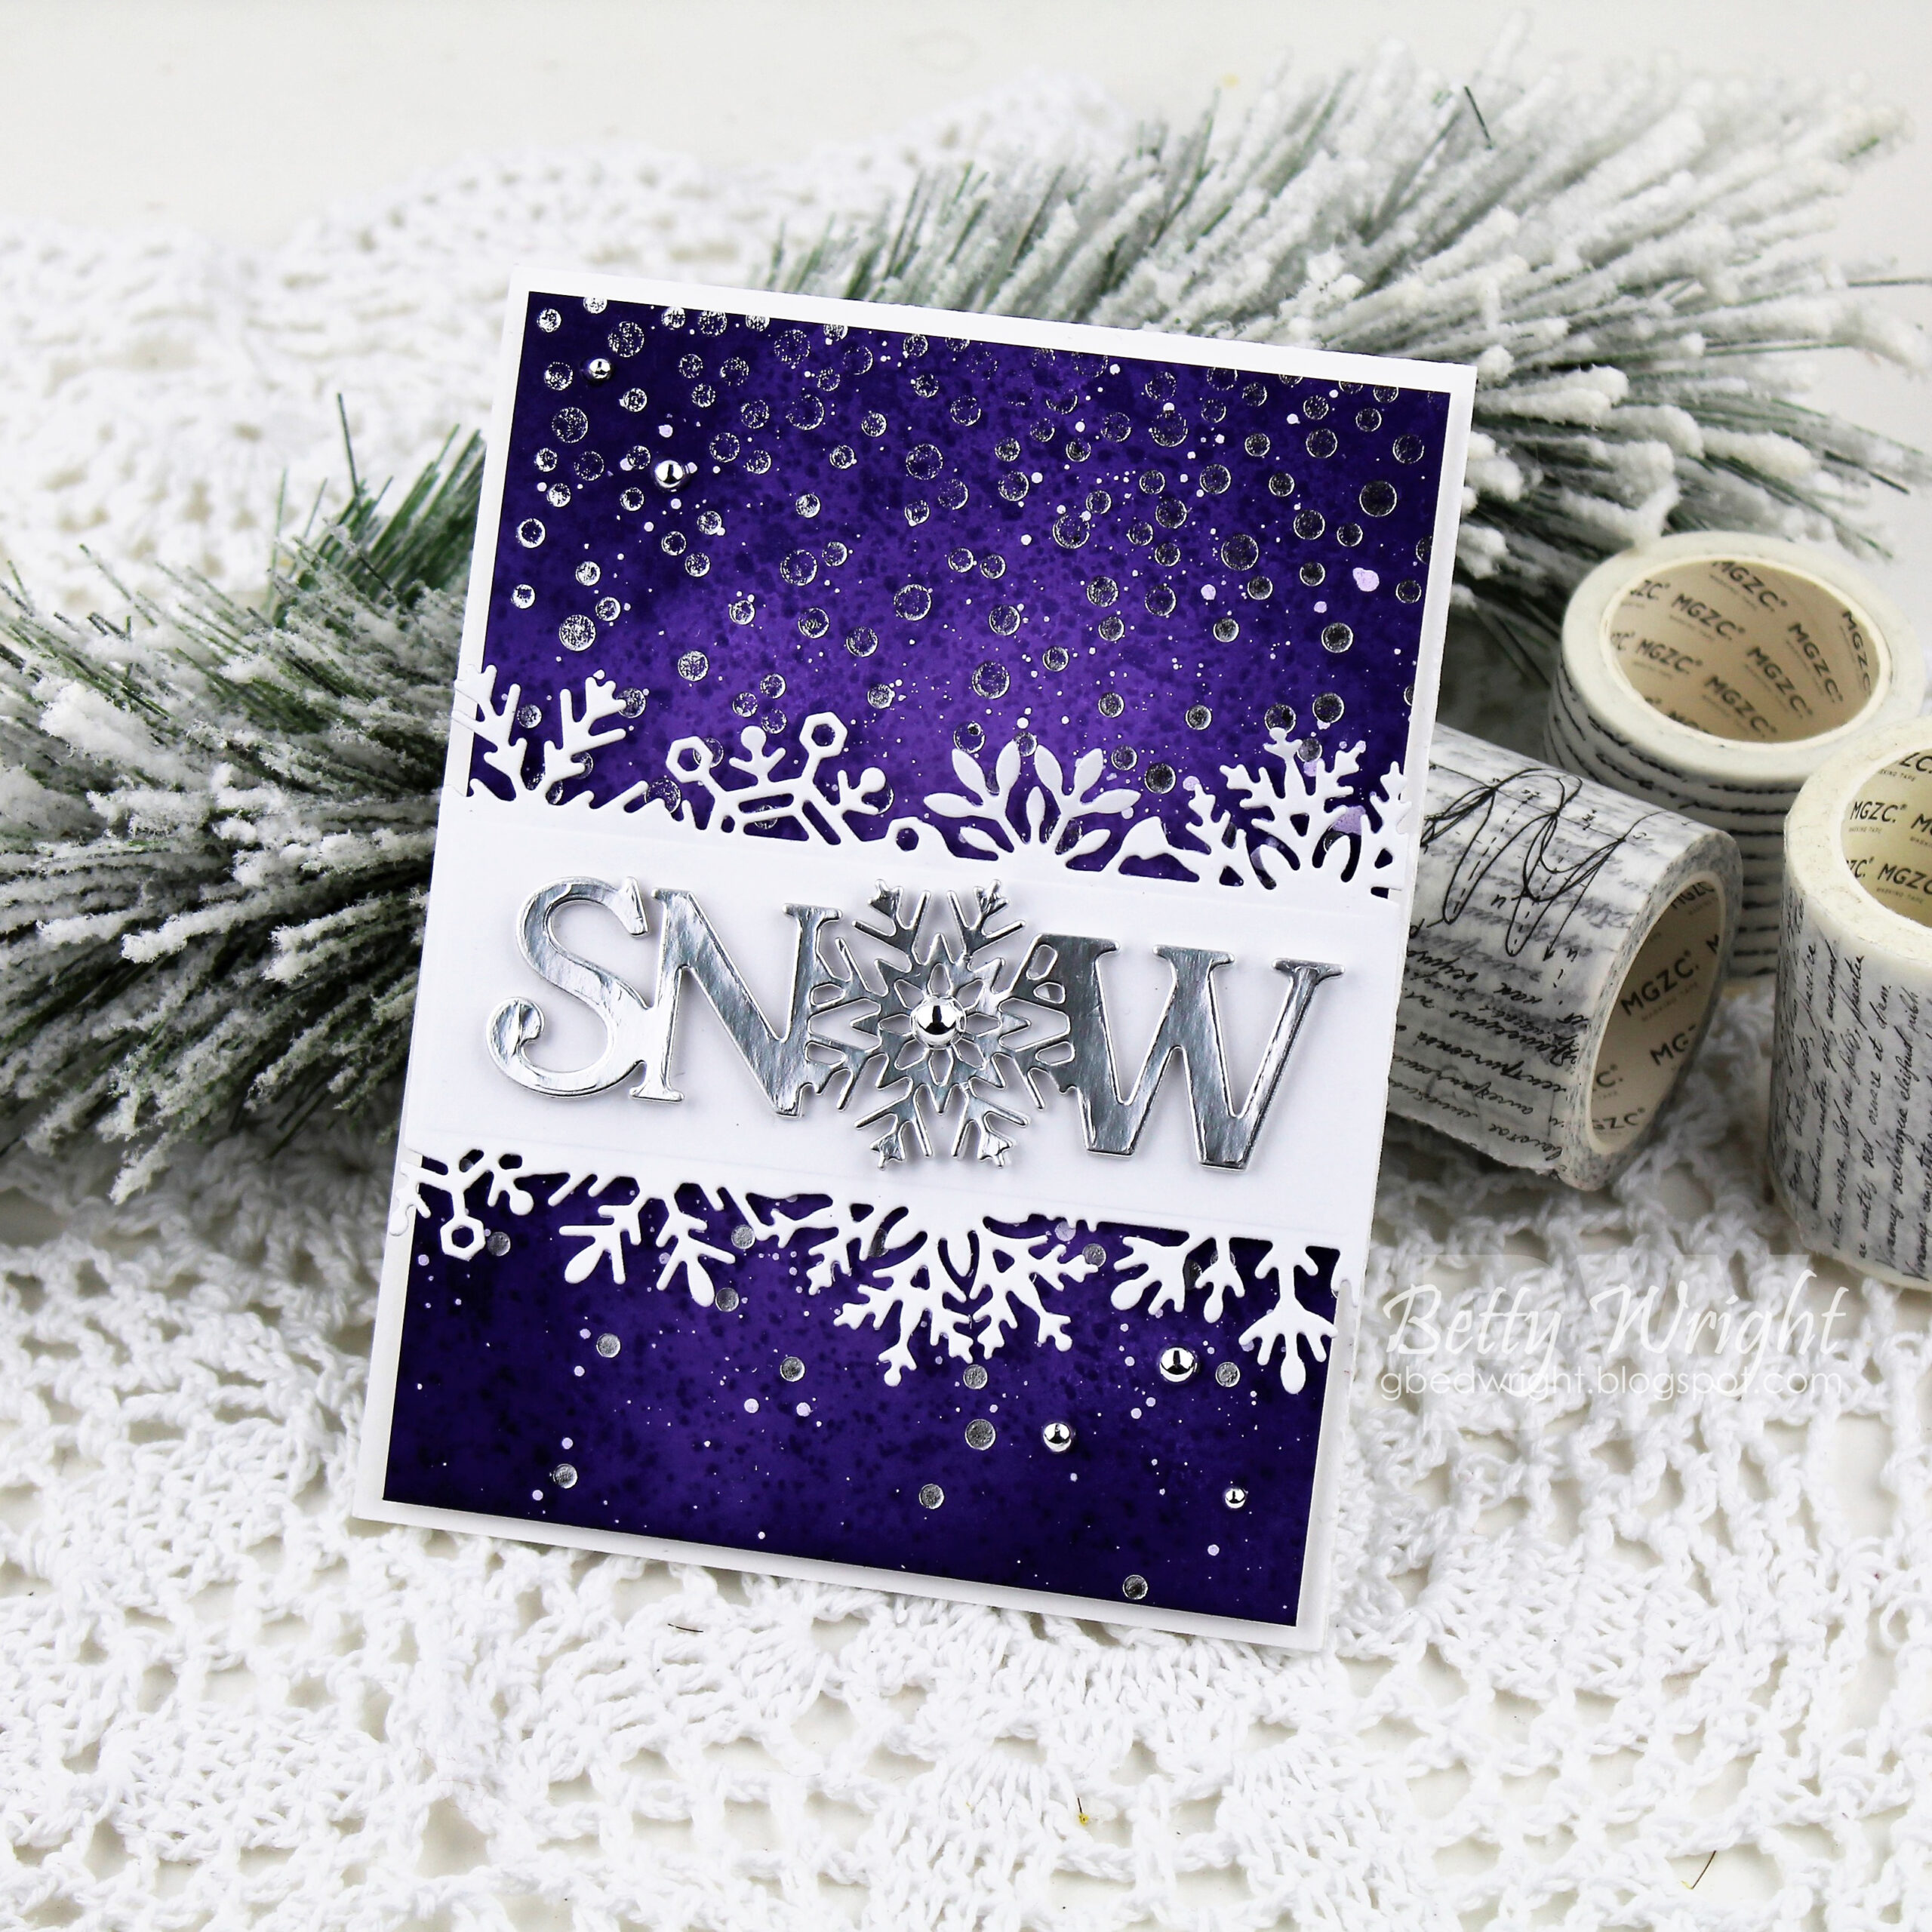
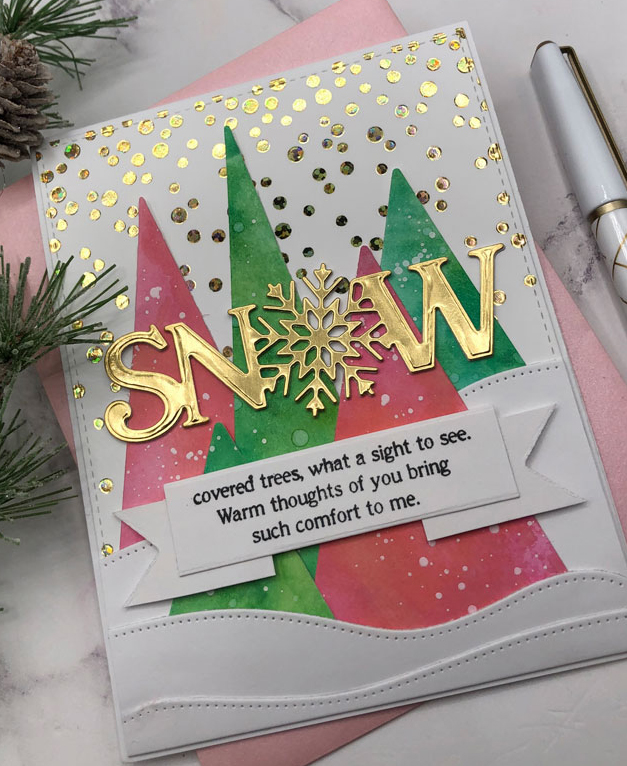
Our next grouping of products today focuses on all things snow! Introducing the new Larger Than Life: Snow die and Larger Than Live: Snow Sentiments stamps.
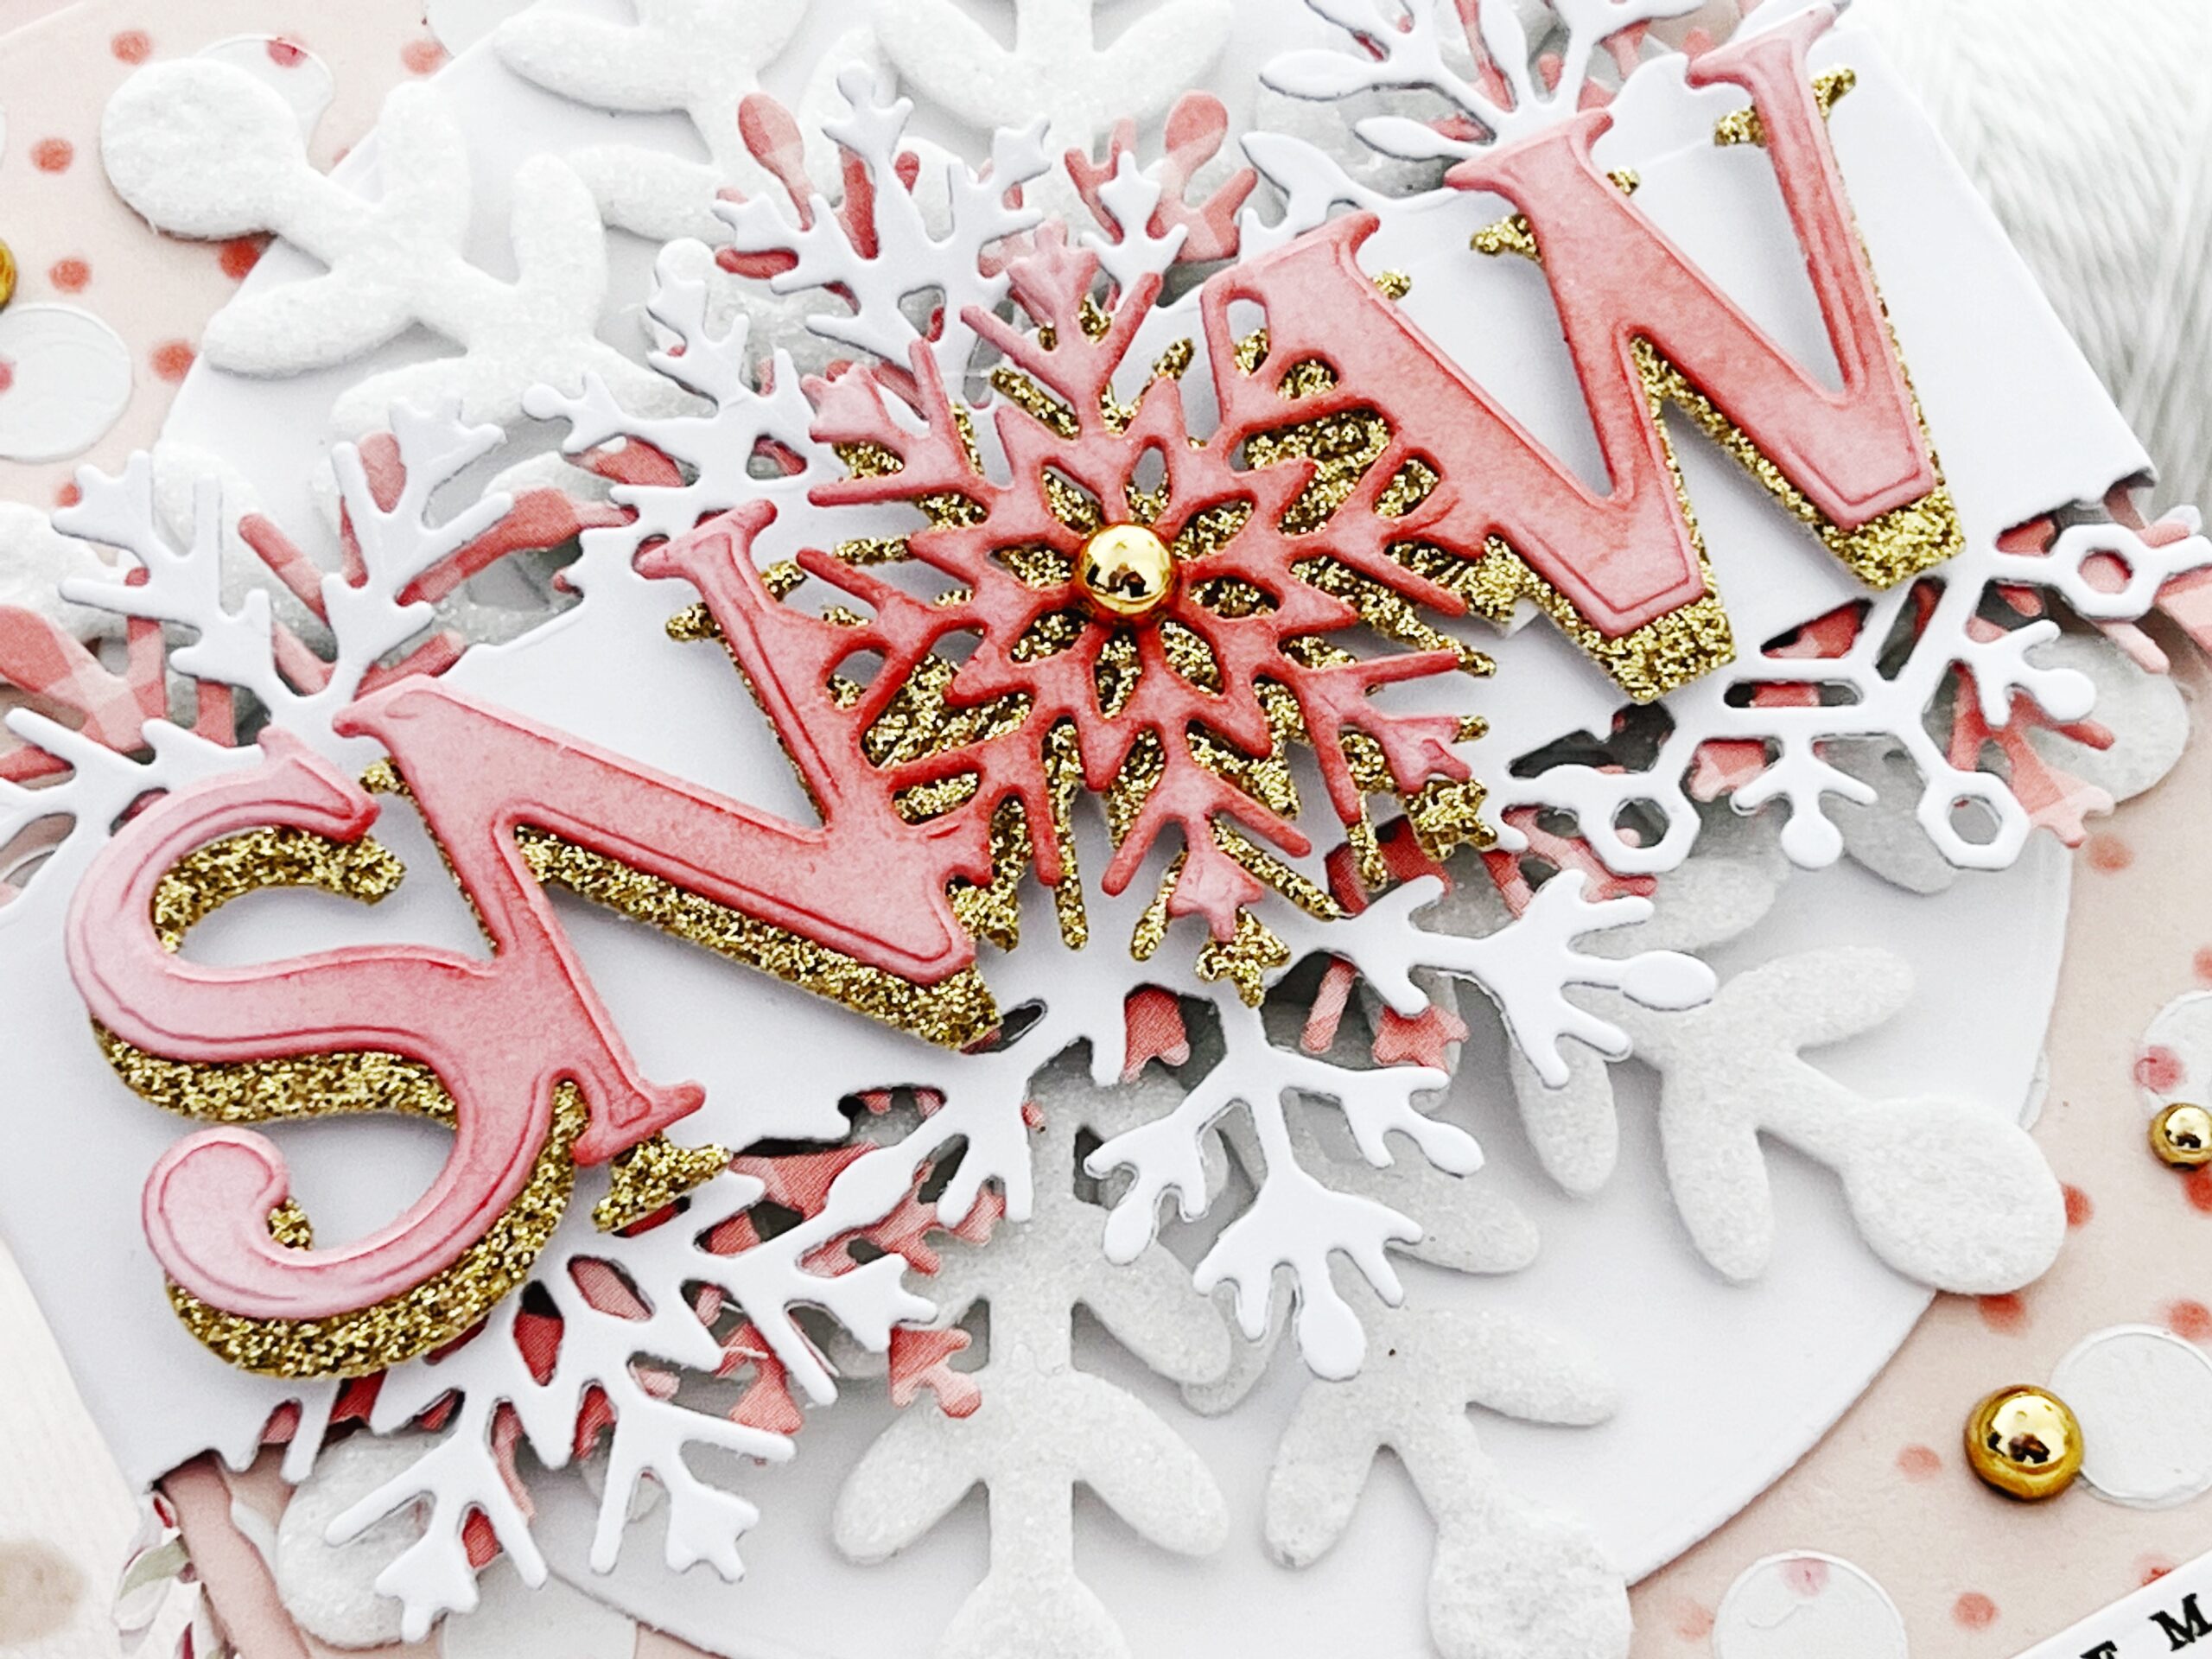
I’ve used the gorgeous, new Larger Than Life: Snow die over the beautiful, new Snowflake Banners dies. These new banner dies come in three different sizes and widths so you can use them horizontally or vertically, layer one on top of the other, such as I’ve done here, and other creative ways as well. I die cut mine from white cardstock for the top layer and pink patterned paper for the bottom layer. I love how bits of pink show from beneath the top layer.
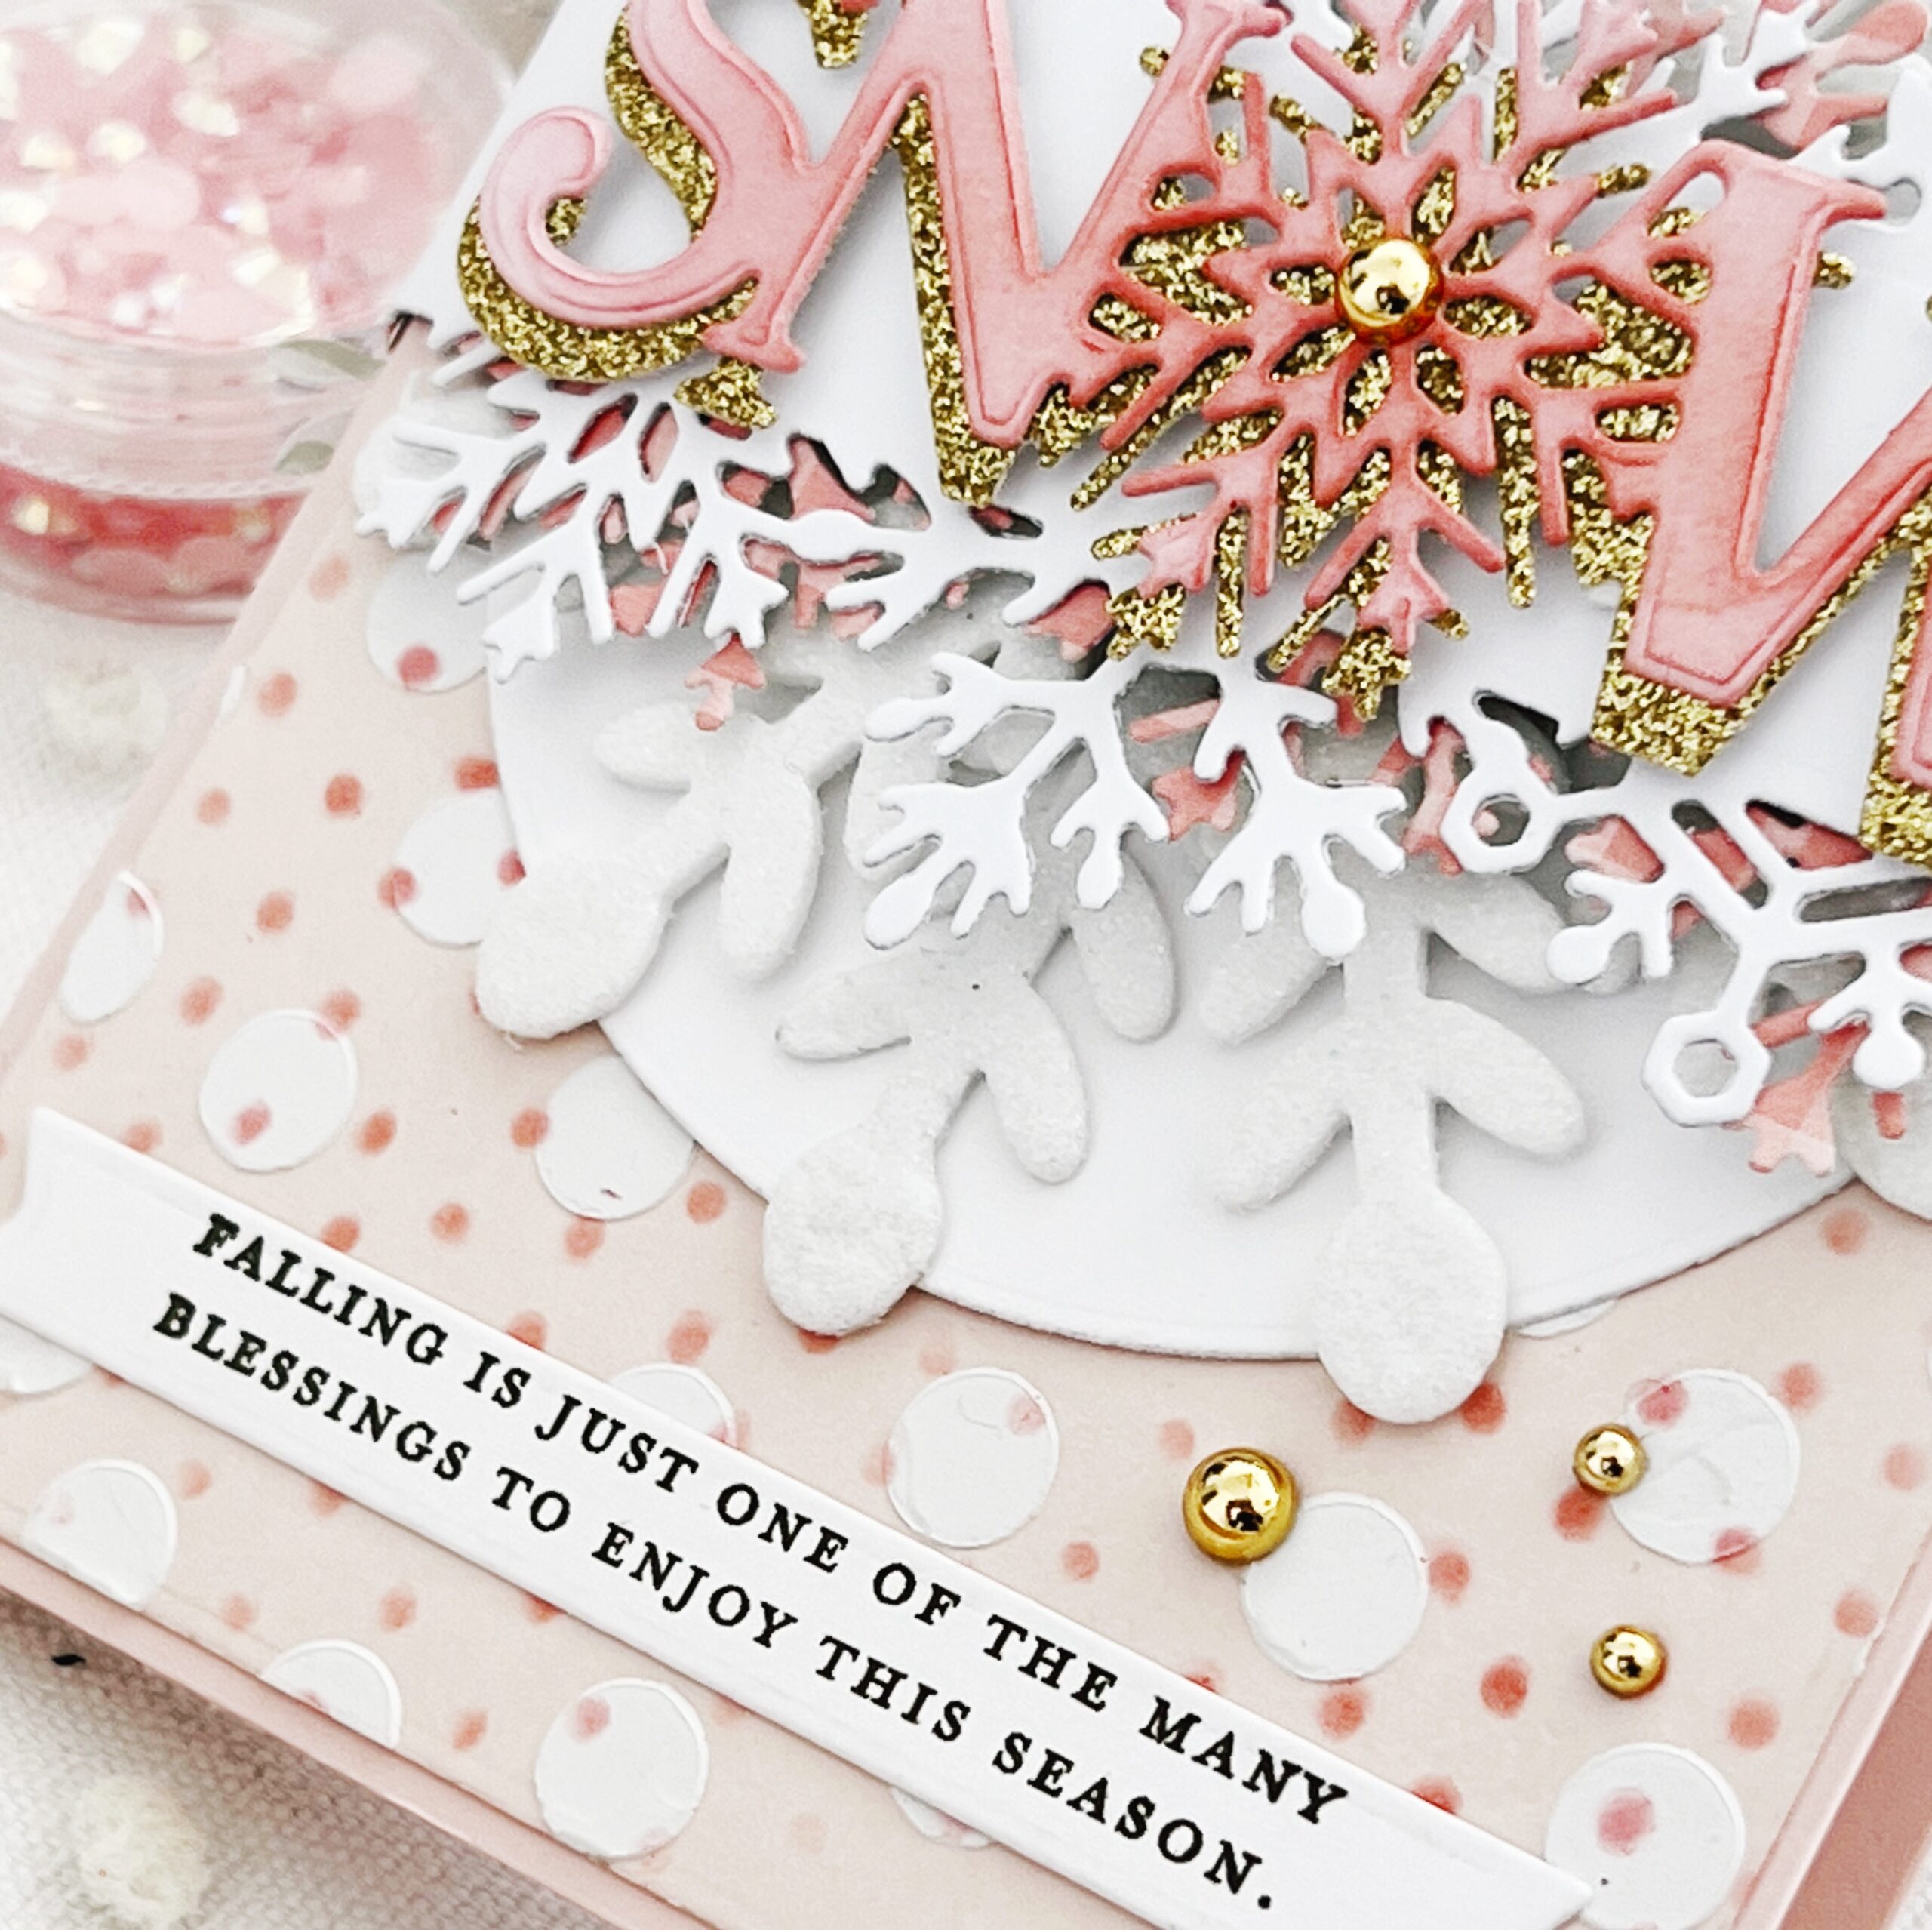
I die cut my Larger Than Life: Snow die from gold glittered cardstock for the bottom layer, and pink cardstock for the top layer. I added a bit of ink blending over my top layer to create a fun shaded effect. Across the bottom of my card I have used the new Larger Than Life Snow Sentiments stamp set, stamped on a die cut banner. To create my layered speckled background, I used the Playful Dots Stencils, using the larger dots with white matte paste, and then once dry, applying the tinier dots using ink in a coordinating color. Such a fun card to create and such gorgeous products to create it with.
Supplies Used:
STAMPS: Larger Than Life: Snow Sentiments
INK: Melon Berry, Olive Twist
PAPER: Stamper’s Select White, Sweet Blush
DIES: Larger Than Life: Snow, Snowflake Banners, Pattern Party, Snowfall Style 2, Wine Bottle Tag #2
OTHER: Playful Dots Stencils, gold glitter cardstock, white glitter foam, matte paste, adhesive gems


TIPS:
- Add Stickles to the edges of the snowflakes to add some sparkle.
- Use Versamark Ink with the stencil and emboss with white embossing powder
- Blend inks in Spring Rain and Blueberry Sky to add color to the word die cut.


- Use a glittered cardstock for the snowflakes
- Use a light foil on a dark cardstock for a striking look
- Die cut the word SNOW three times and layer the die cuts one on top of each other to add more depth.
We hope you have enjoyed all the beautiful projects that we have shared with you today! We would love to hear what you think of everything we have introduced! Please leave a comment on this post to tell us what you like the most and why, and you will be eligible to win big!

Leave a comment today and you will be automatically entered to win a $50 Papertrey Ink gift certificate! You have until 10am ET, November 14th to leave your comment and be eligible to win. Only one comment per person please. One randomly selected winner will be posted on the November Release Winners Page by 11 PM ET on November 17th.


Leave a Reply