
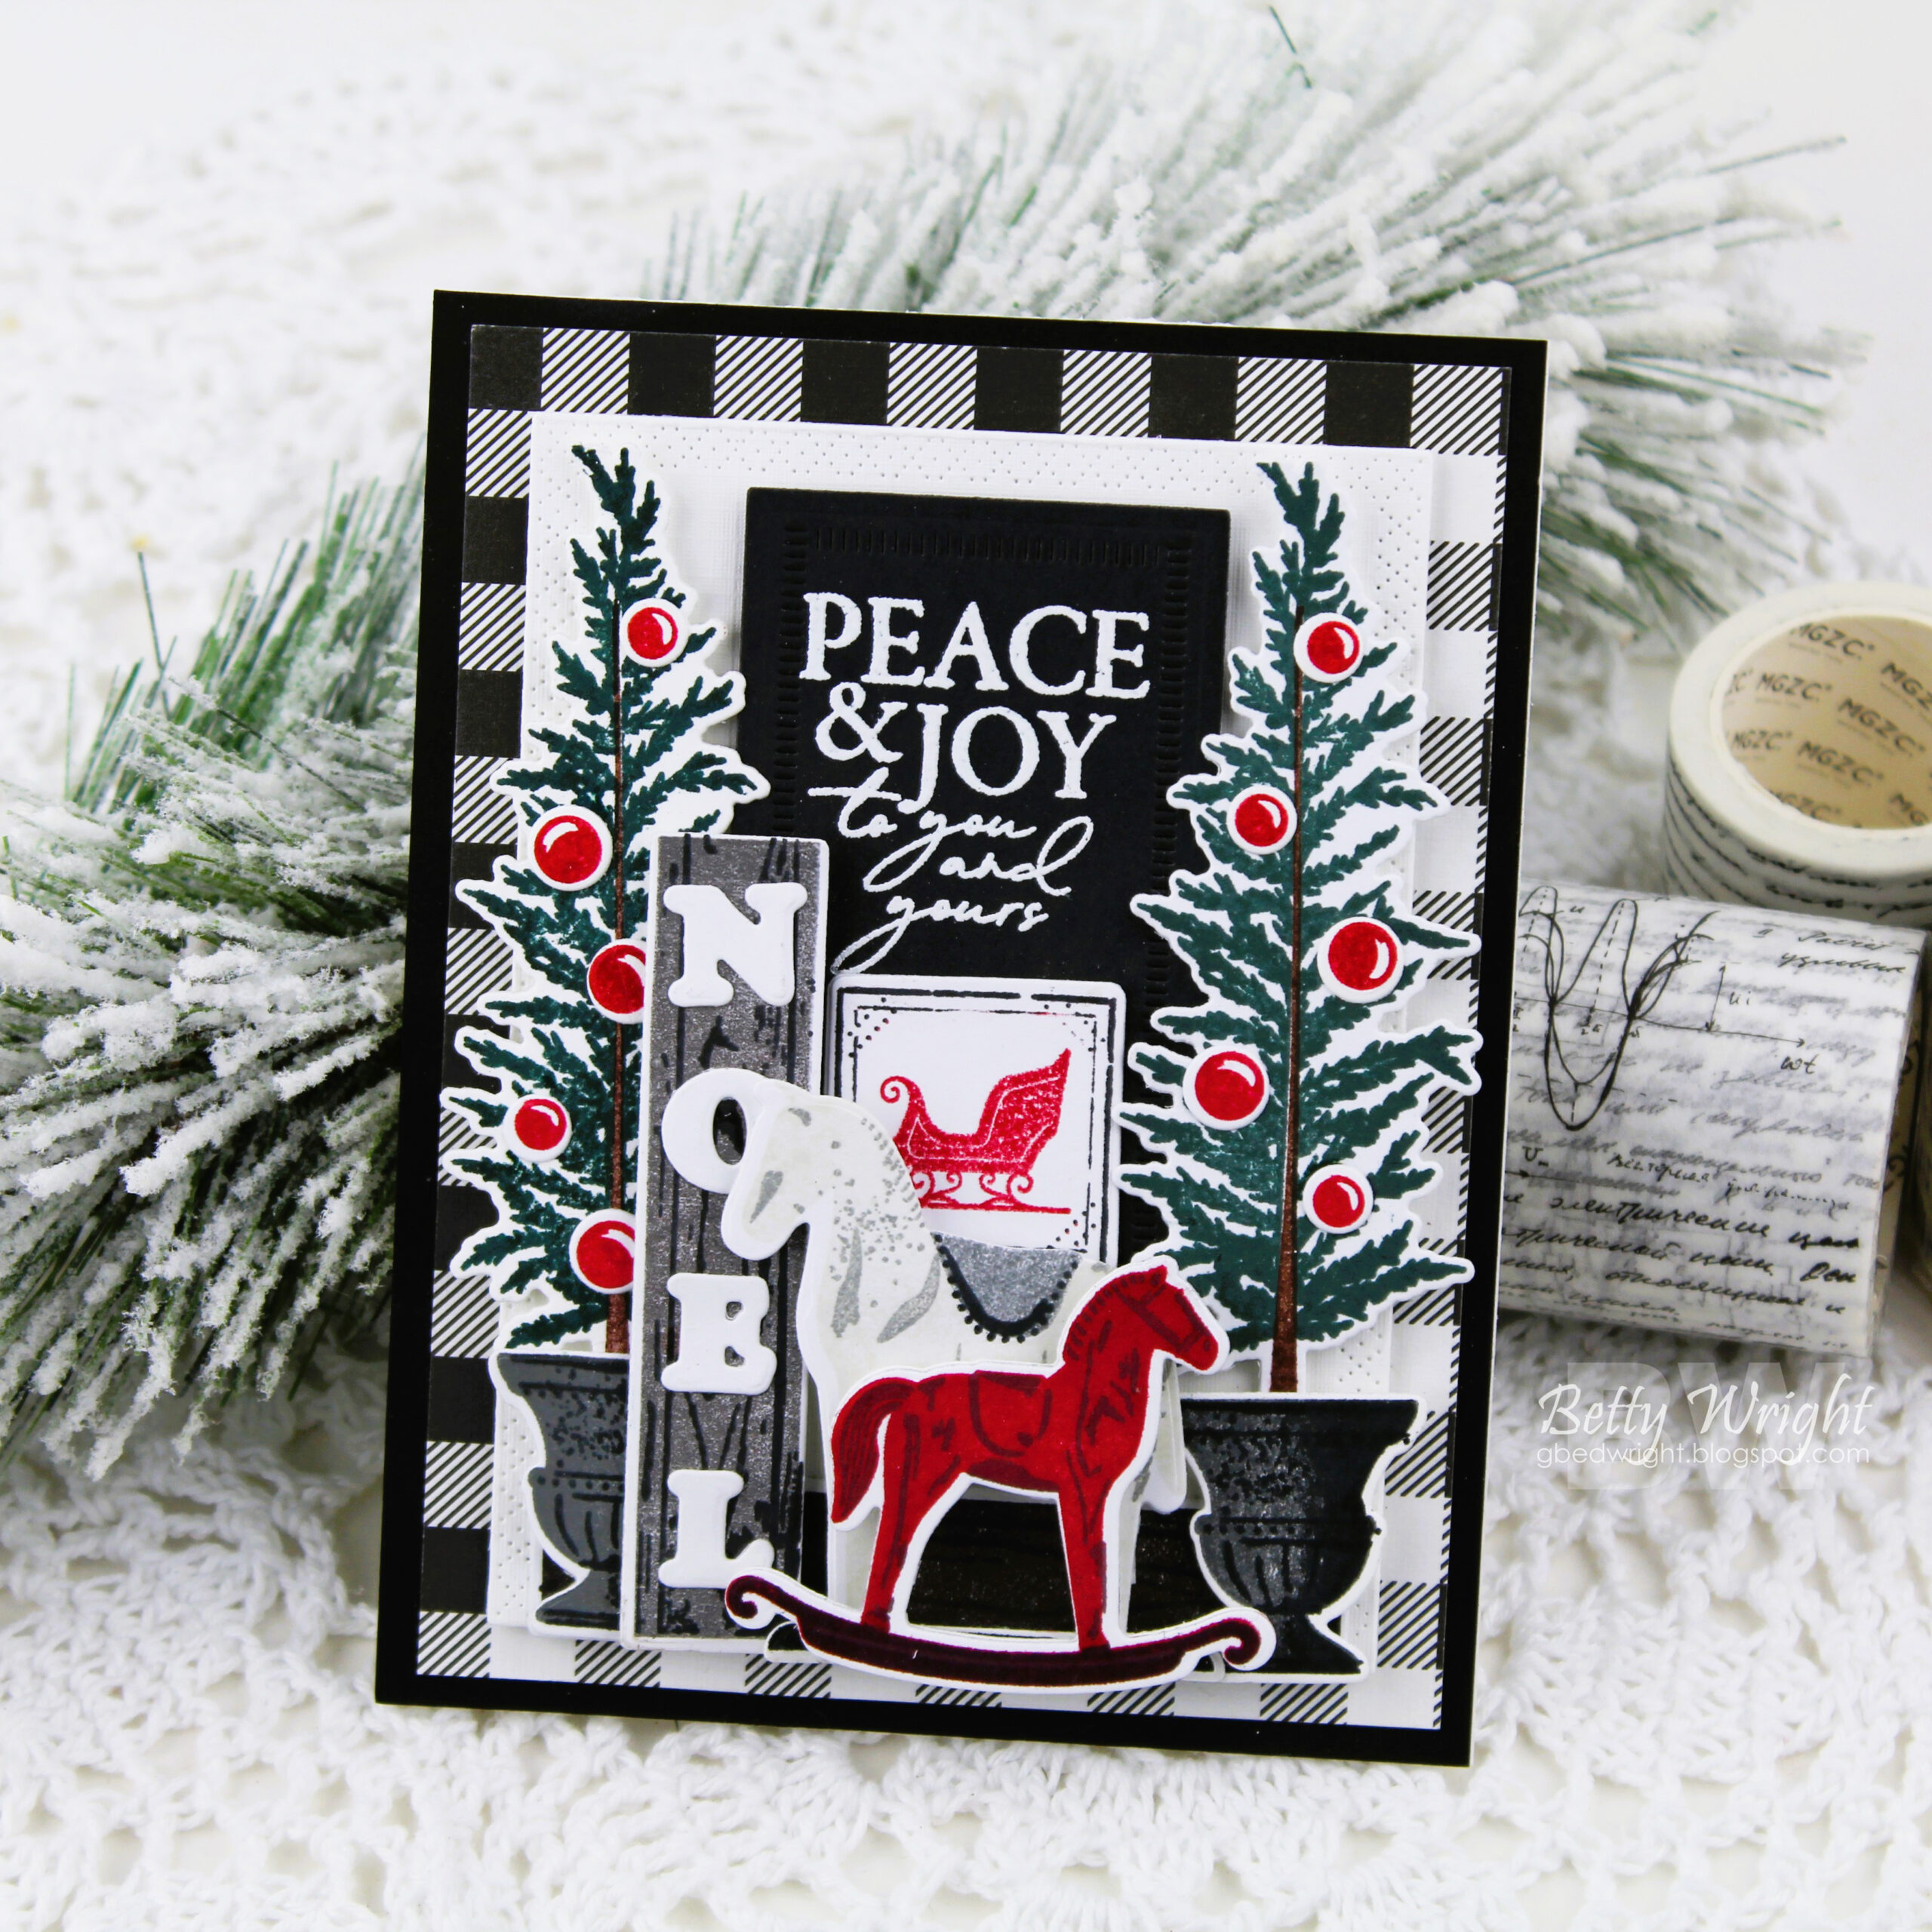
We are already on Day 3 of our special November Countdown and today’s products most definitely carry the warmth and coziness of Christmas magic with them. Introducing the new Christmastime stamp set and dies.
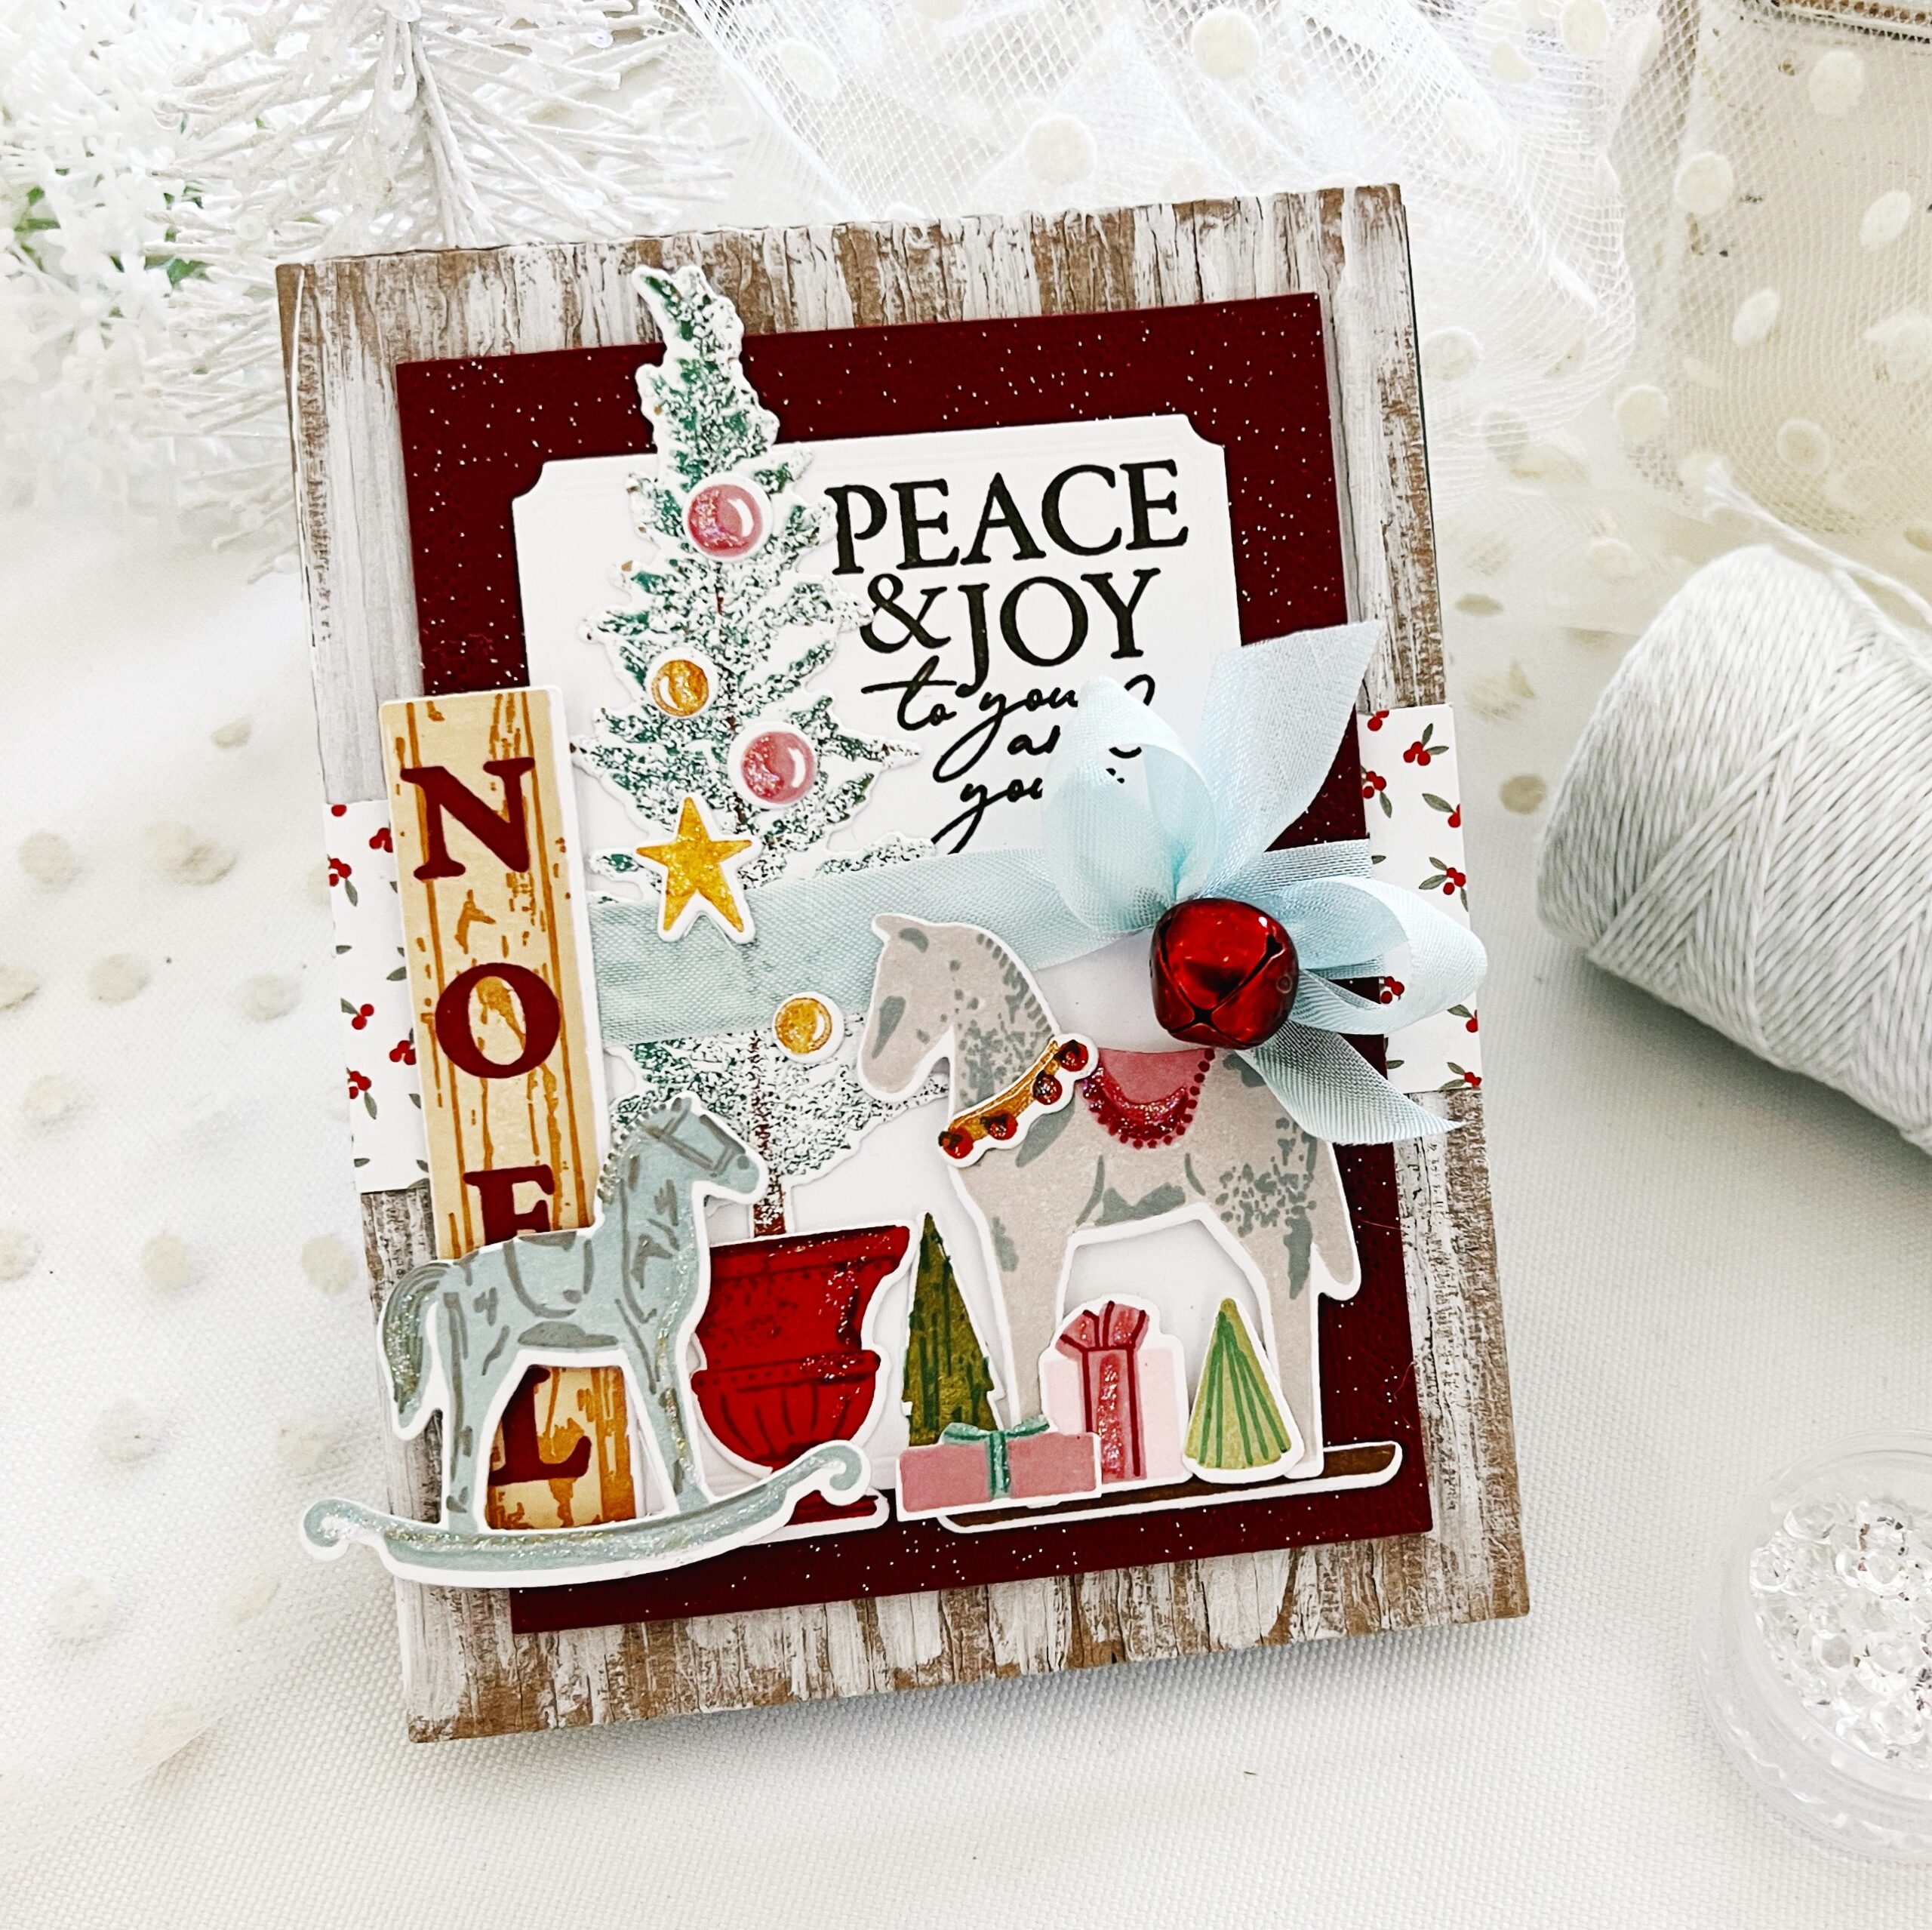
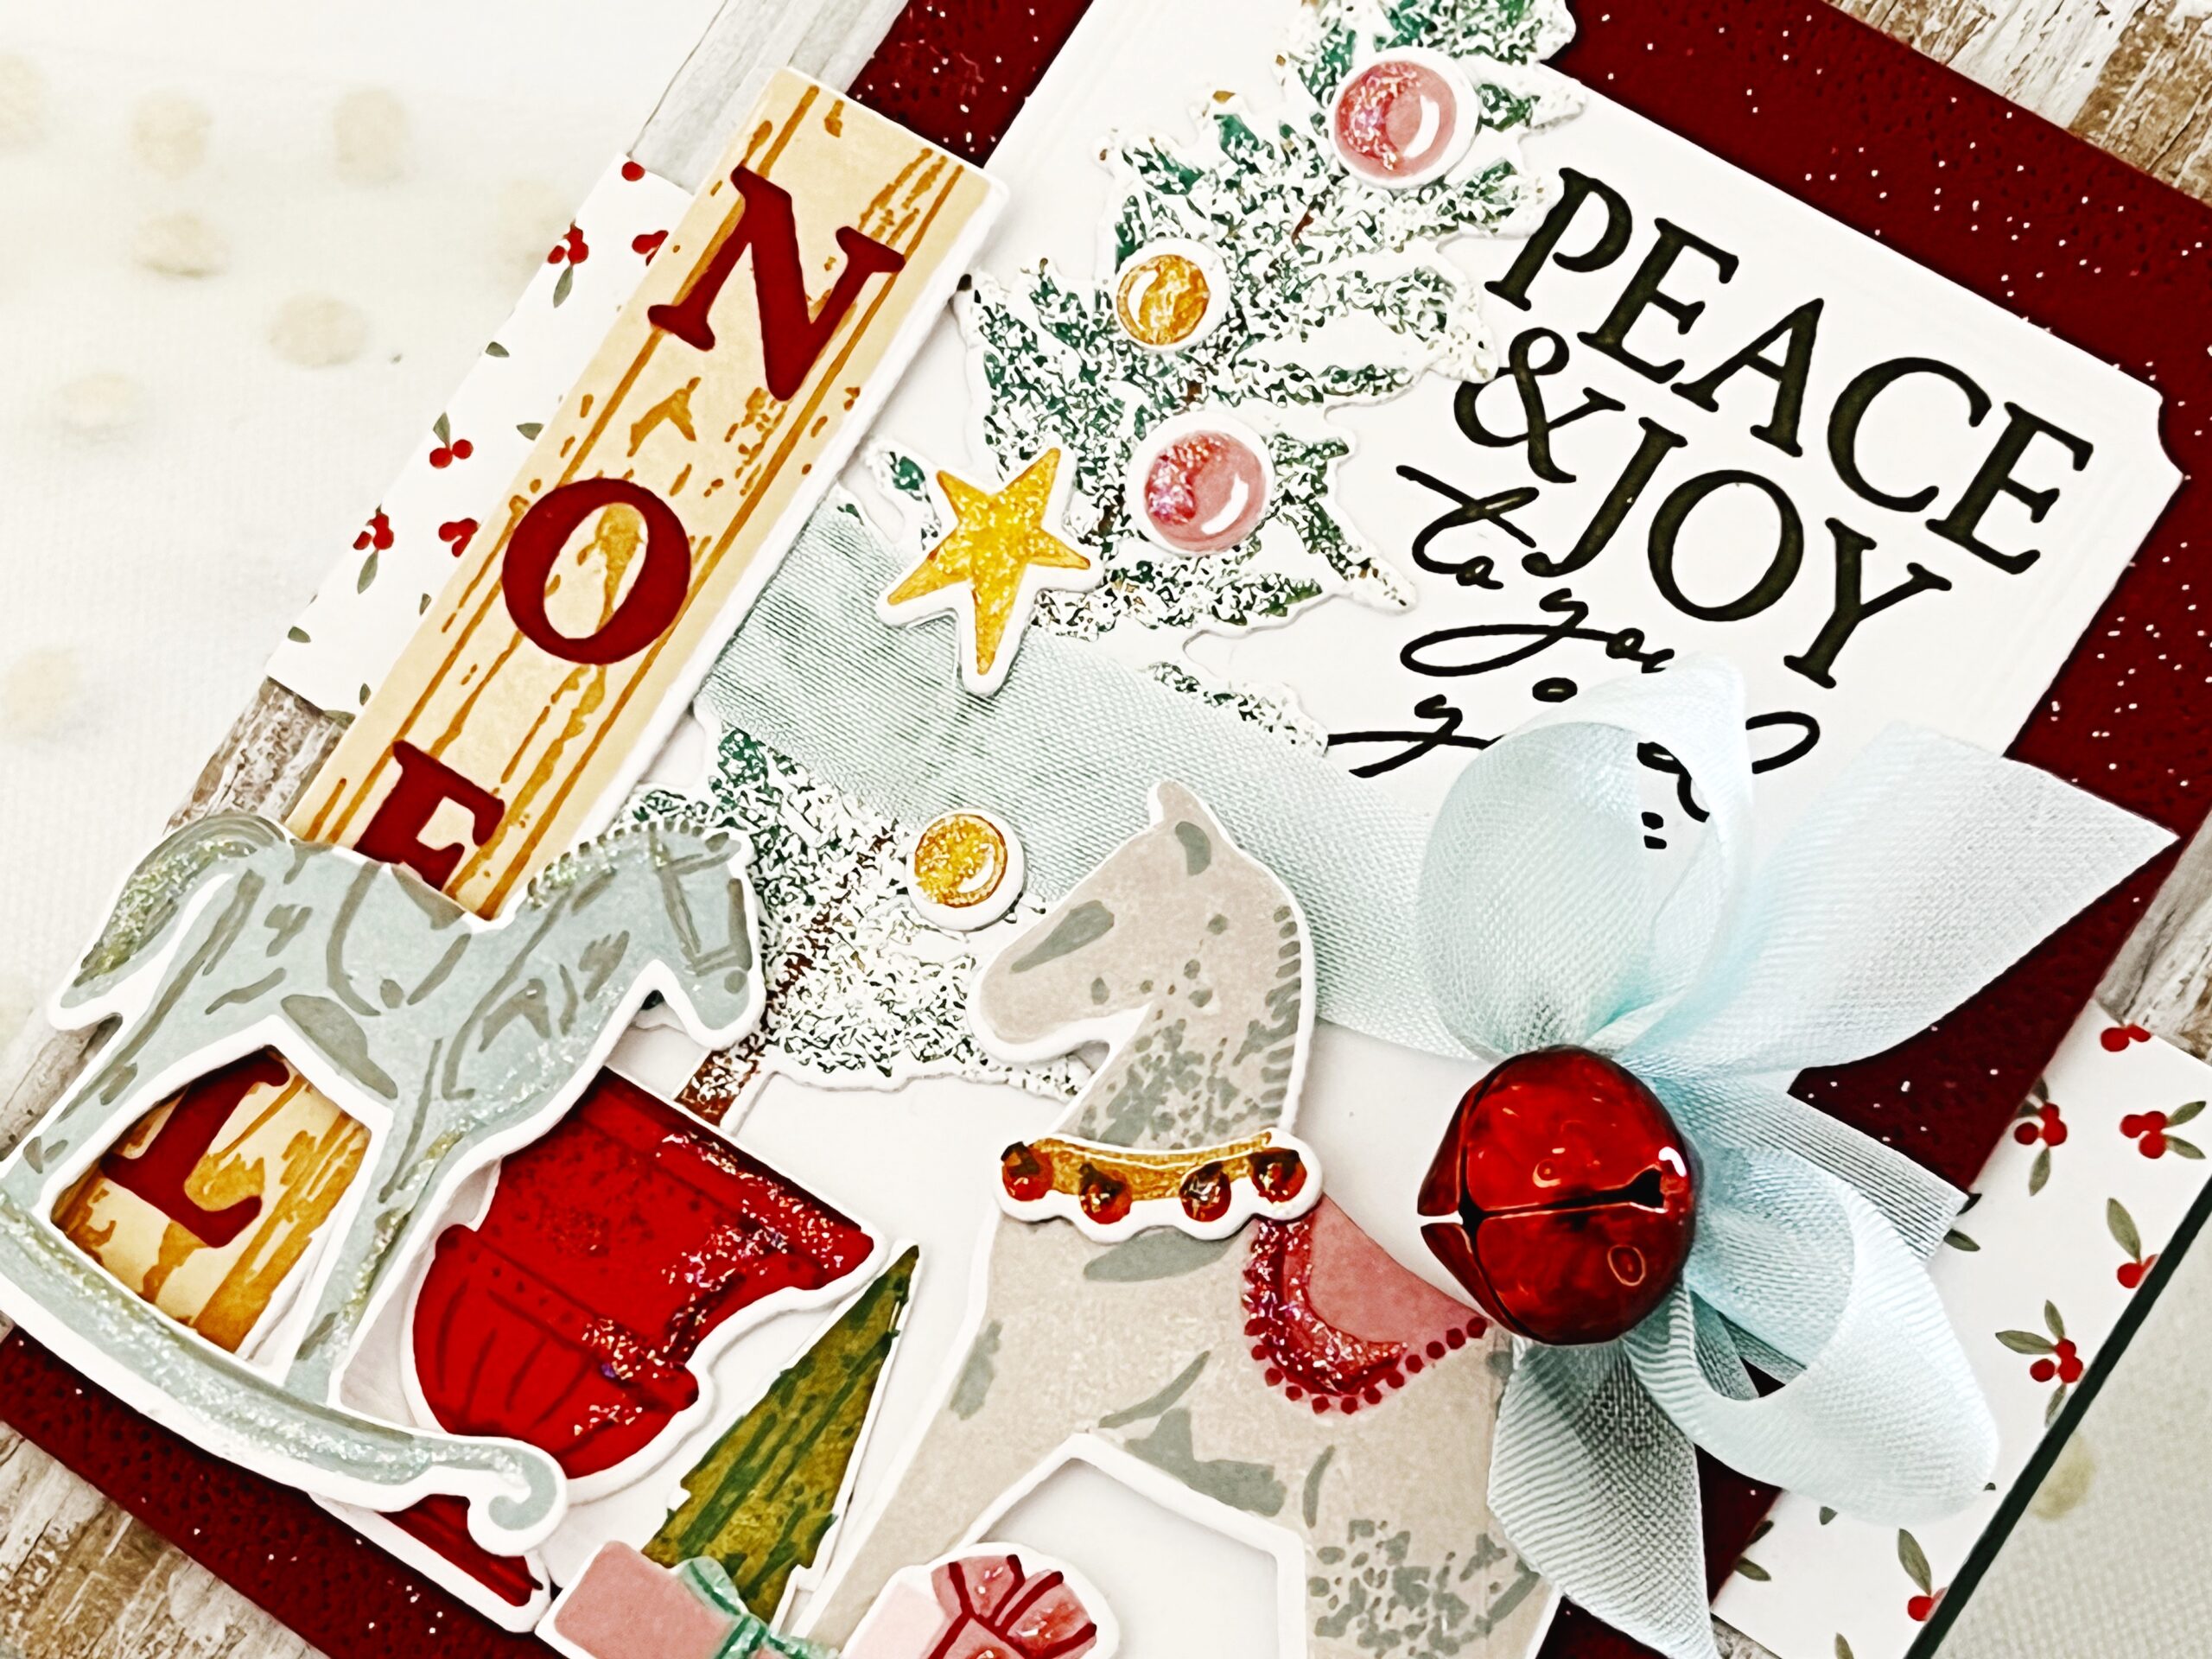
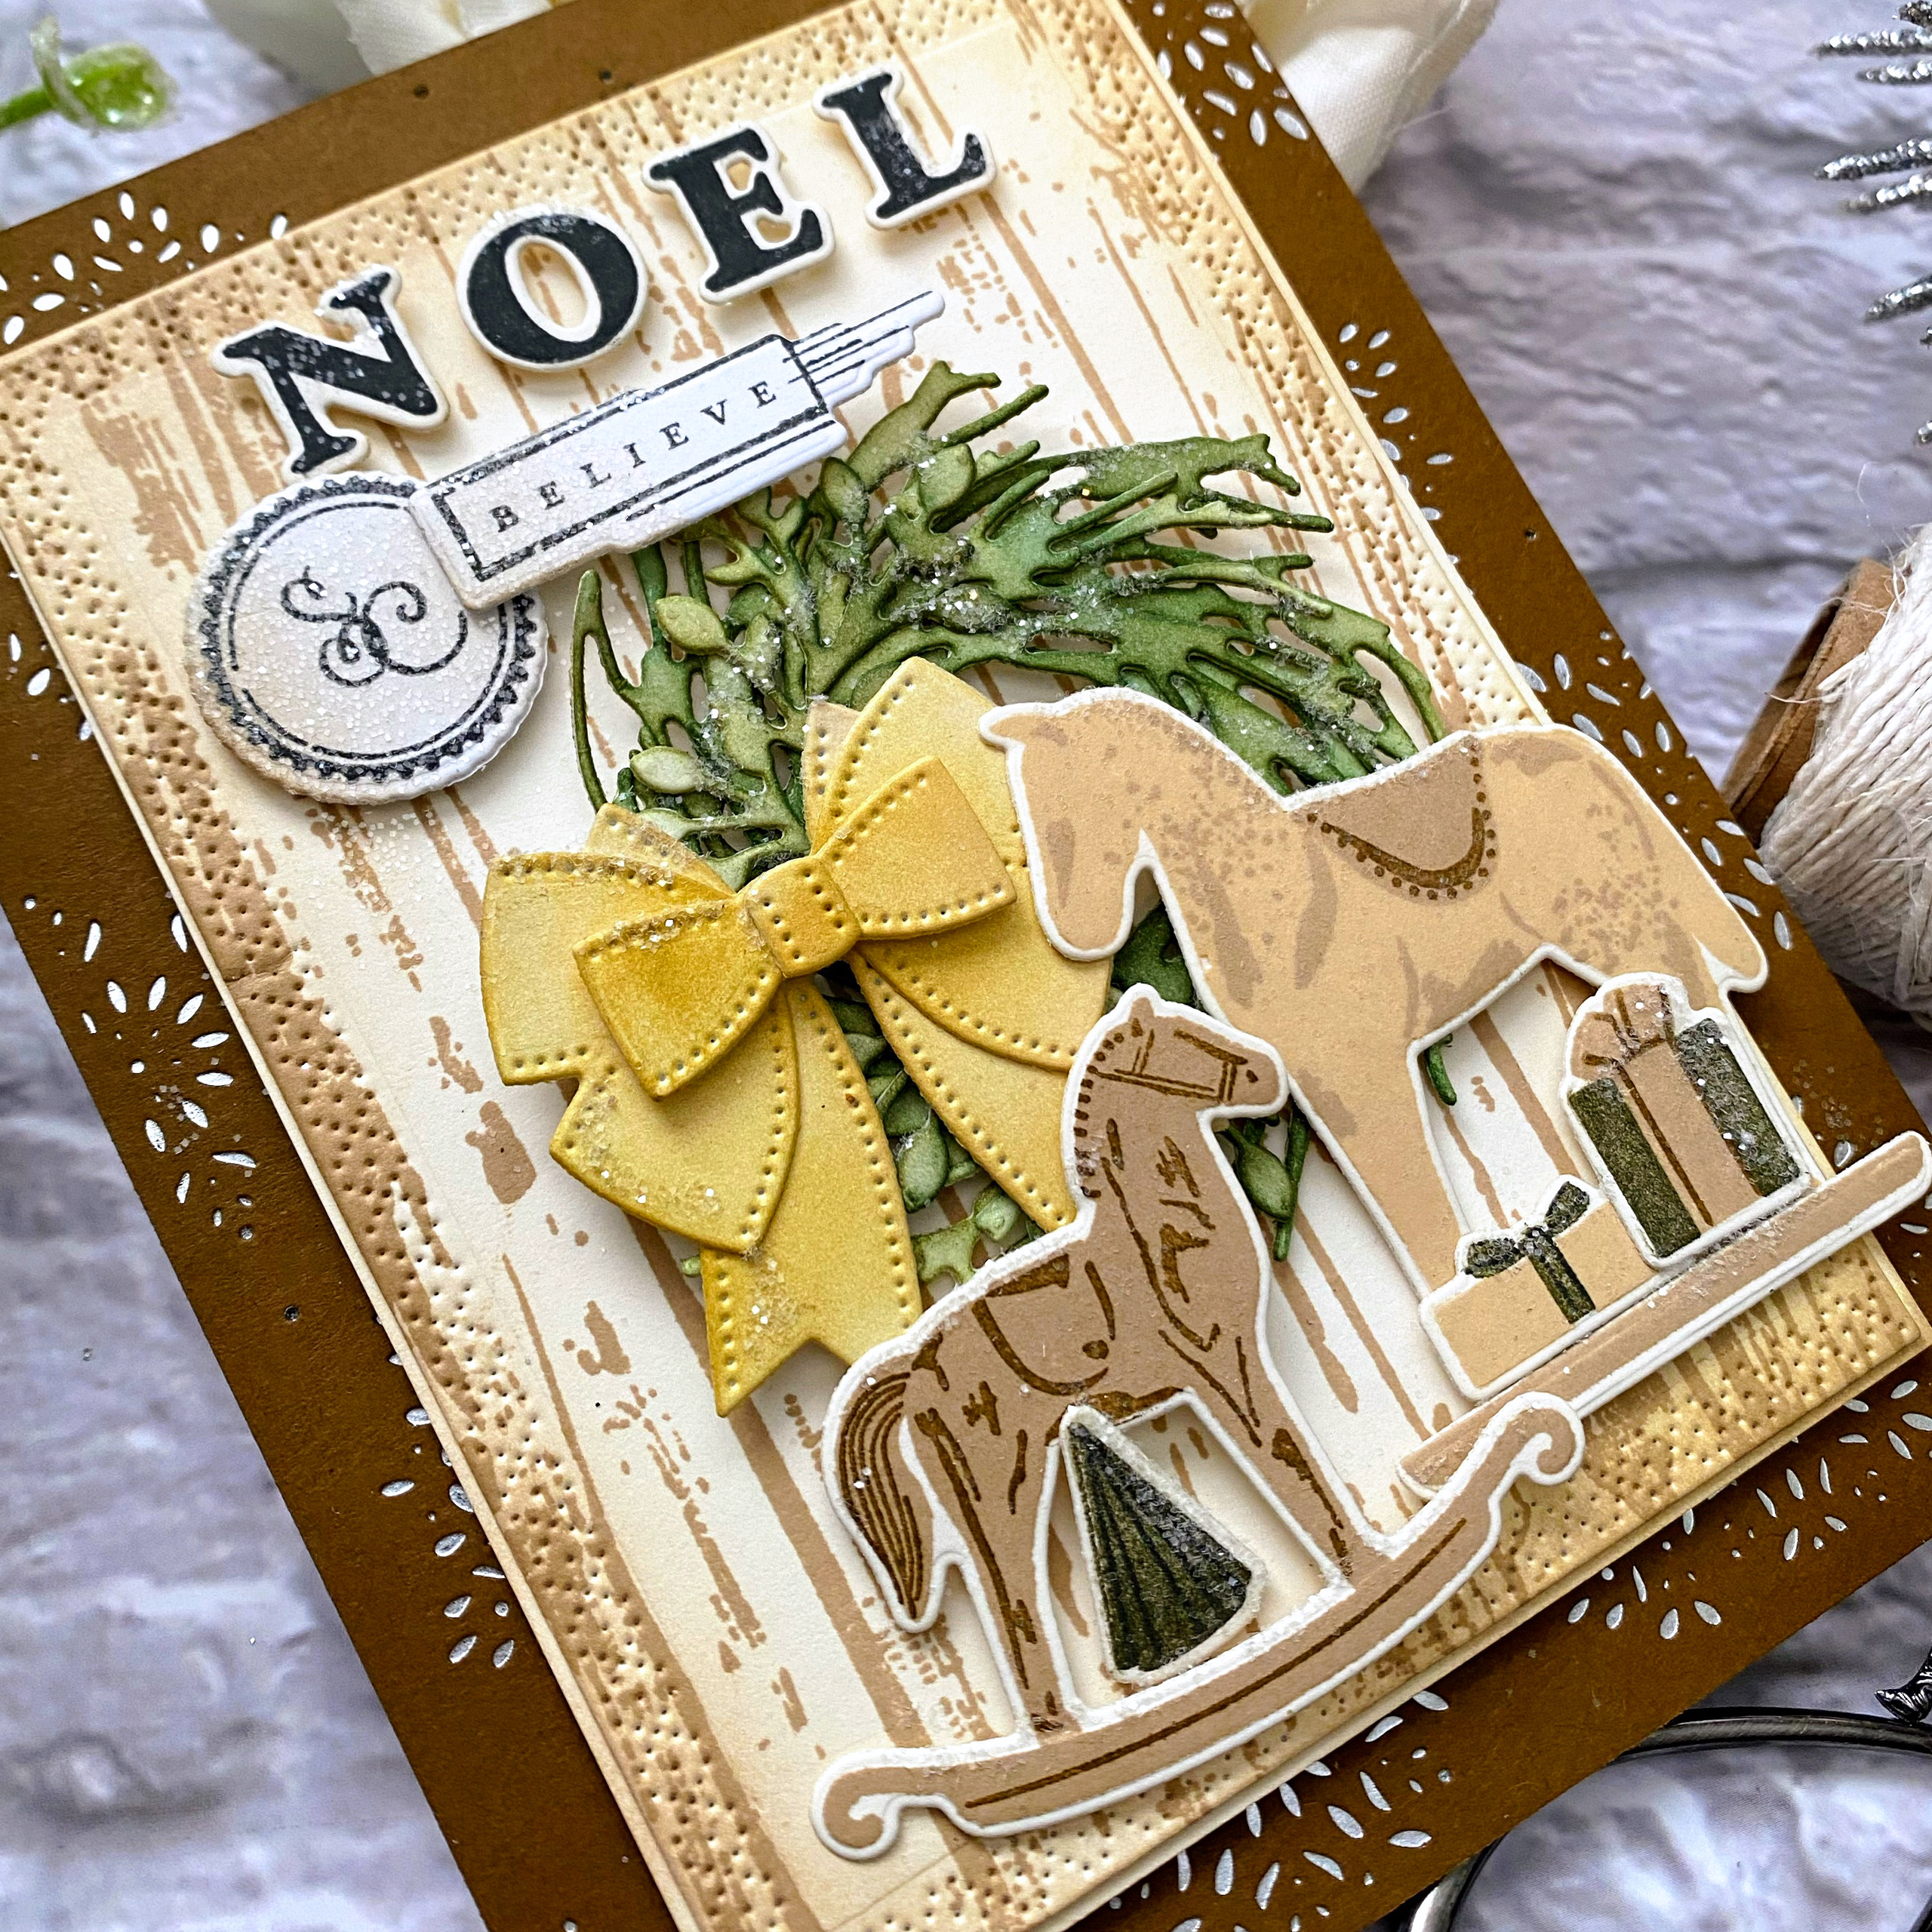
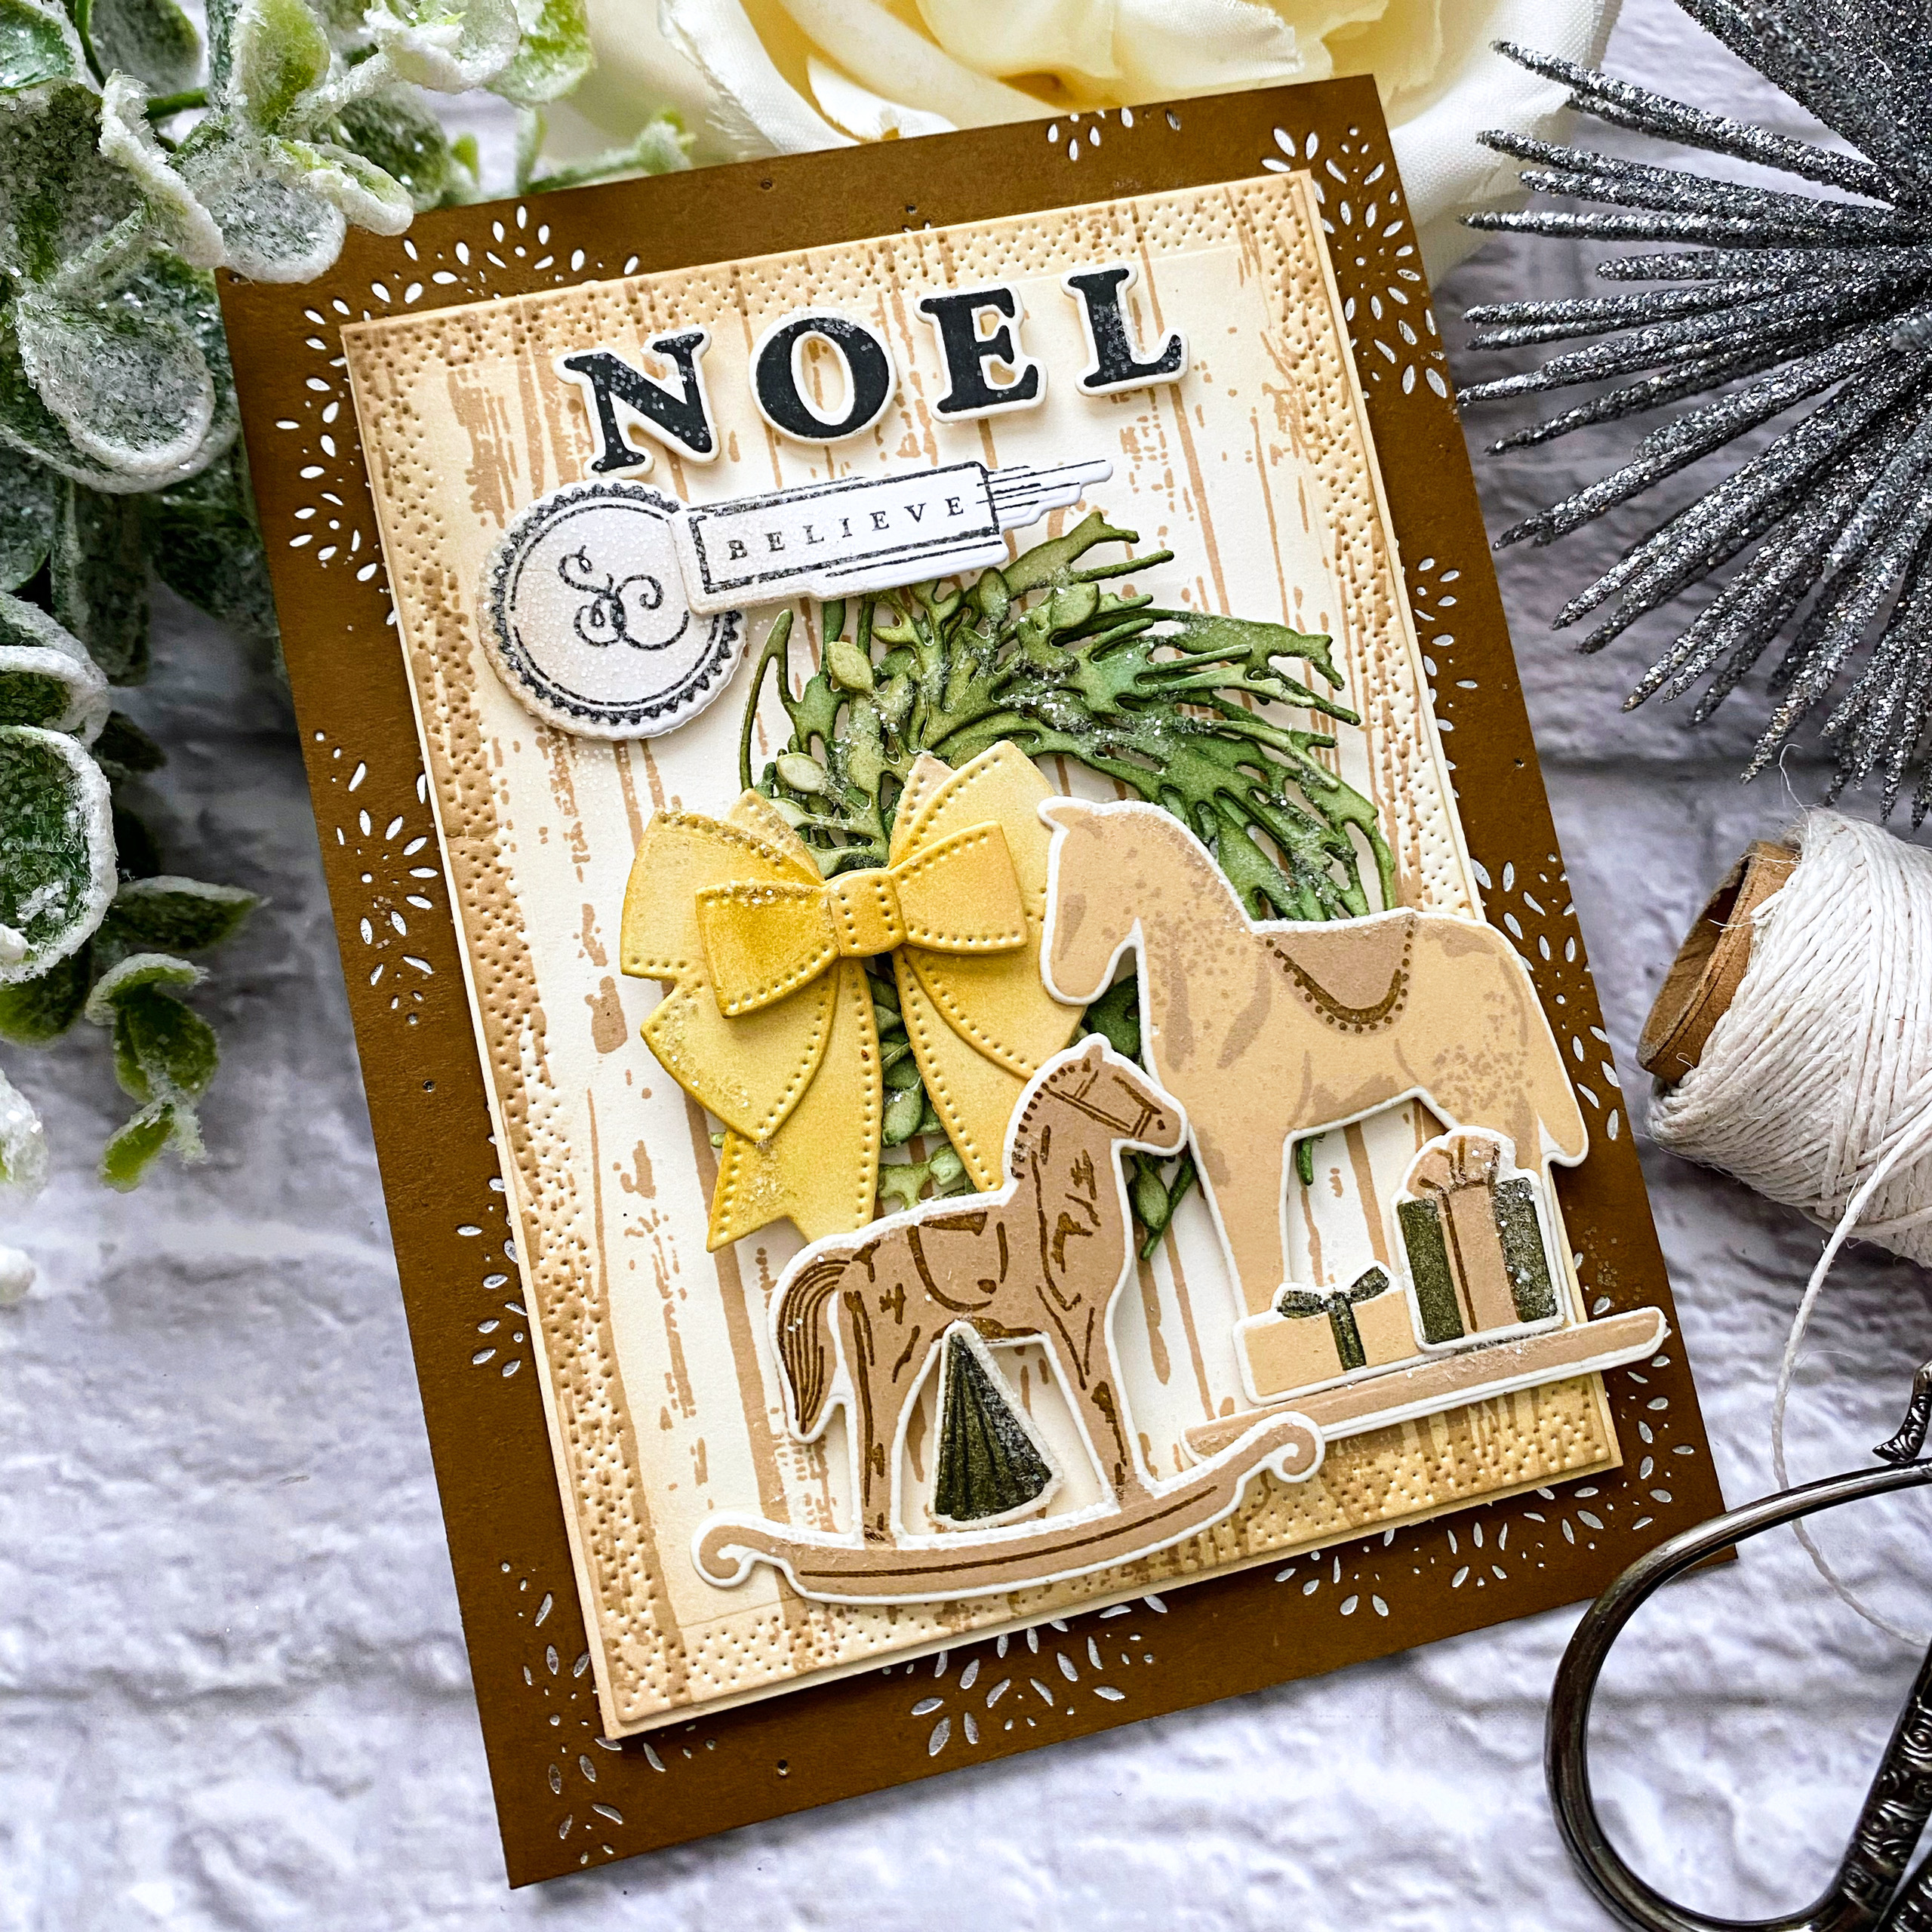
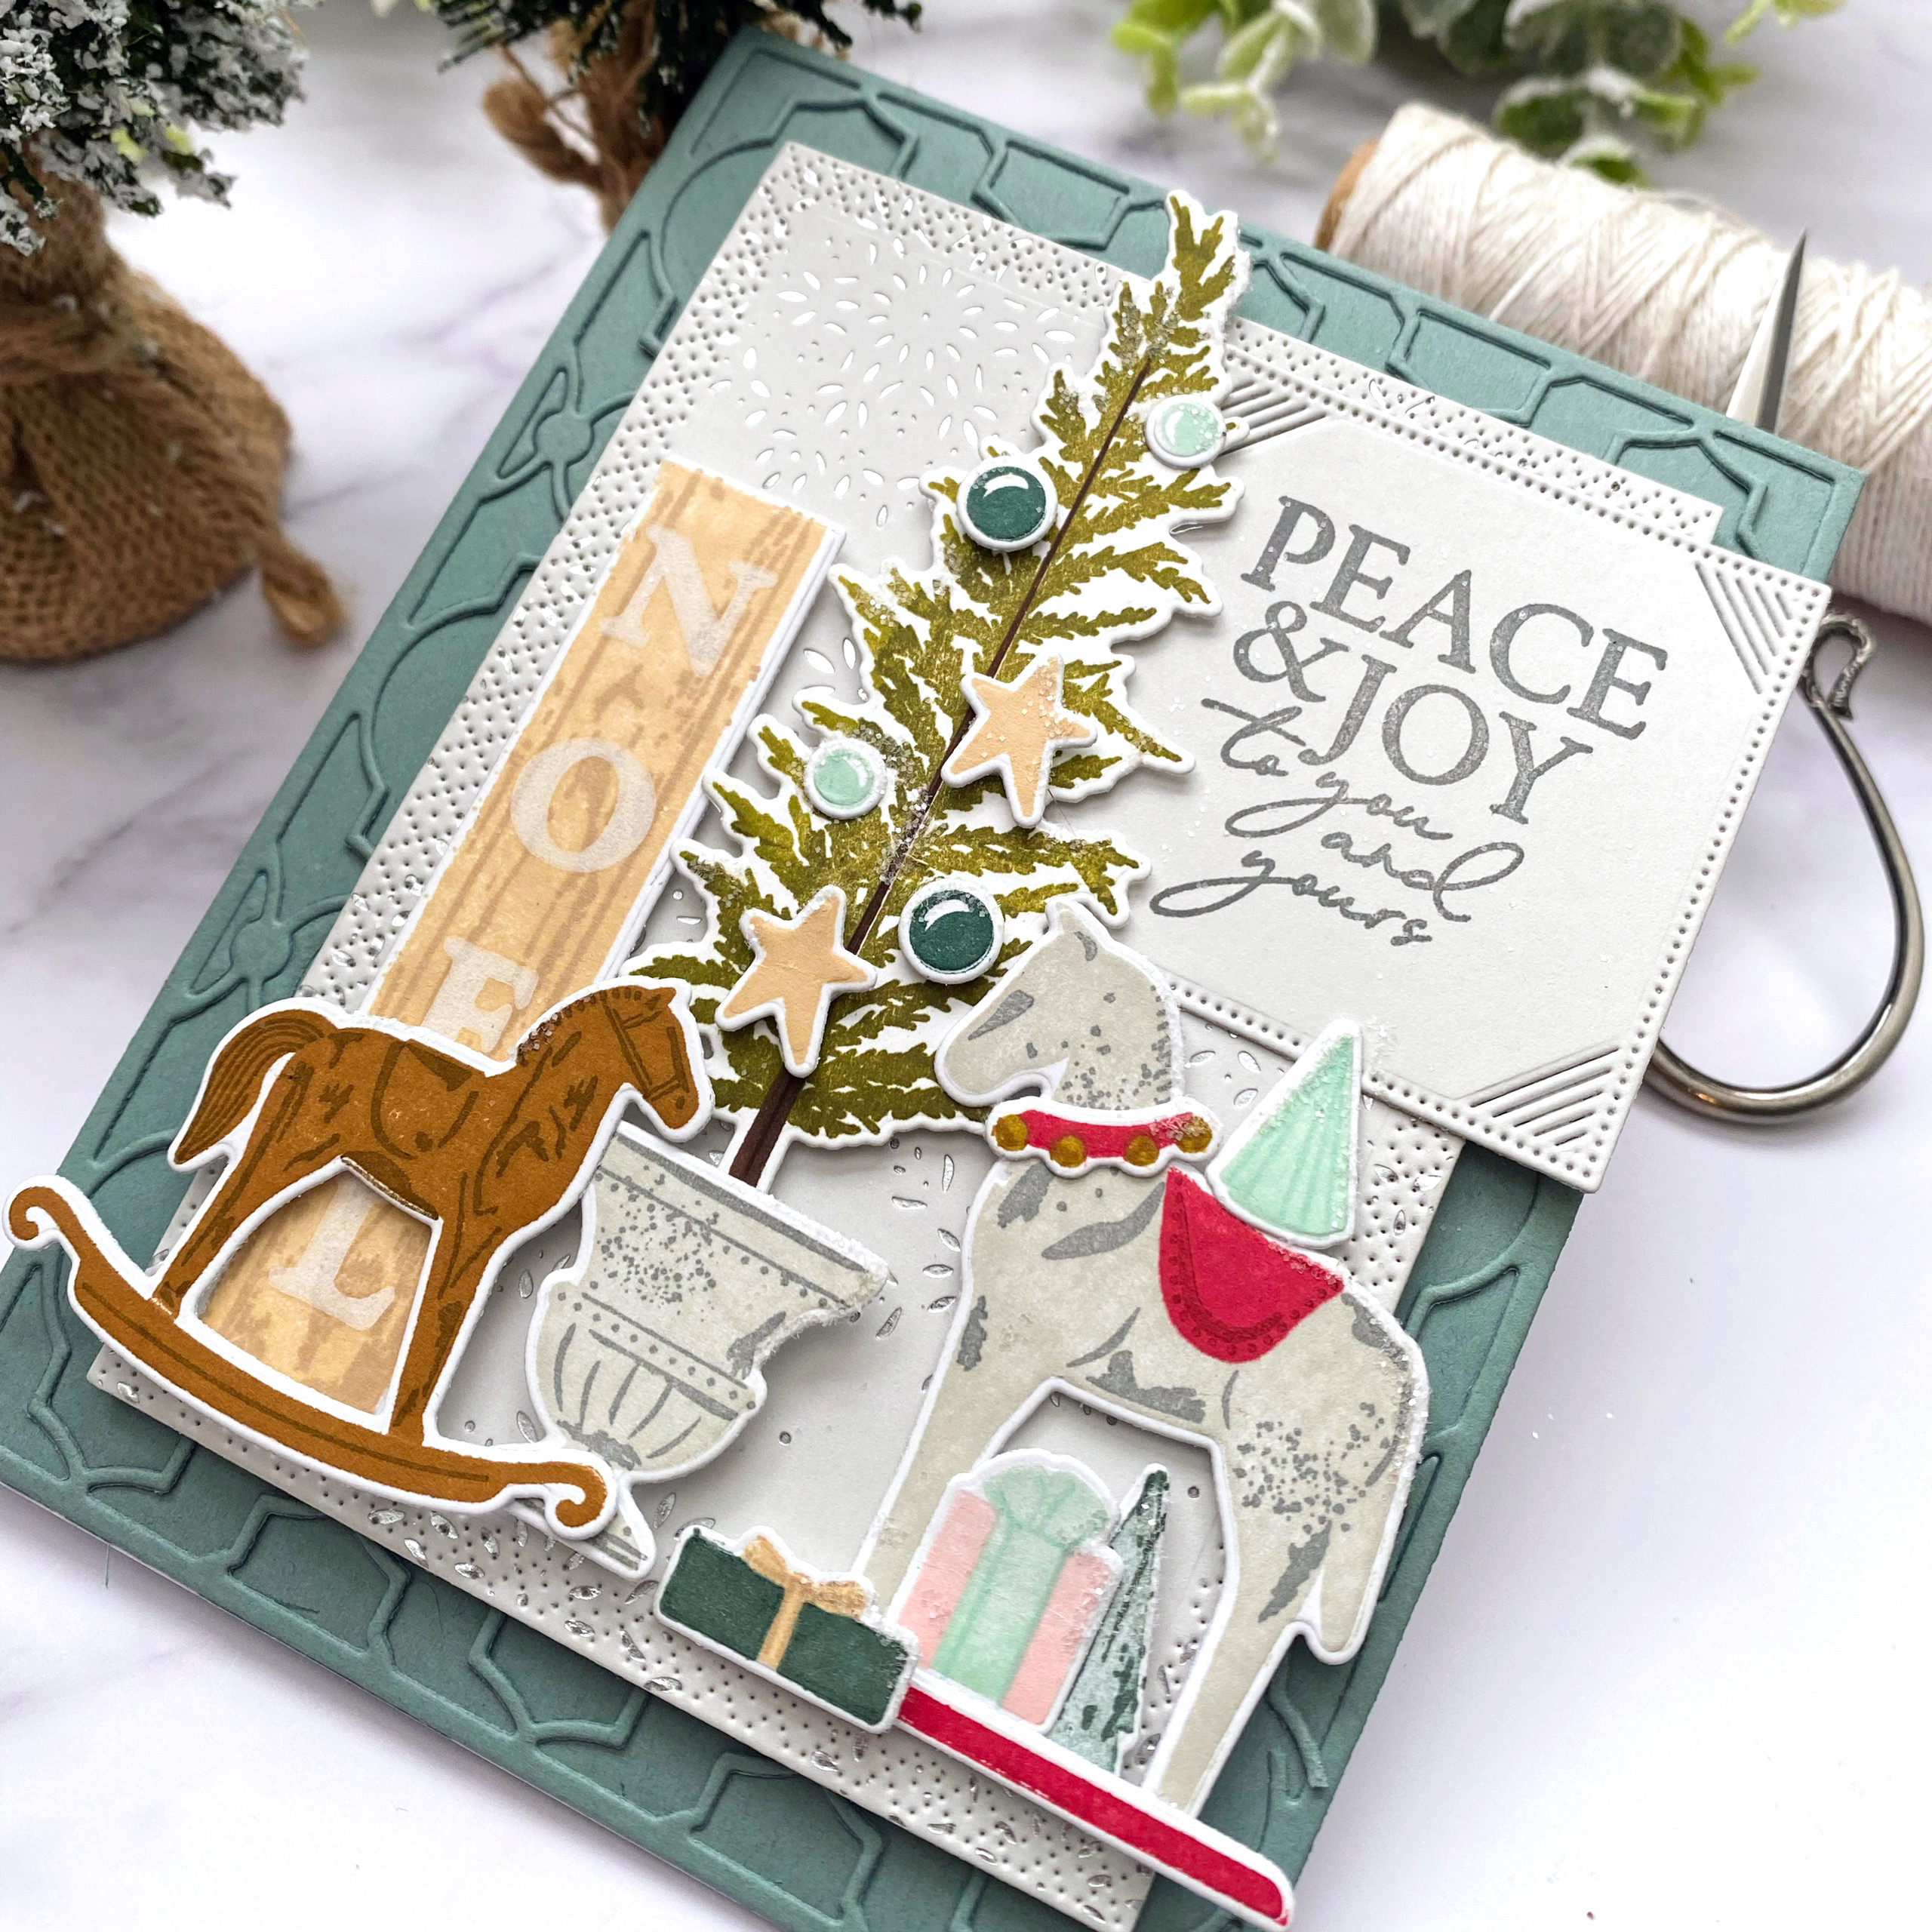
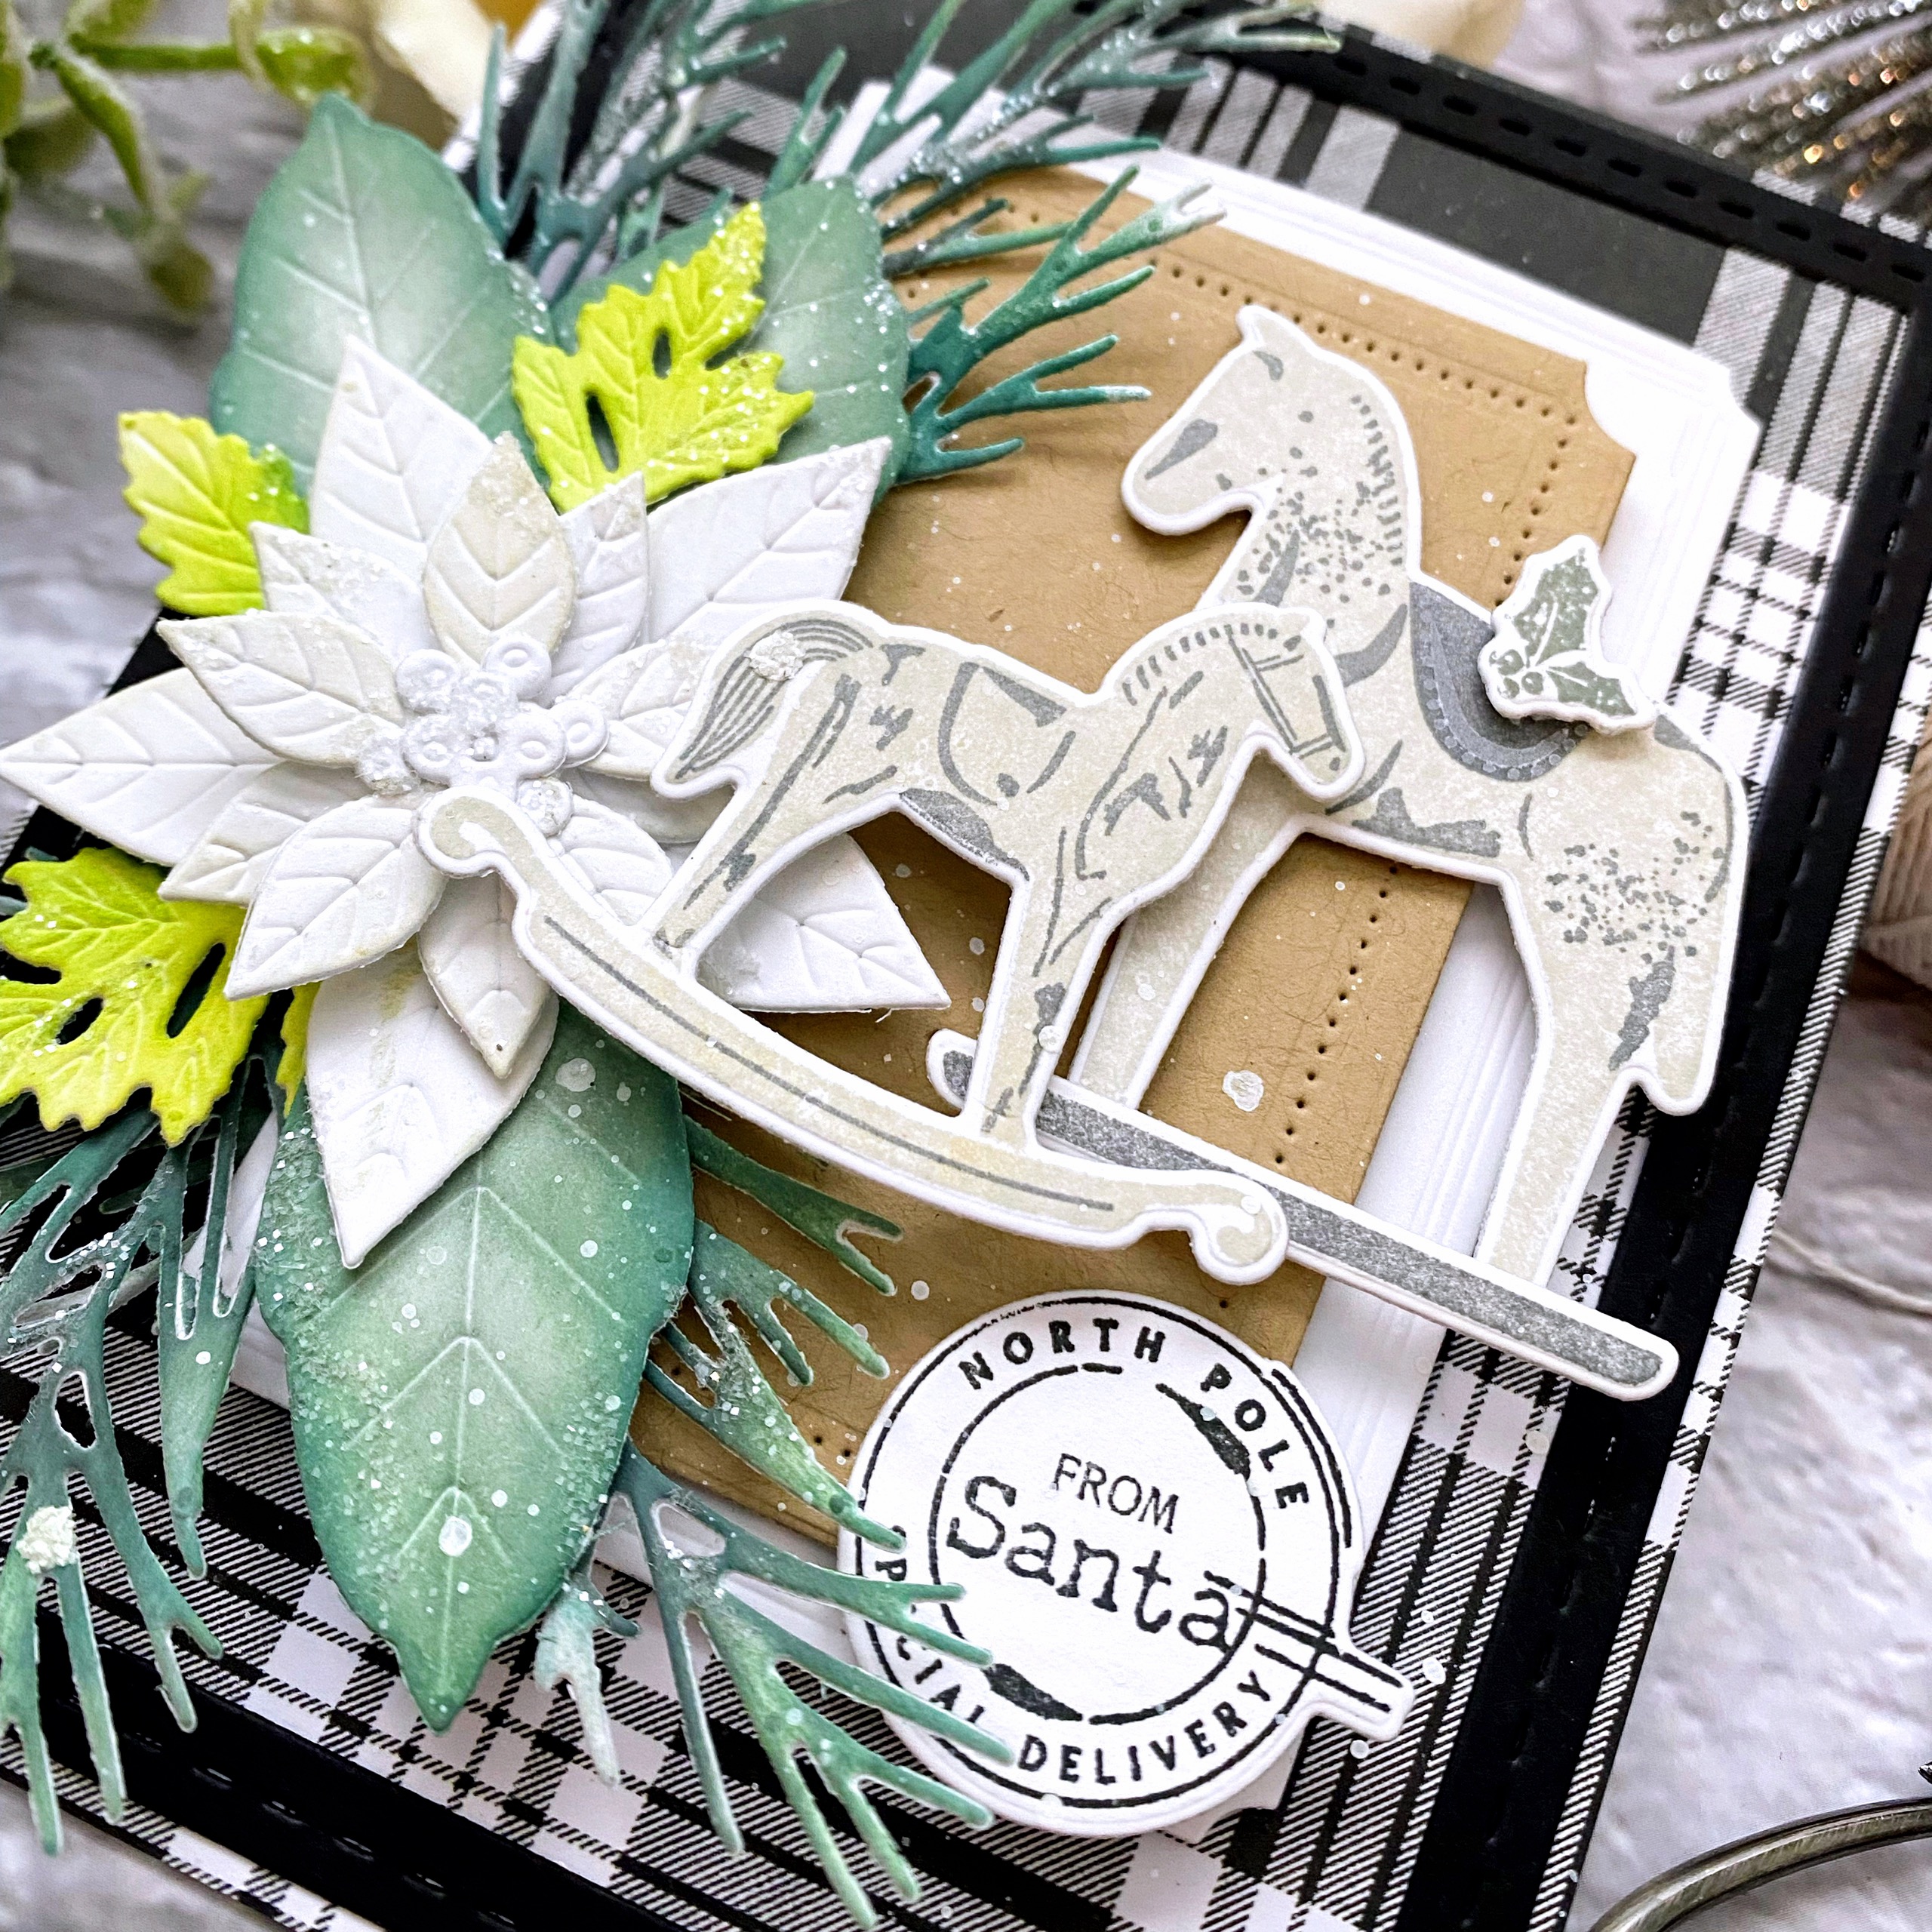
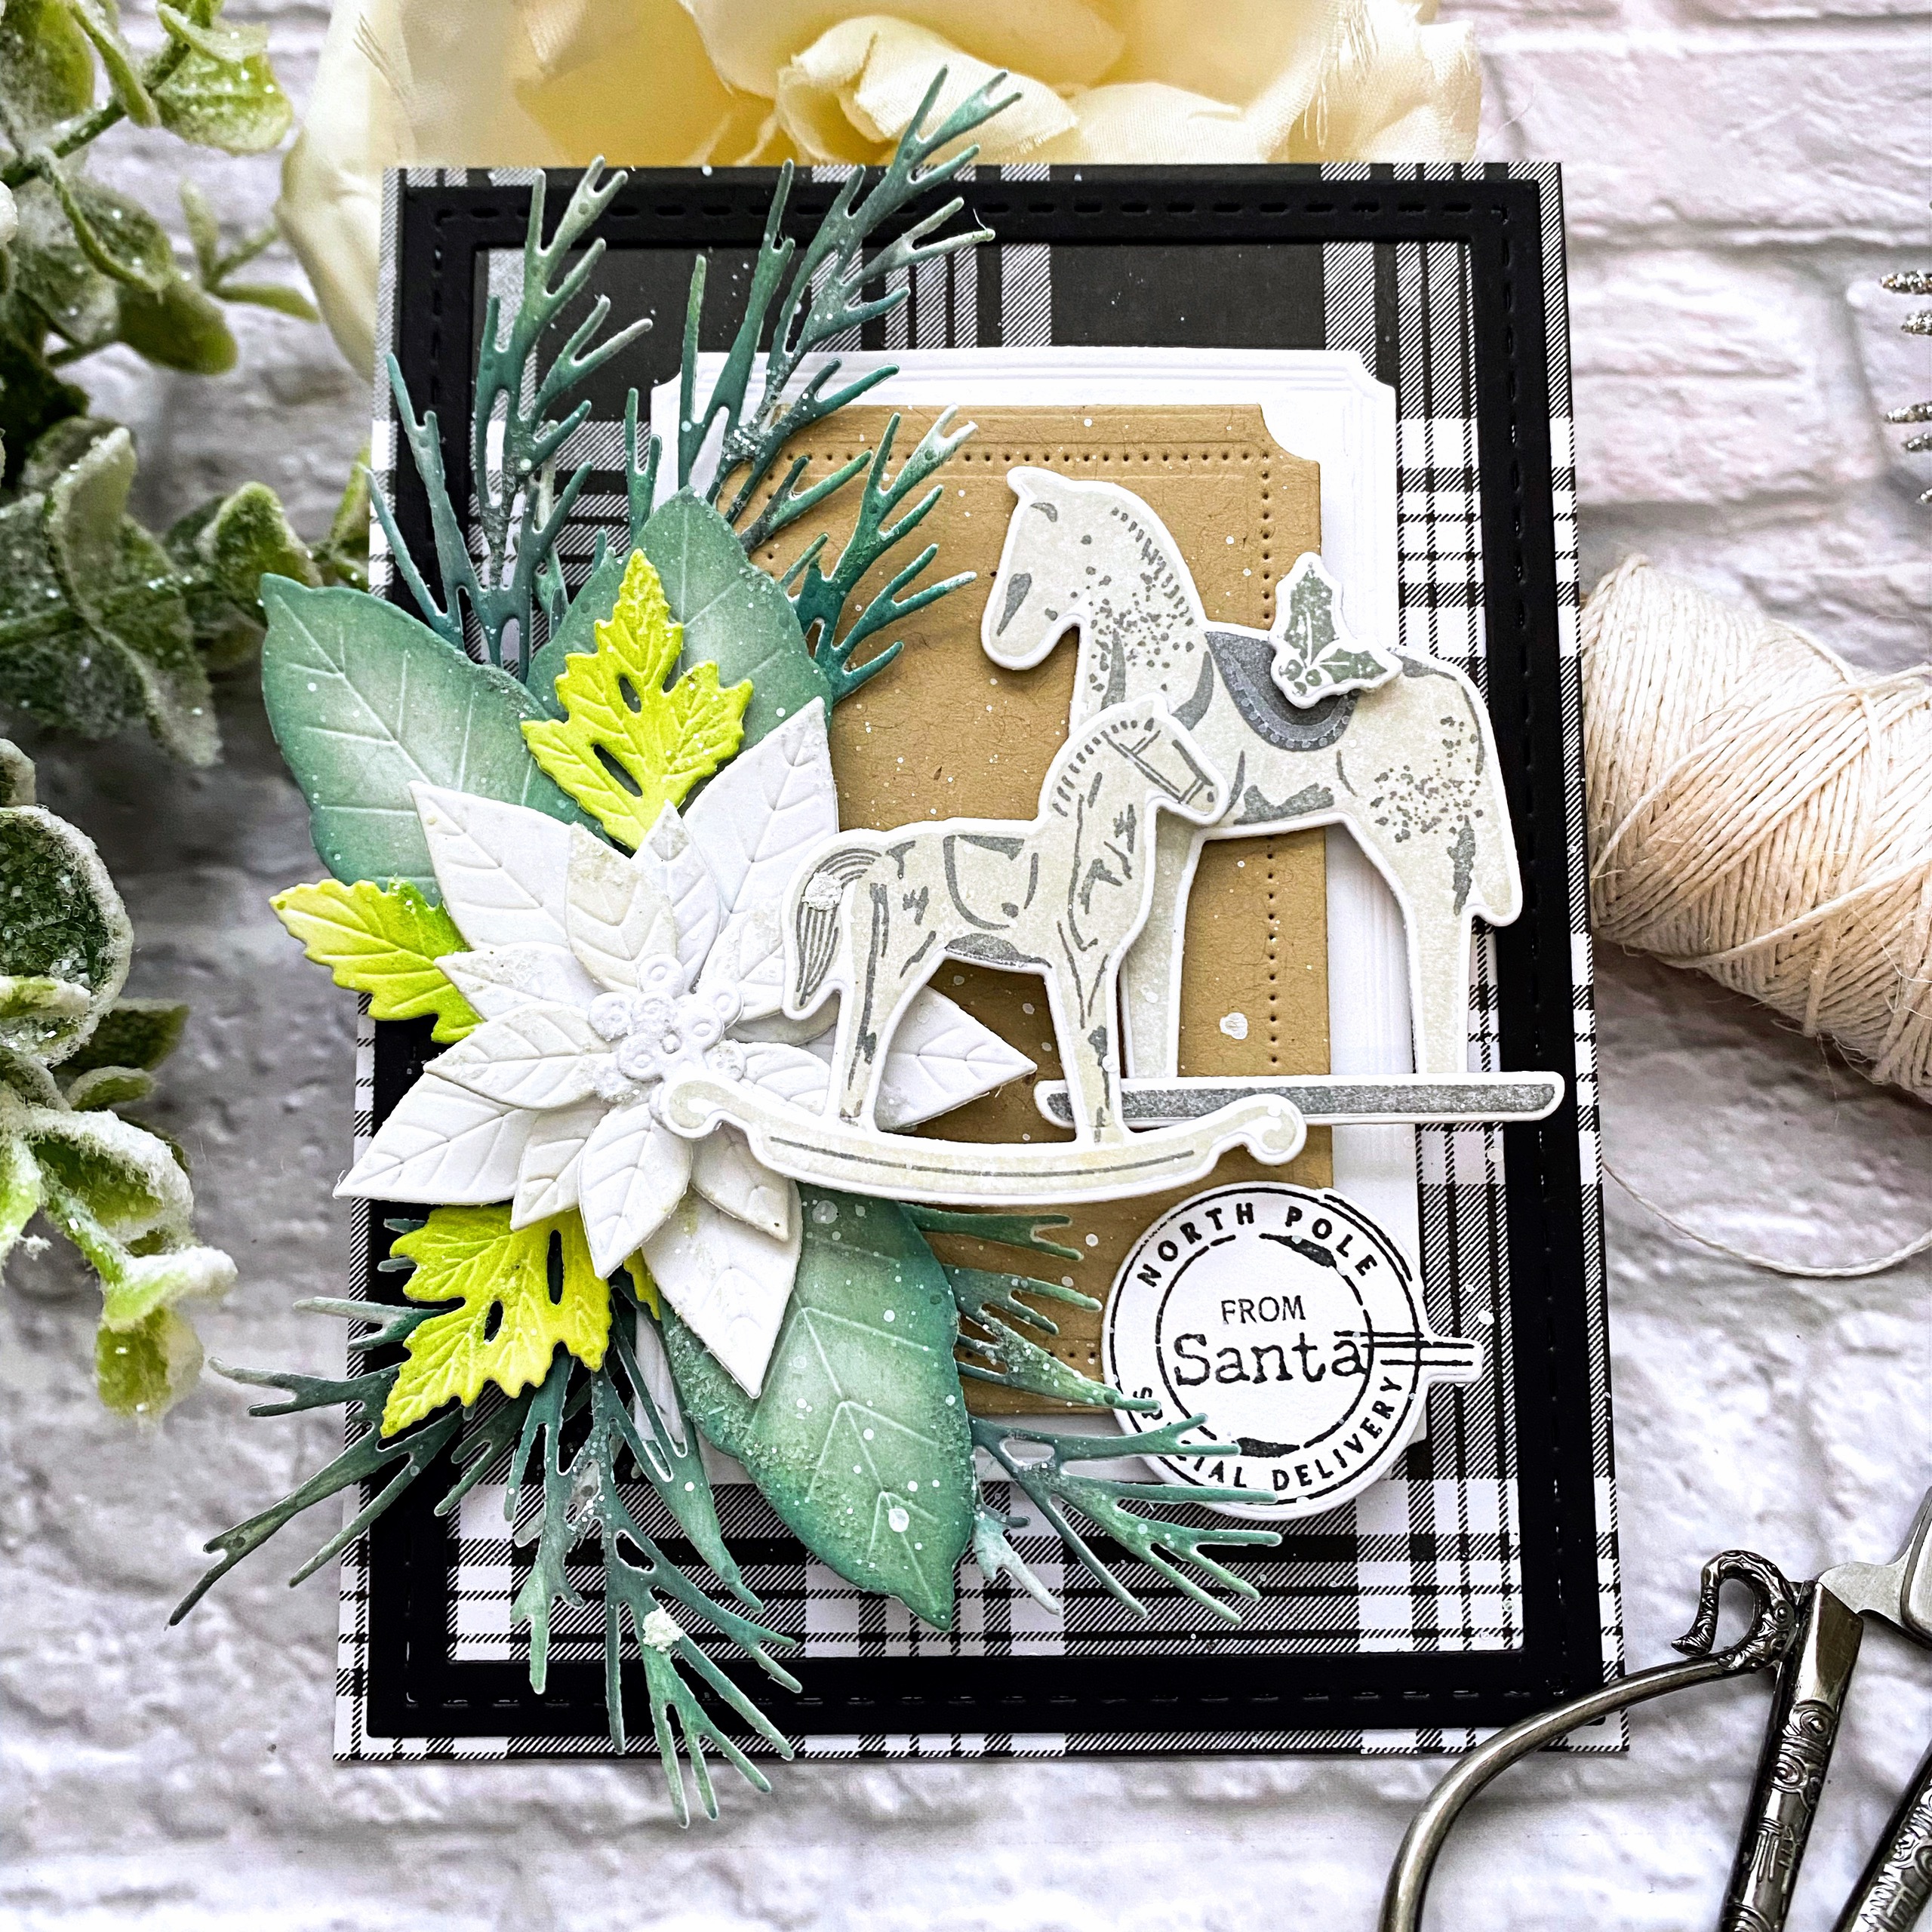
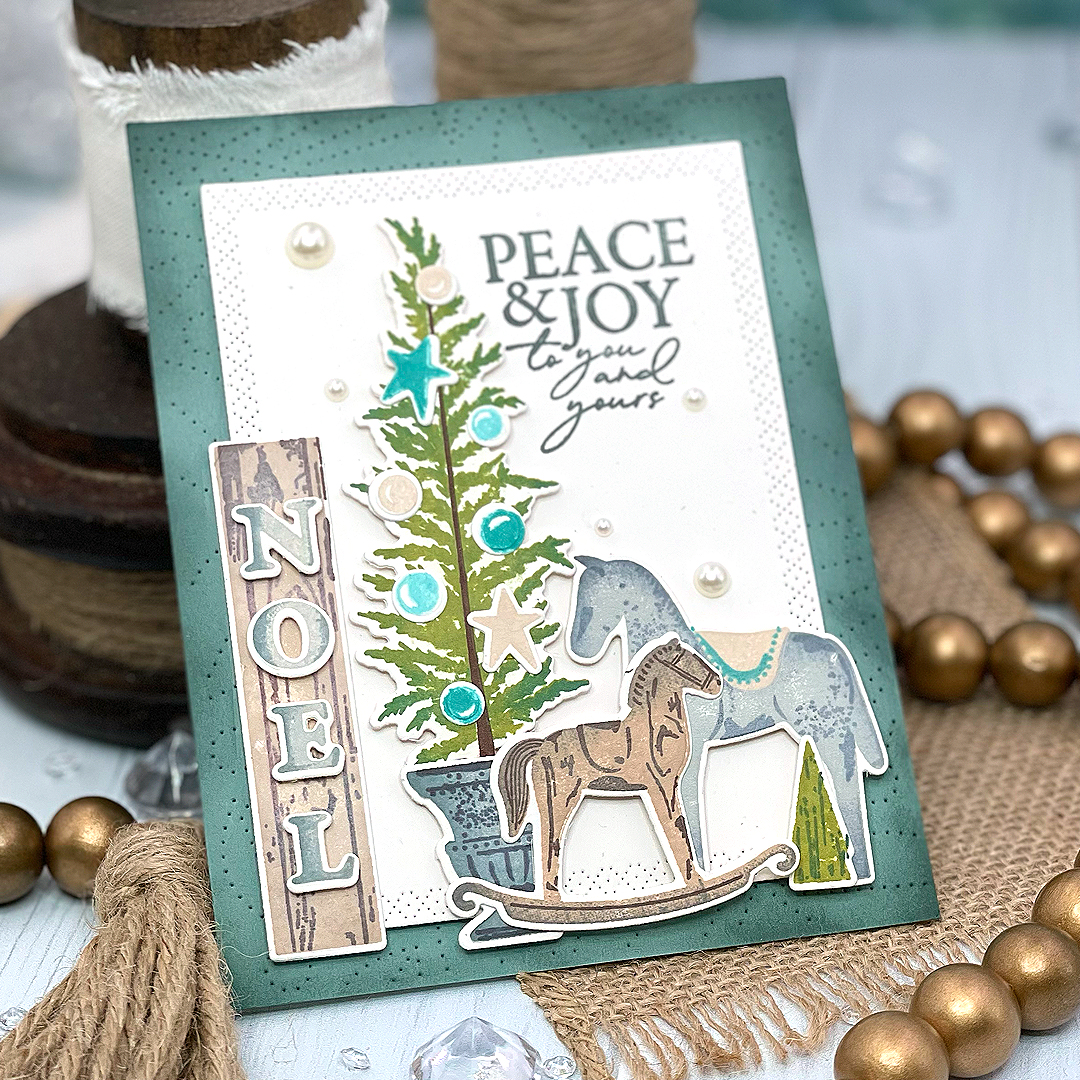
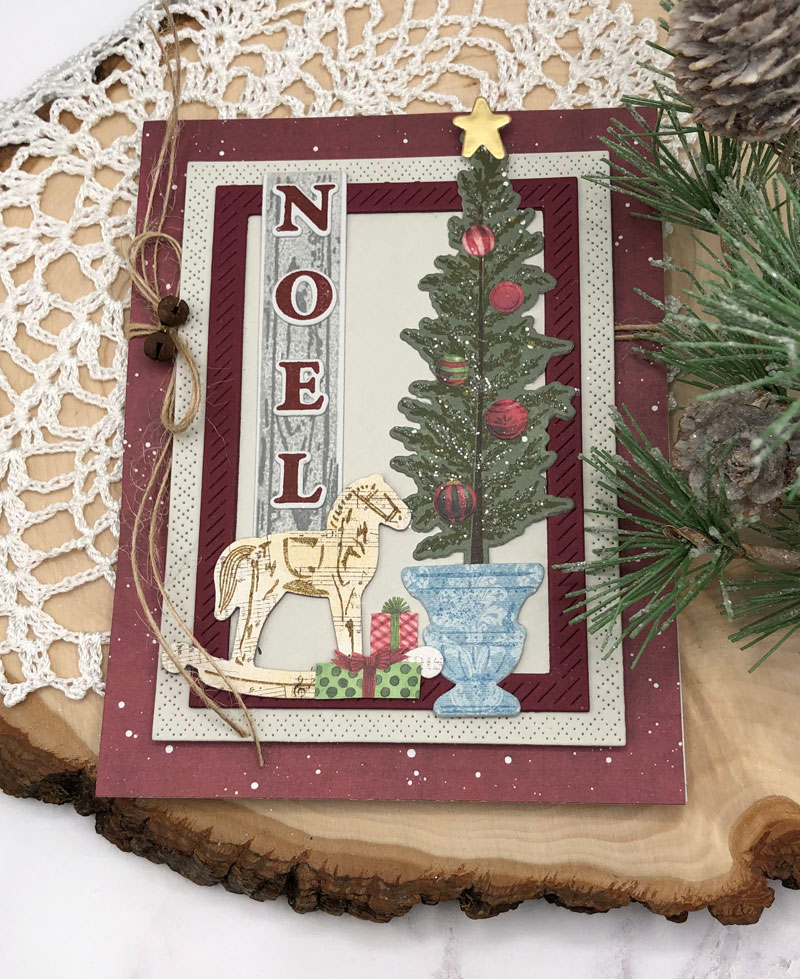
The new Christmastime stamp set reminds me of Christmases gone-by and has the feel of a Victorian holiday. I adore the look of the old-fashioned horses, tinsel tree, shiny ornaments and other sweet accents.
The new Love to Layer: Rectangles dies are a much-needed addition to the Love to Layer series. You’ll love the crisscross stitching on the larges die, the notched corners on the center die, and the embossed edges on the smallest die. I have used both largest and middle-sized rectangles on my card today.
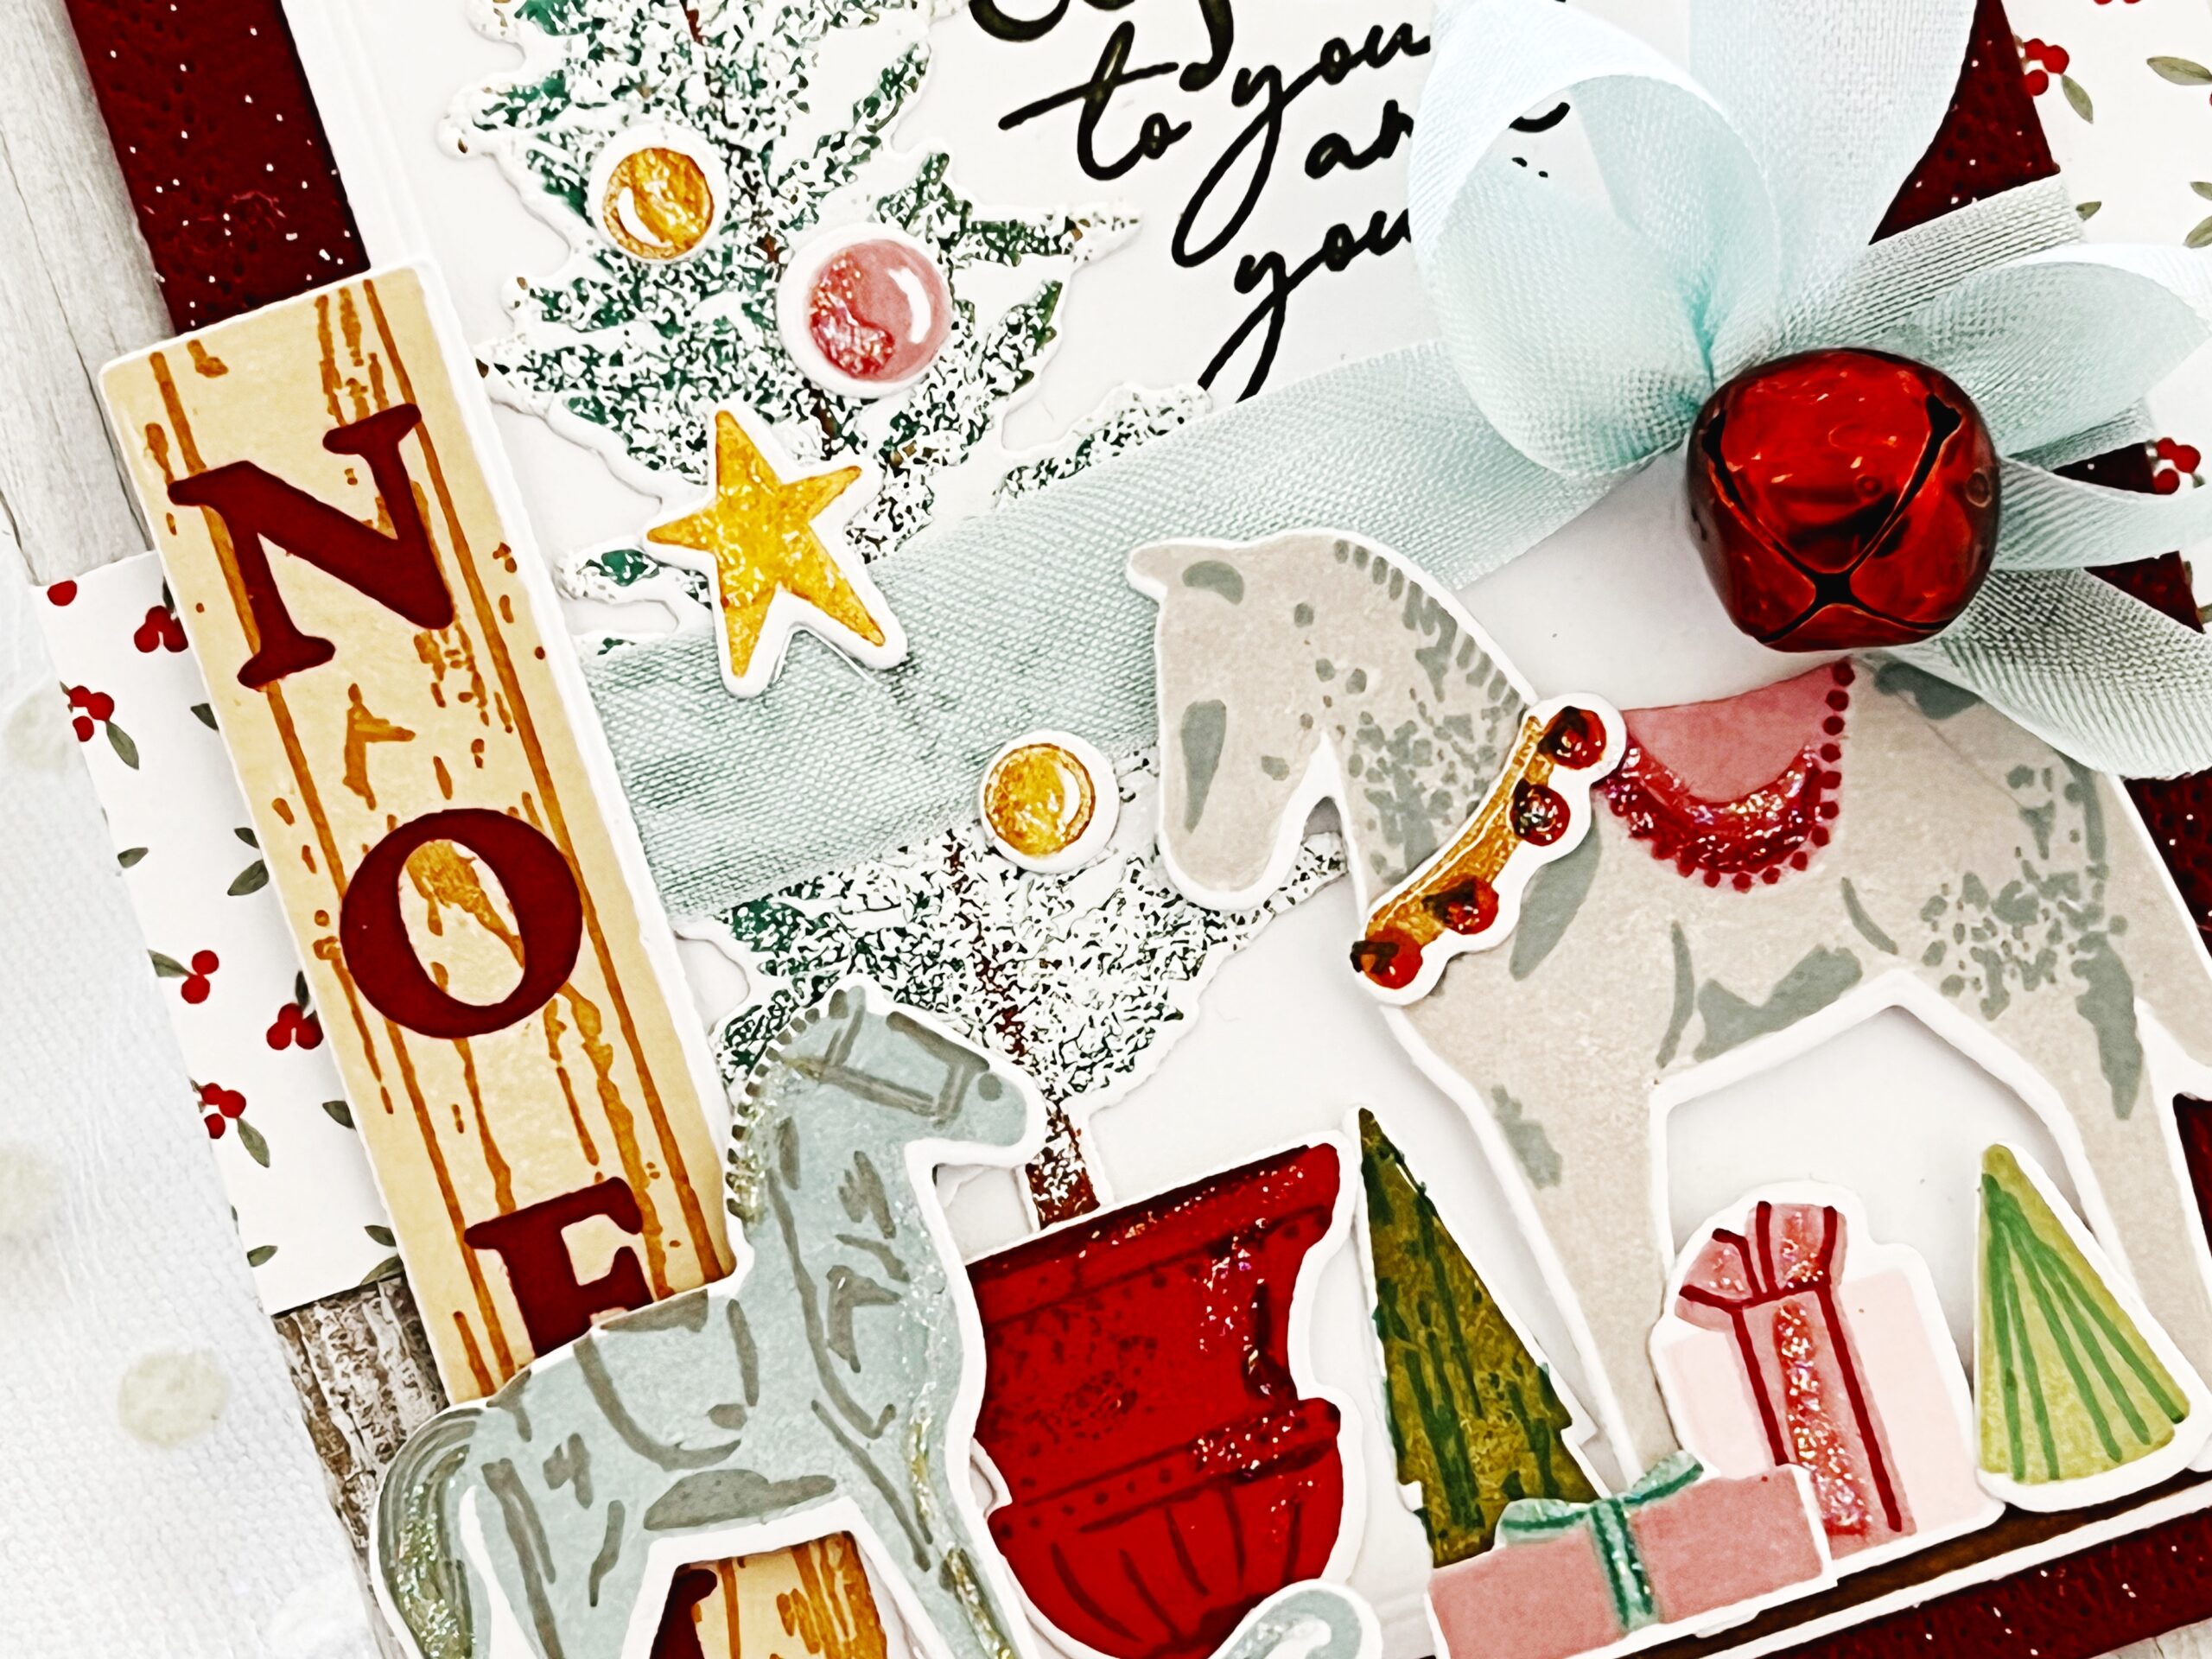
It is so fun to pick a color scheme for your old-fashioned Christmastime stamp set and then build on it. I used painted corrugated cardstock in the background and then layered over some shimmery Scarlet Jewel cardstock. I added shabby green embossing enamel to my Christmas tree, hoping to achieve a flocked look. One of my favorite elements of this set might just be the darling porch sign that spells our “Noel.” Too much to love about this new set!
You will love what our designers have created using these new set of products. Enjoy!
Supplies Used:
STAMPS: Christmastime
INK: Olive Twist, Ocean Tides, Autumn Rose, Honey Nut, Summer Sunrise, Soft Stone, Scarlet Jewel, Dark Chocolate, Fine Linen, Saffron Spice, Weathervane, Spring Moss, Sweet Blush
PAPER: Ocean Tides, Stamper’s Select White
DIES: Love to Layer: Rectangles, Christmastime
OTHER: Seam binding, jingle bell, Stickles glitter, shimmer cardstock, corrugated cardstock, patterned paper


- Use the Deliver By December 25th stamp set to enhance your sentiment
- Use three different colors of ink on the wreath to give it dimension
- Use the Noel letters on their own for something different


TIPS:
- In a rut? Use the stamping guide for color combinations to get your creative juices flowing
- Try stamping the Noel letters directly onto the sign for a hand painted look
- Use a hot foiled background to add some sparkle and shine
TIPS:
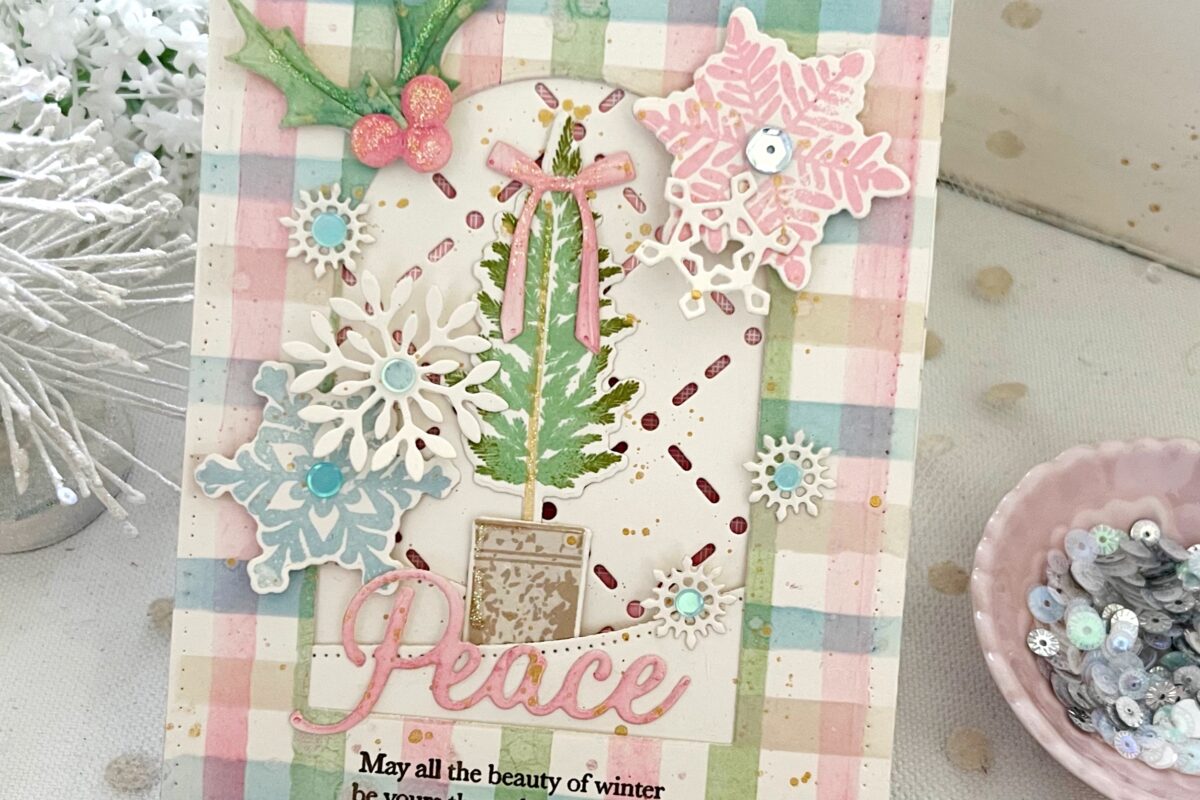
- Use a few different leaves and pine branches for variety
- Keep your color palette neutral for a soft look
- Use pattern paper as your background for added detail
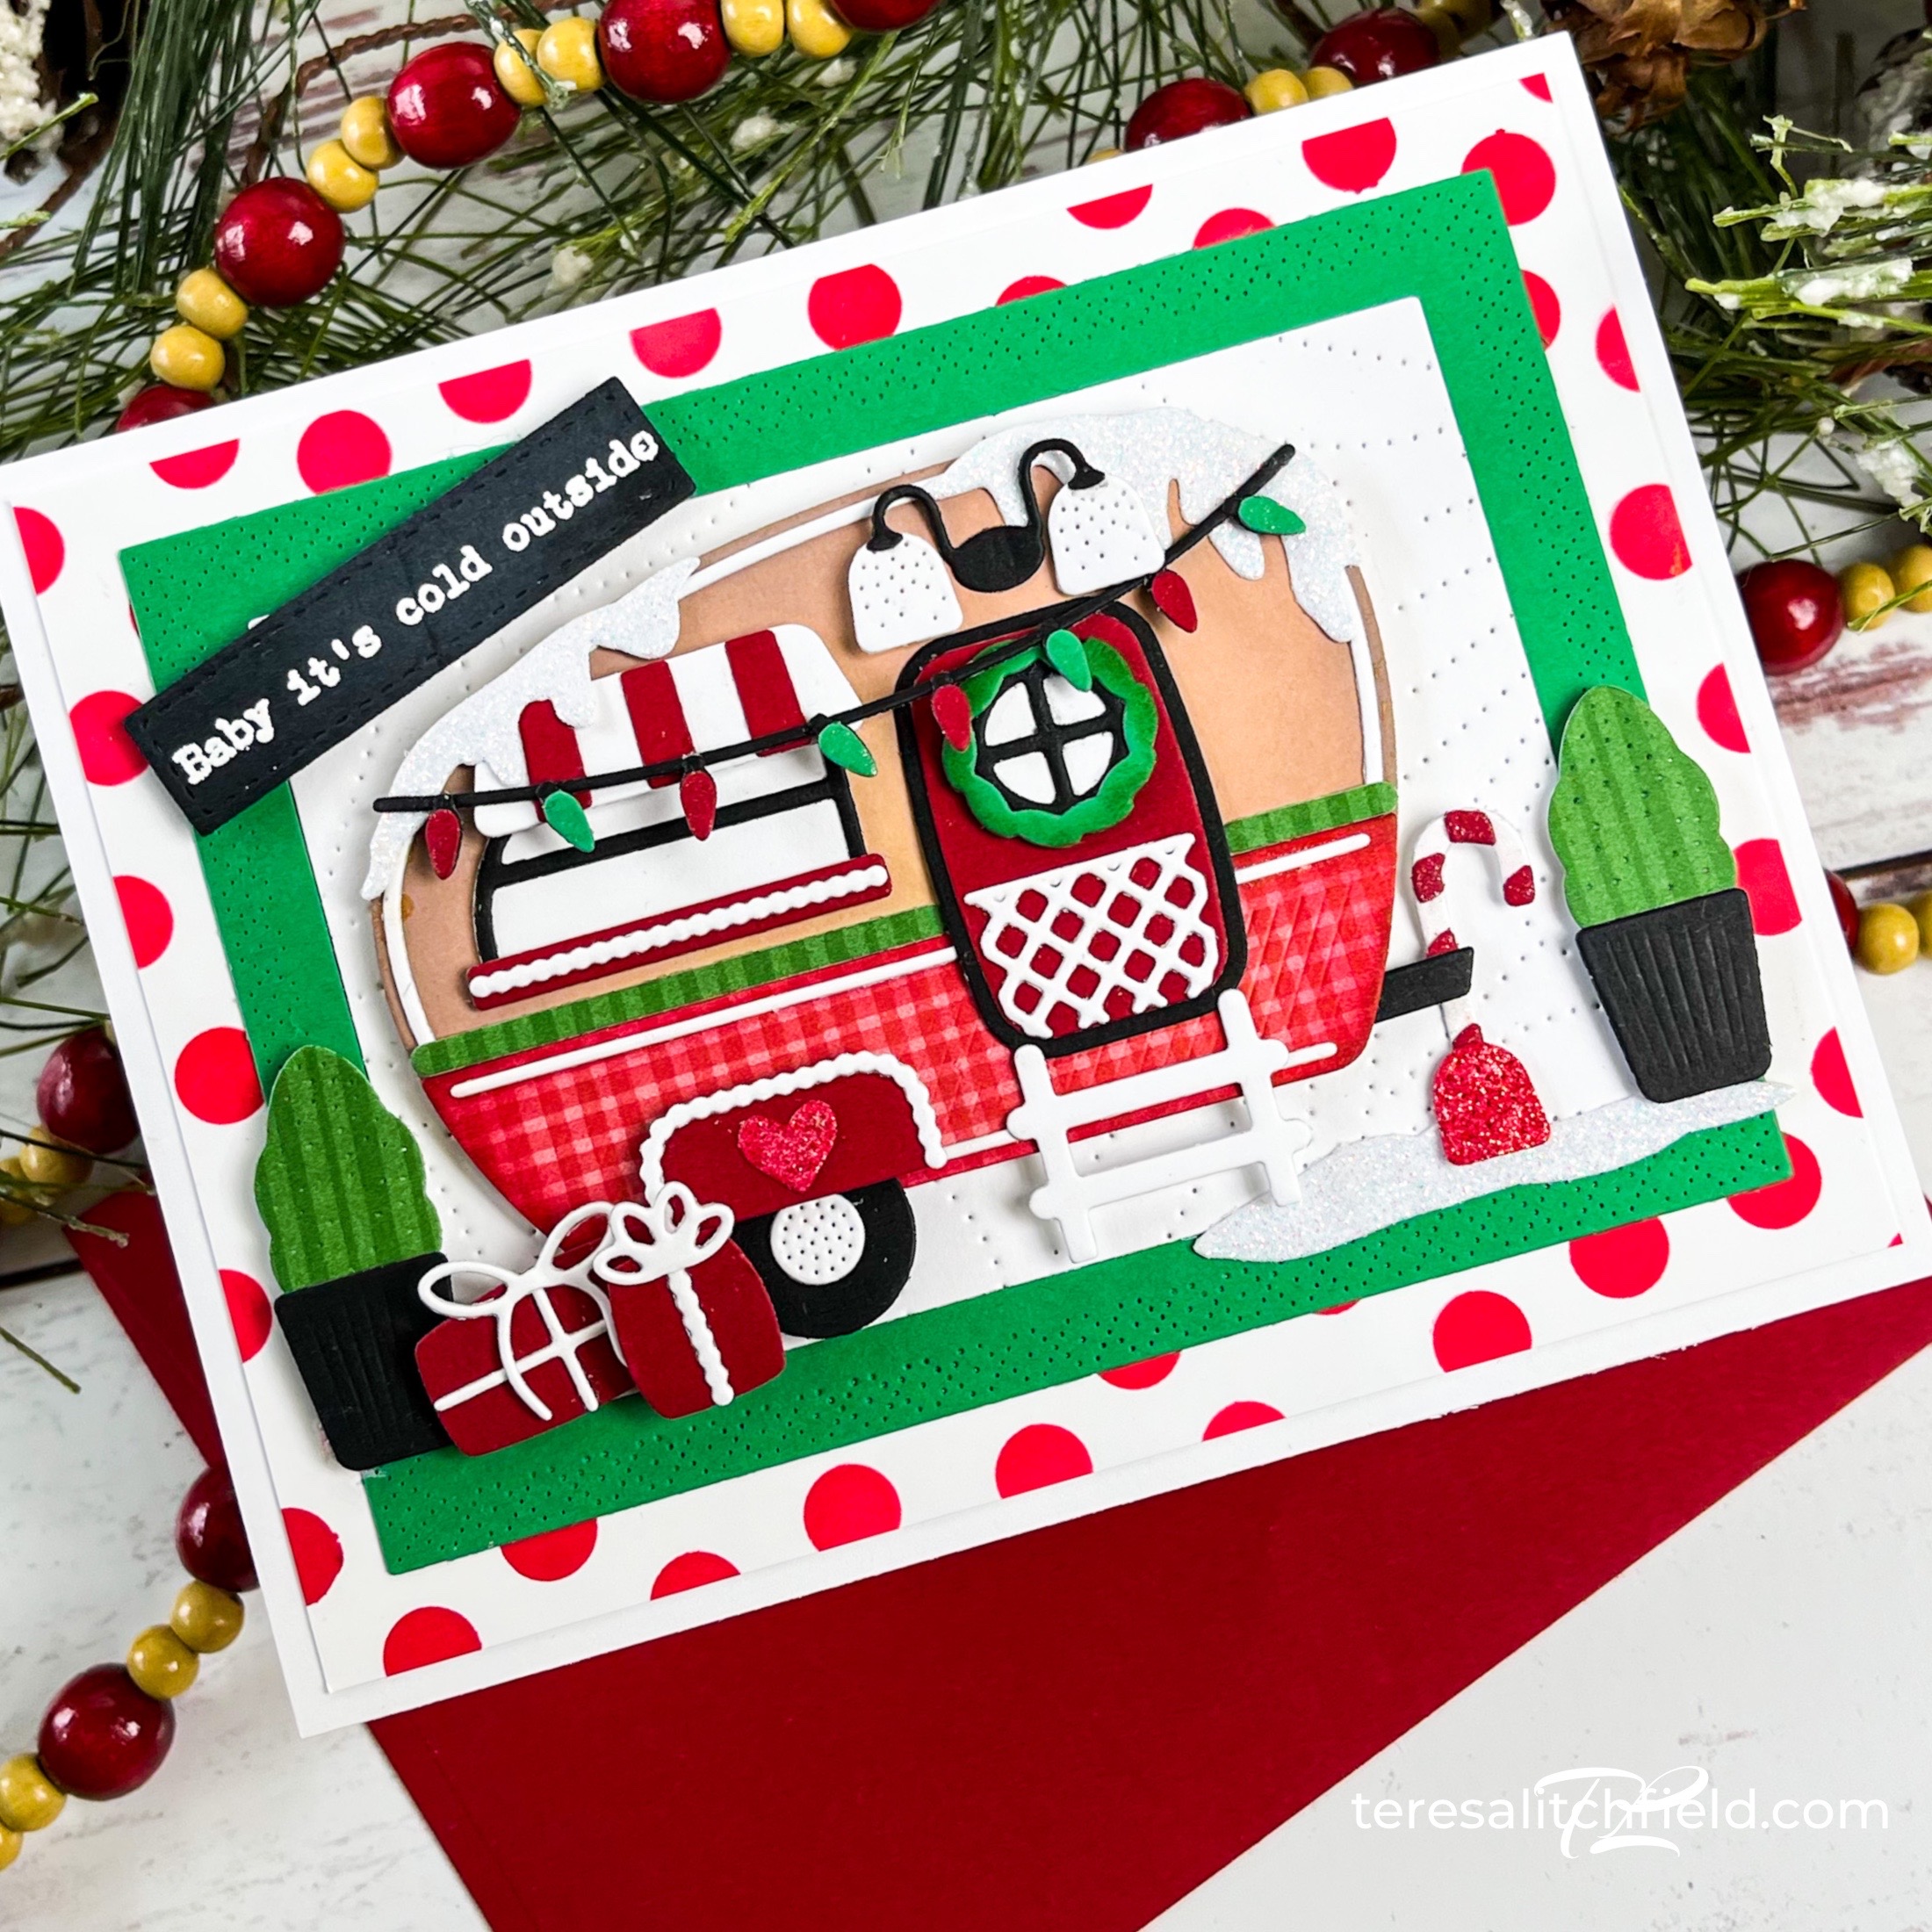
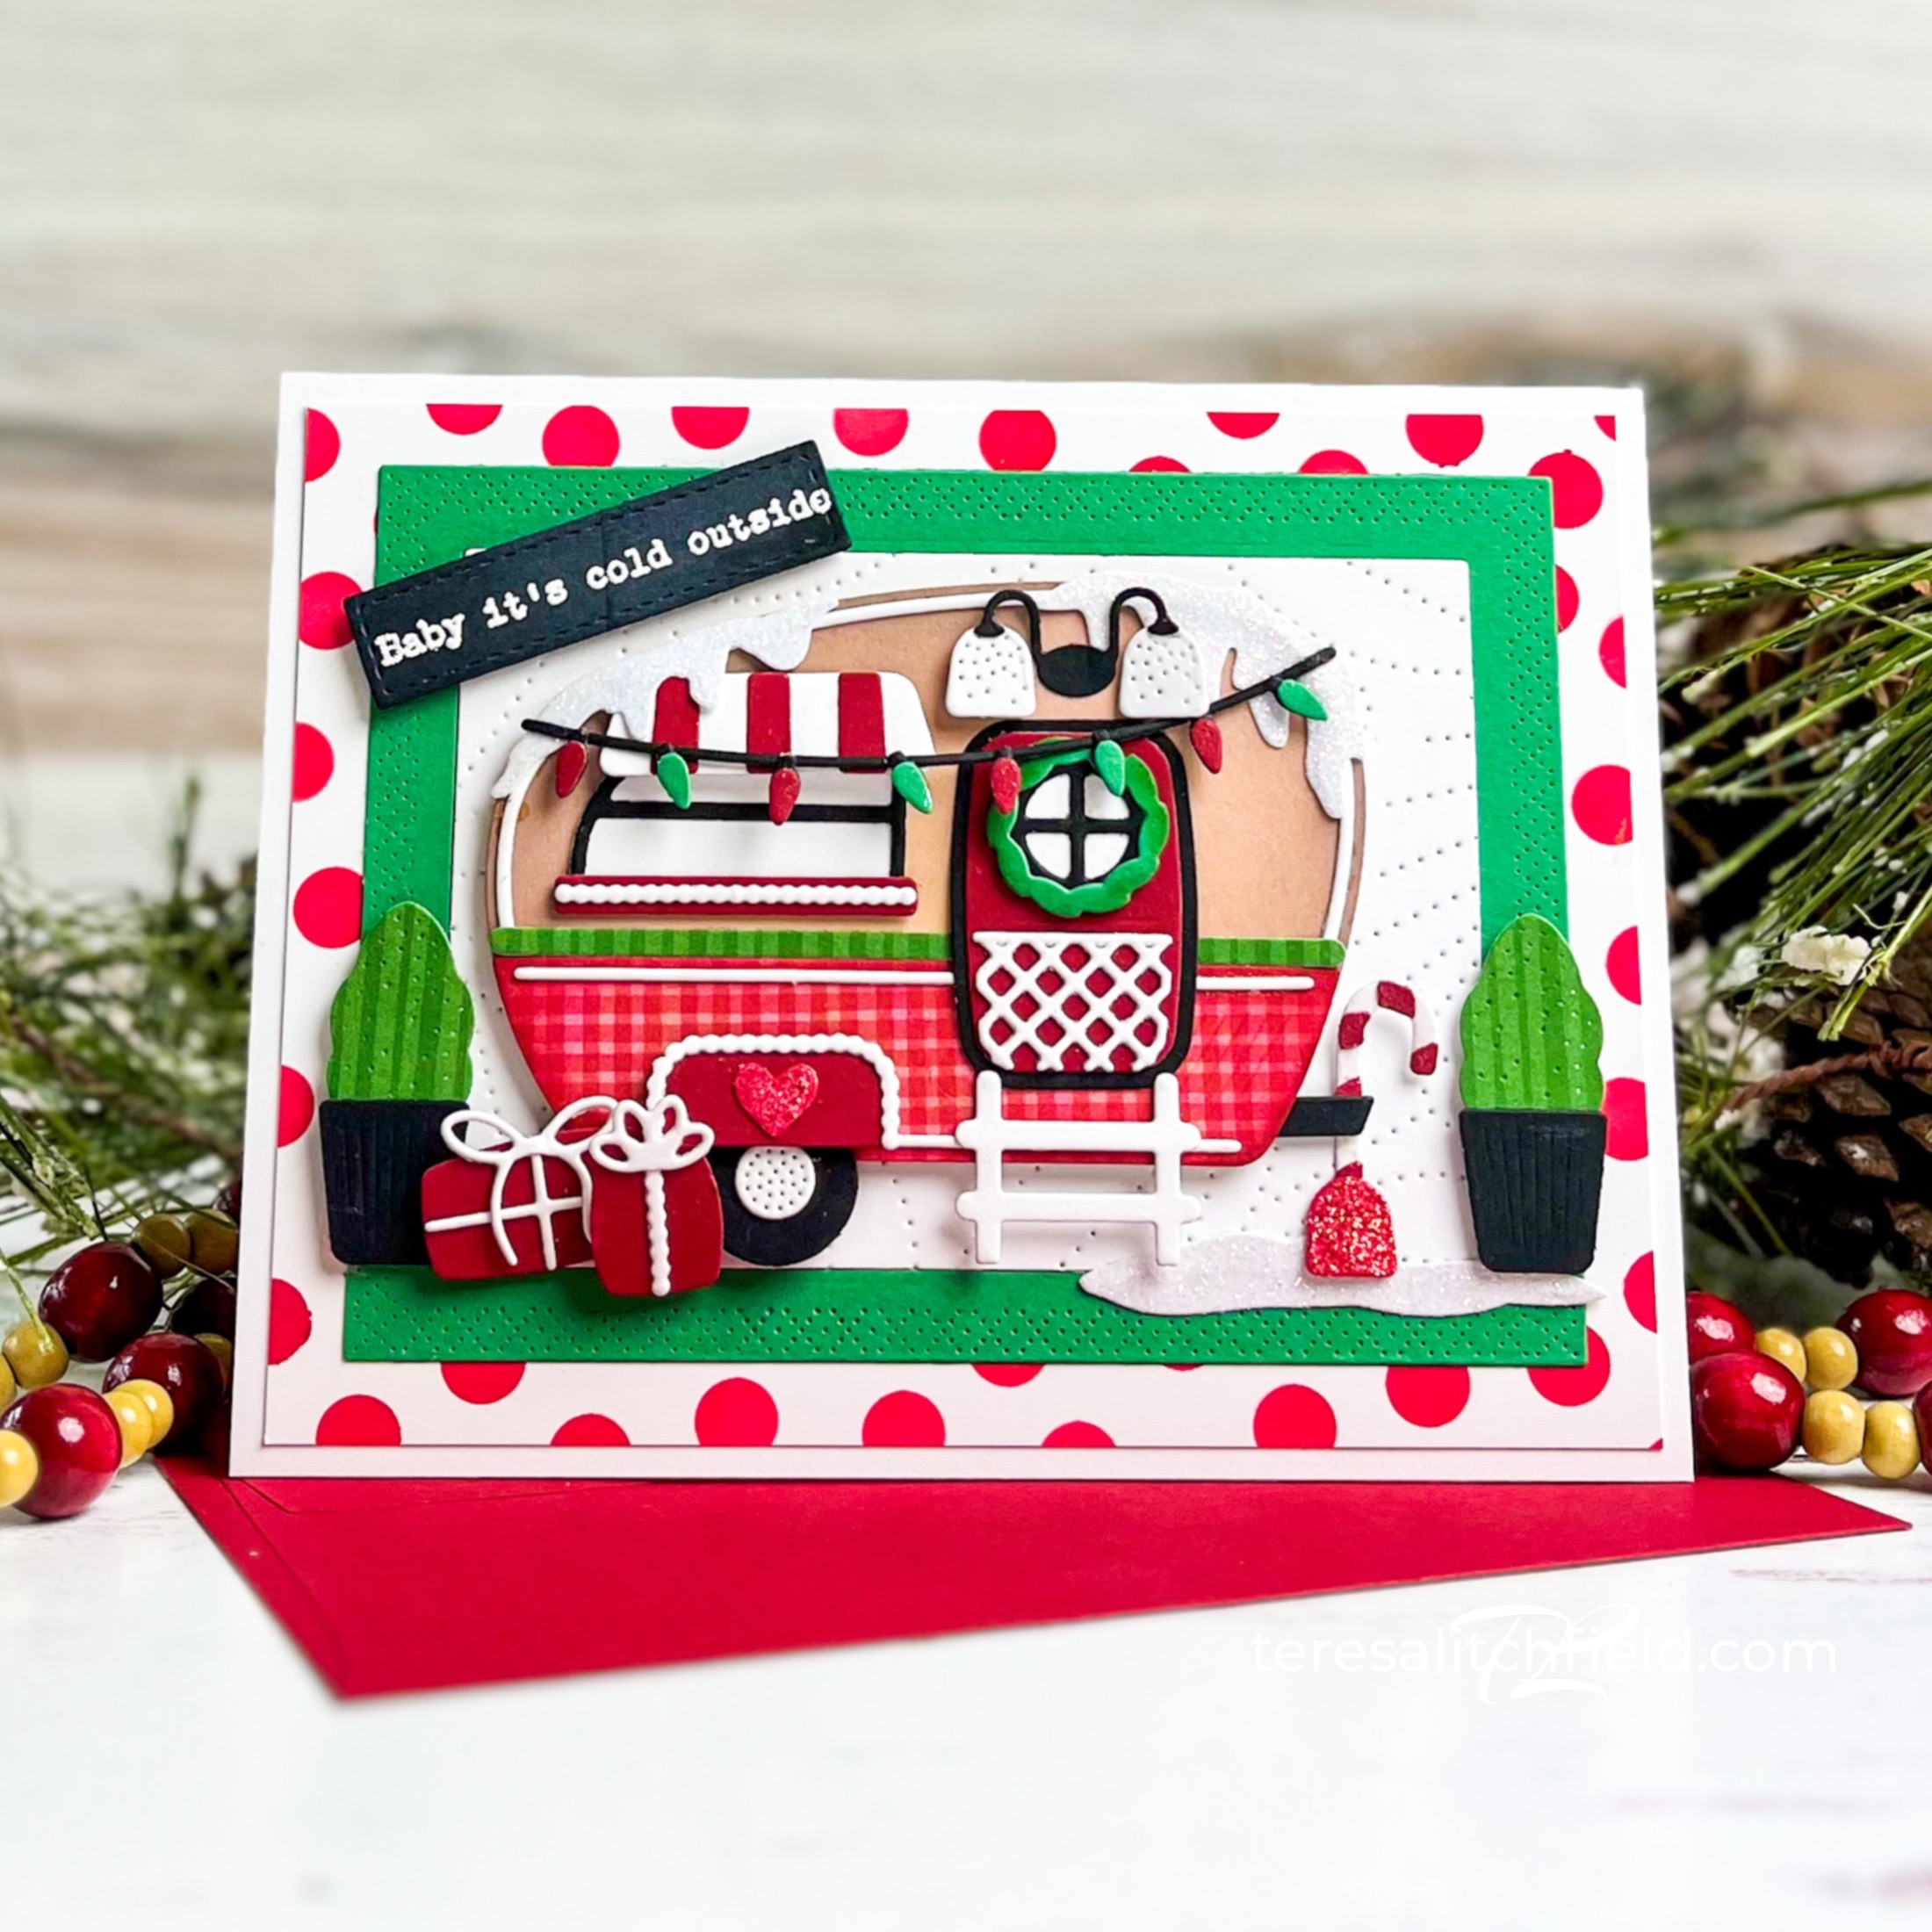
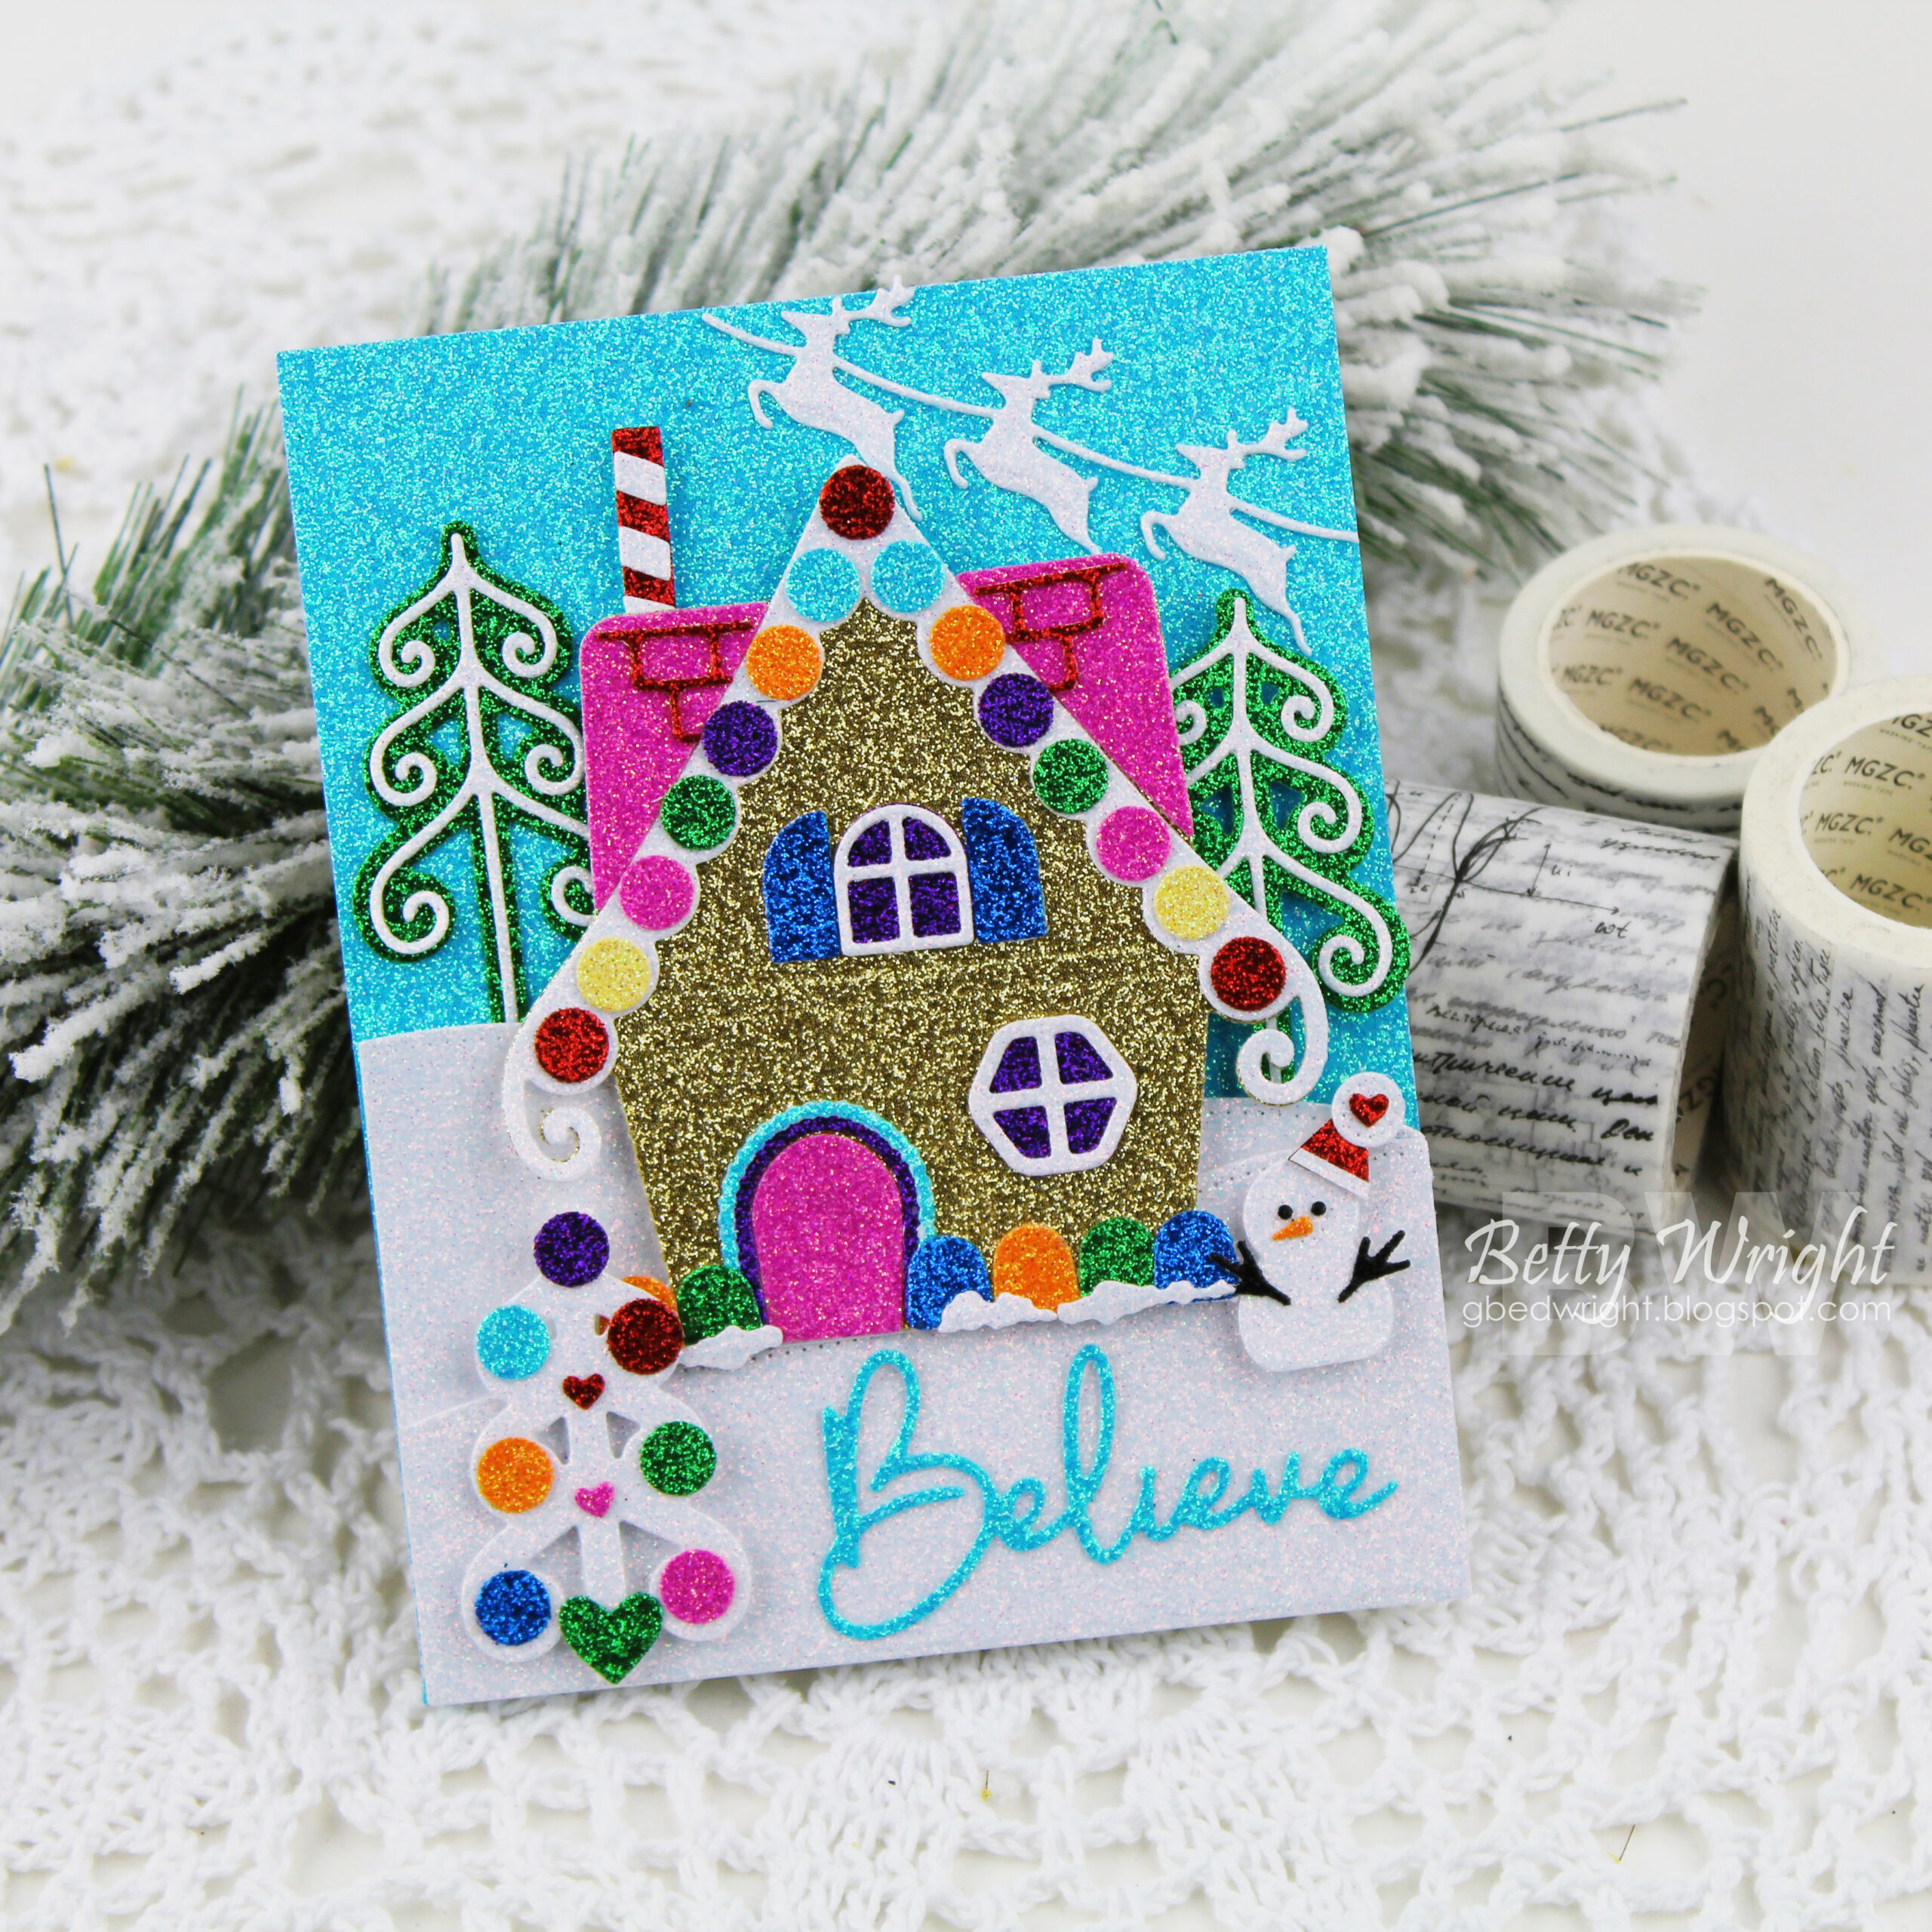
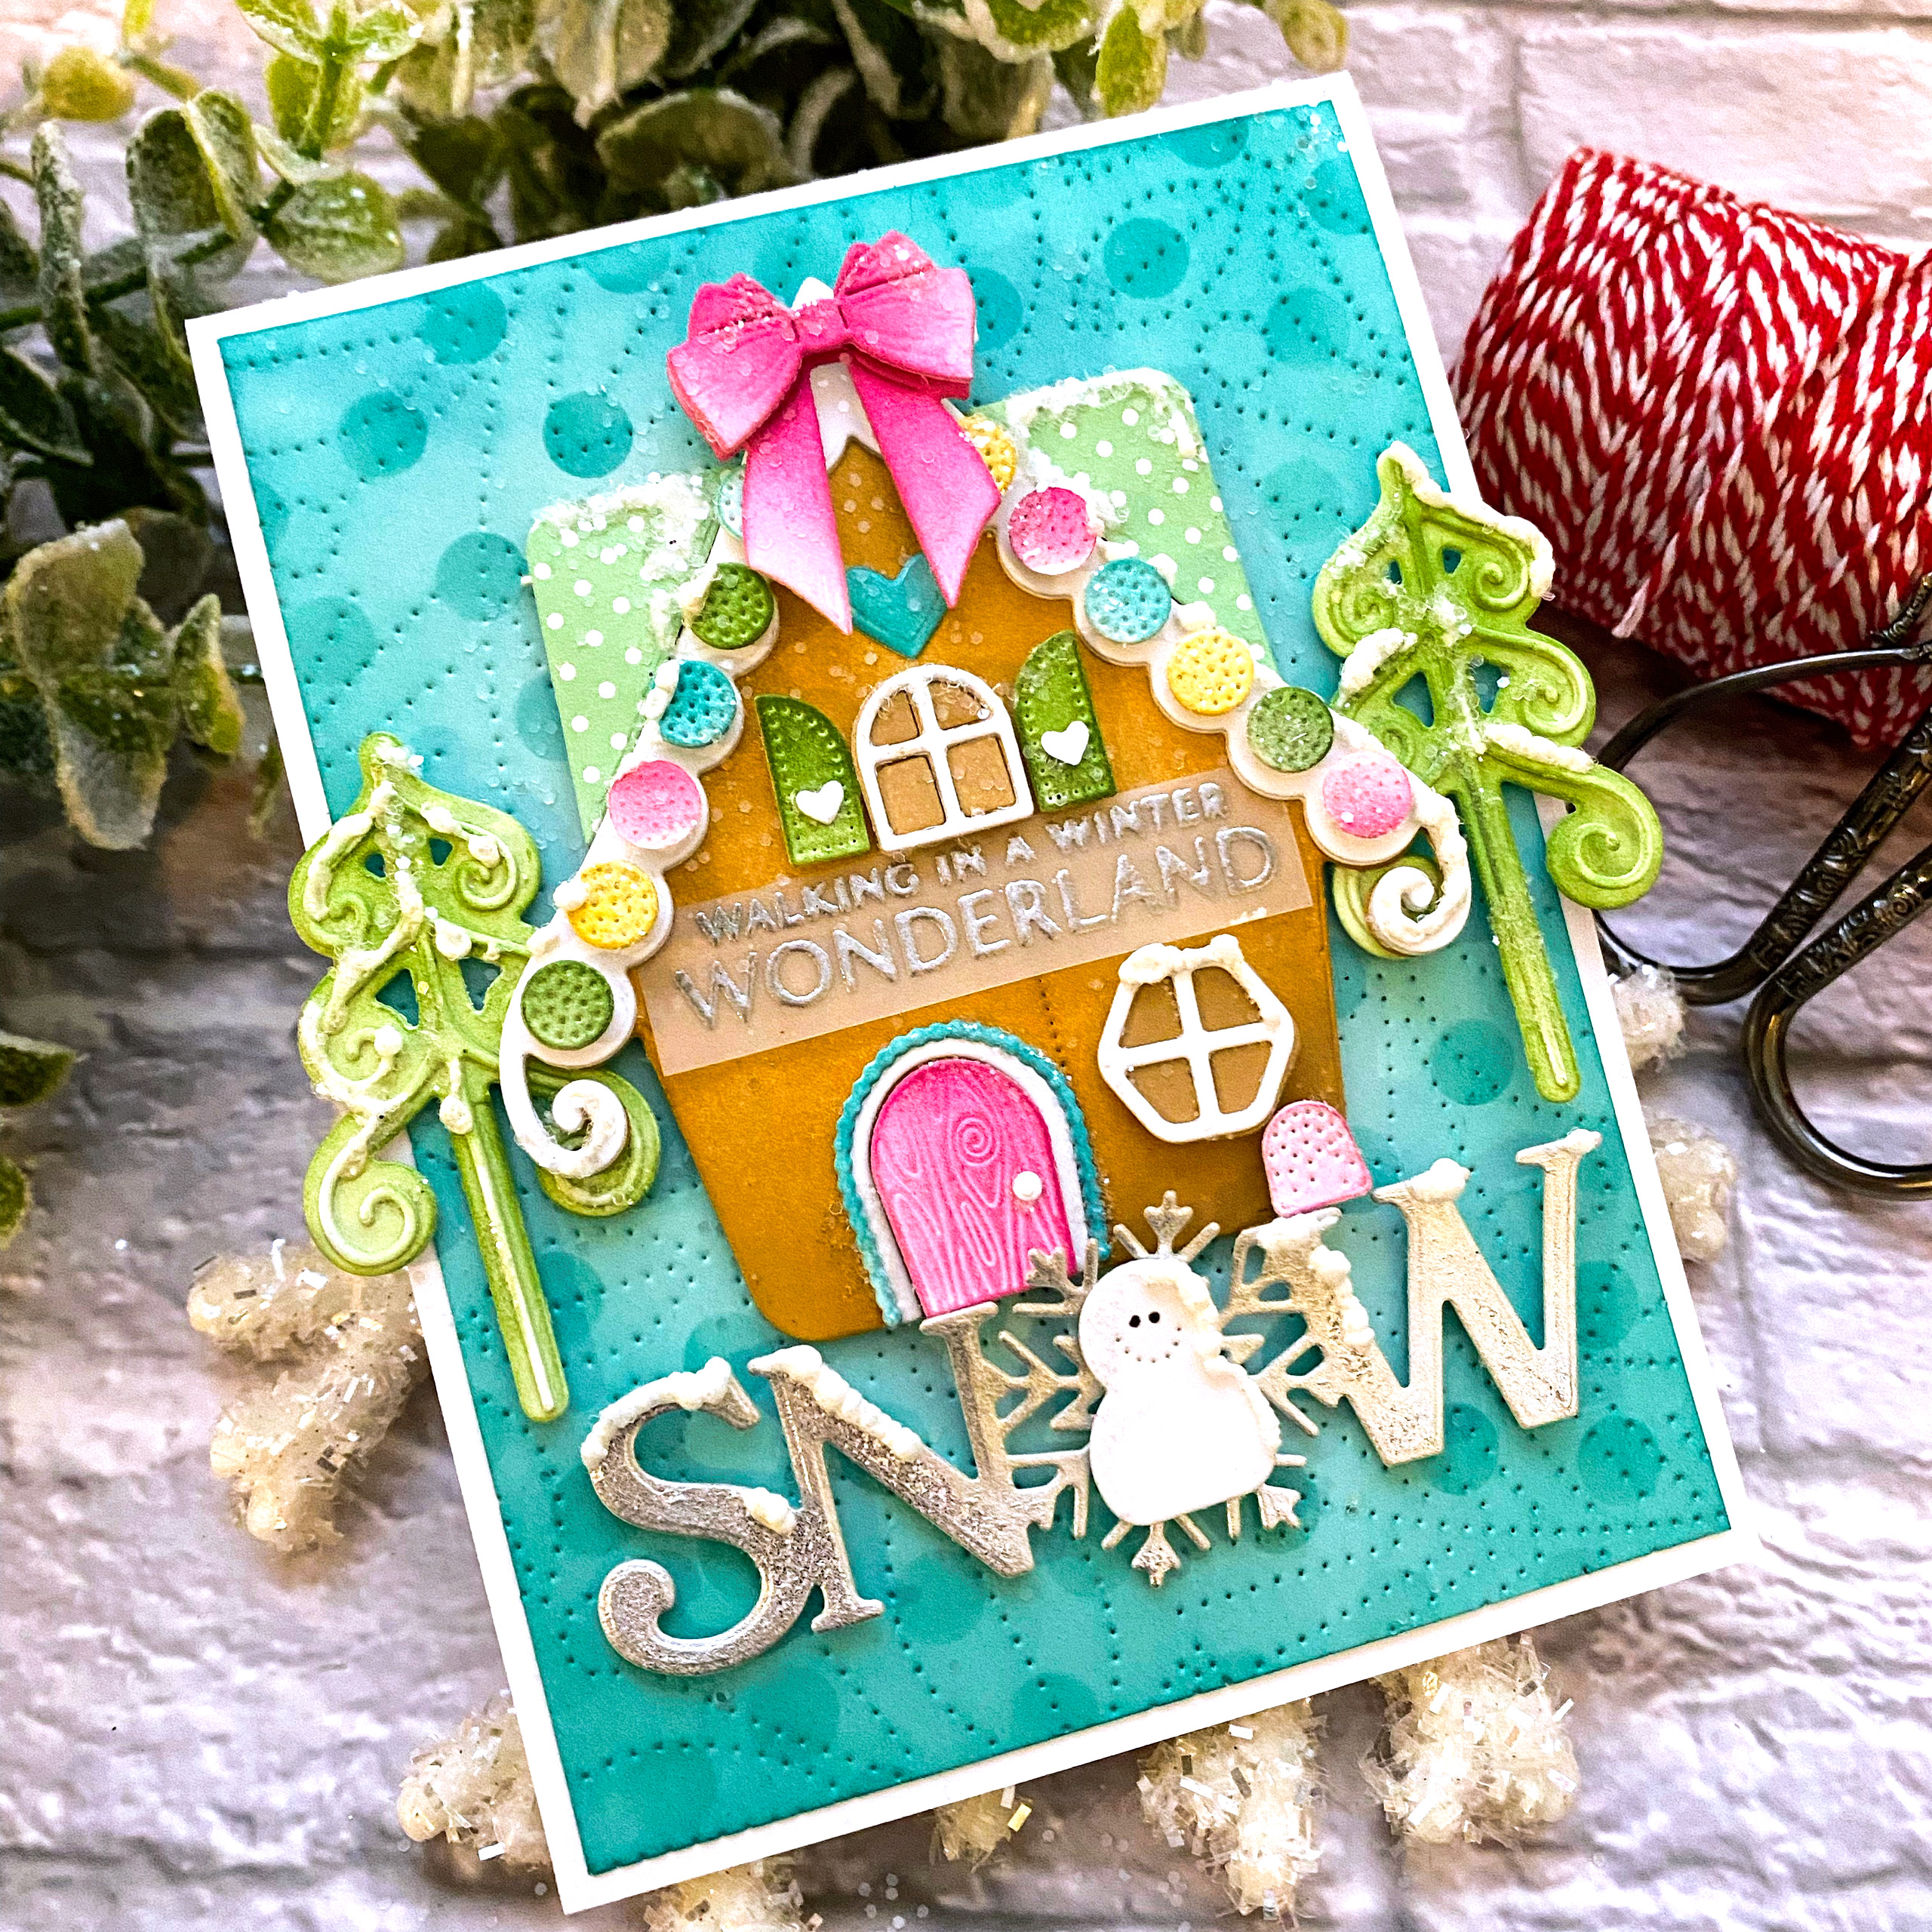
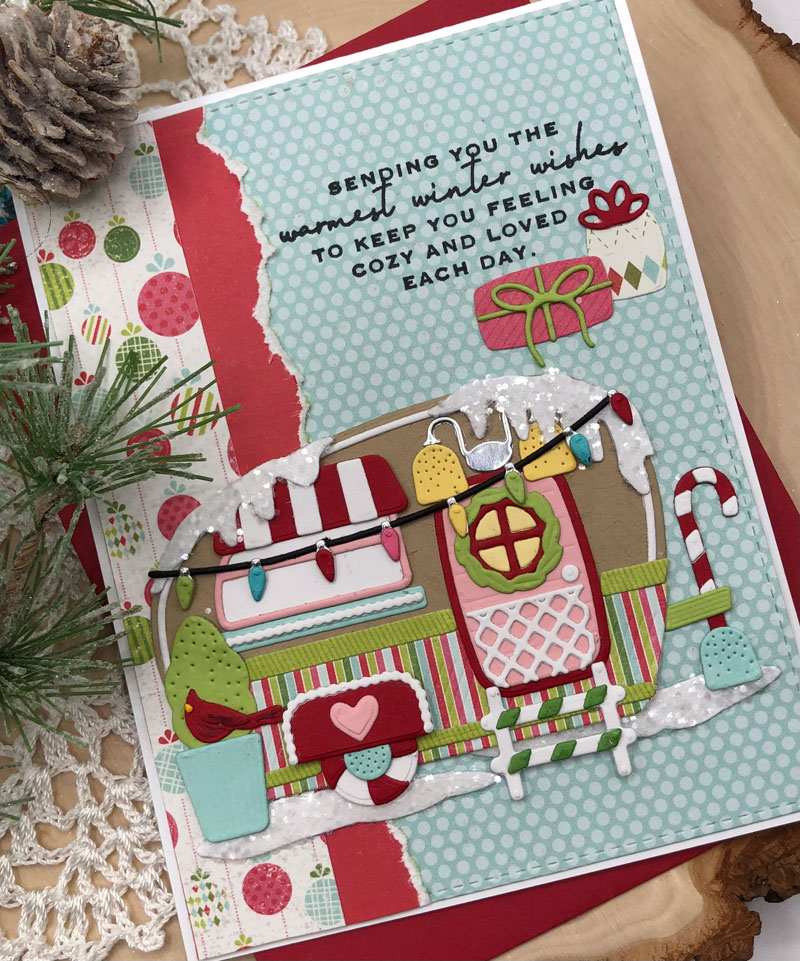
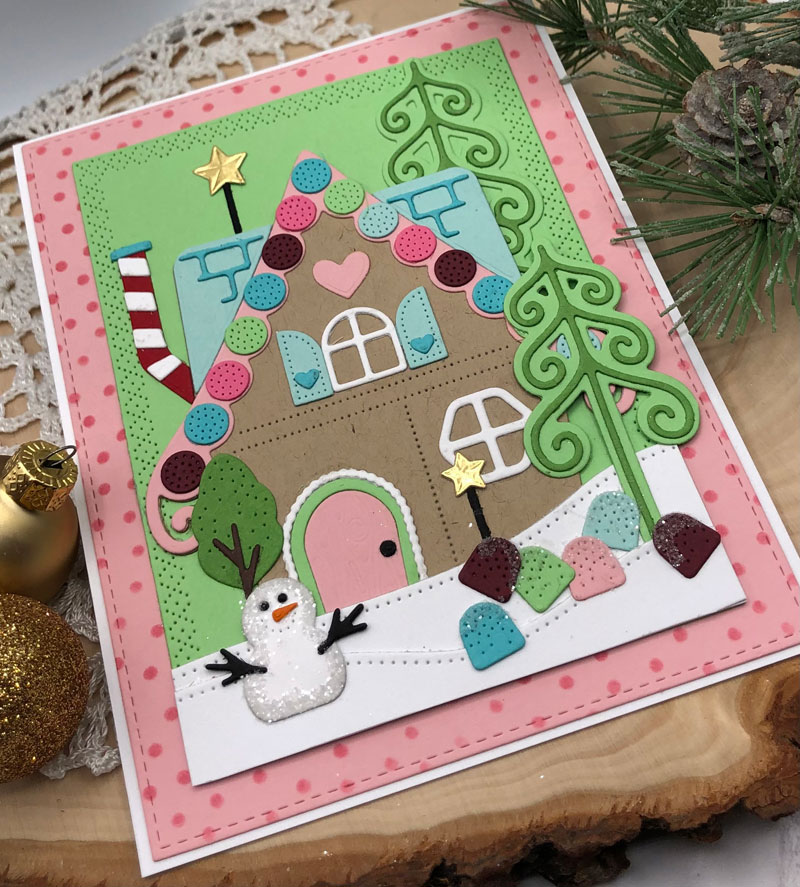
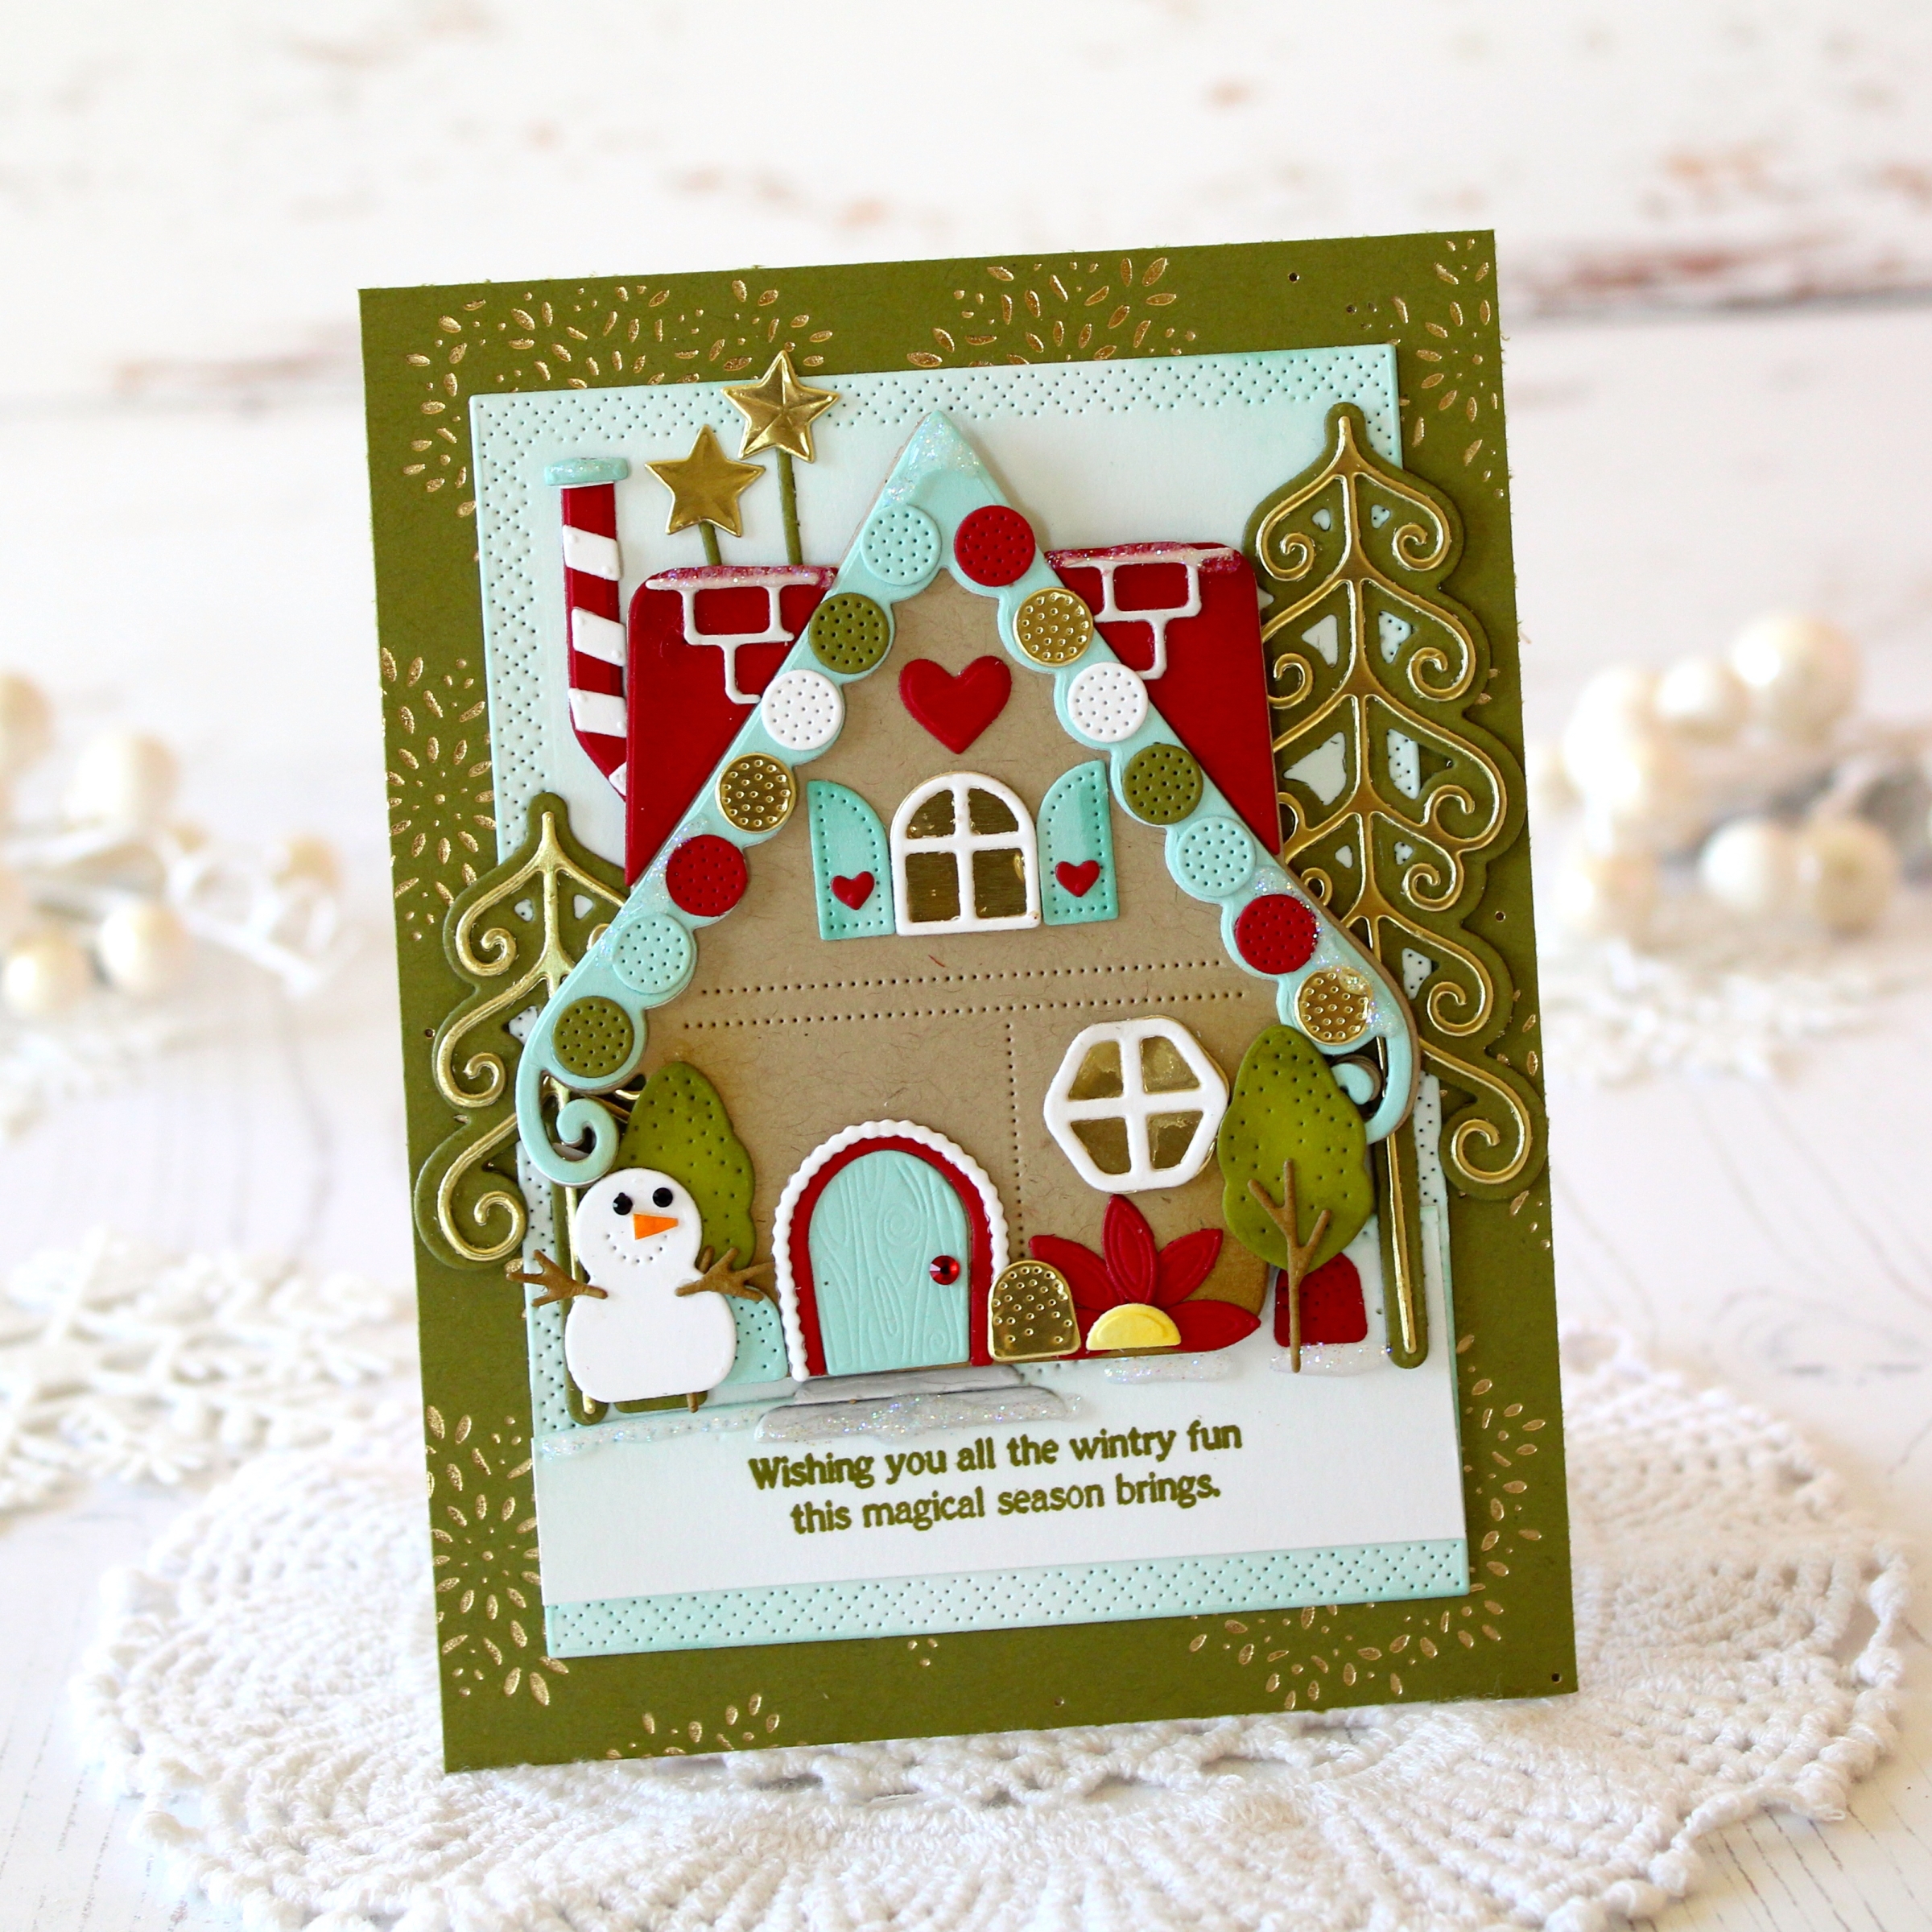
I hope you’ll love the new Gingerbread House dies and Gingerbread Camper dies as much as I do. They are sweet like candy and too cute for words. Watching them come to life as you create with them is such a delight!
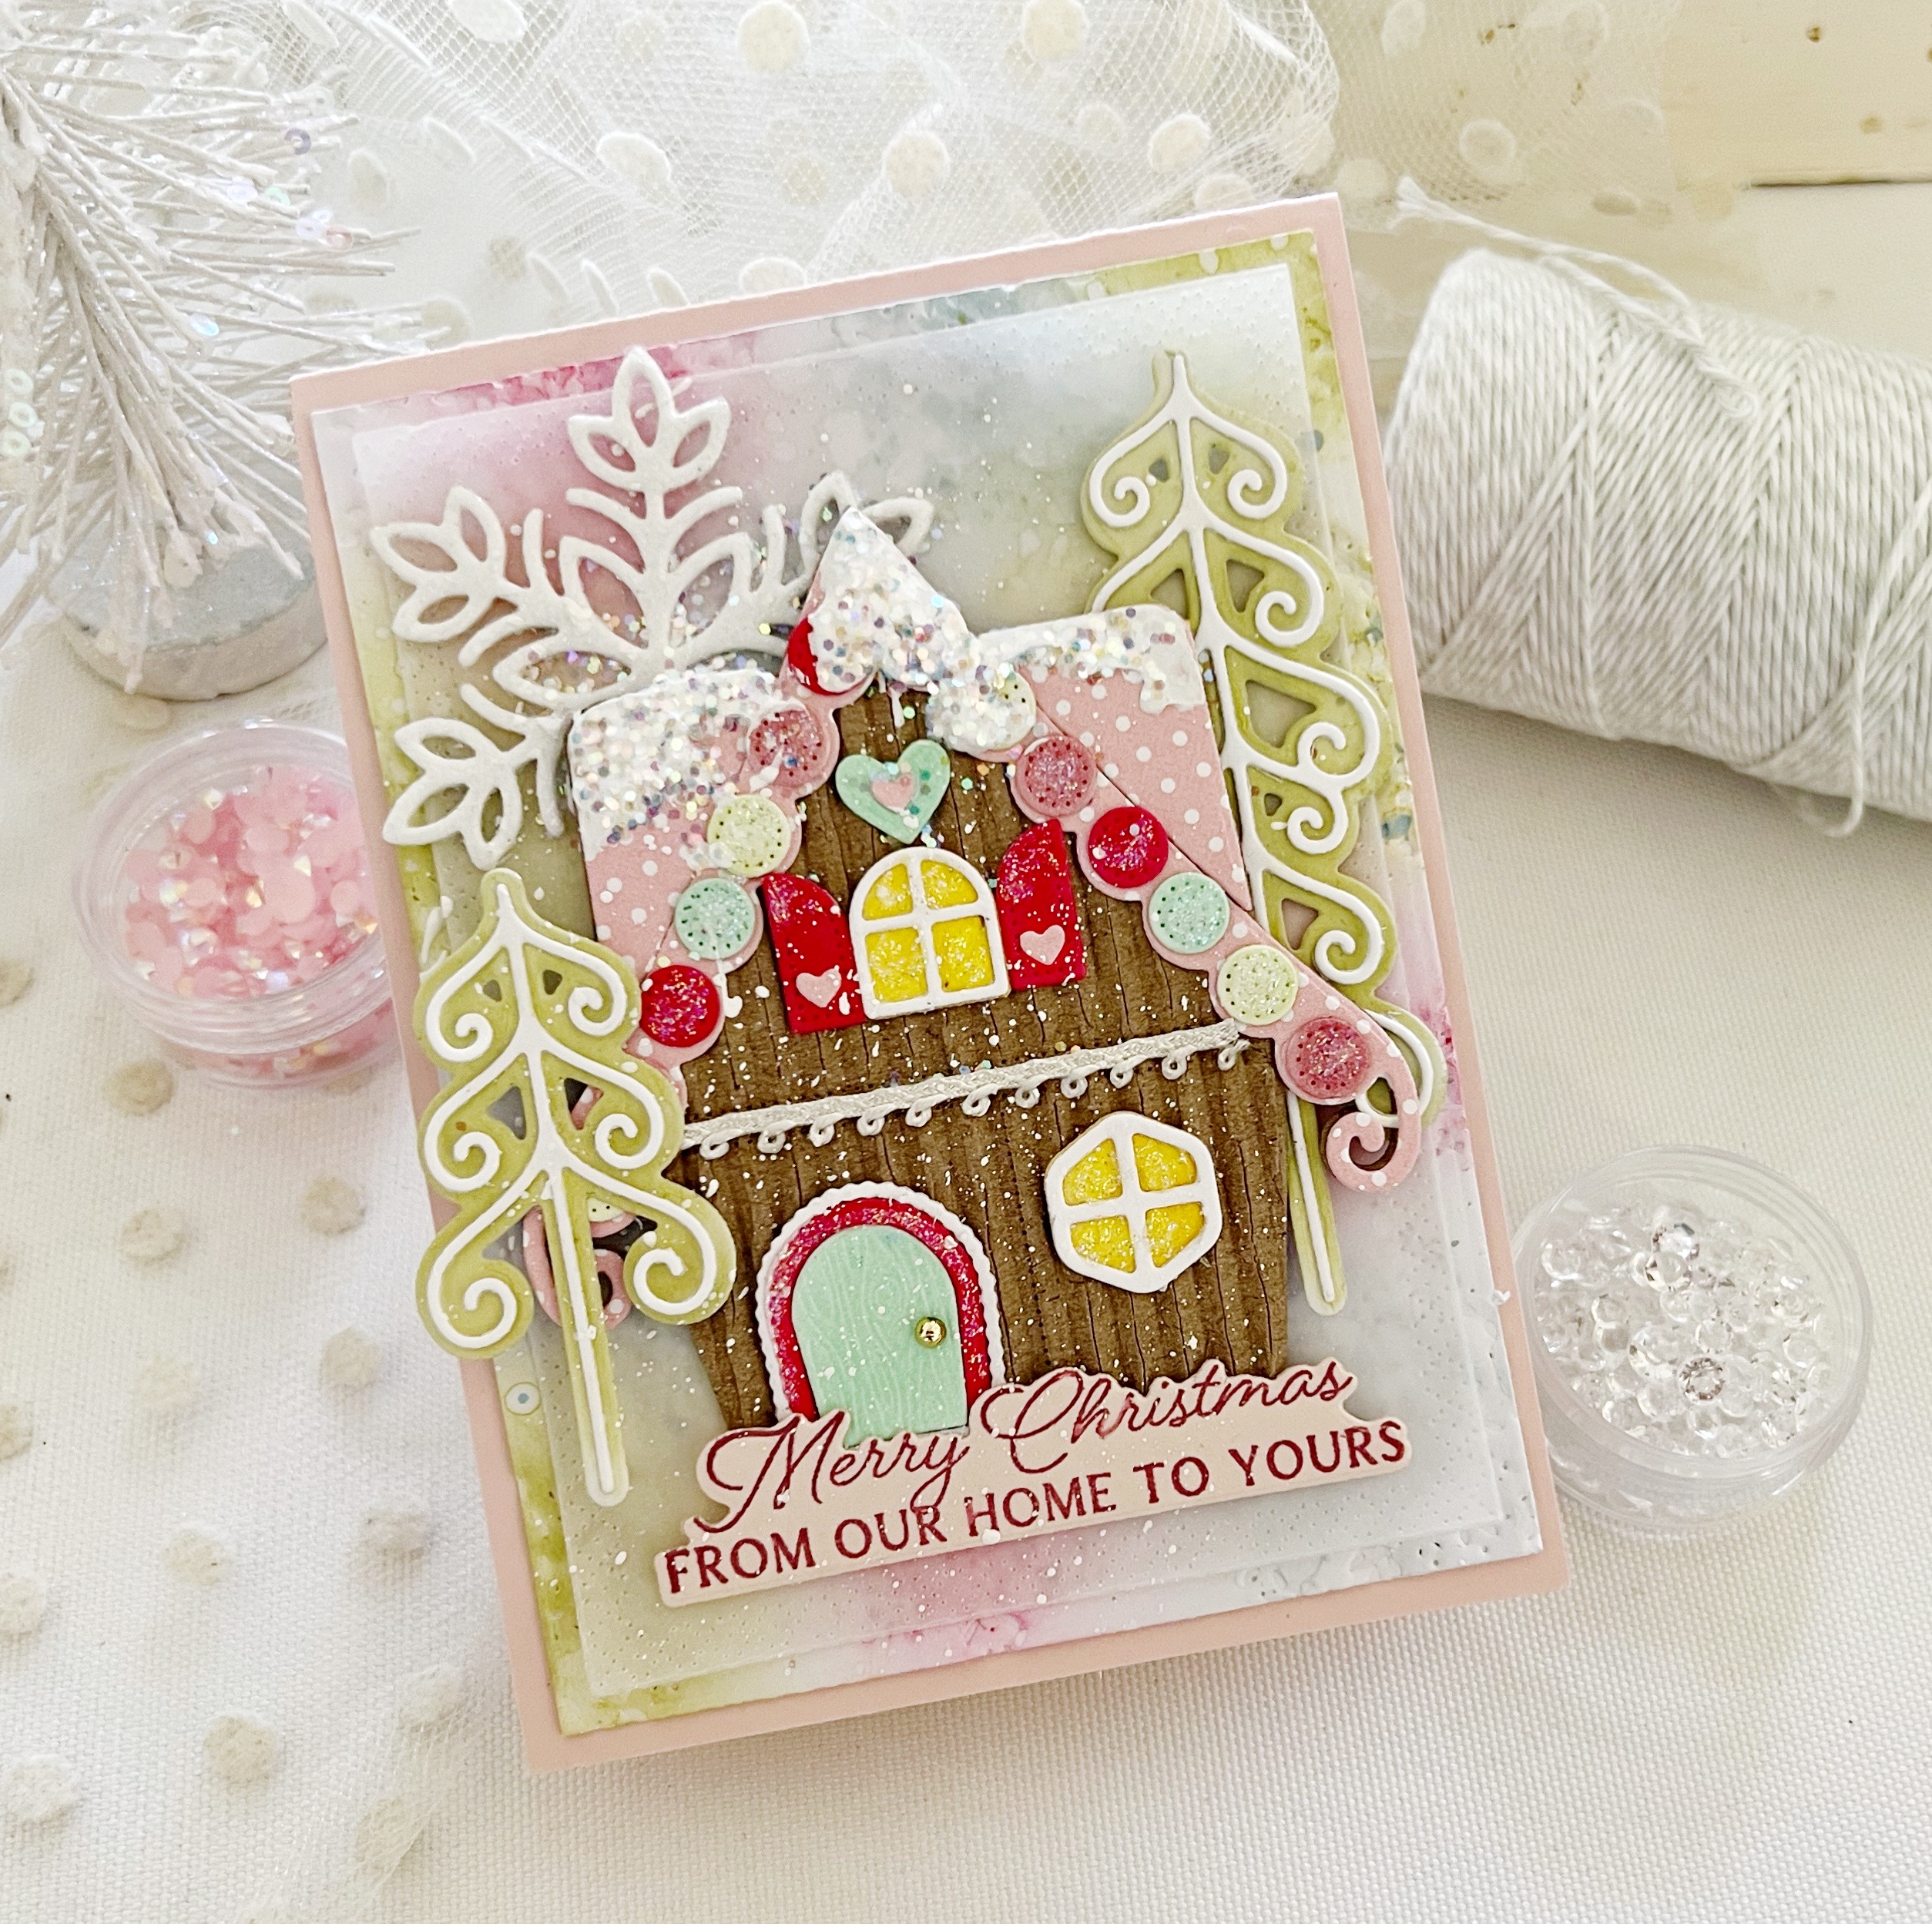
I chose to create with the new Gingerbread House dies for my project today. I’ve been dreaming of a Papertrey Ink gingerbread house for a long time now, and it’s been such a treat to watch it happen. This sweet house is just as whimsical and enchanting as they come. I adore the gumdrop trim and swirls of the roof and trees. The magical shape, feel, and shape of all the windows, trimmings, and accents just couldn’t be more perfect.
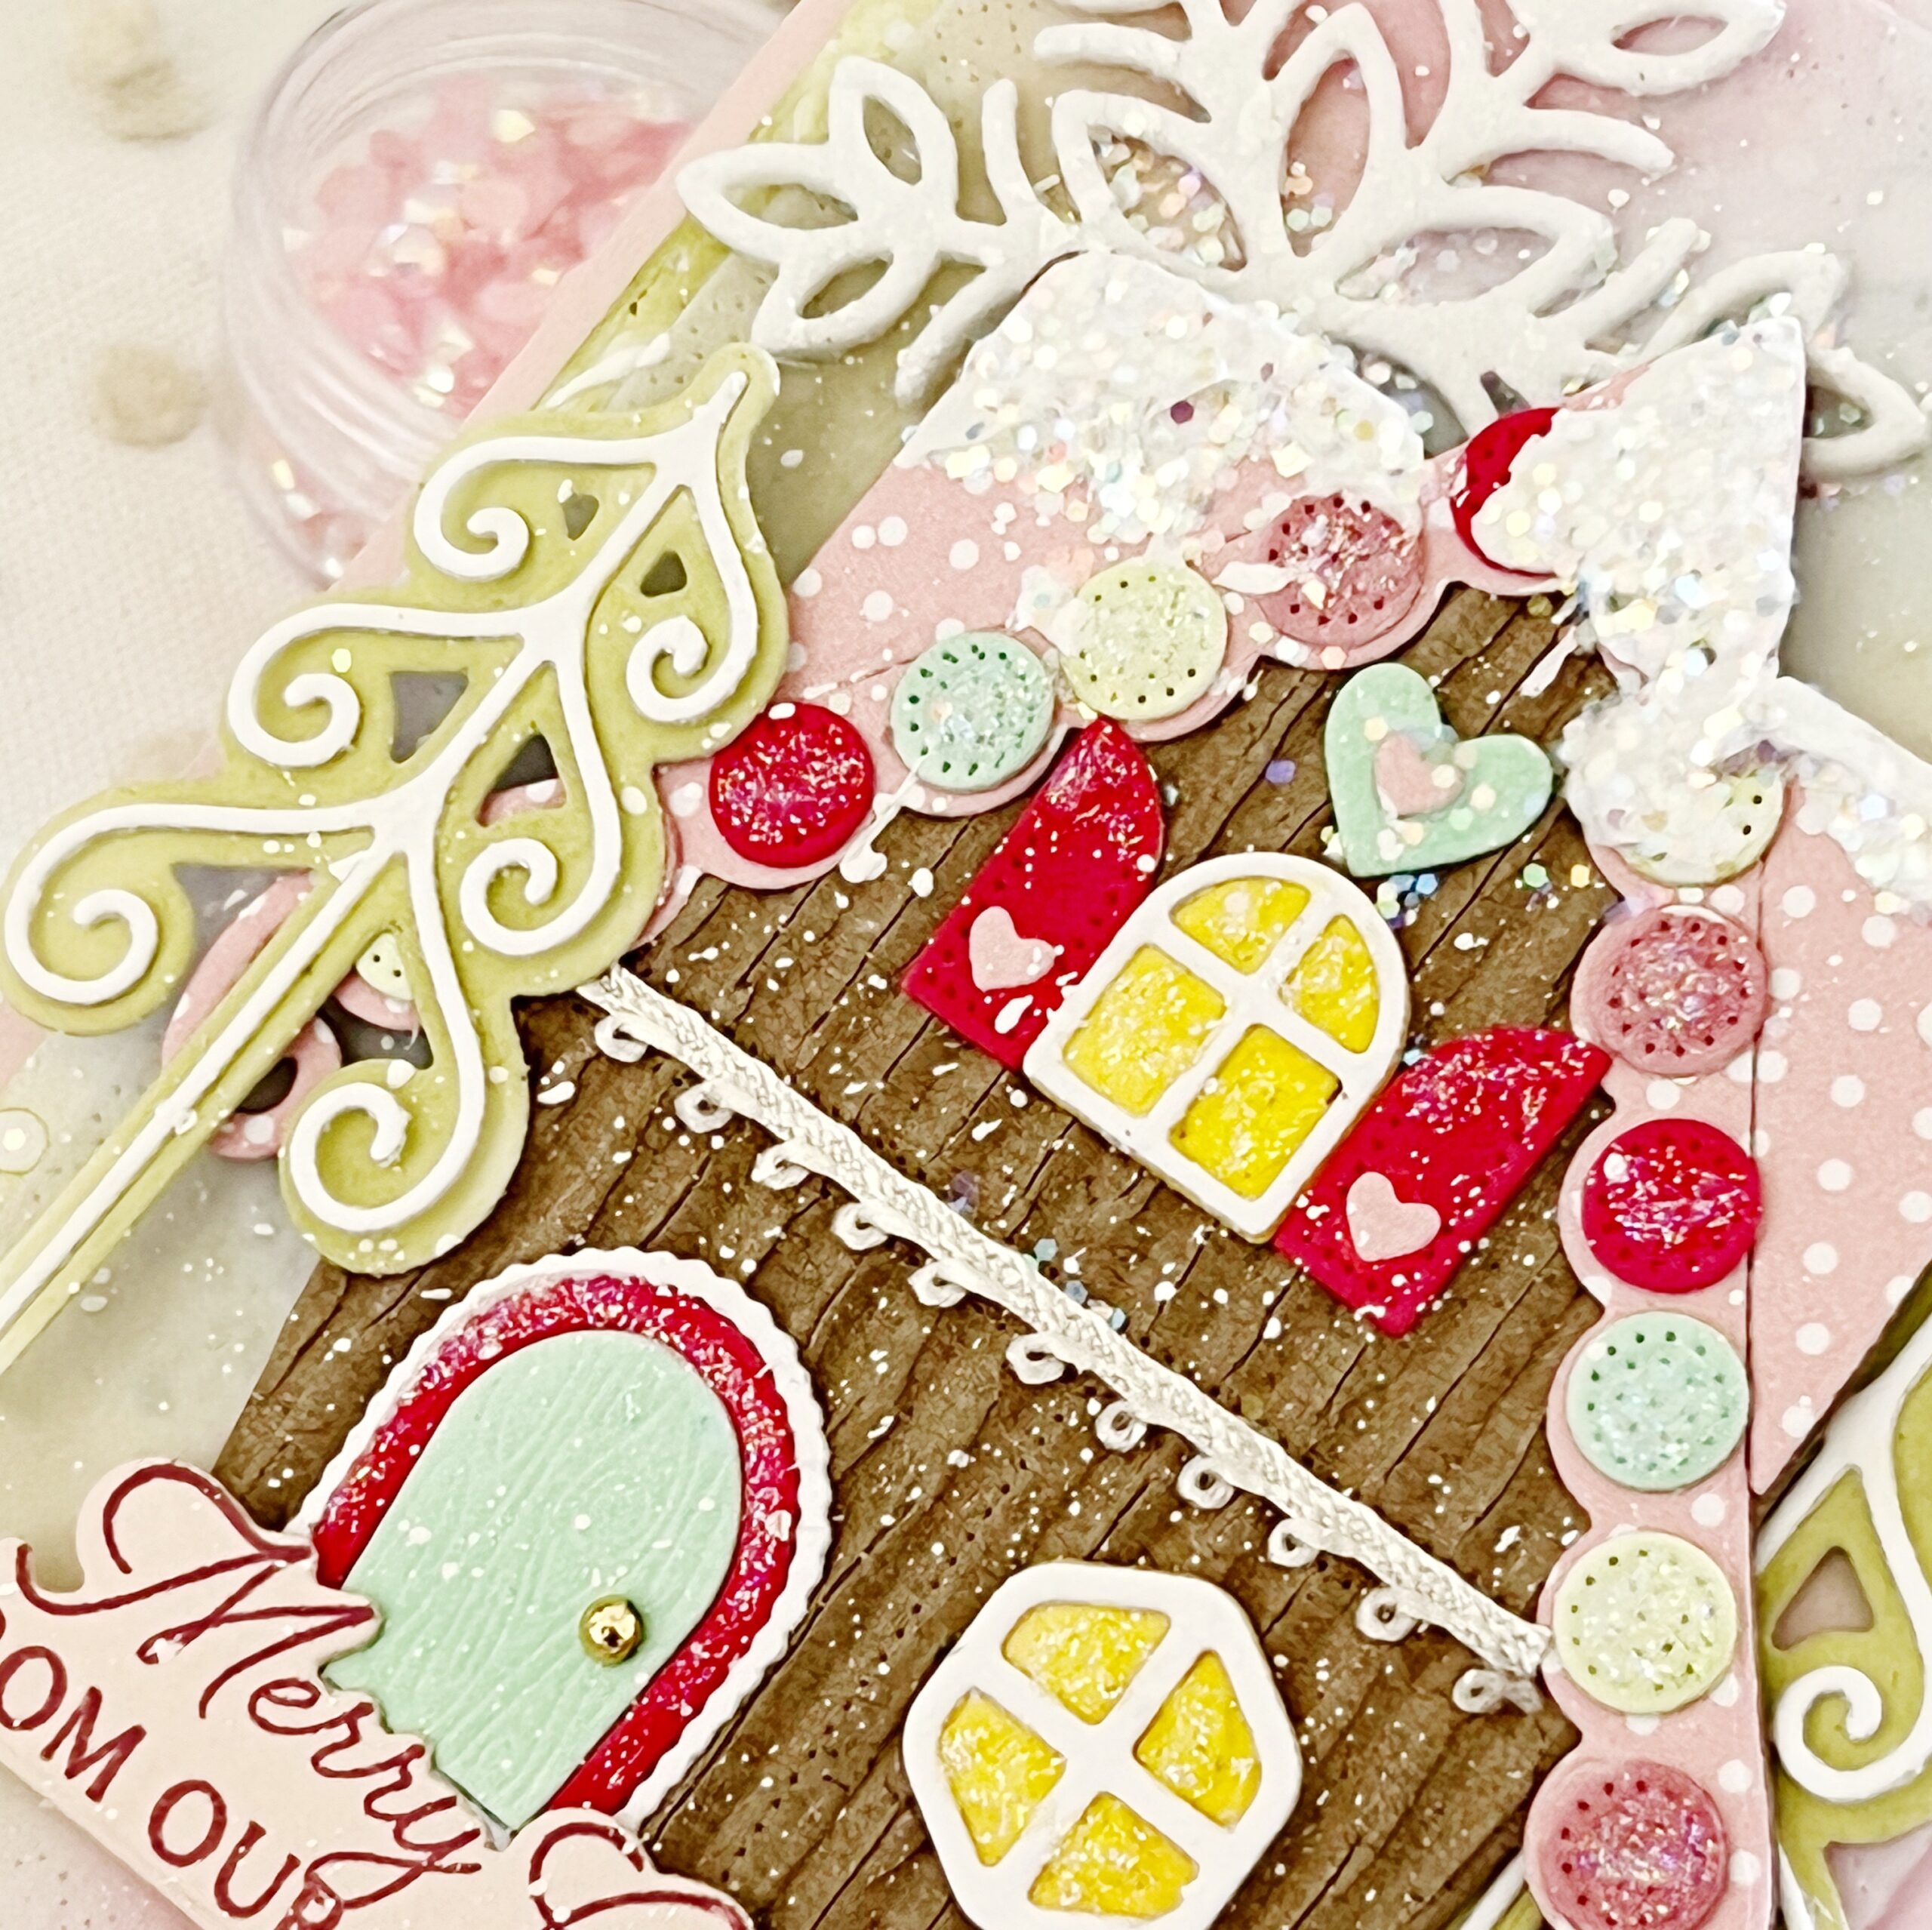
I die cut the main body of my house from corrugated cardstock, saved from a cardboard box. I then added a Bitty Big Pale Peony rooftop and Copic colored gumdrops for the trim. All of the accents on my house were either cut from patterned paper or from white cardstock and colored with my Copics. This makes adding color to the tiny pieces so easy. I added a bit of trim across the center of my home, in order to create a bit of frill and further the playful gingerbread house feel.
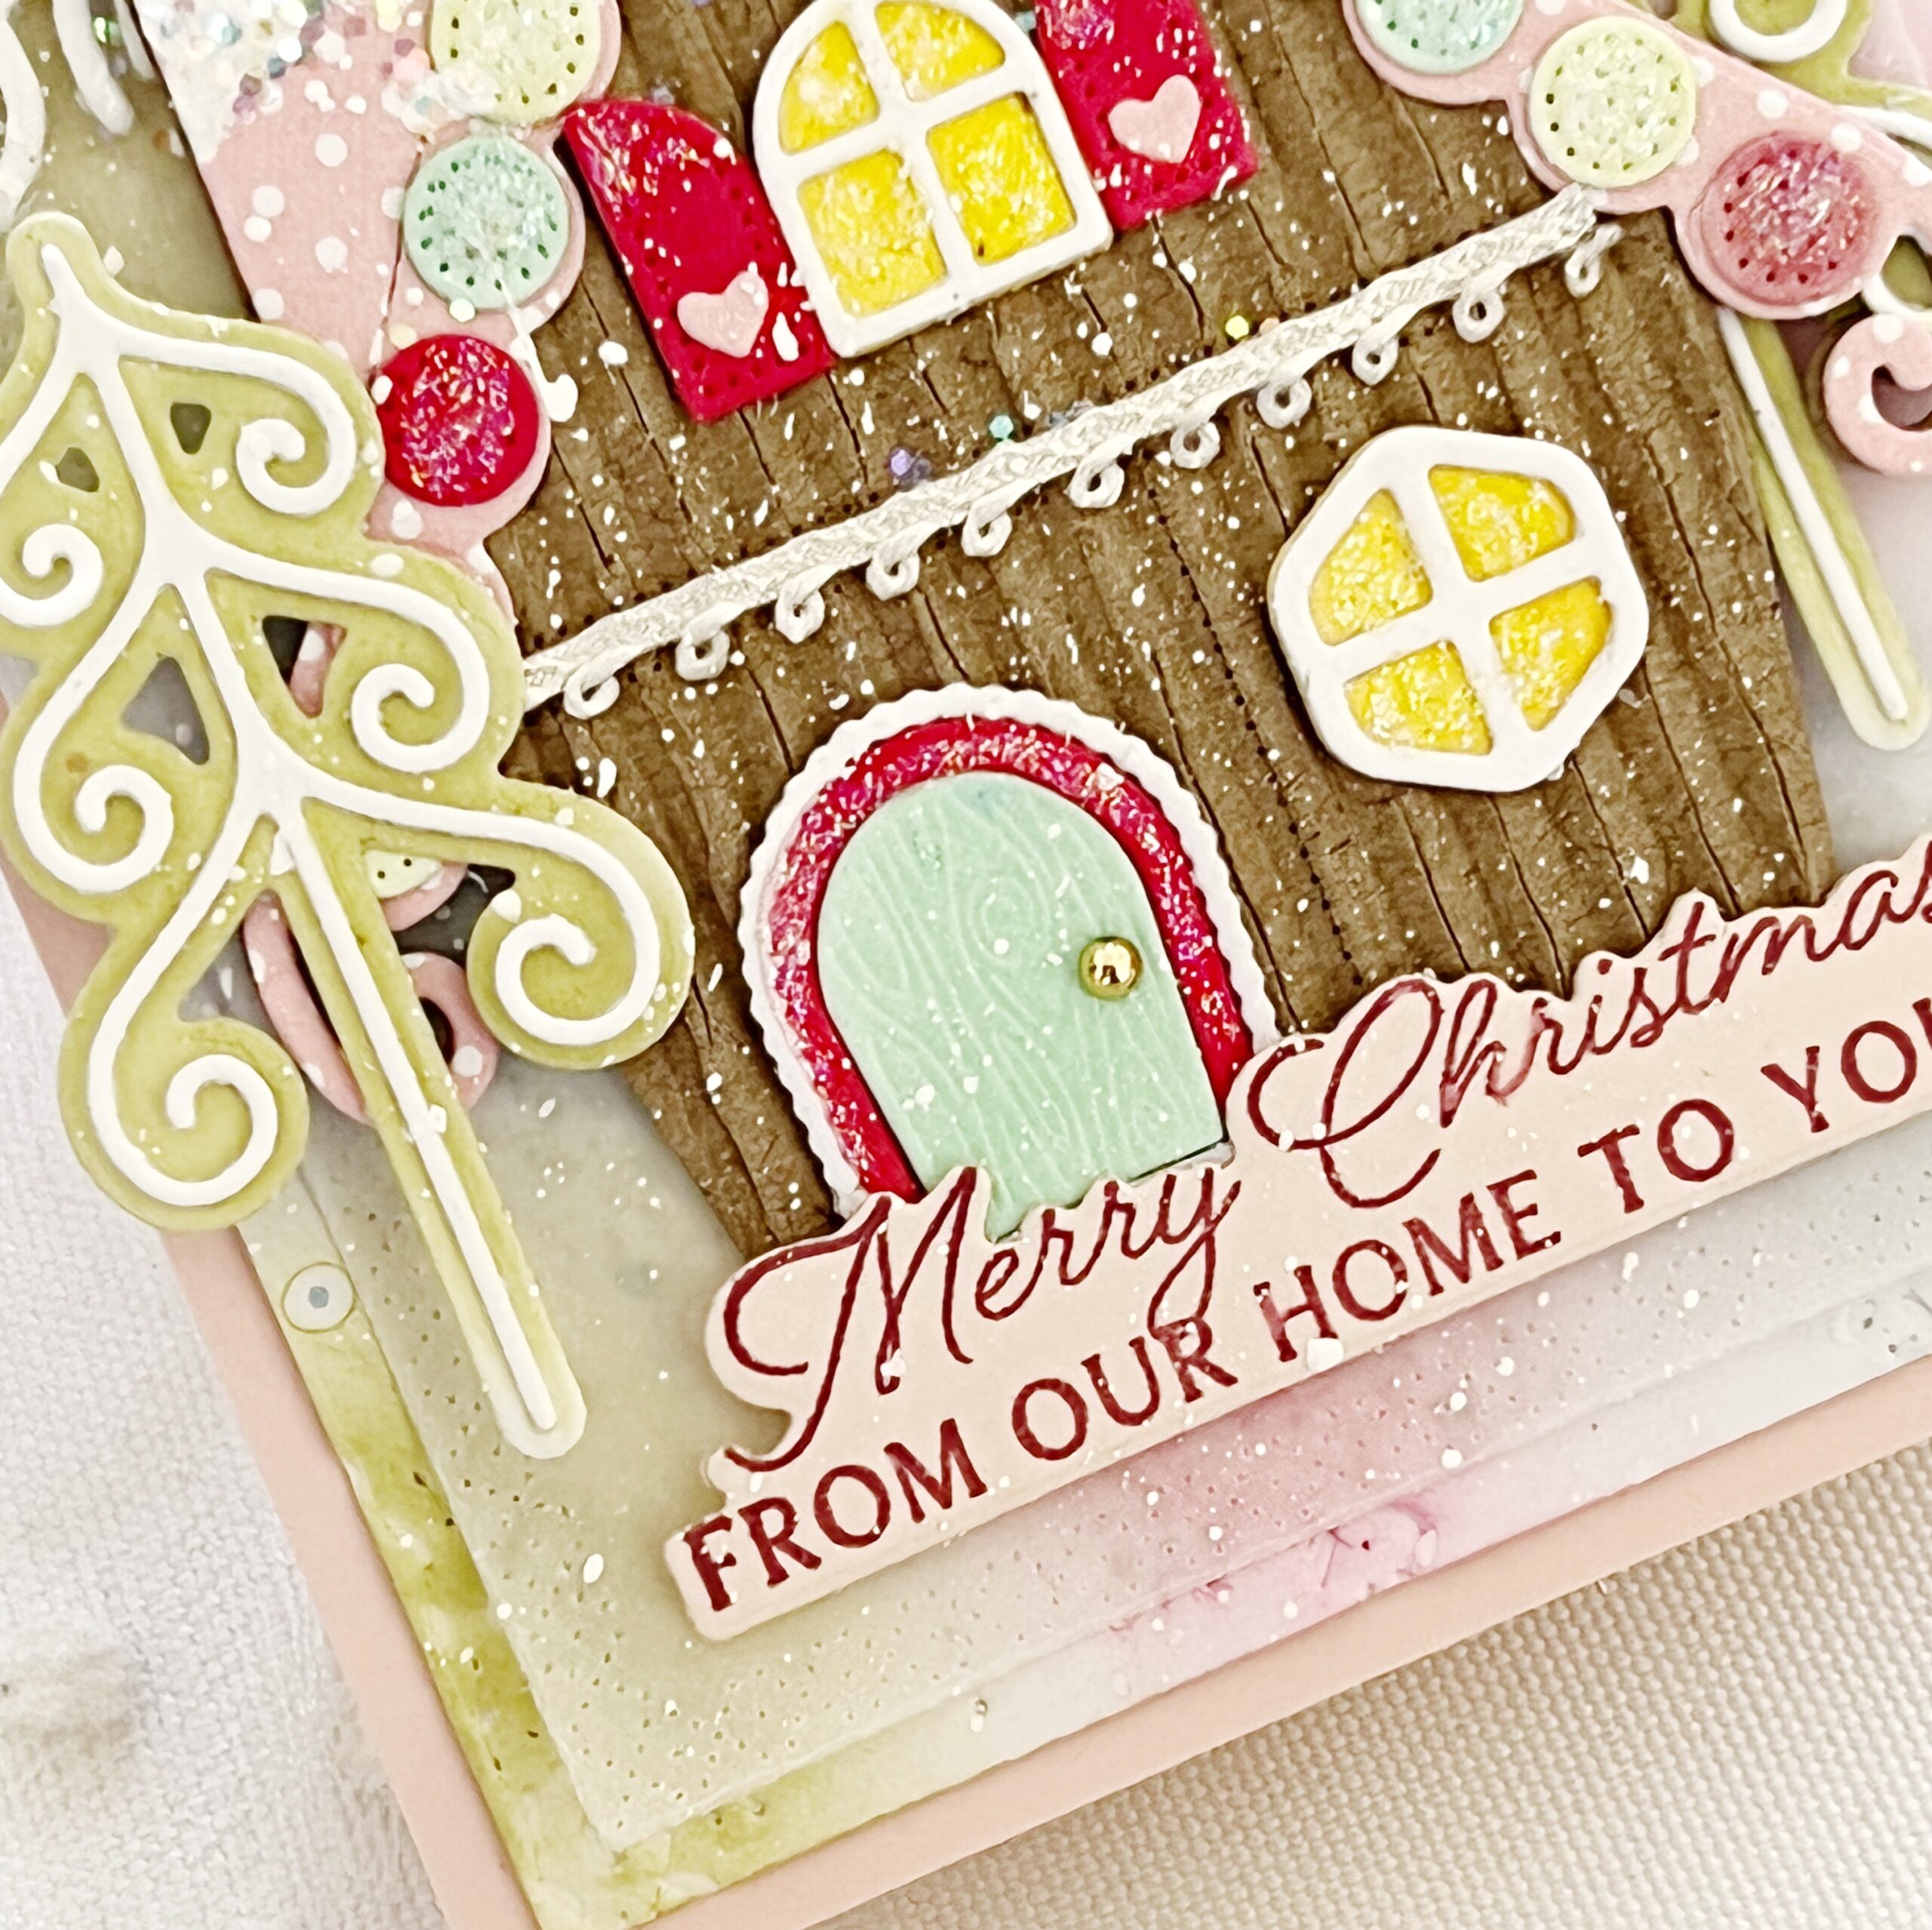
White paint was splattered across the front of my house to resemble snow and matte paste and glitter added to my roof to bring in the holiday shimmer and sparkle of snow. My sentiment across the bottom is from the Scene Everywhere: Winter stamp set and was just the perfect size and sentiment to accent my, cozy, candy house.
Enjoy the samples of both the Gingerbread House and Gingerbread Camper dies provided by our amazing Design Team. You’ll be just a smitten as I am!
Supplies Used:
STAMPS: Scene Everywhere: Winter
INK: Autumn Rose, Spring Rain, Limeade Ice, Hibiscus Burst, Bright Buttercup
PAPER: Sweet Blush, Stamper’s Select White, Bitty Big Pale Peony, Sheer Basics Vellum
DIES: Gingerbread House, Splendid Snowflakes, Scene Everywhere: Winter
OTHER: Fanciful Snowflakes Background Hot Foil Plate, mica flakes, Stickles glitter, matte paste, trim, Copic markers, white paint, glitter foam


TIPS:
- Use Kraft card stock for gingerbread pieces – get a speckled look with paint splatters.
- Add shading and pattern details with Copic markers.
- Add highlights with a white gel pen.
- To give snow a glistening look, use Stickles Glitter glue.

We hope you have enjoyed all the beautiful projects that we have shared with you today! We would love to hear what you think of everything we have introduced! Please leave a comment on this post to tell us what you like the most and why, and you will be eligible to win big!

Leave a comment today and you will be automatically entered to win a $50 Papertrey Ink gift certificate! You have until 10am ET, November 16th to leave your comment and be eligible to win. Only one comment per person please. One randomly selected winner will be posted on the November Release Winners Page by 11 PM ET on November 17th.


Leave a Reply