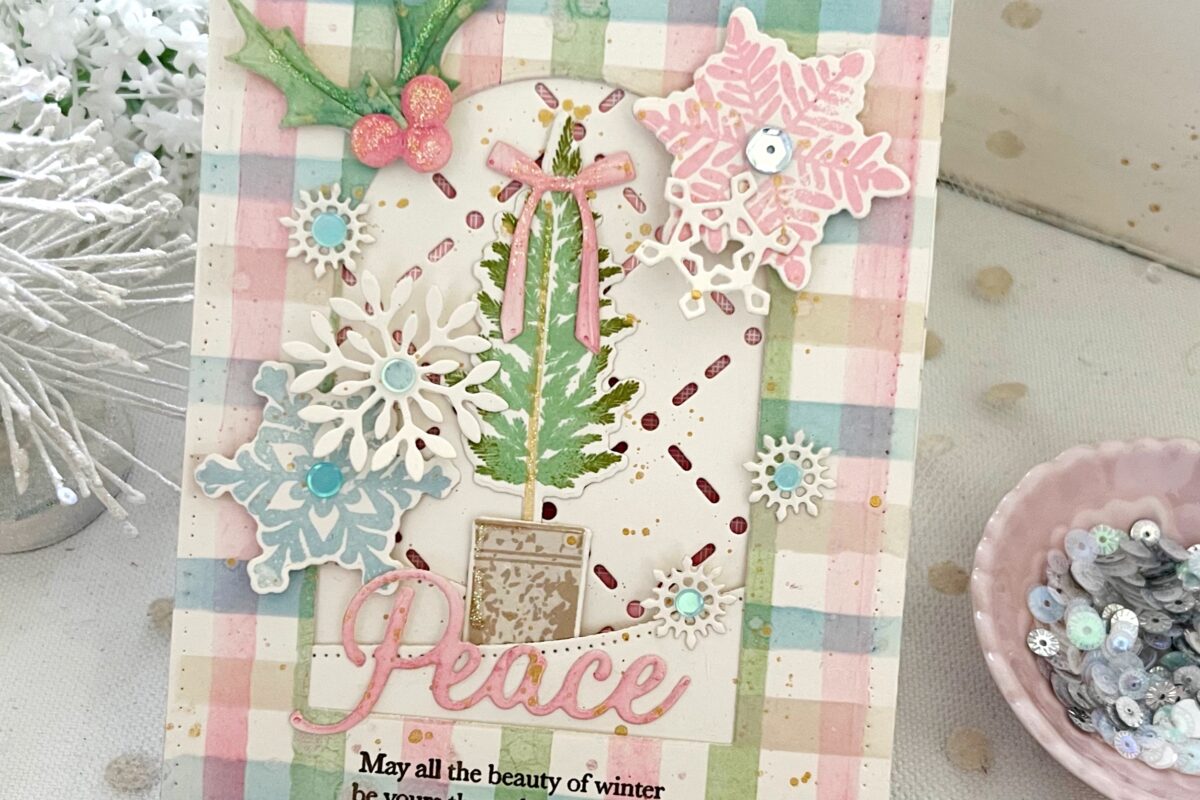
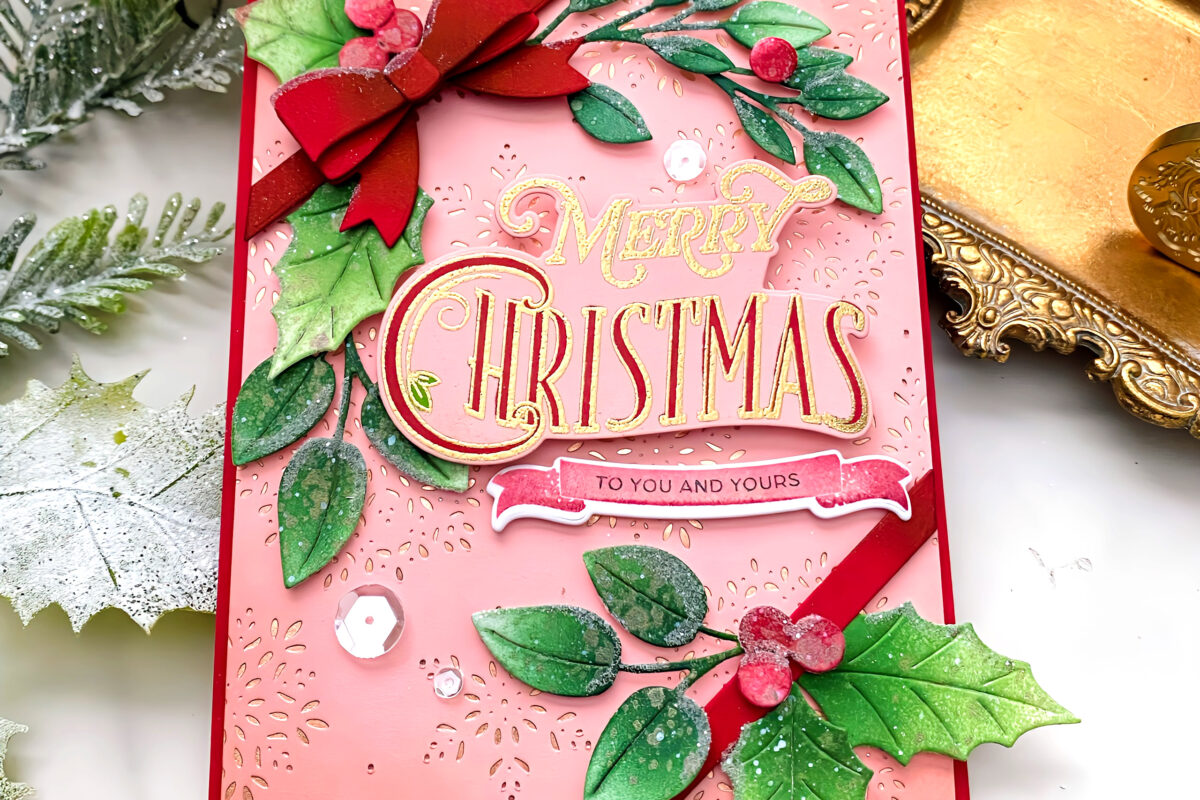
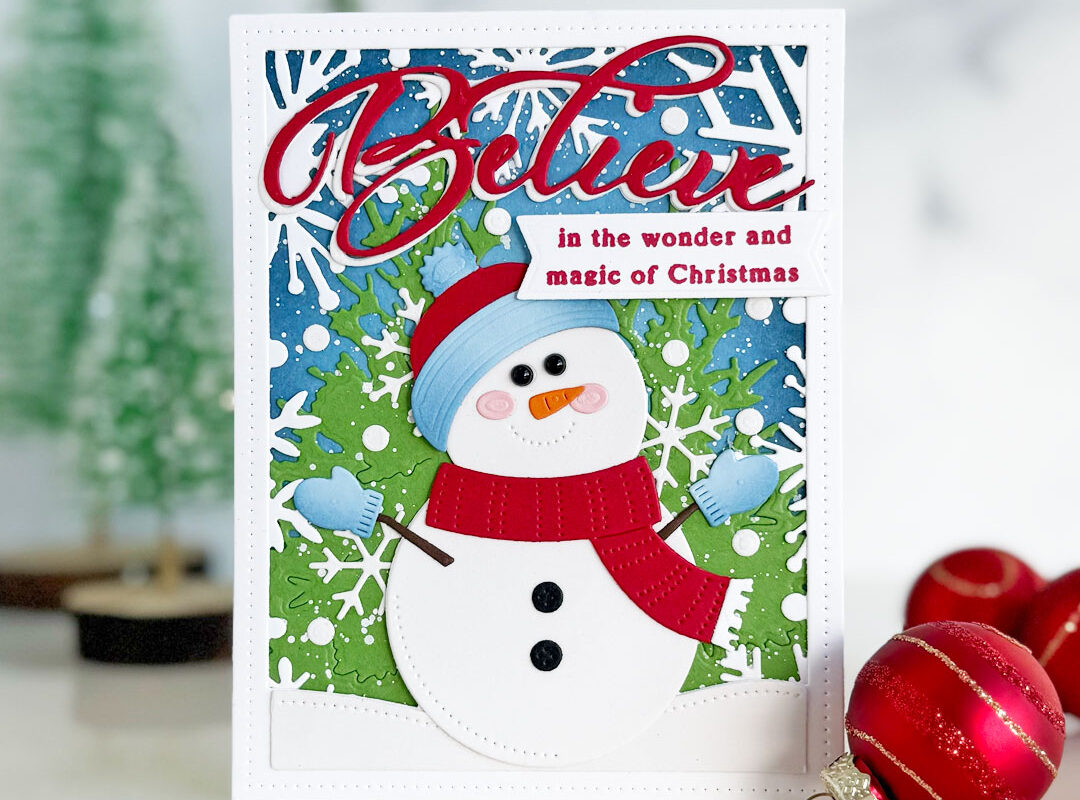
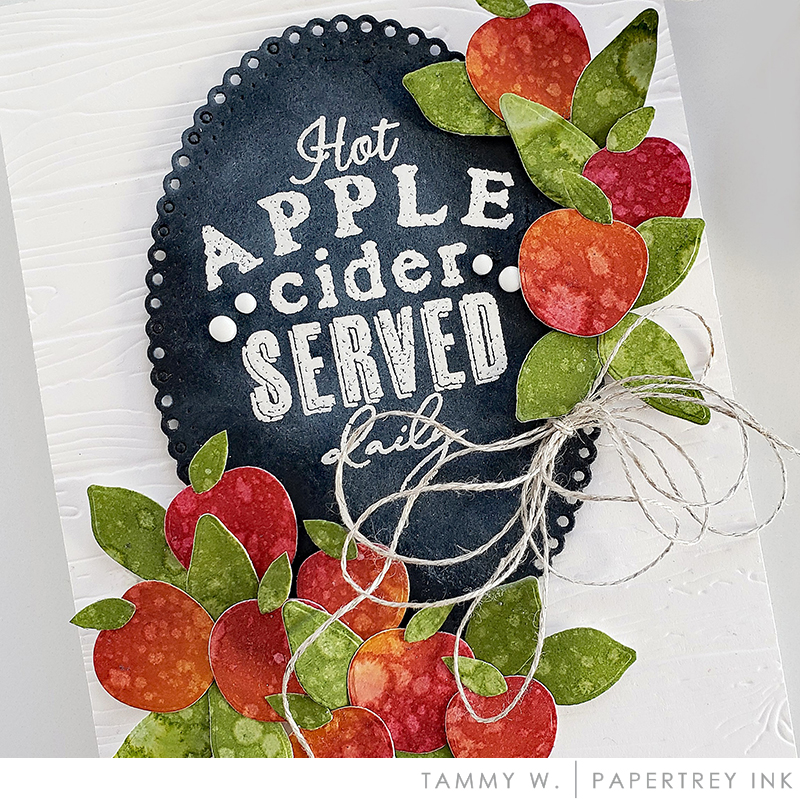
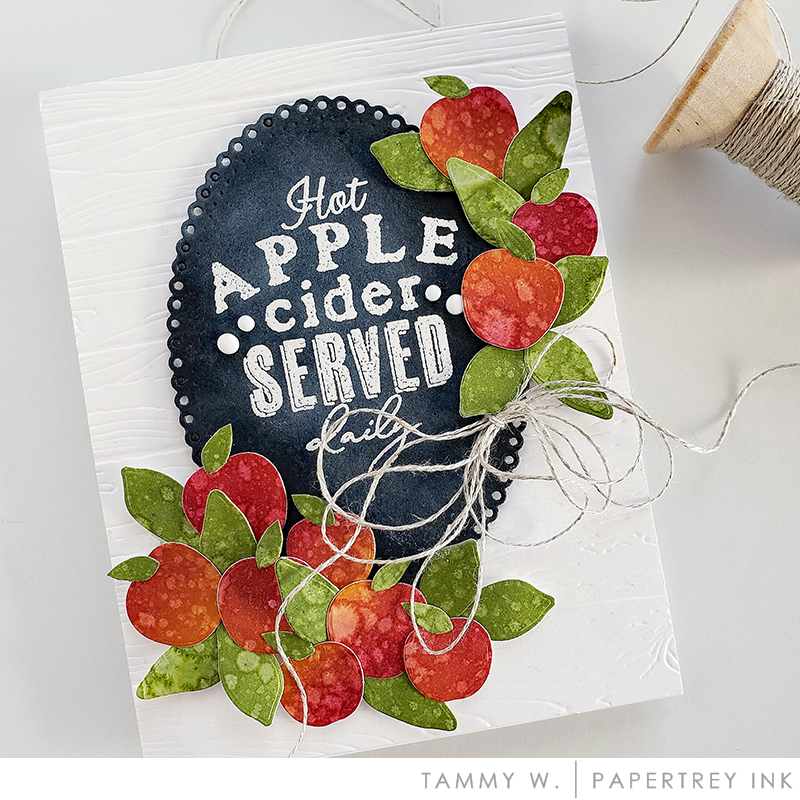
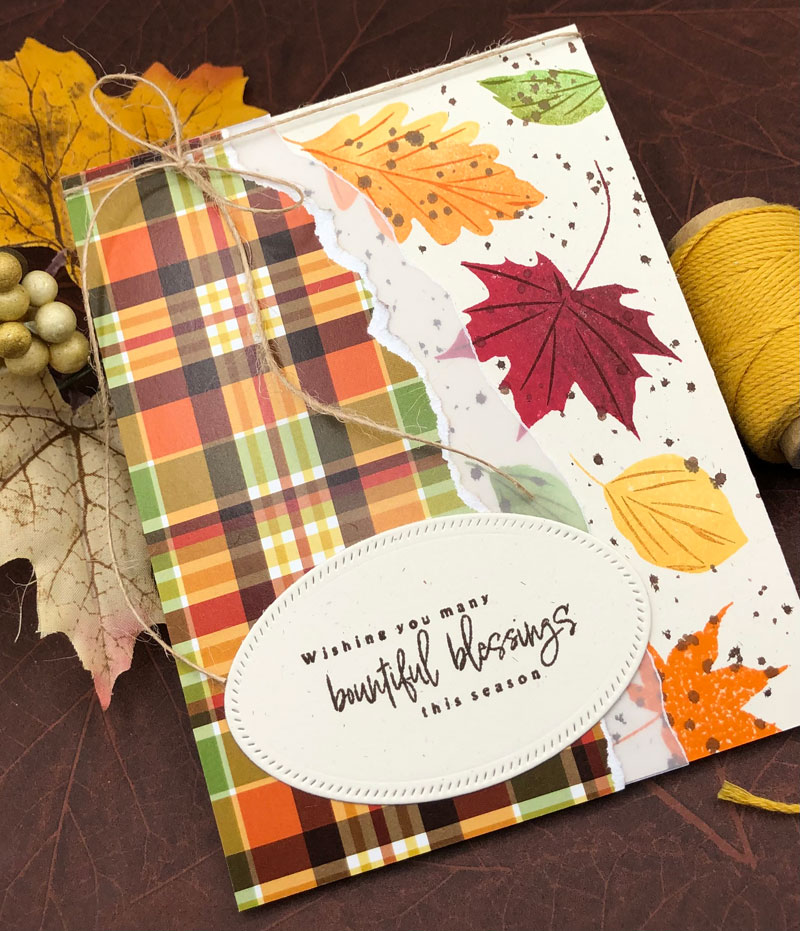
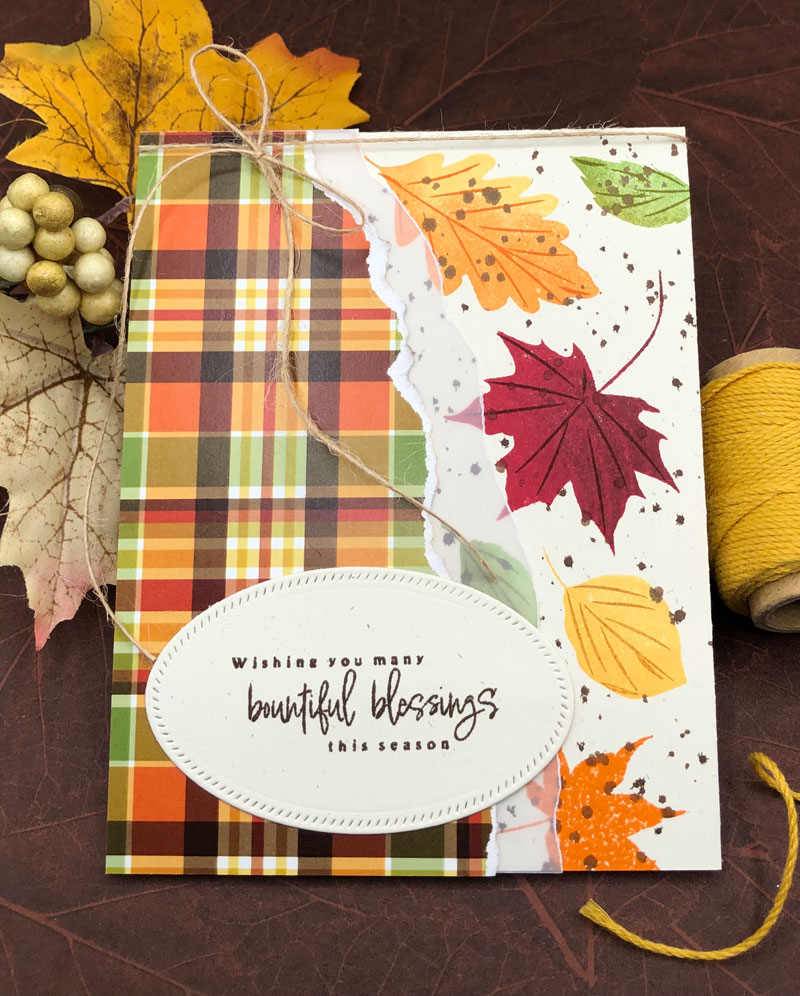
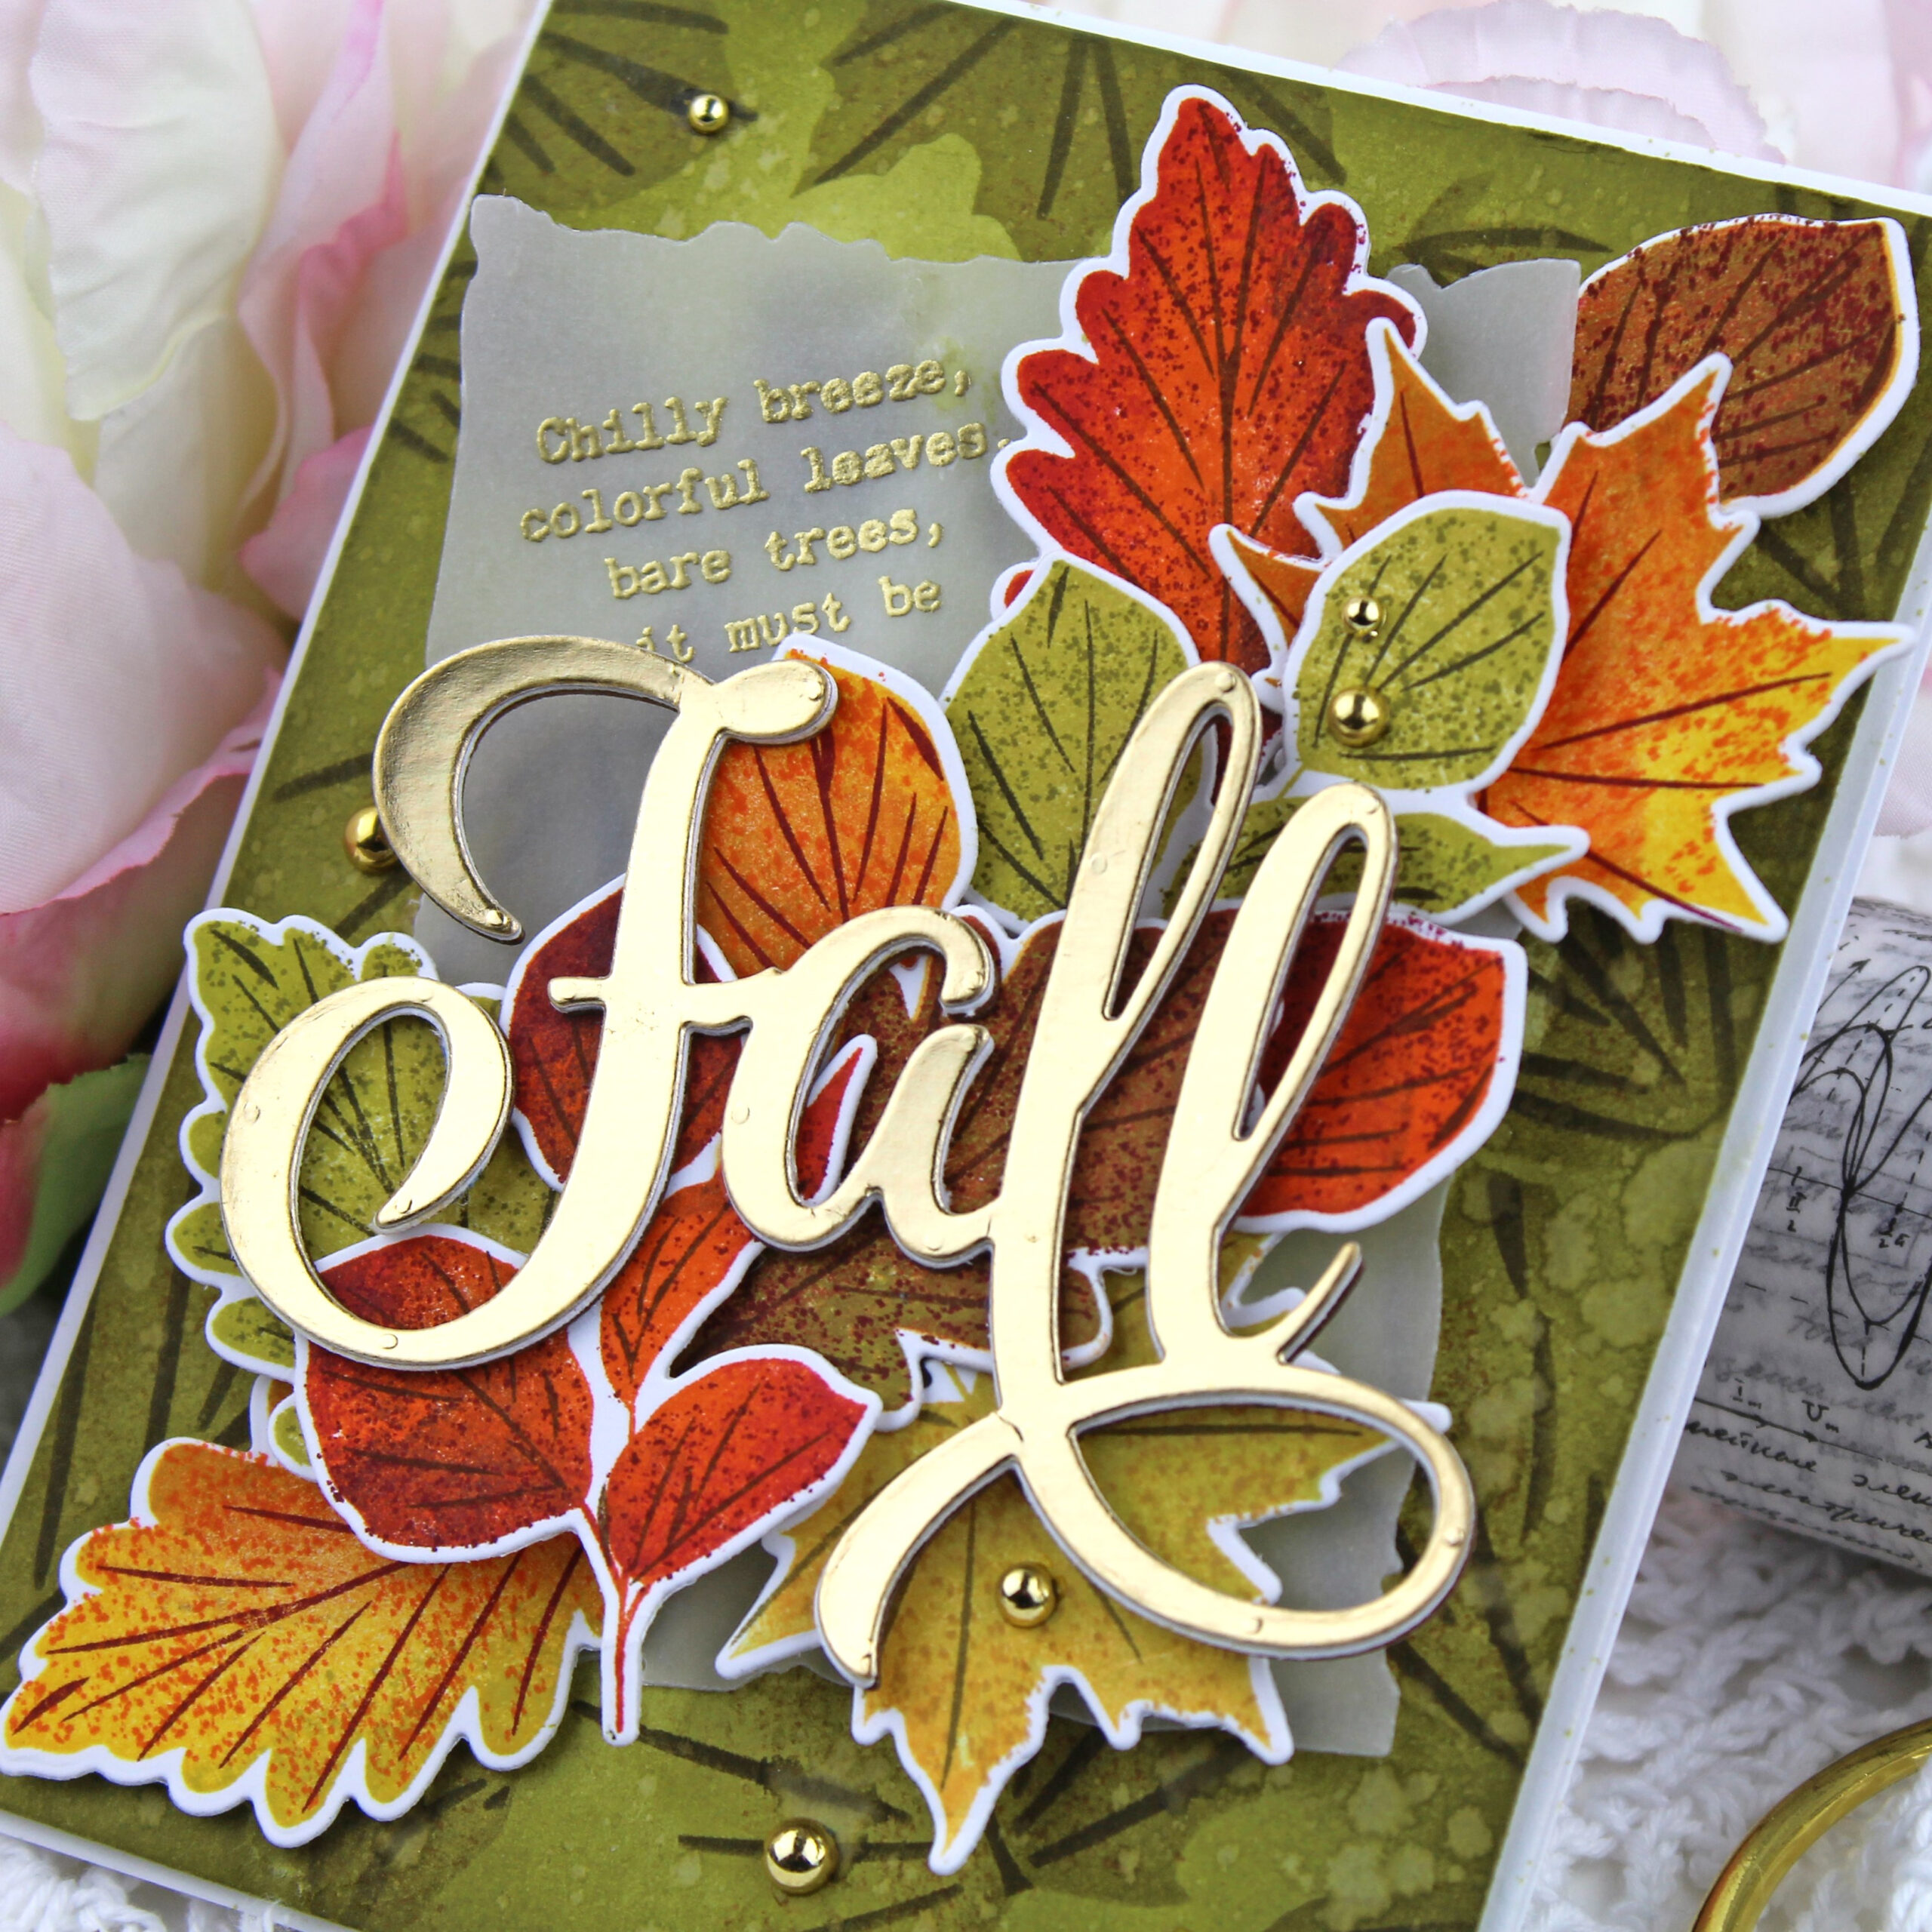
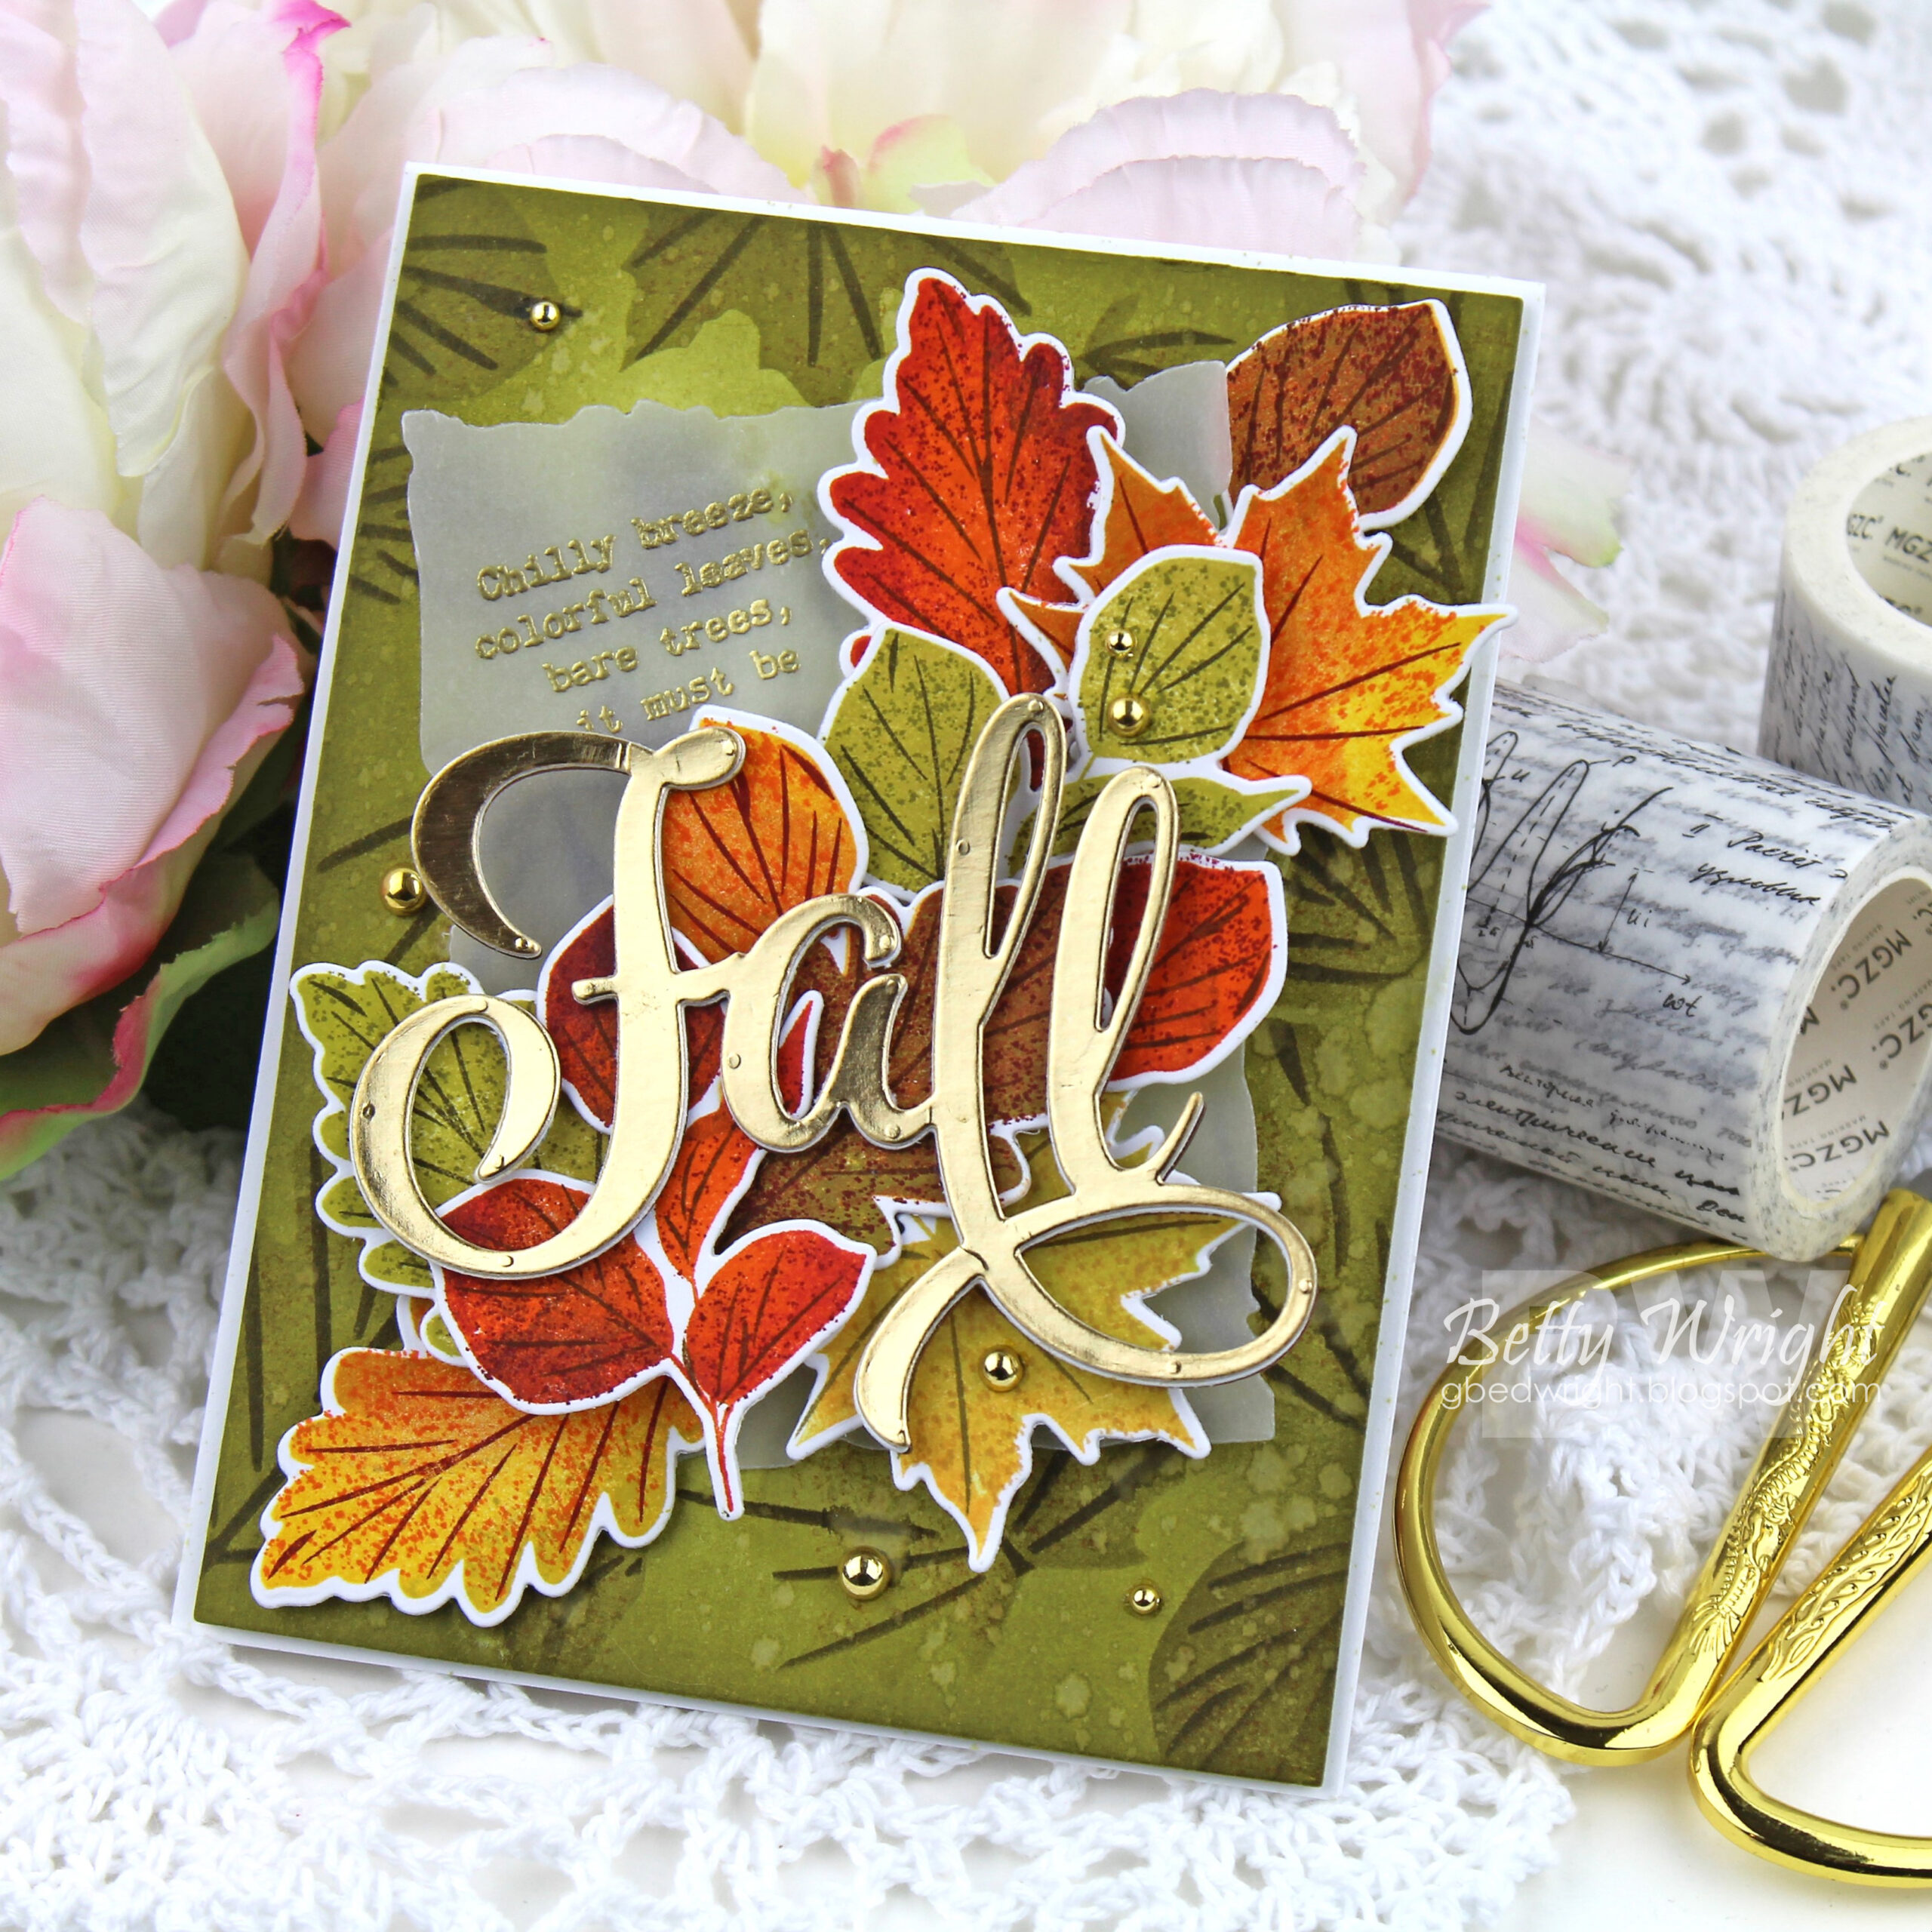
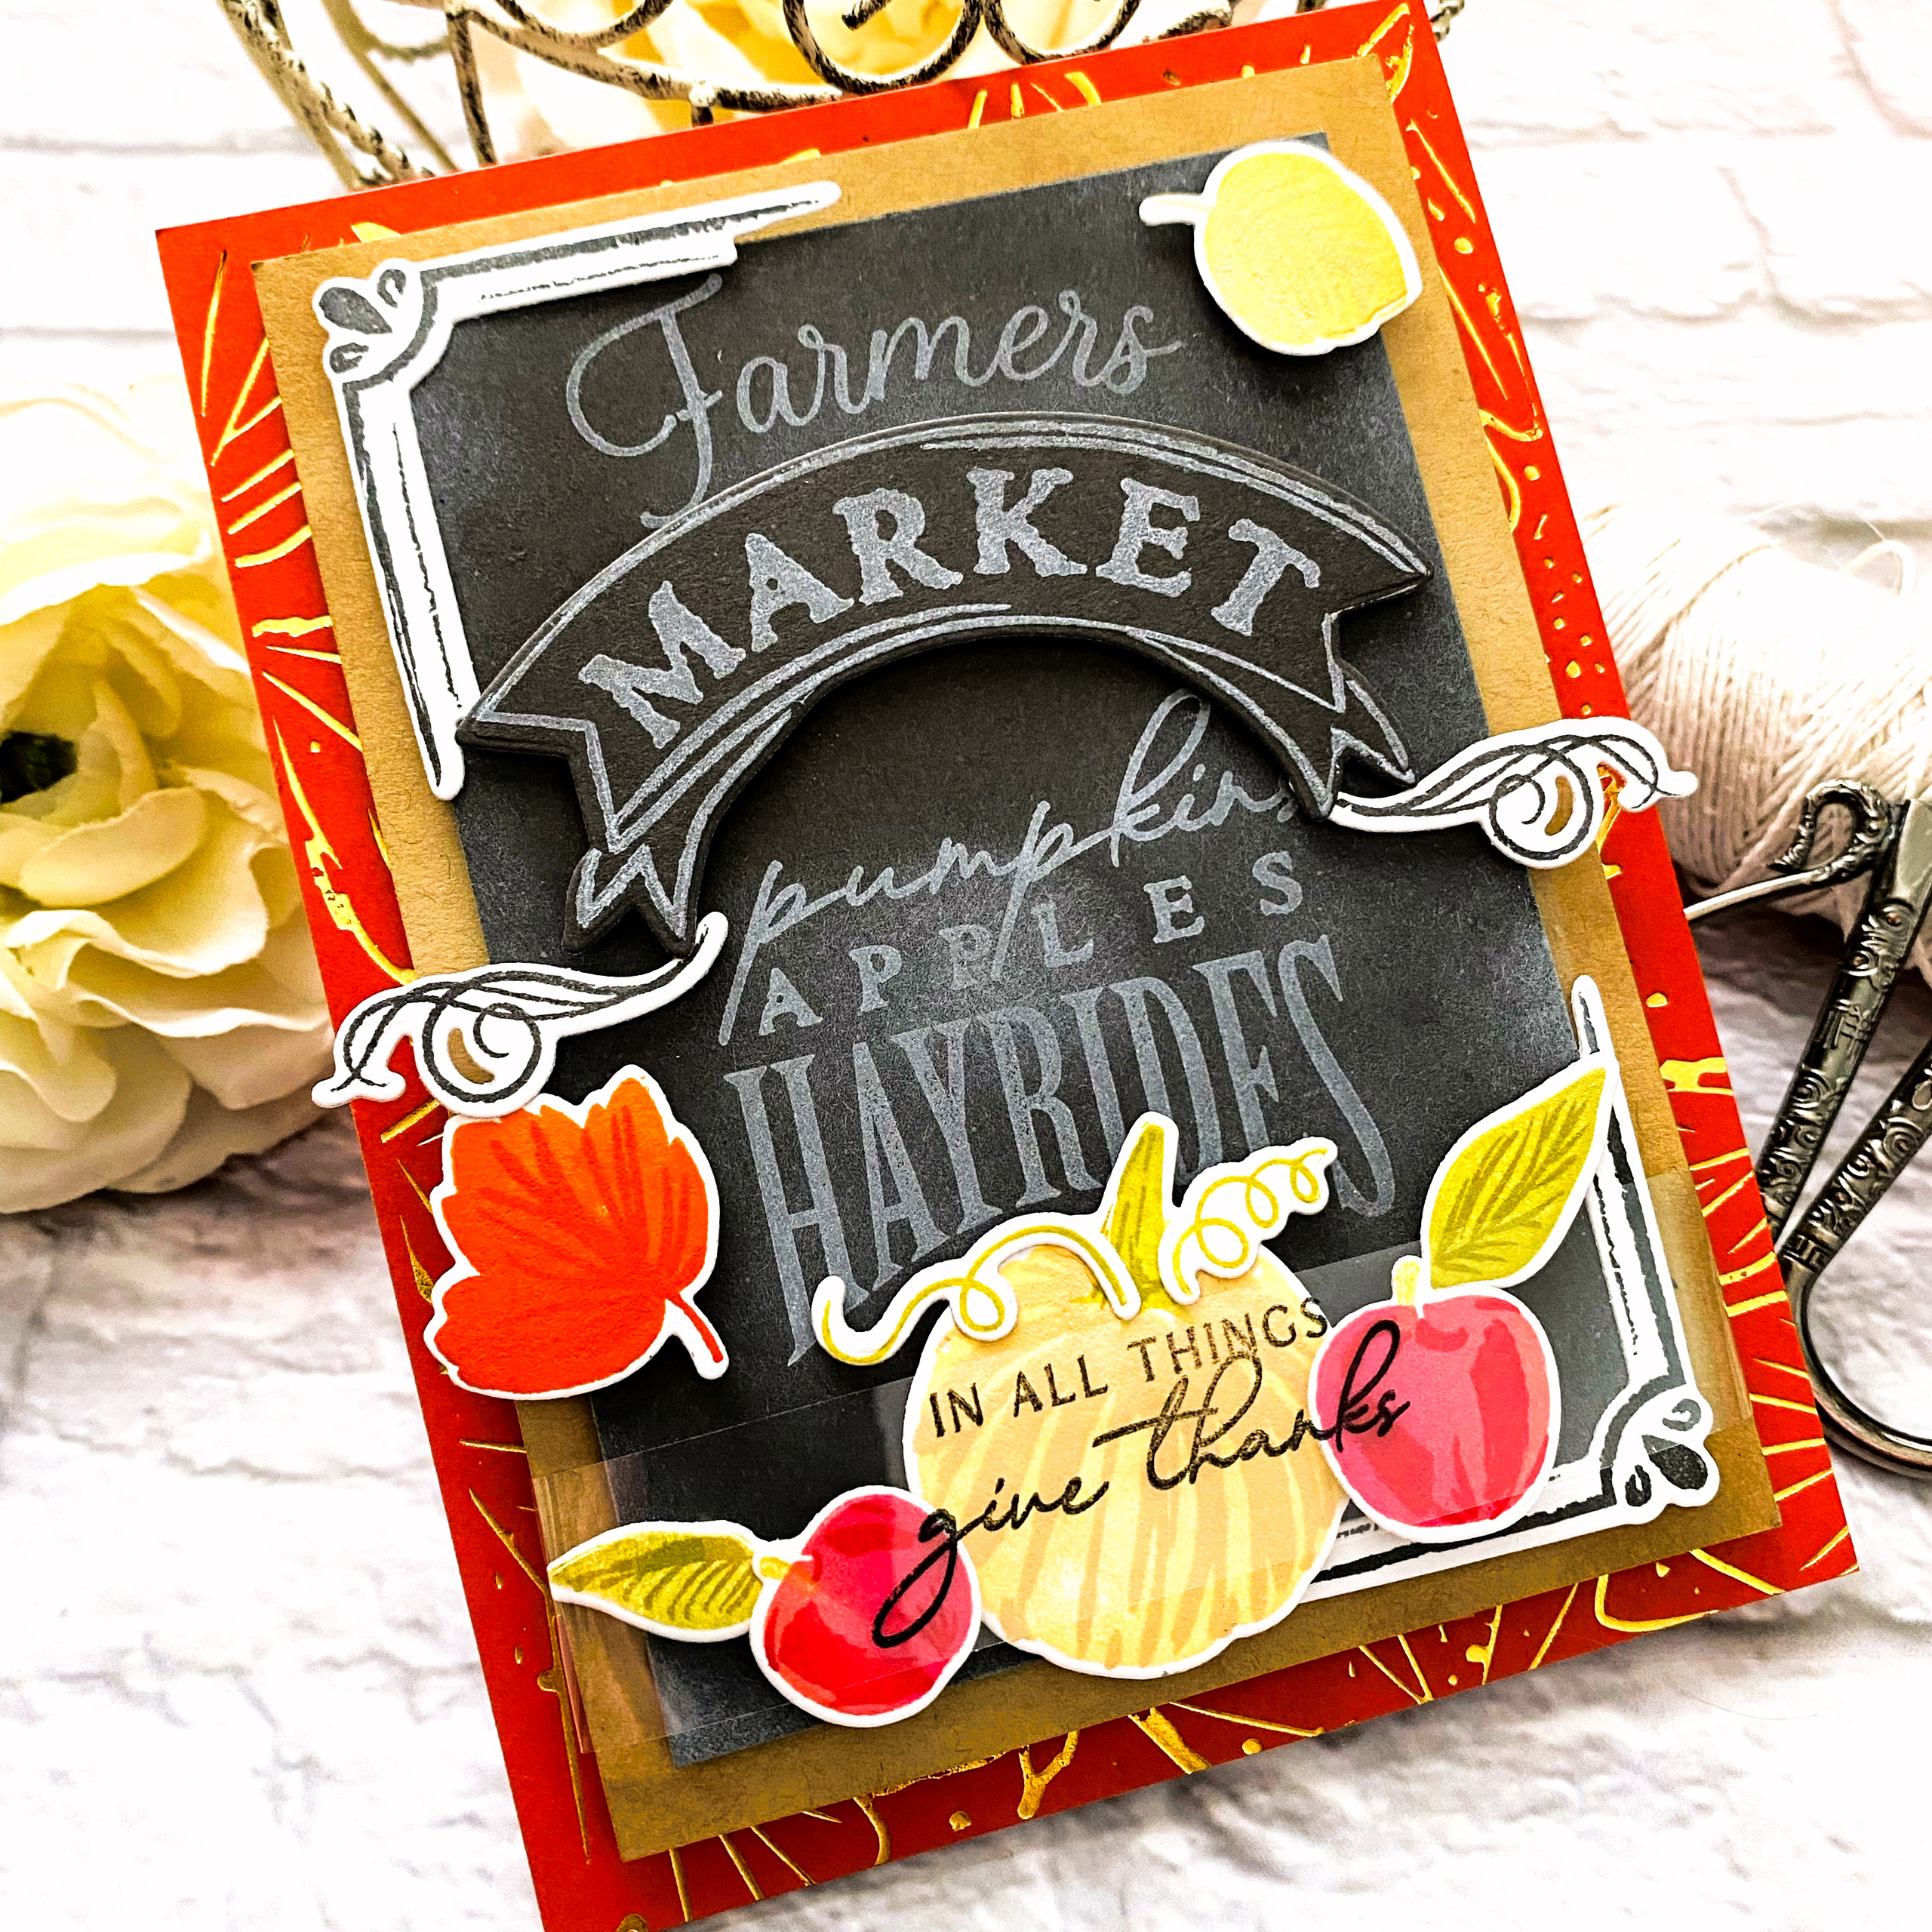
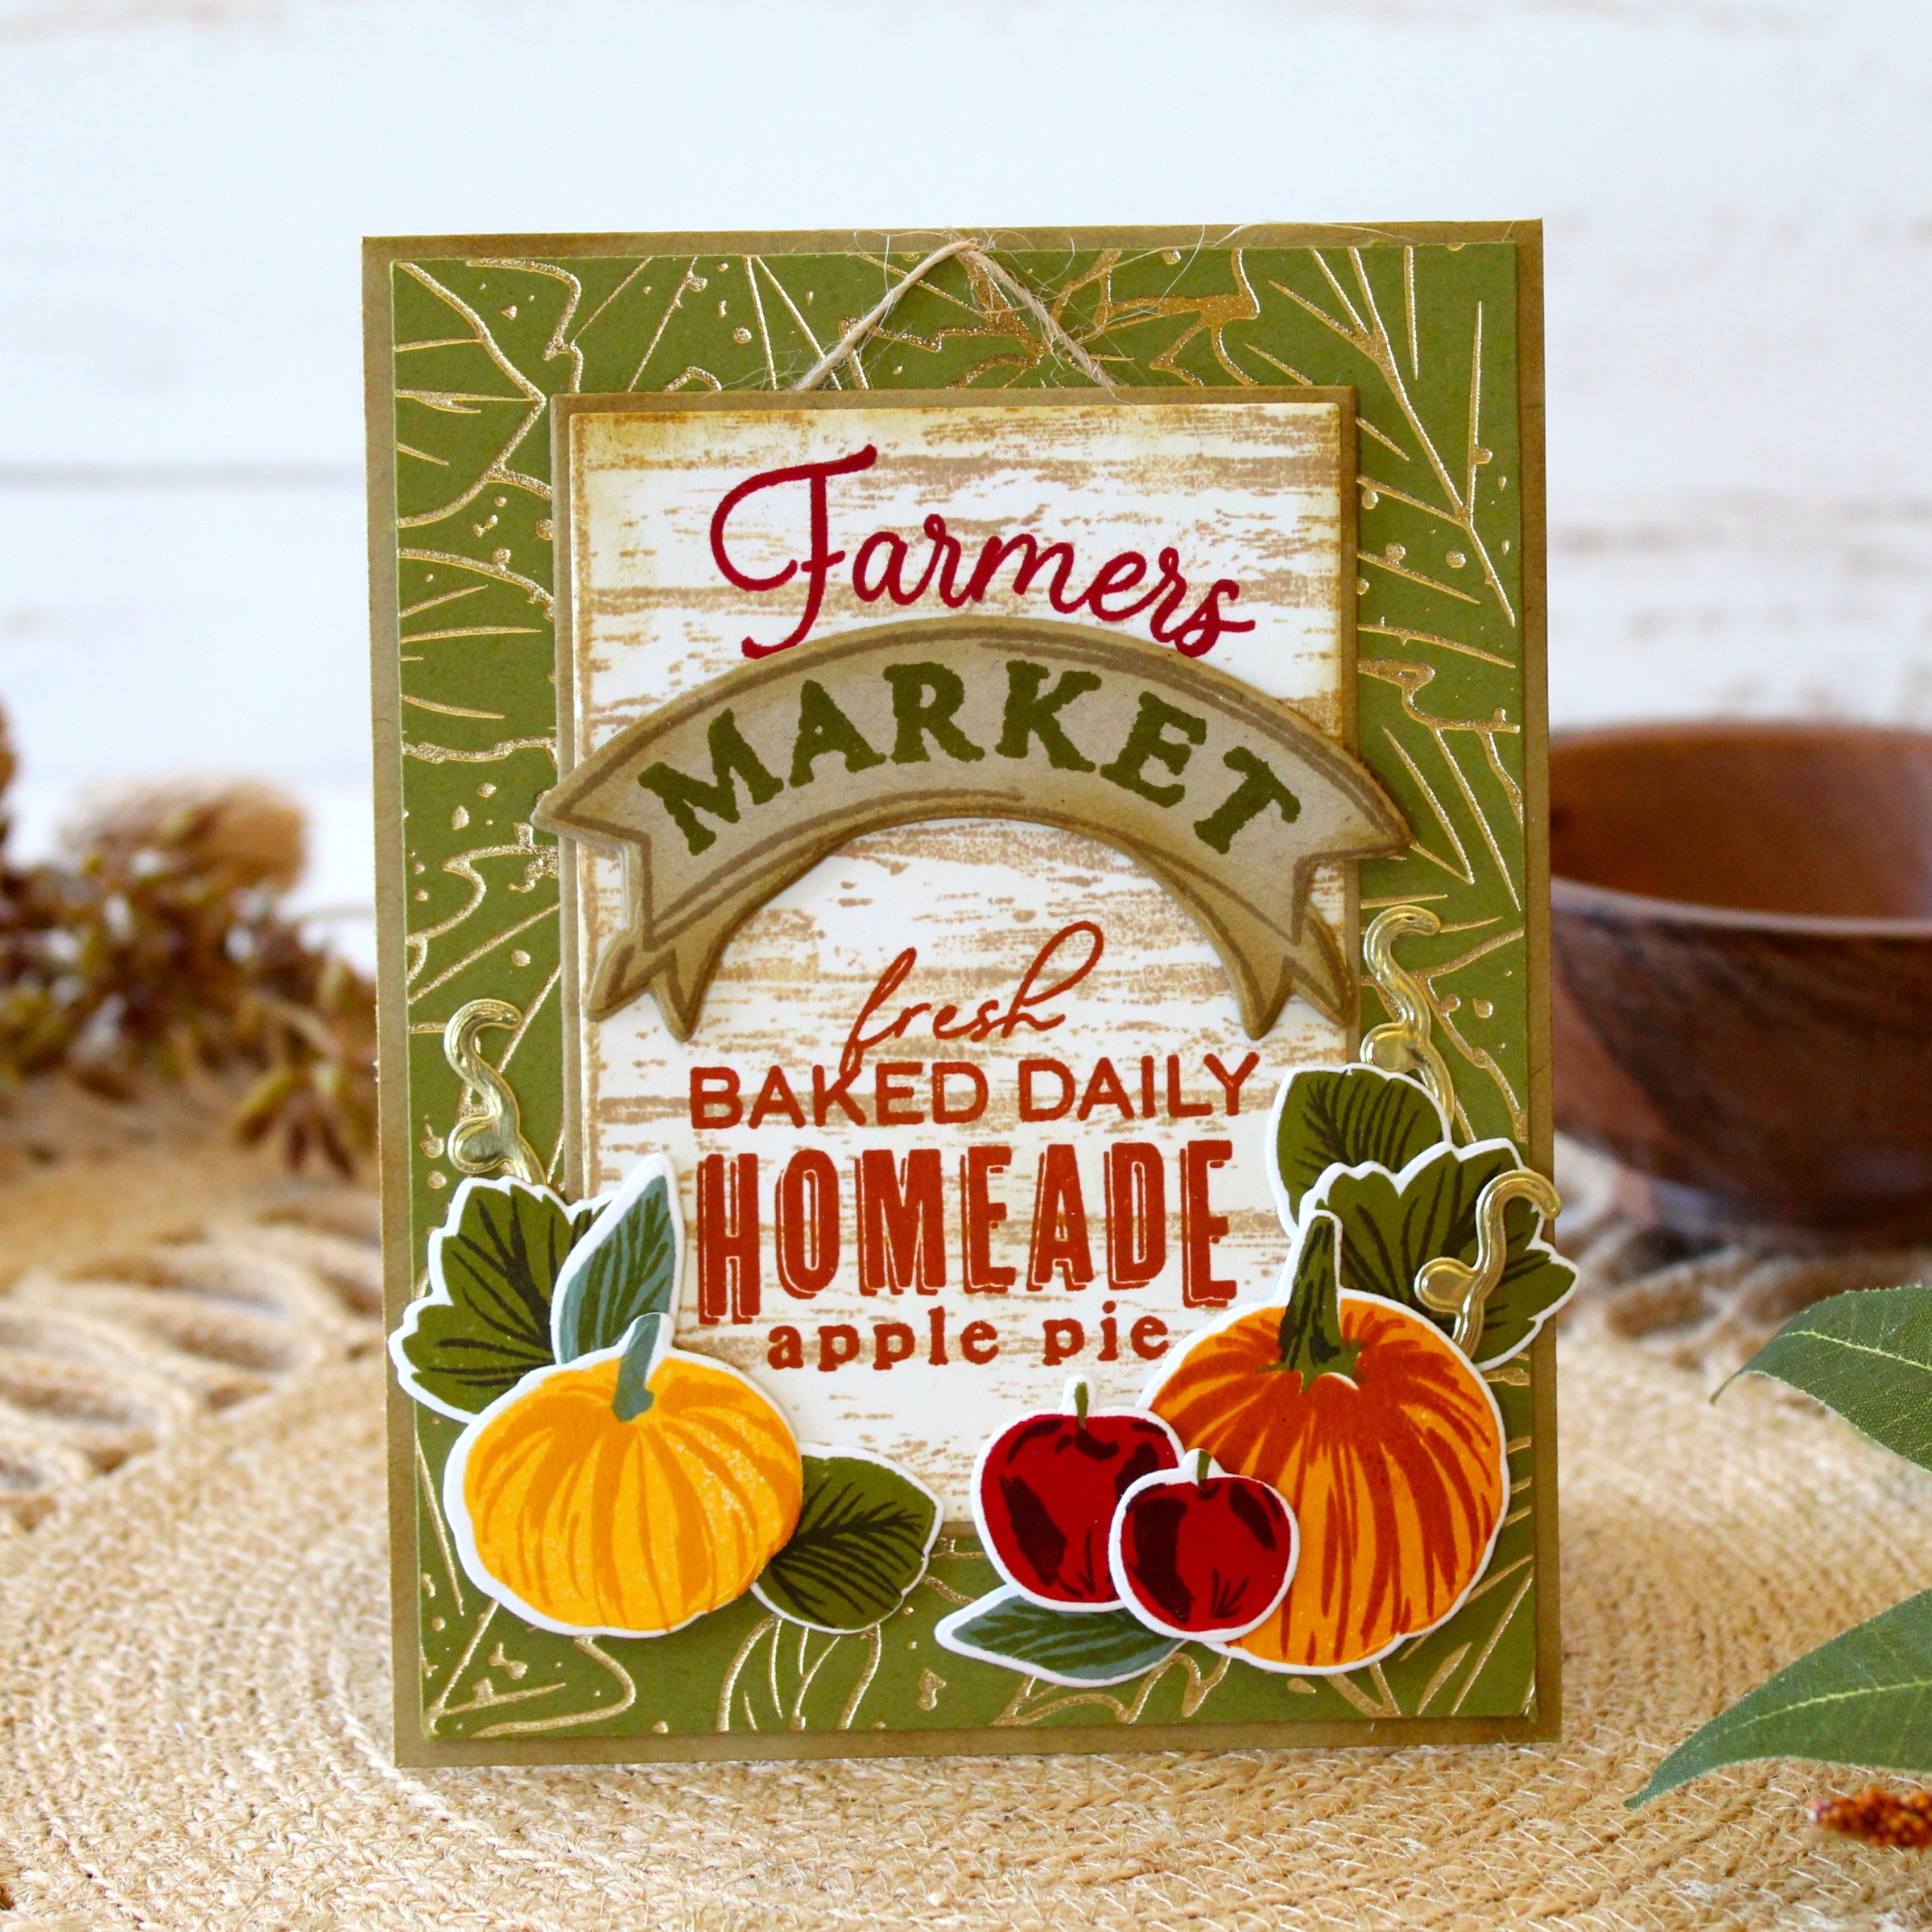
Day 3 of our August Release is all about Autumn, leaves, and pumpkins, please! I’m starting with the gorgeous new, and quite perhaps my most favorite new stamp set, Fall Farmers Market stamps and dies. I’ve also got our first Hot Foil Plate to introduce you to, called Fallen Leaves, and our Thankful for Fall: Sentiments stamps. All to die for!
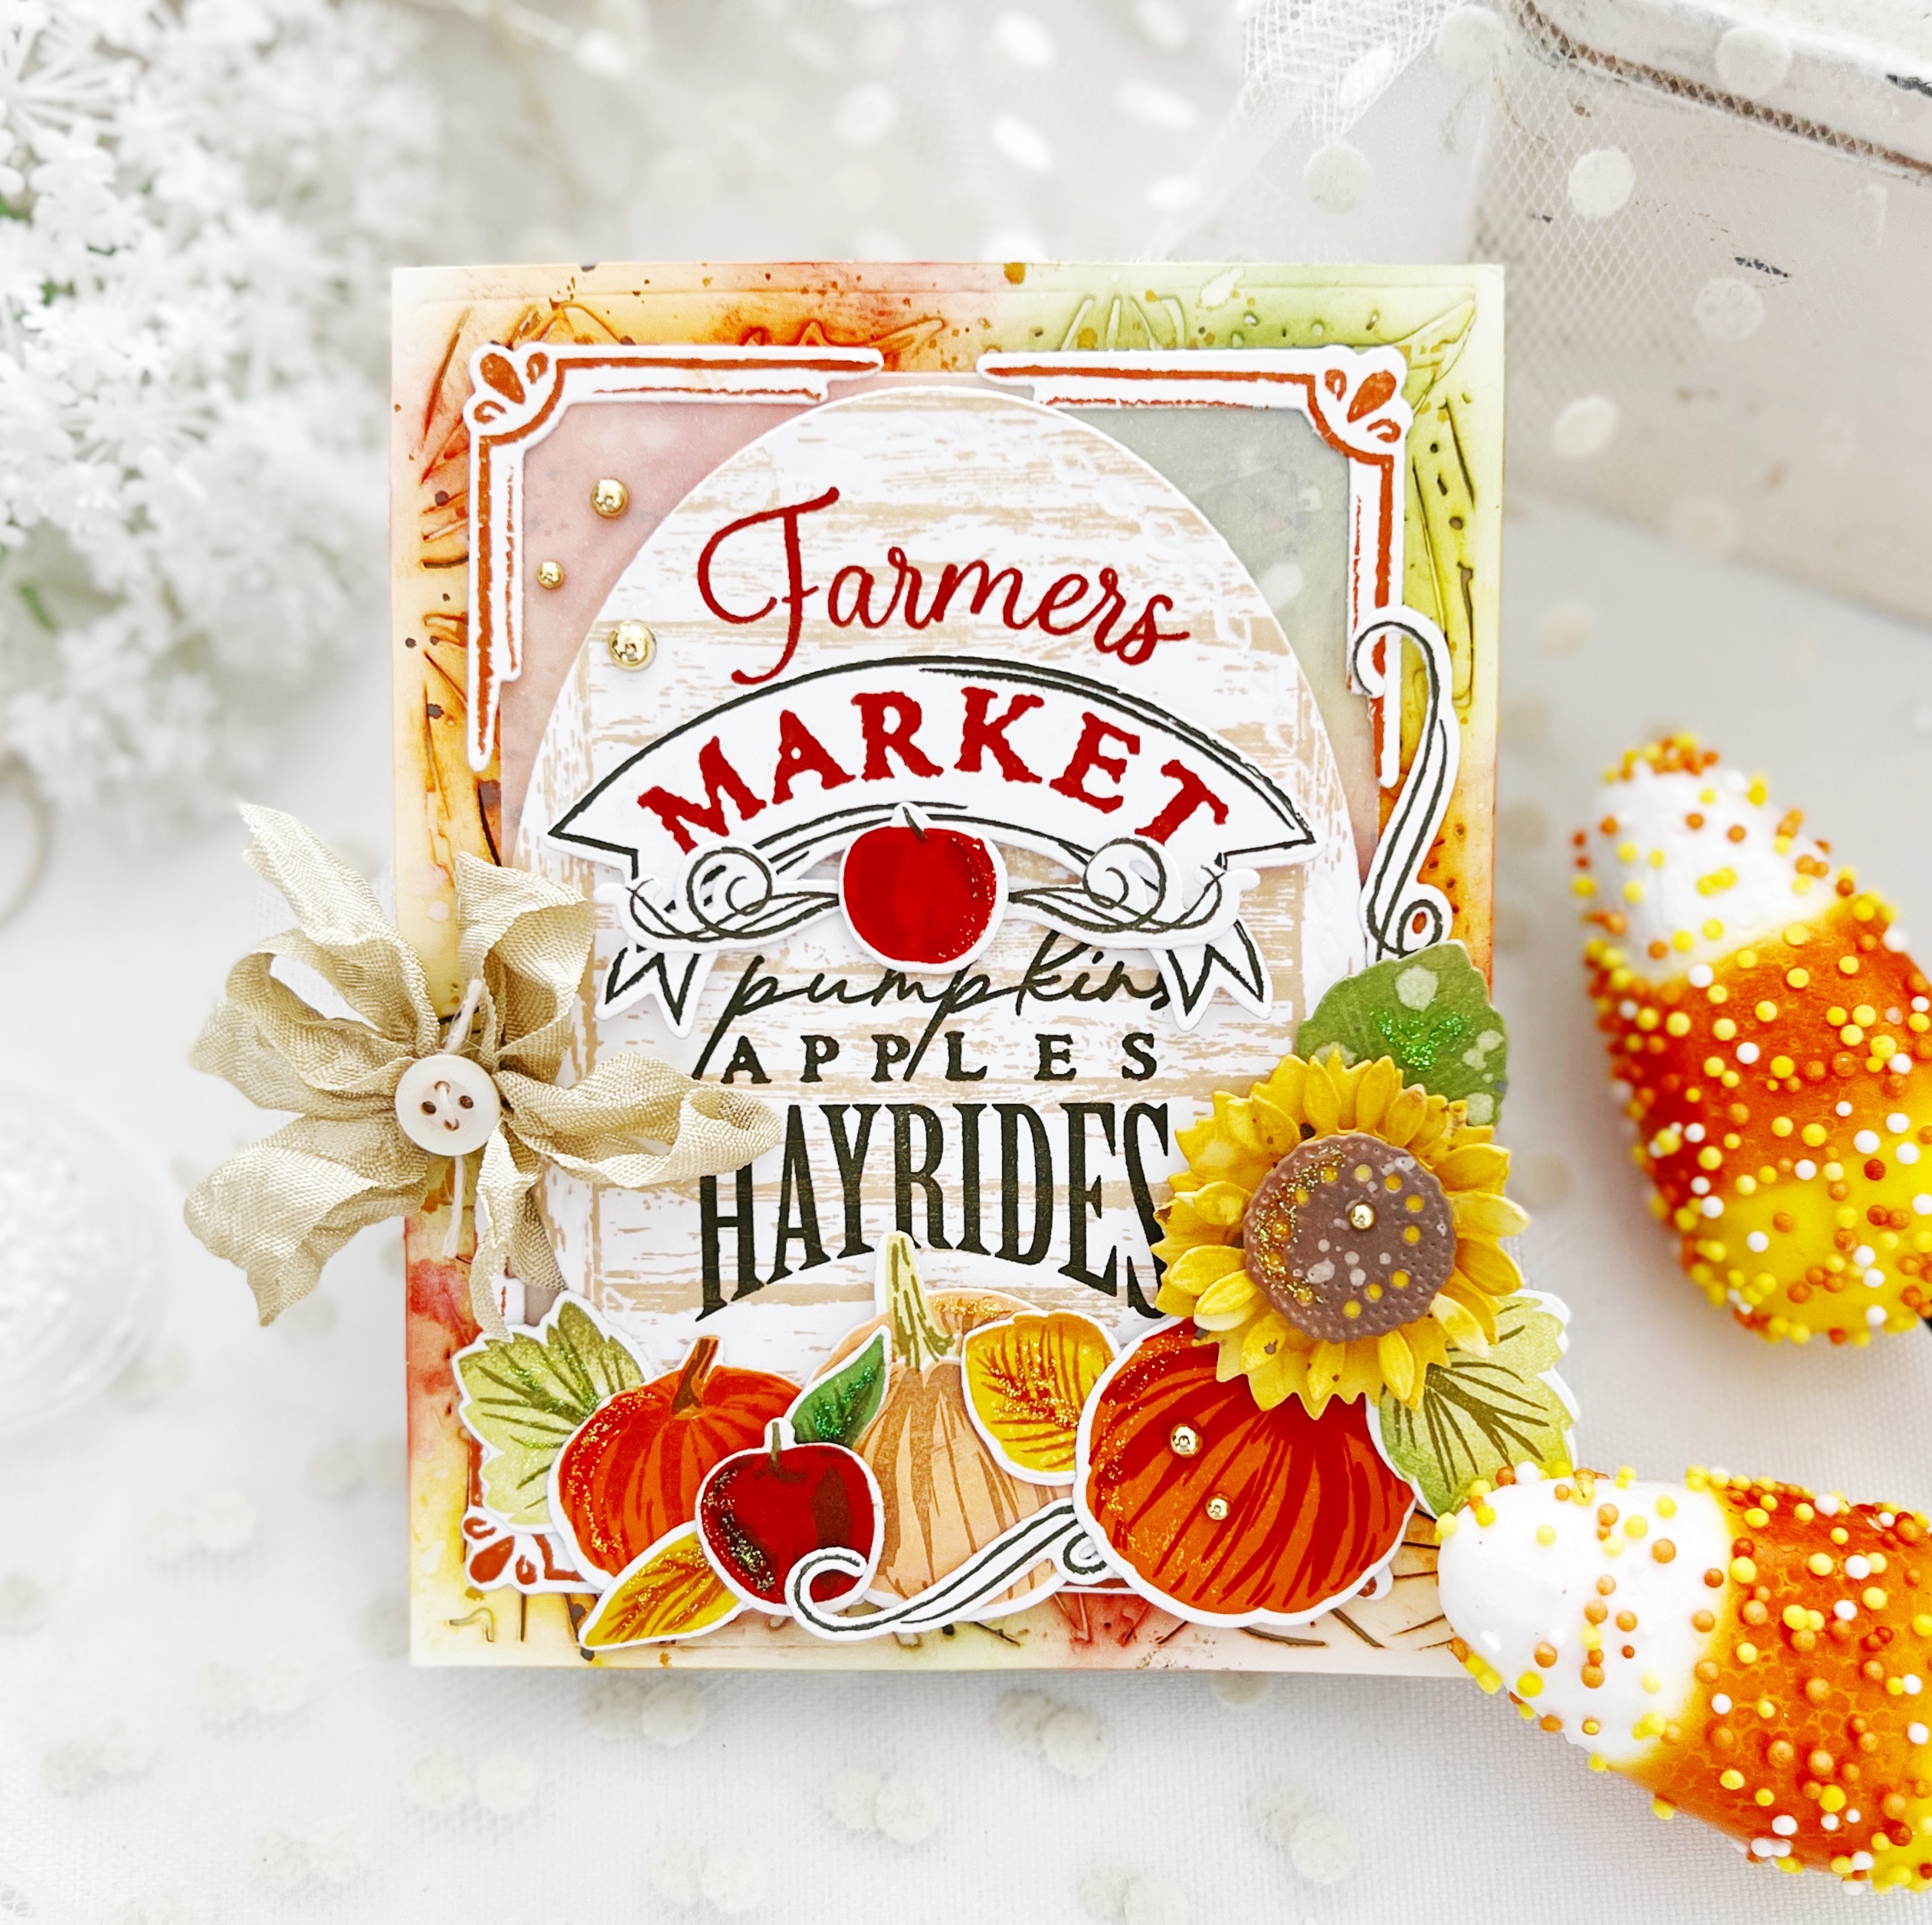
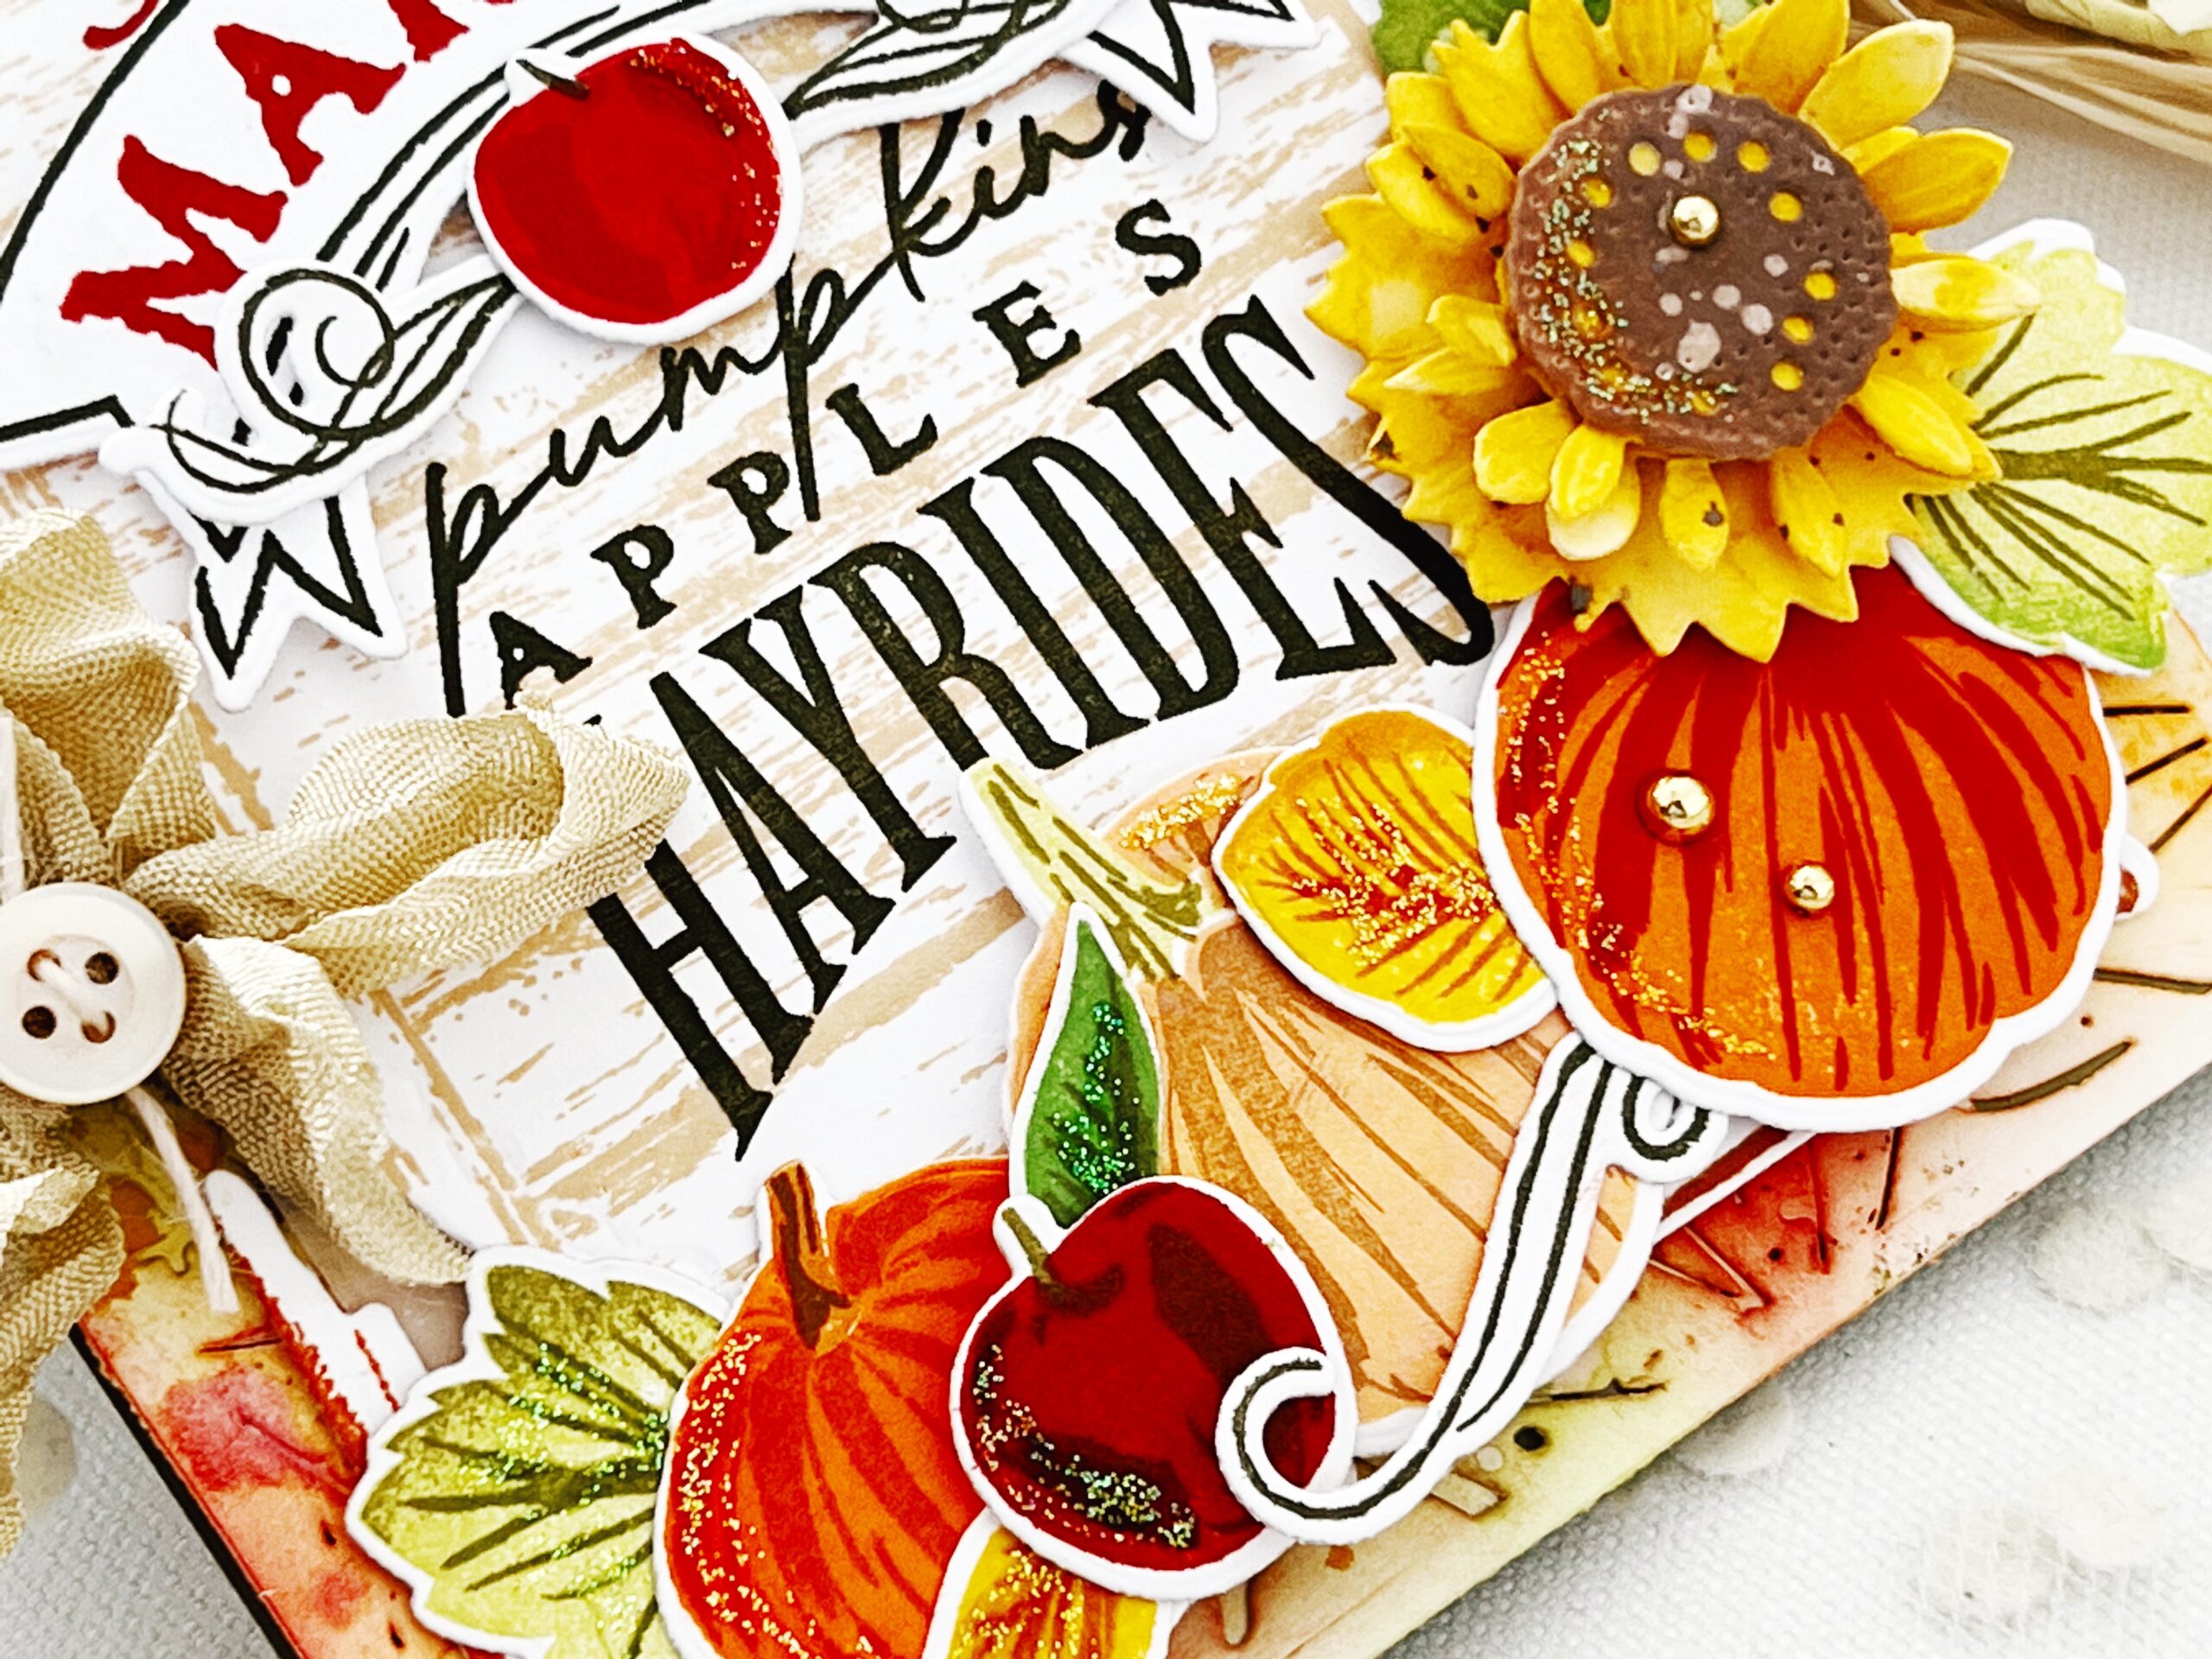
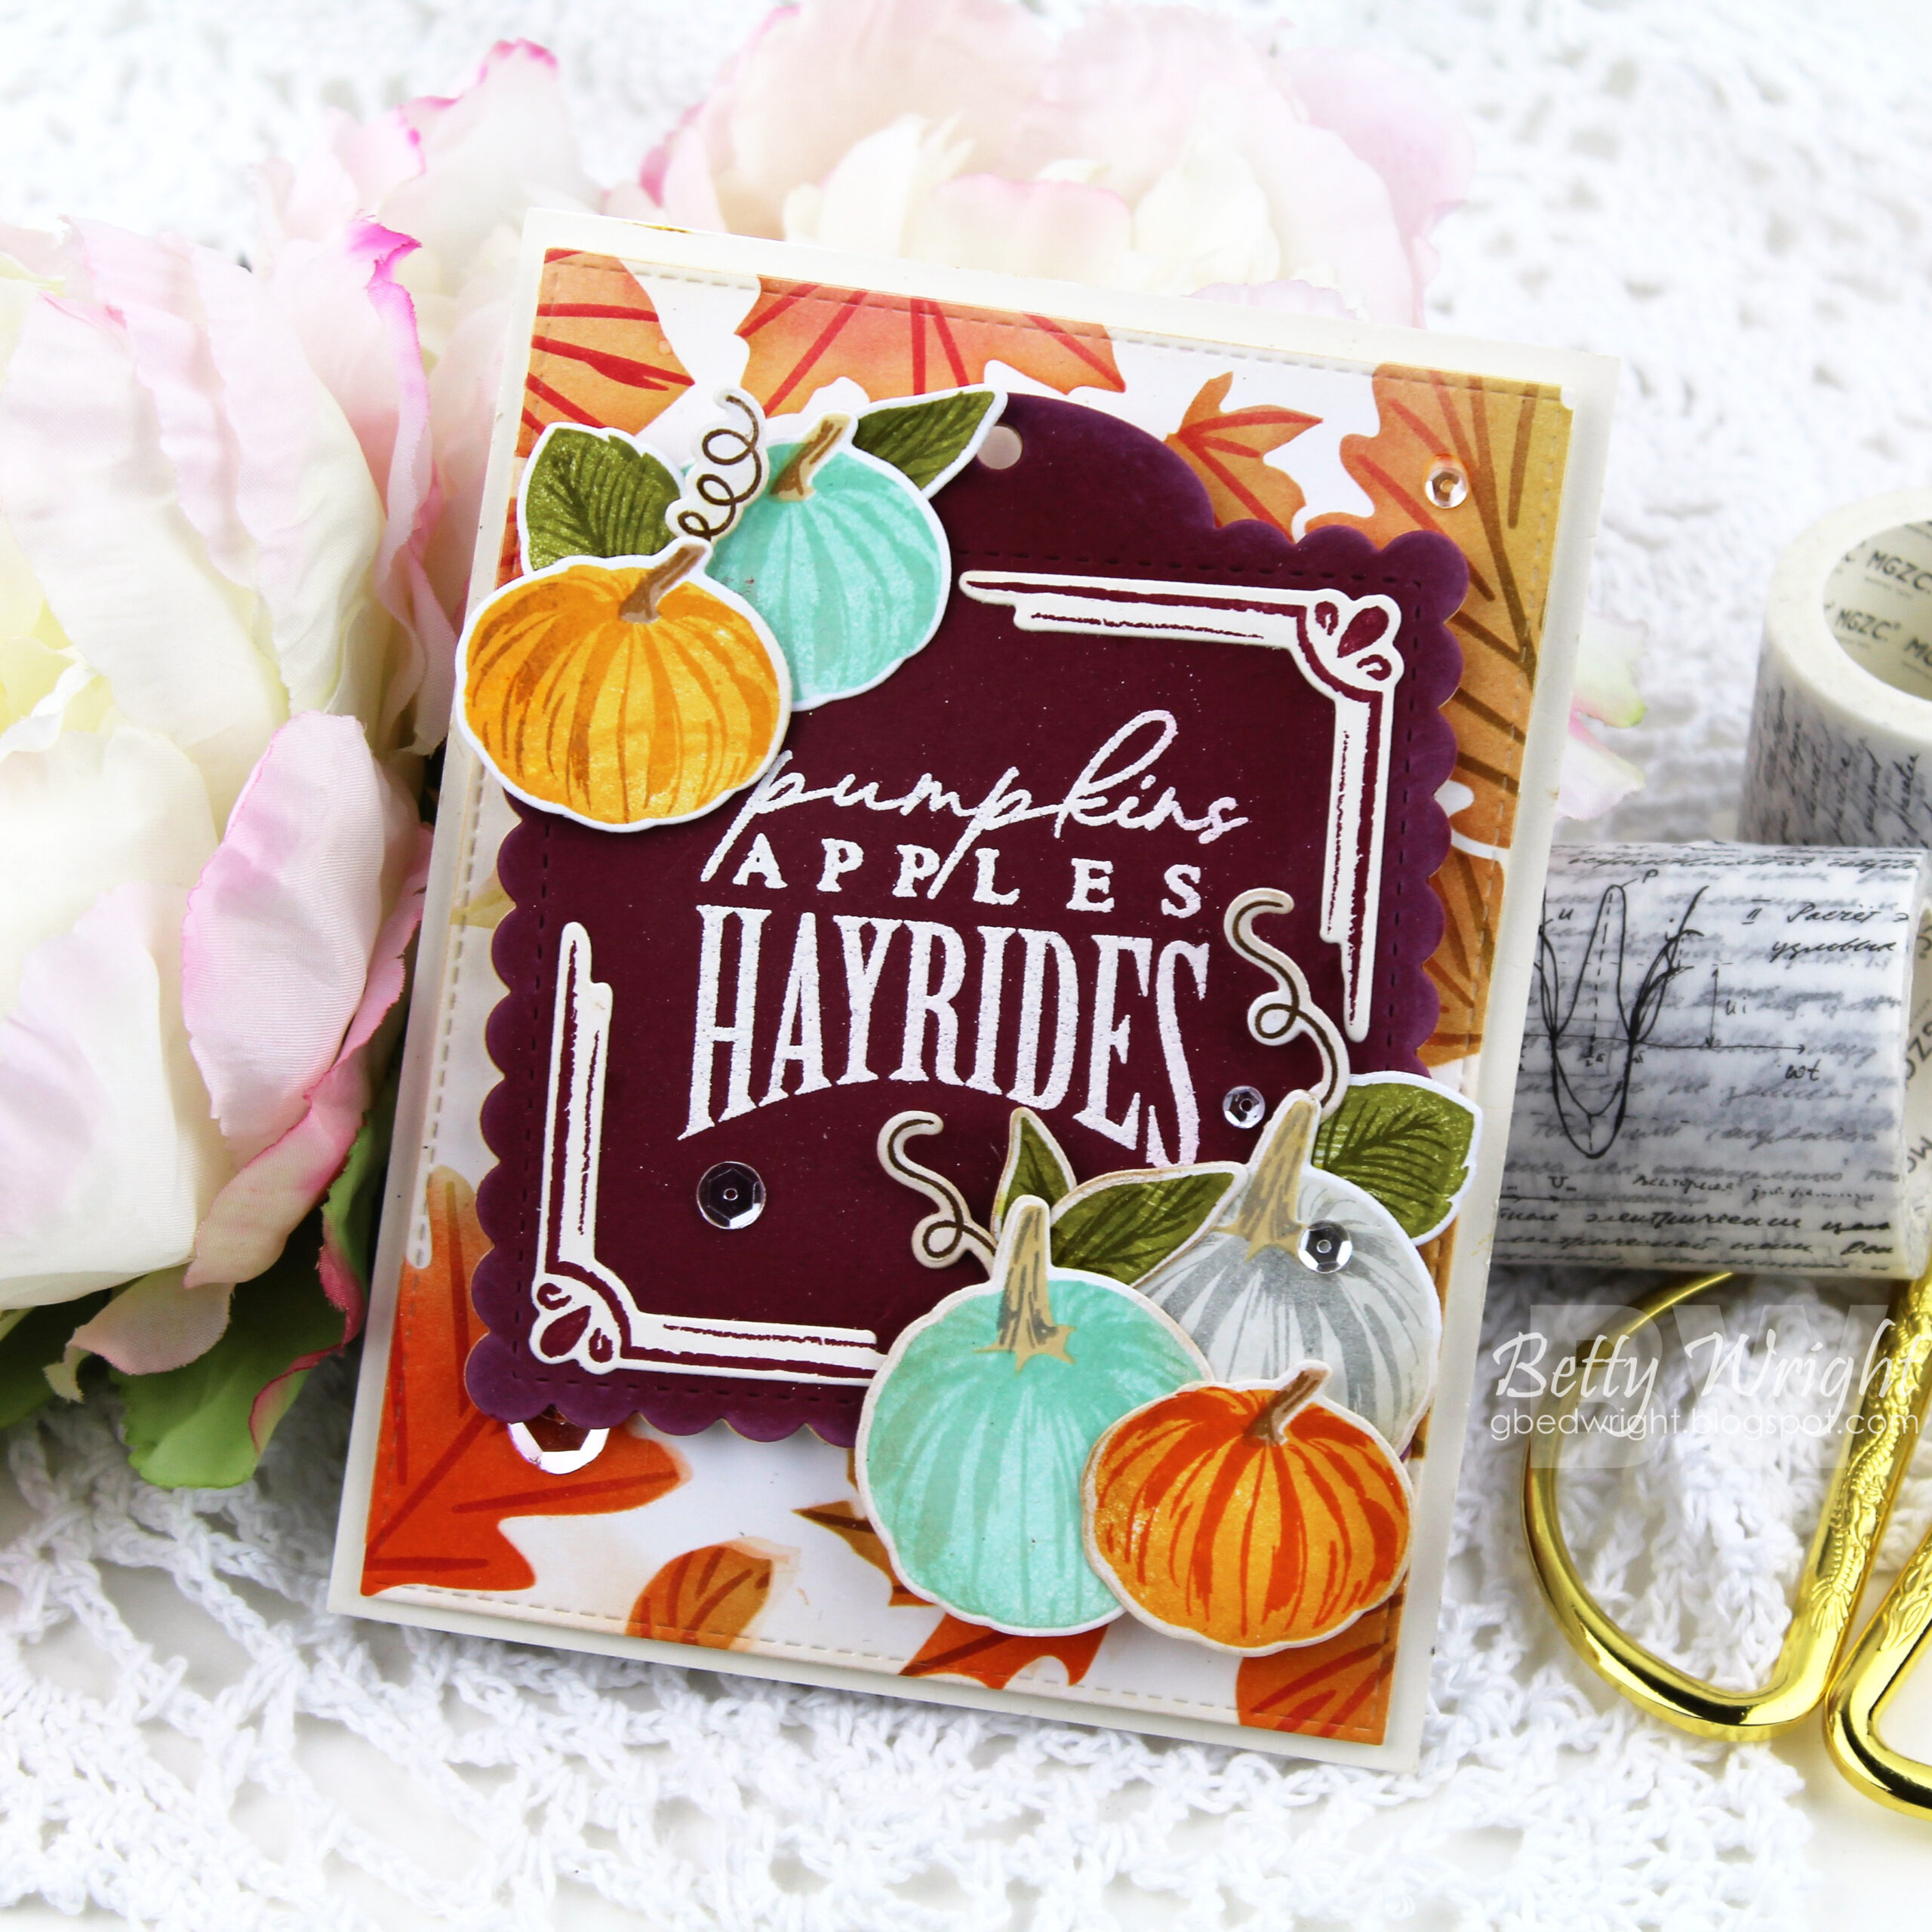
My card uses the lovely Fall Farmers Market stamp set as its focal point. This set is full of playful possibilities, including the option of mixing and matching, and layering the images and sentiments. I began with a Love to Layer: Ovals die, stamped with the Wood Plank Background stamps. I then layered on my selected phrases from the Farmers Market set and followed with all of the cute pumpkins, leaves, apples, and swirls you can dream of.
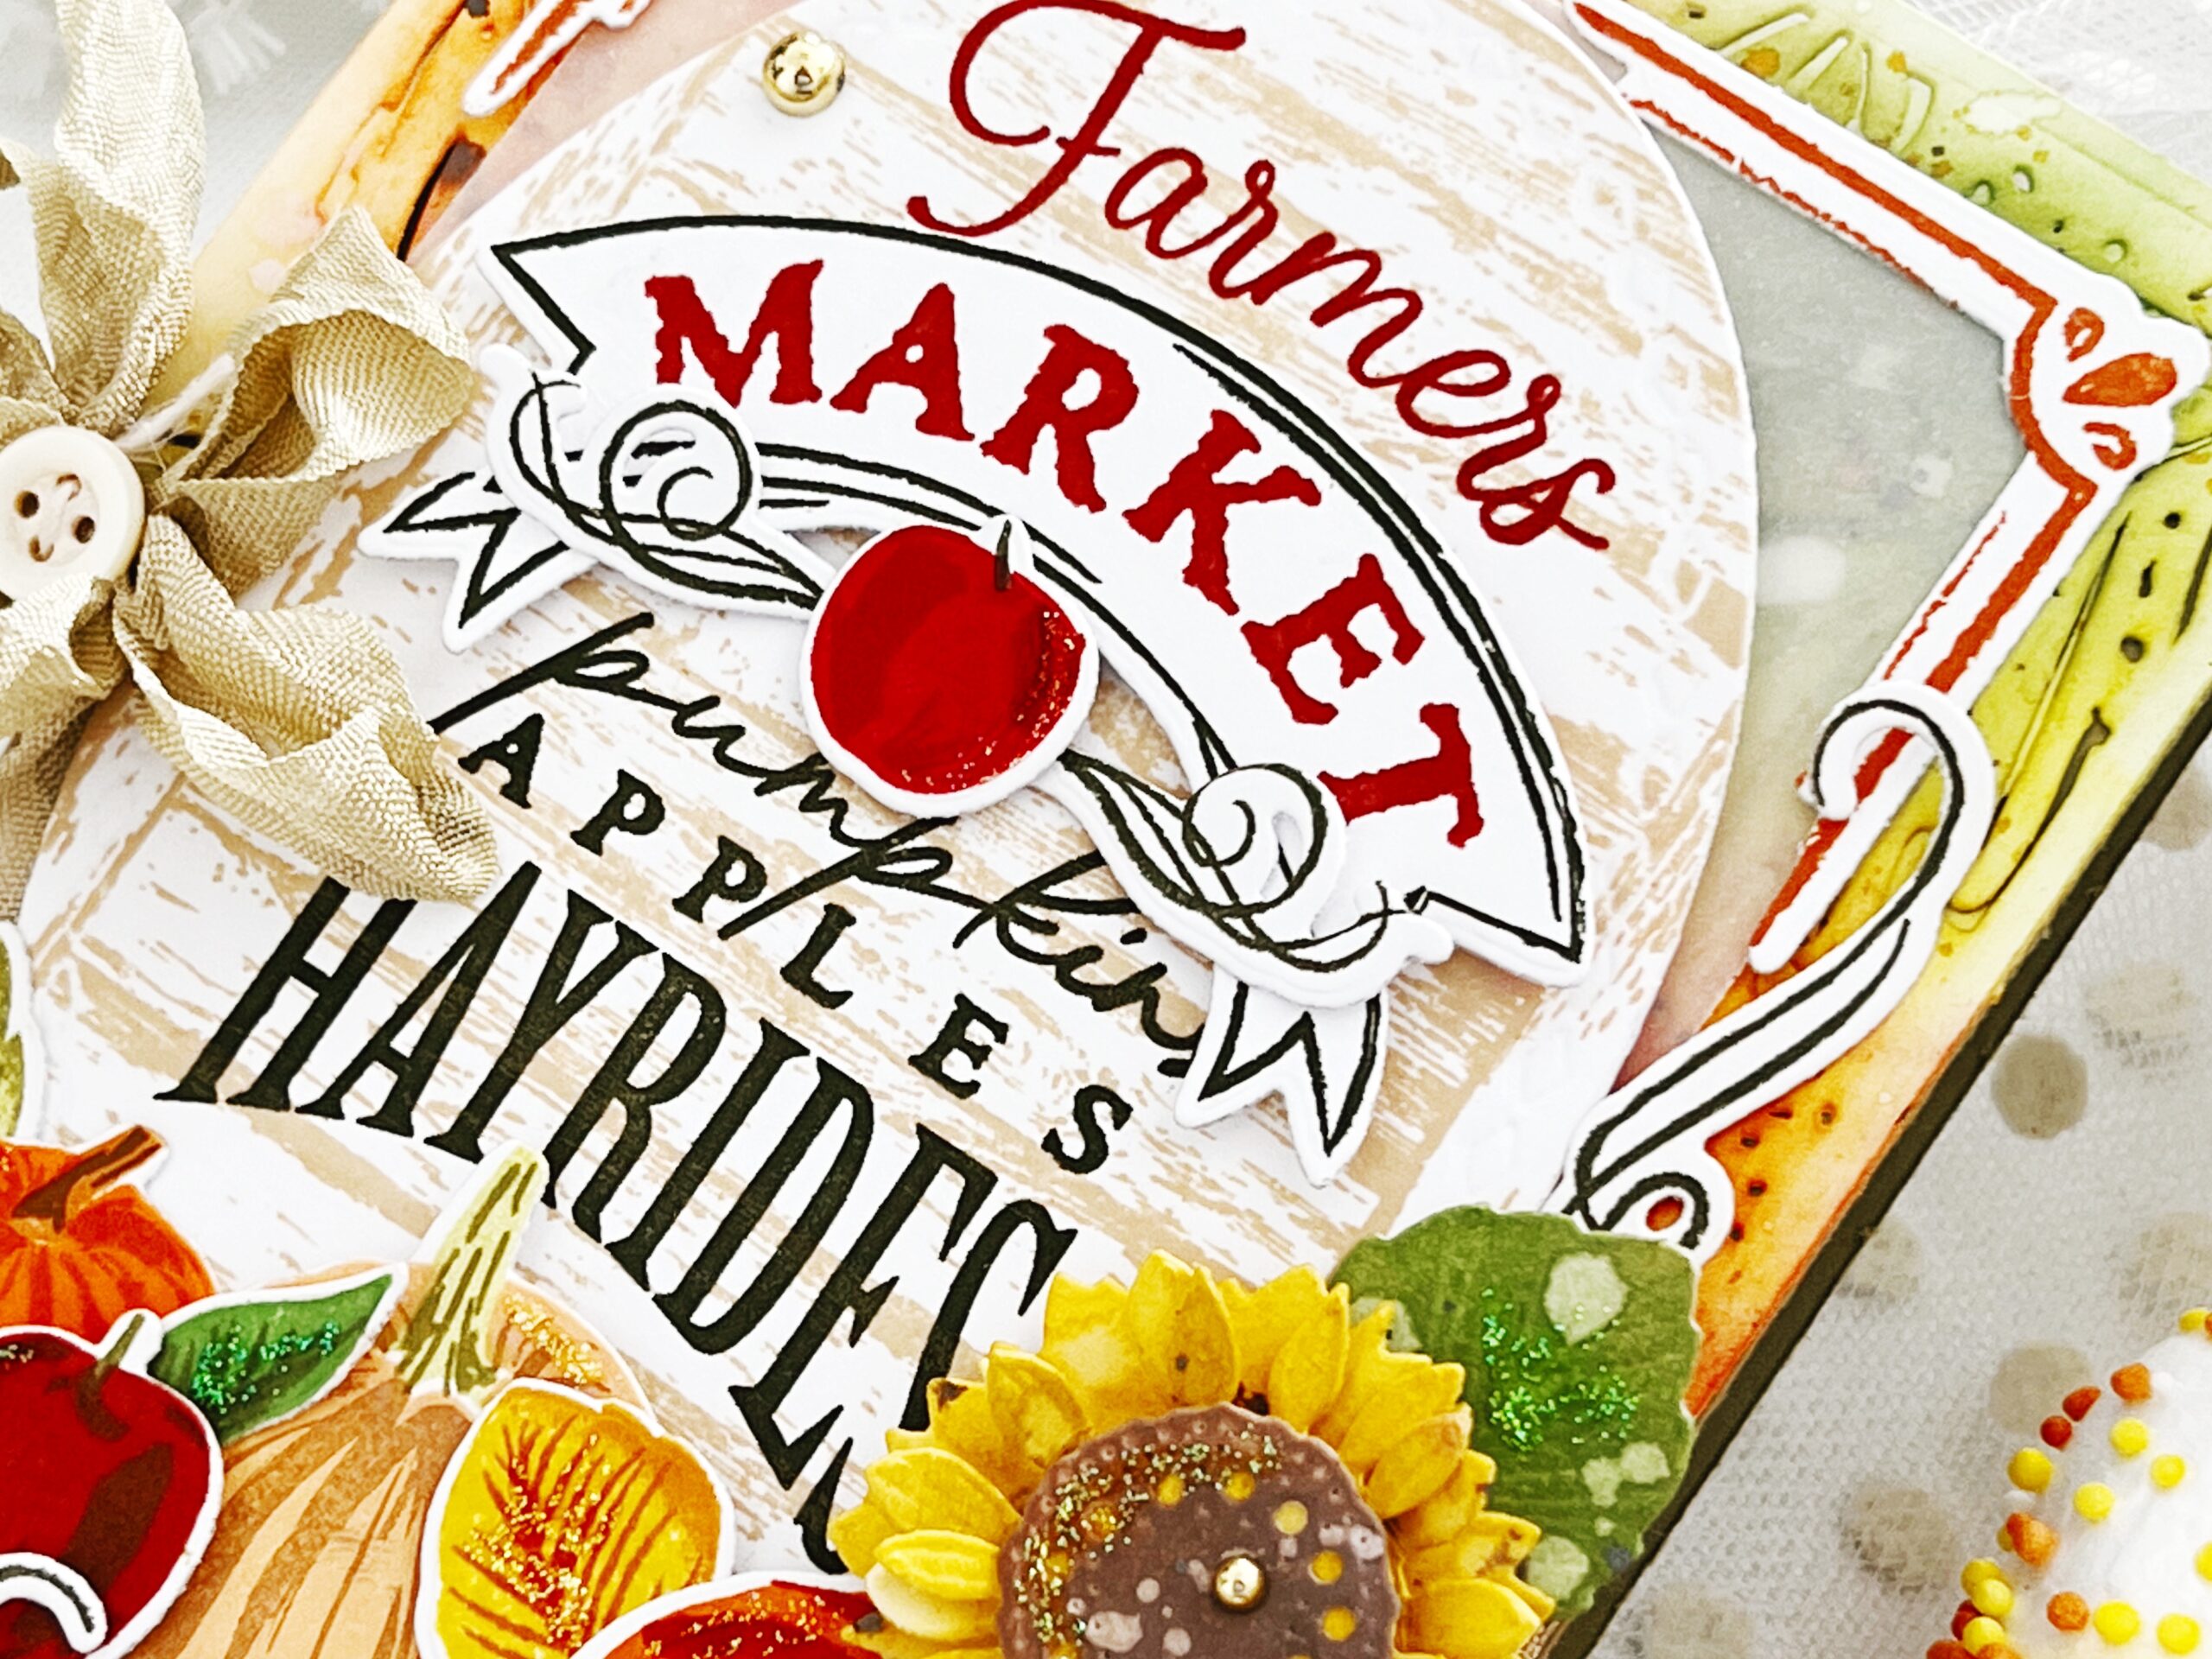
The banner in Farmers Market comes with a coordinating die, so you can give it dimension and make it pop up from the rest of the card if you choose. I added one of the tiny apples from the set just underneath it, followed by flourishes, to compliment the arch and curvature of the banner.
In the background I have used the gorgeous Fallen Leaves: Hot Foil Plate. I didn’t combine mine with foil through. I used it as a form of embossing my cardstock and boy, did it turn out beautifully. I then sponged on the colors of fall, added water to activate the ink, and spritzed on some Distress Spray. I love that there is more than one way to use the Hot Foil Plates, just as you’ll notice in the designers’ projects.
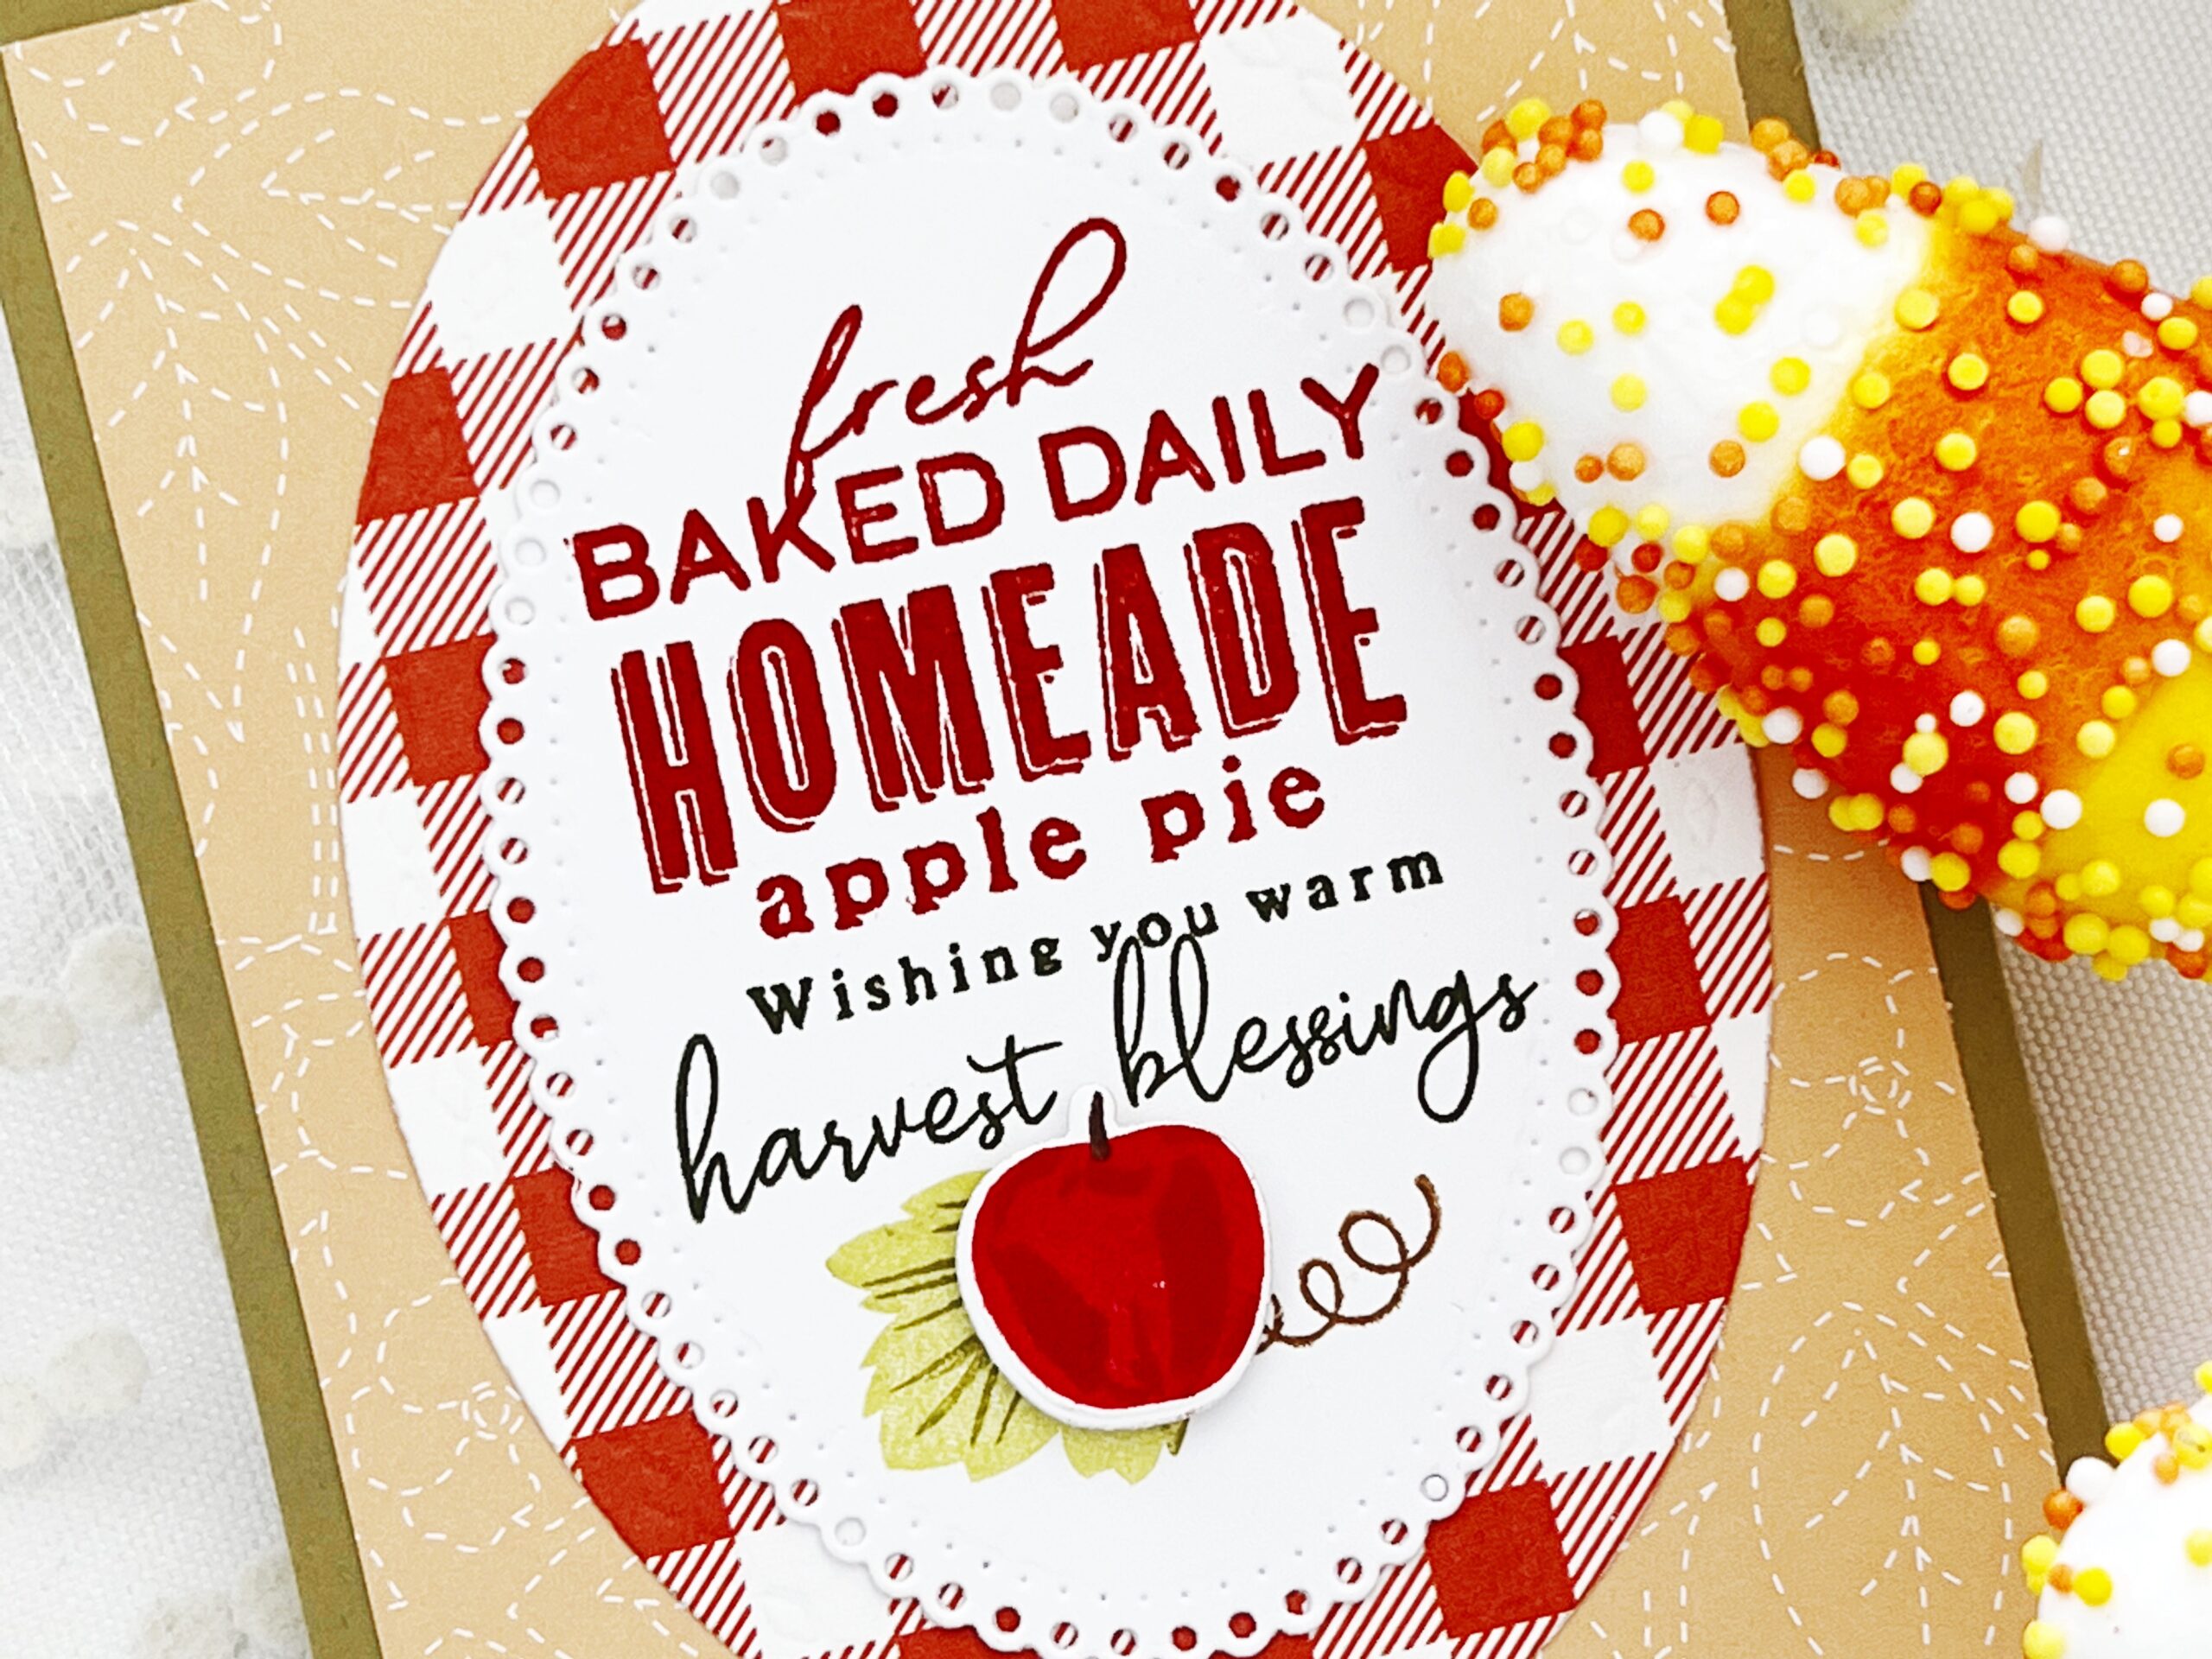
I finished the inside of my card by using another phrase from Fall Farmers Market and an accompanying sentiment from the Thankful for Fall: Sentiments stamp set. I adore each of the sentiments you’ll find within this delightful, and useful set. I added some of the outside to the inside of my card by adding a stamped leaf and apple. Such a joyful card to create. These new products are irresistible and so hard to set aside.
Supplies used:
STAMPS: Fall Farmers Market: Thankful for Fall: Sentiments, Wood Plank Background
INK: Summer Sunrise, Bright Buttercup, Americana, Pure Poppy, Olive Twist, Saffron Spice, Honey Nut, Dark Chocolate, New Leaf, Ripe Avocado, Fine Linen, Melon Berry, Scarlet Jewel
PAPER: Stamper’s Select White, Sheer Basics Vellum, Chicken Scratch Gingham
DIES: Fall Farmers Market, Fallen Leaves: Hot Foil Plate, Love to Layer: Ovals
OTHER: Distress Ink and spray, Stickles glitter, gold adhesive dots, seam binding, button


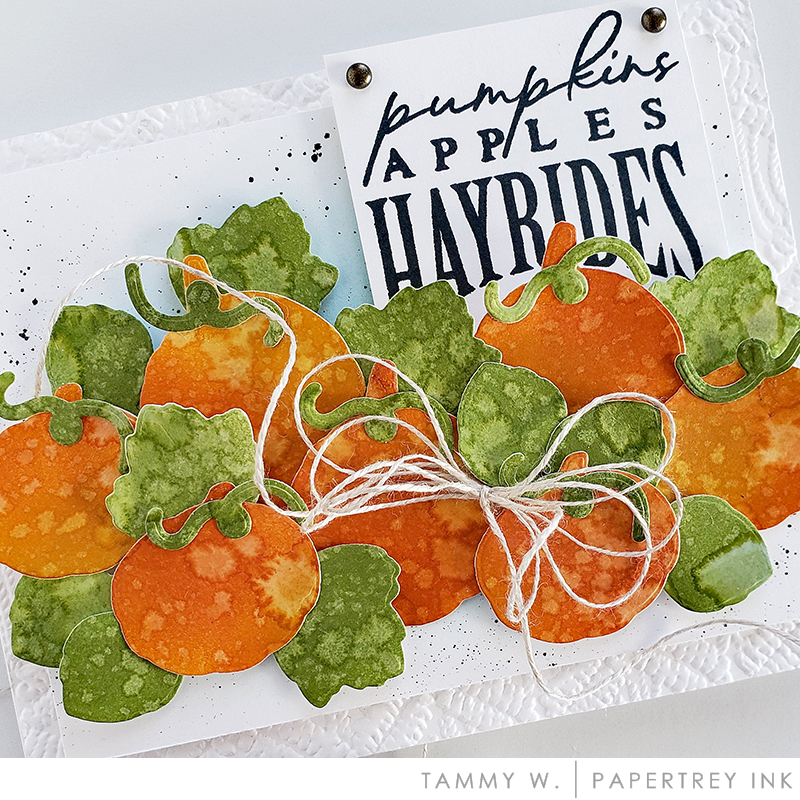

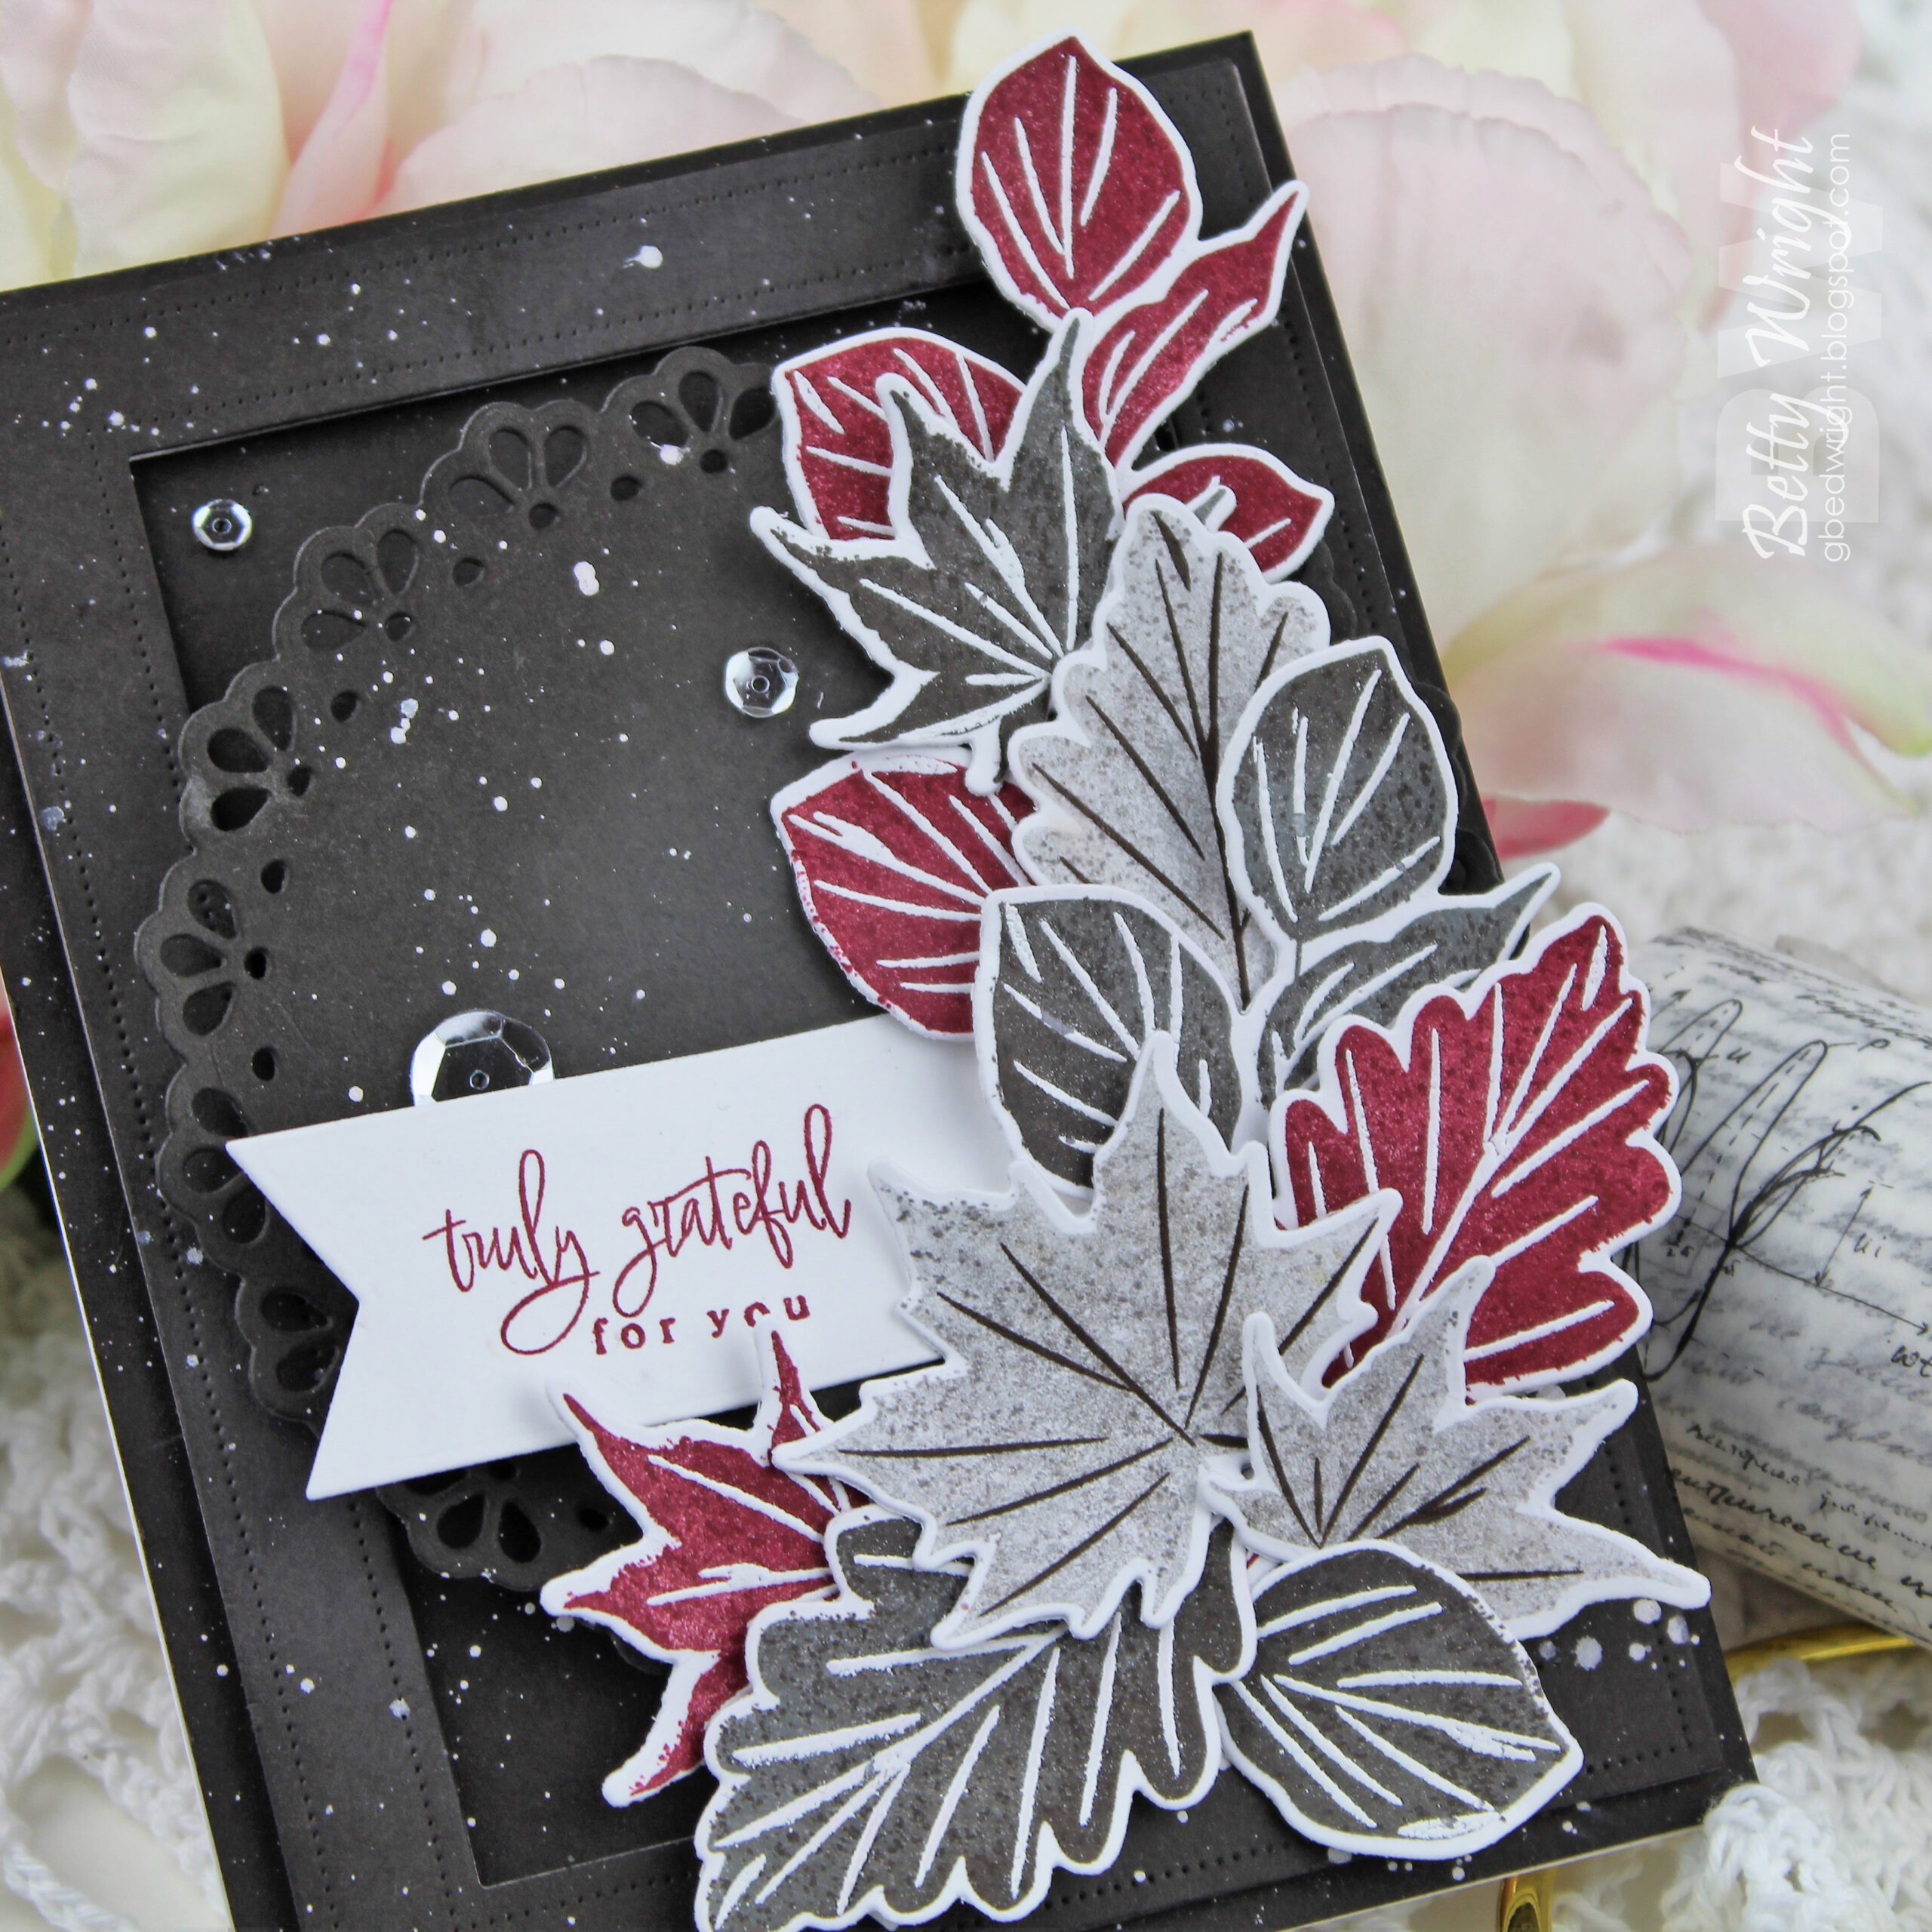
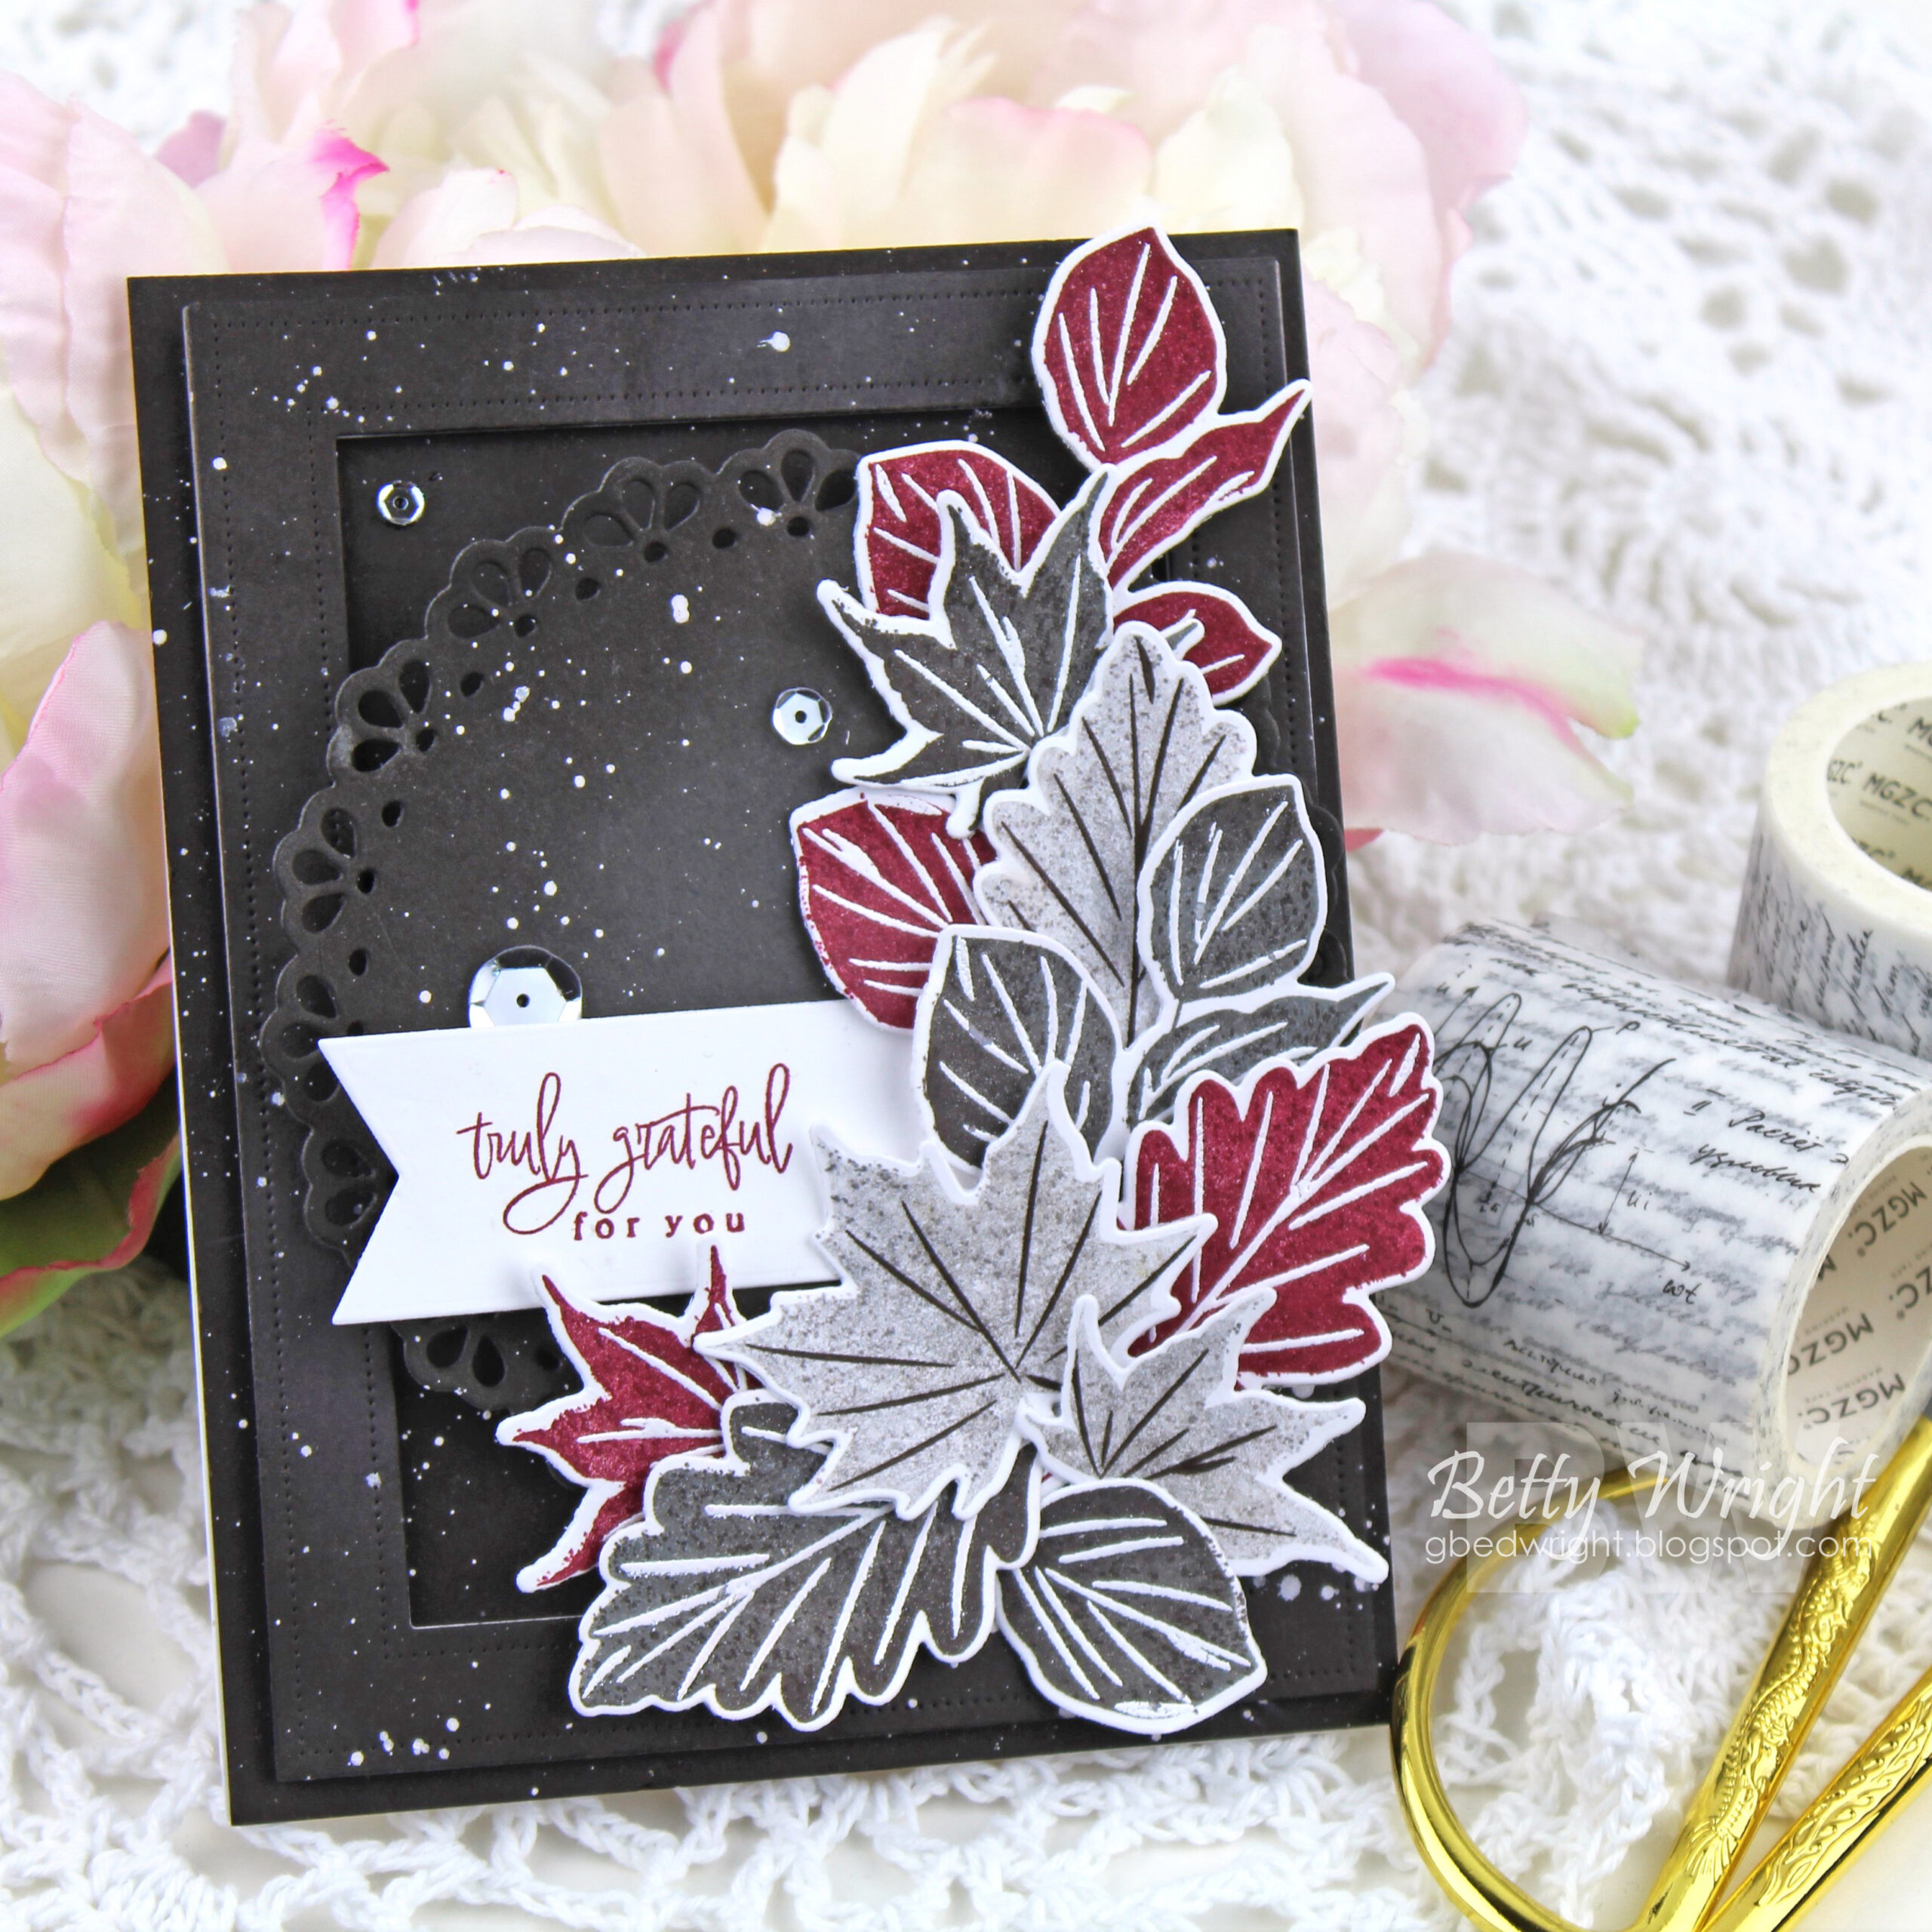
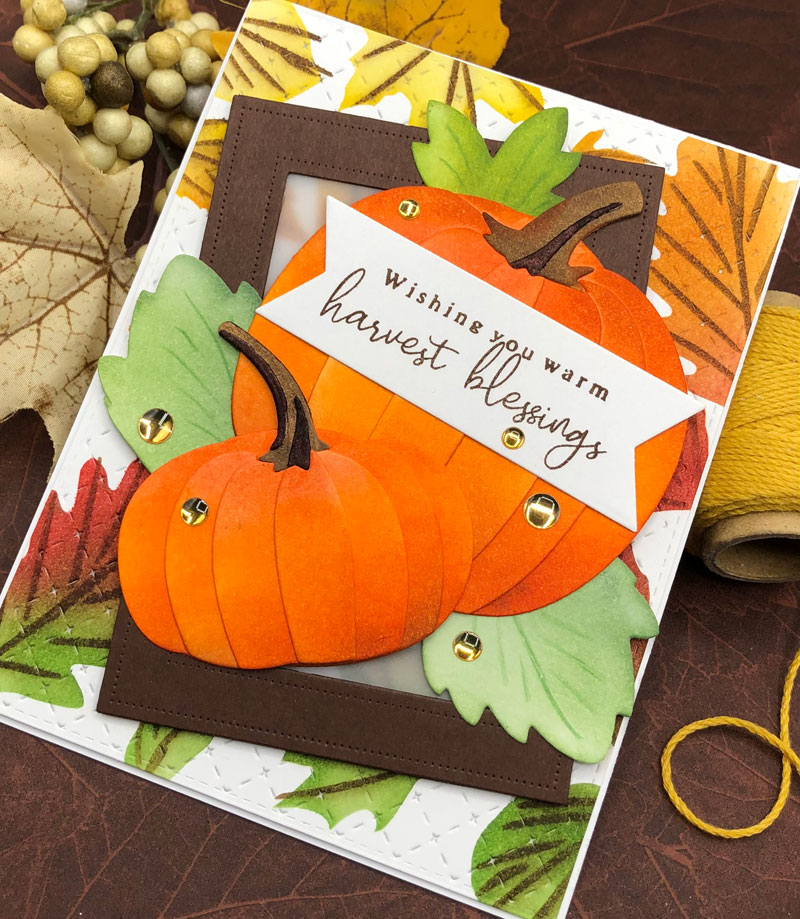
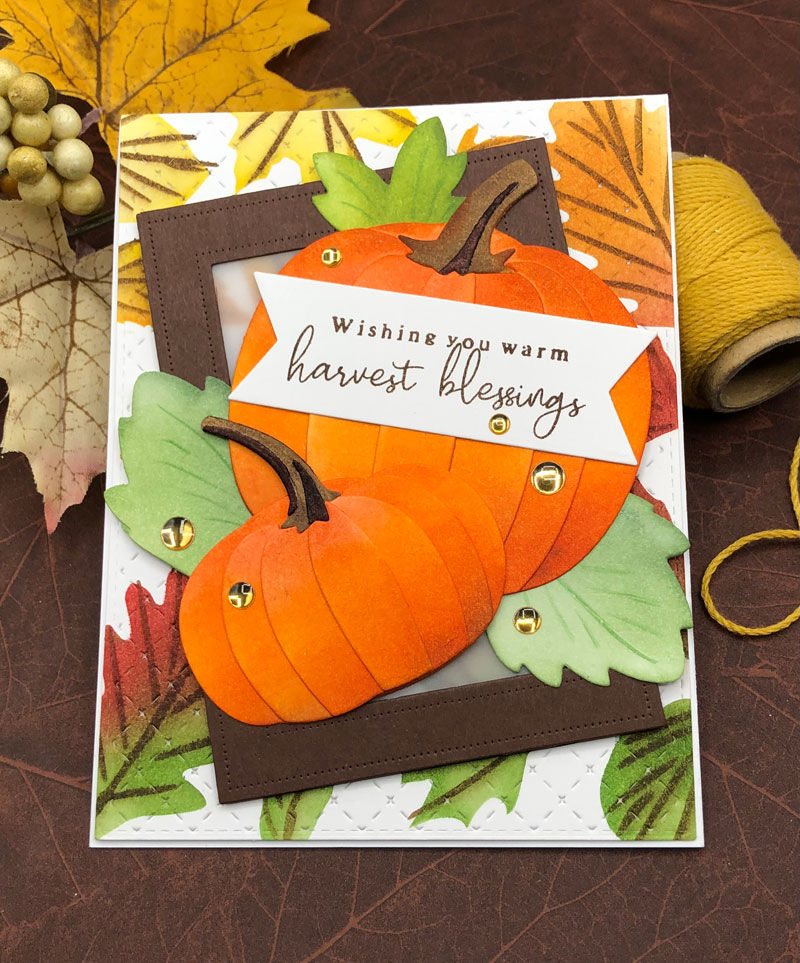
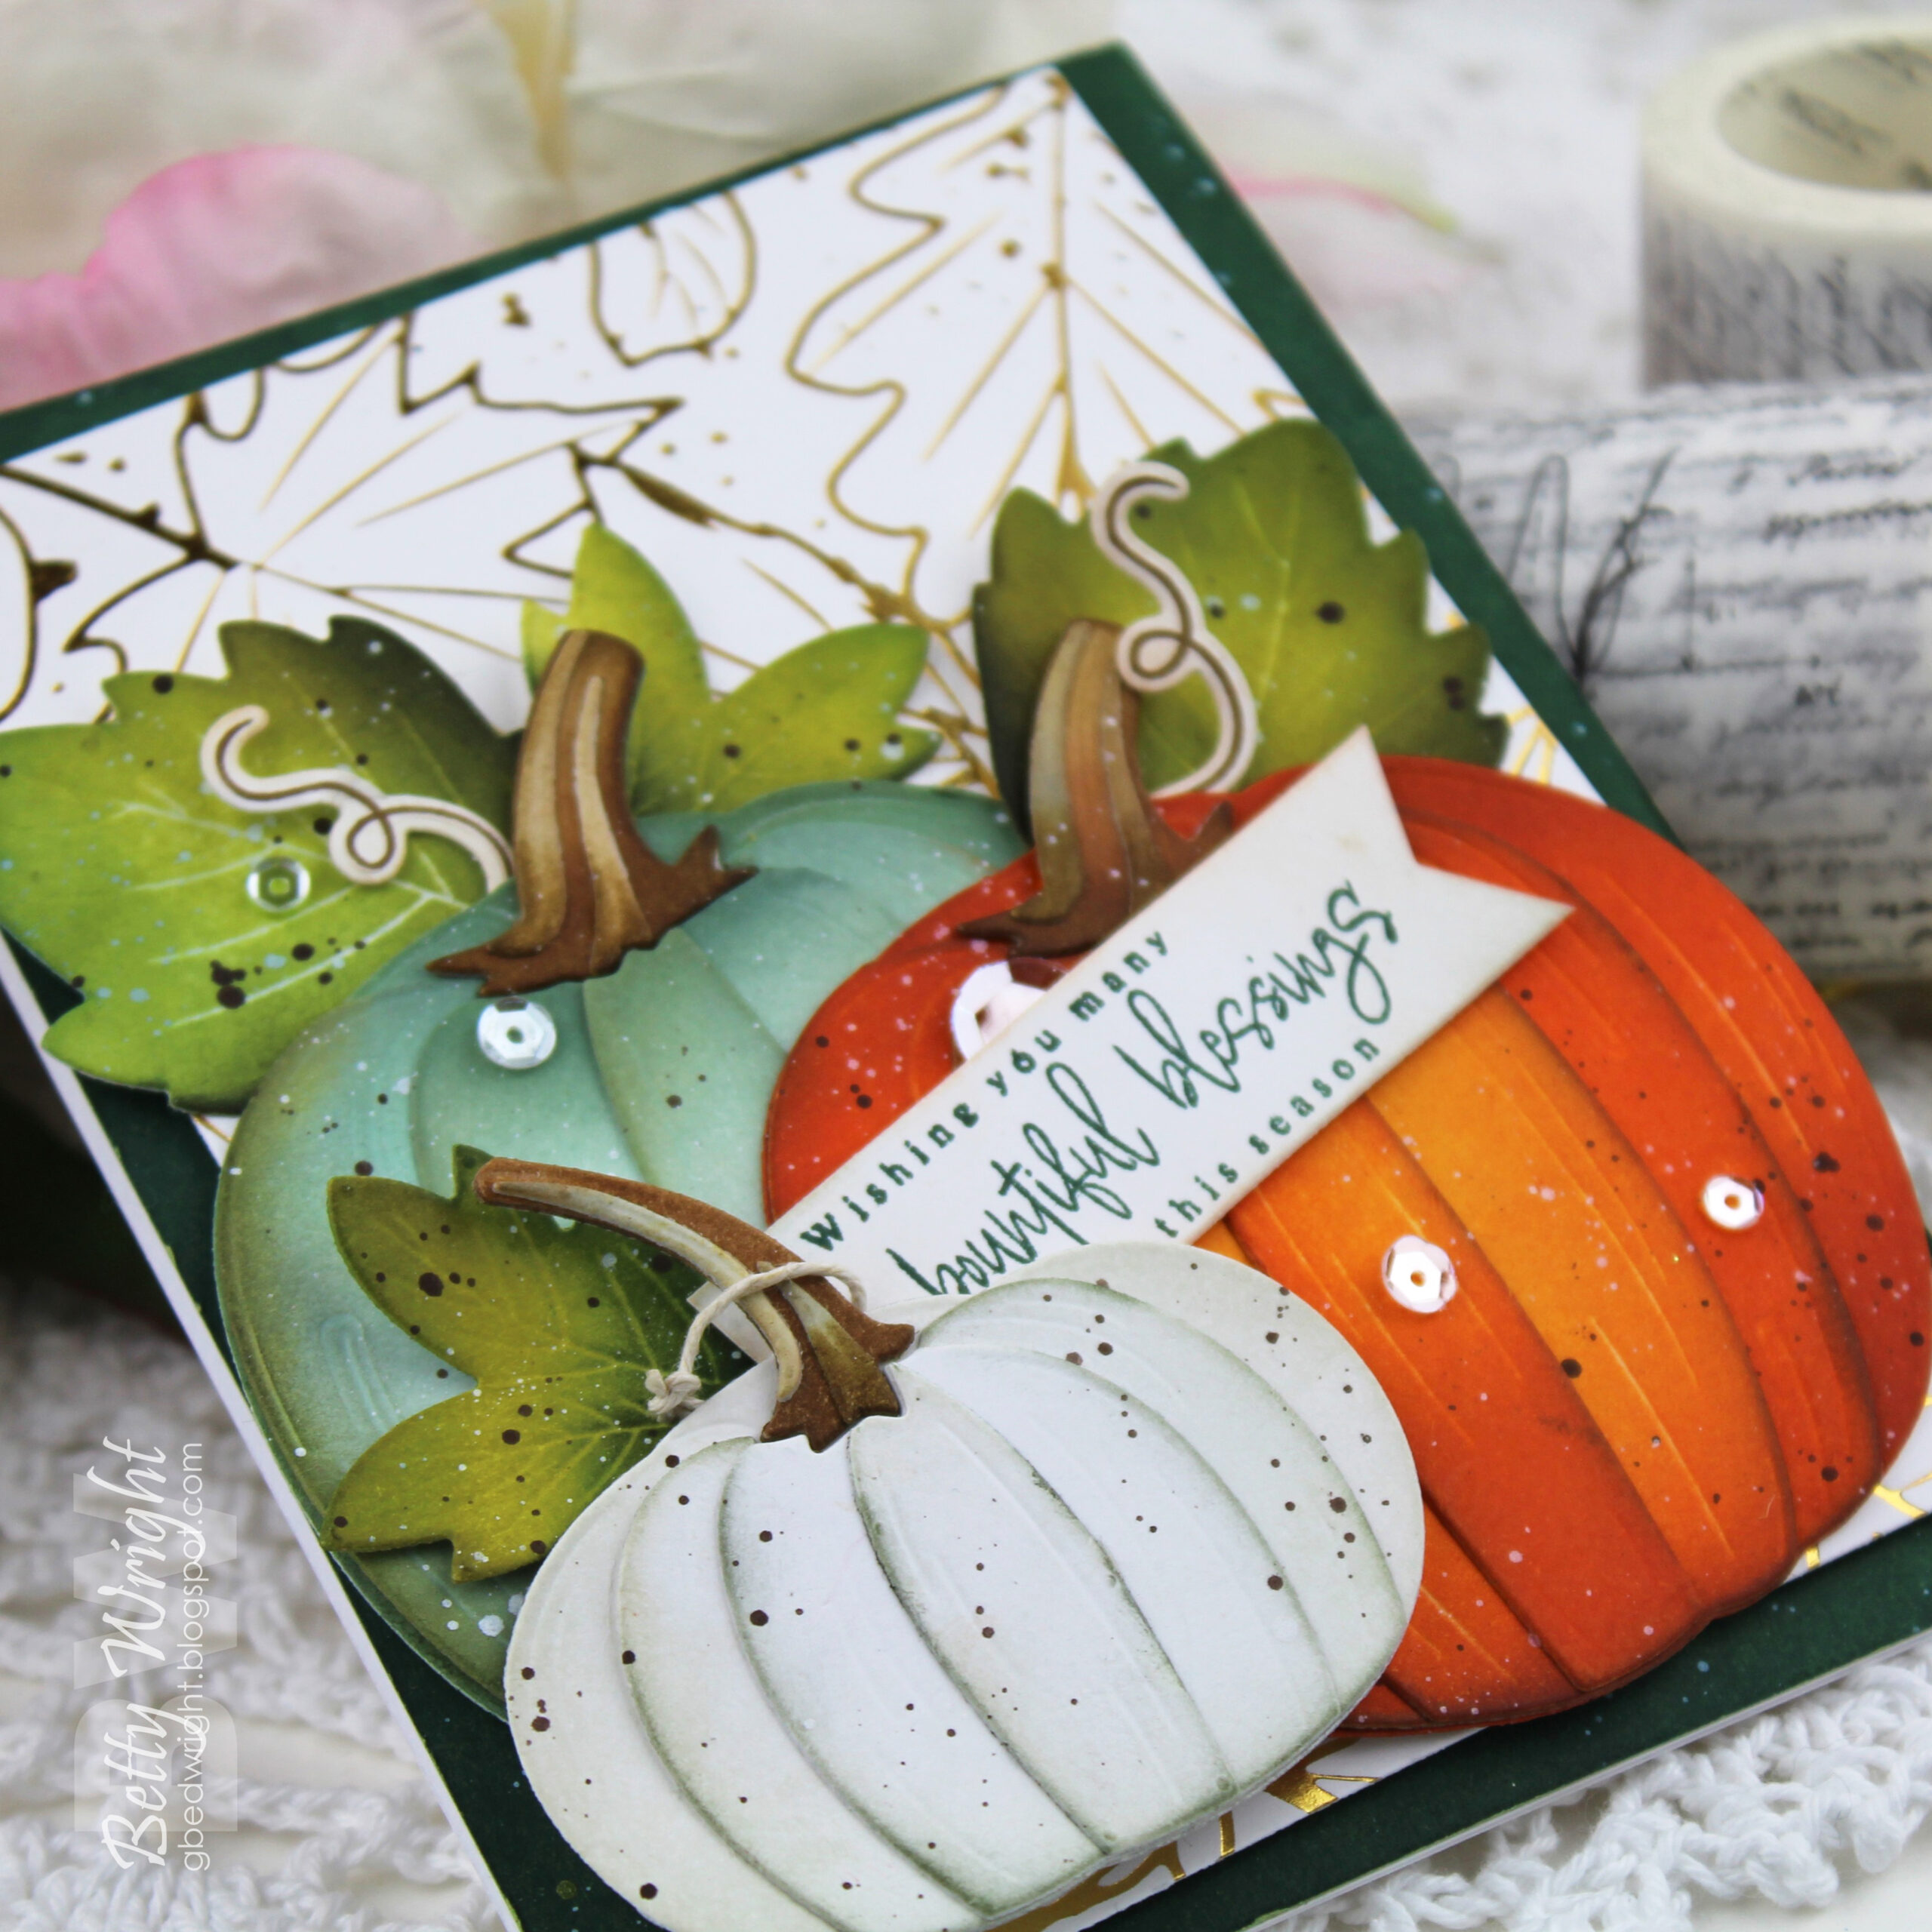
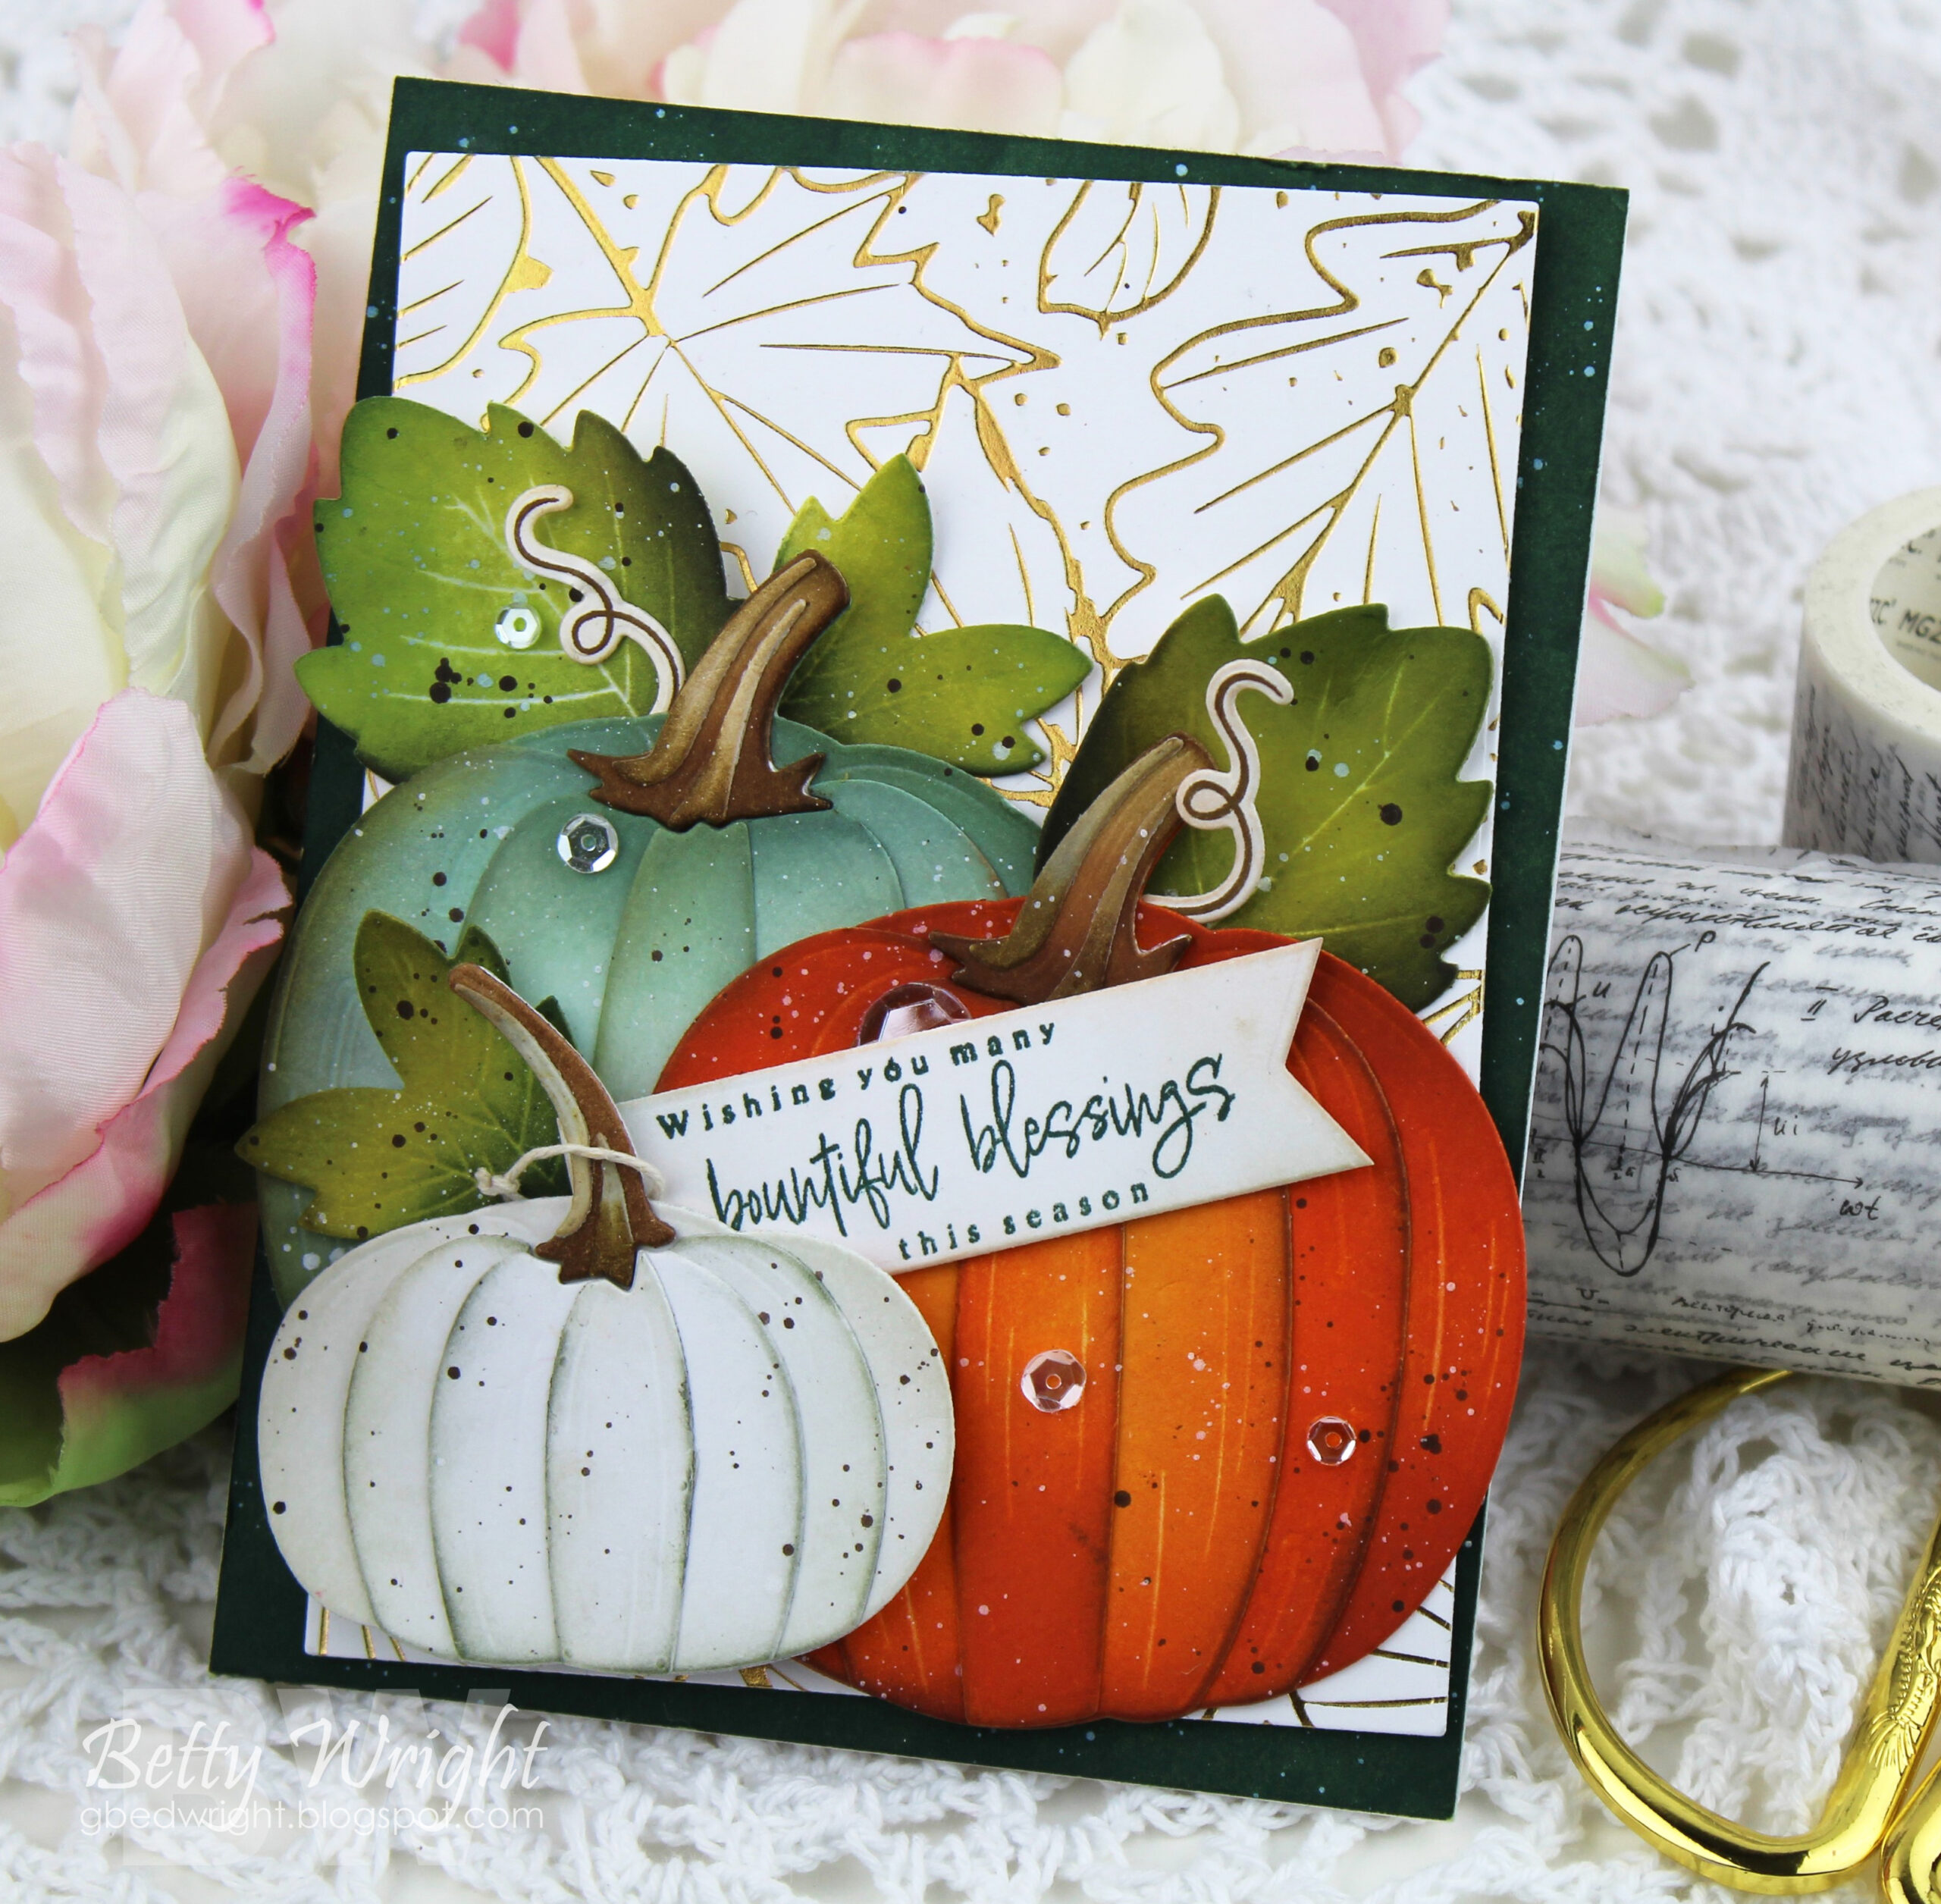
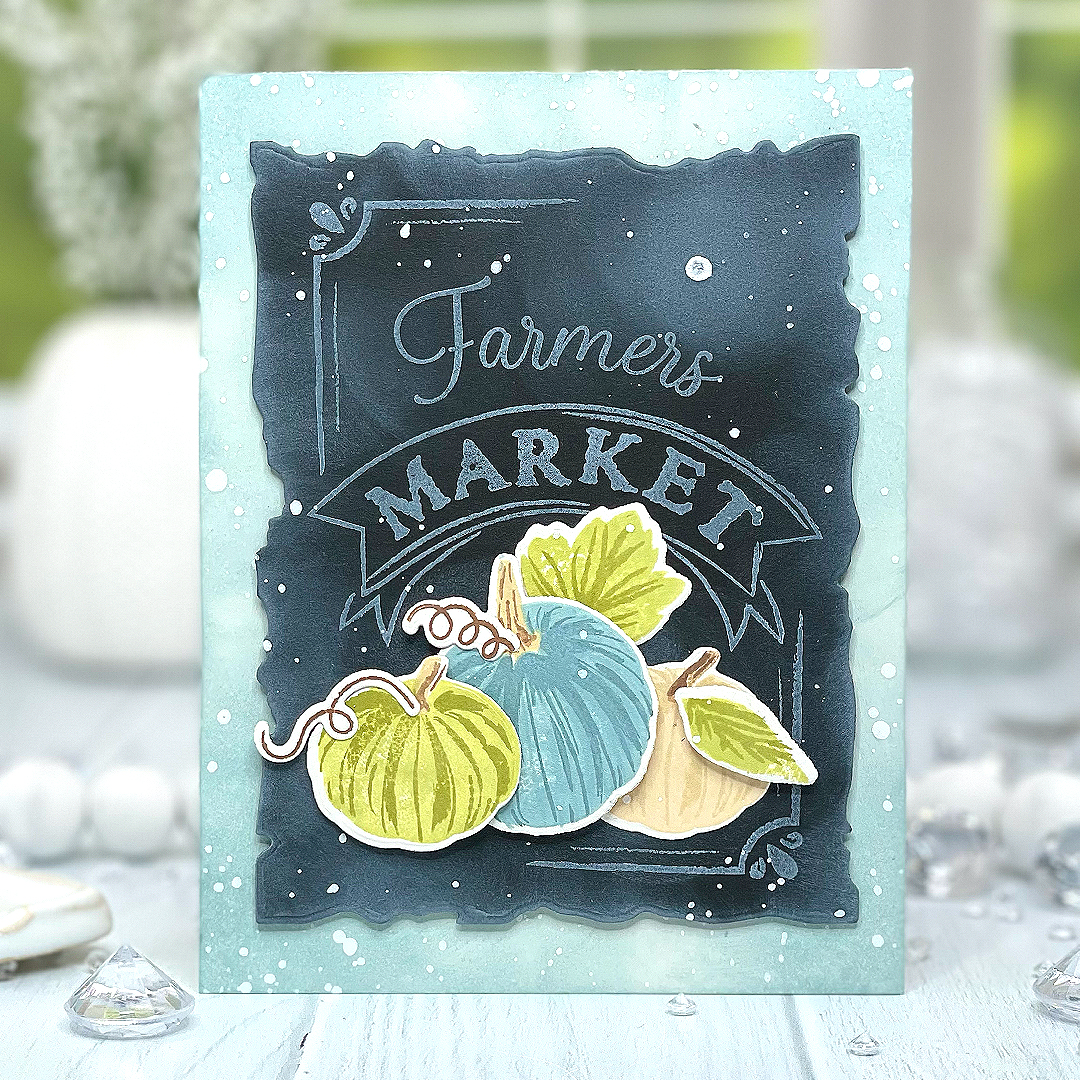
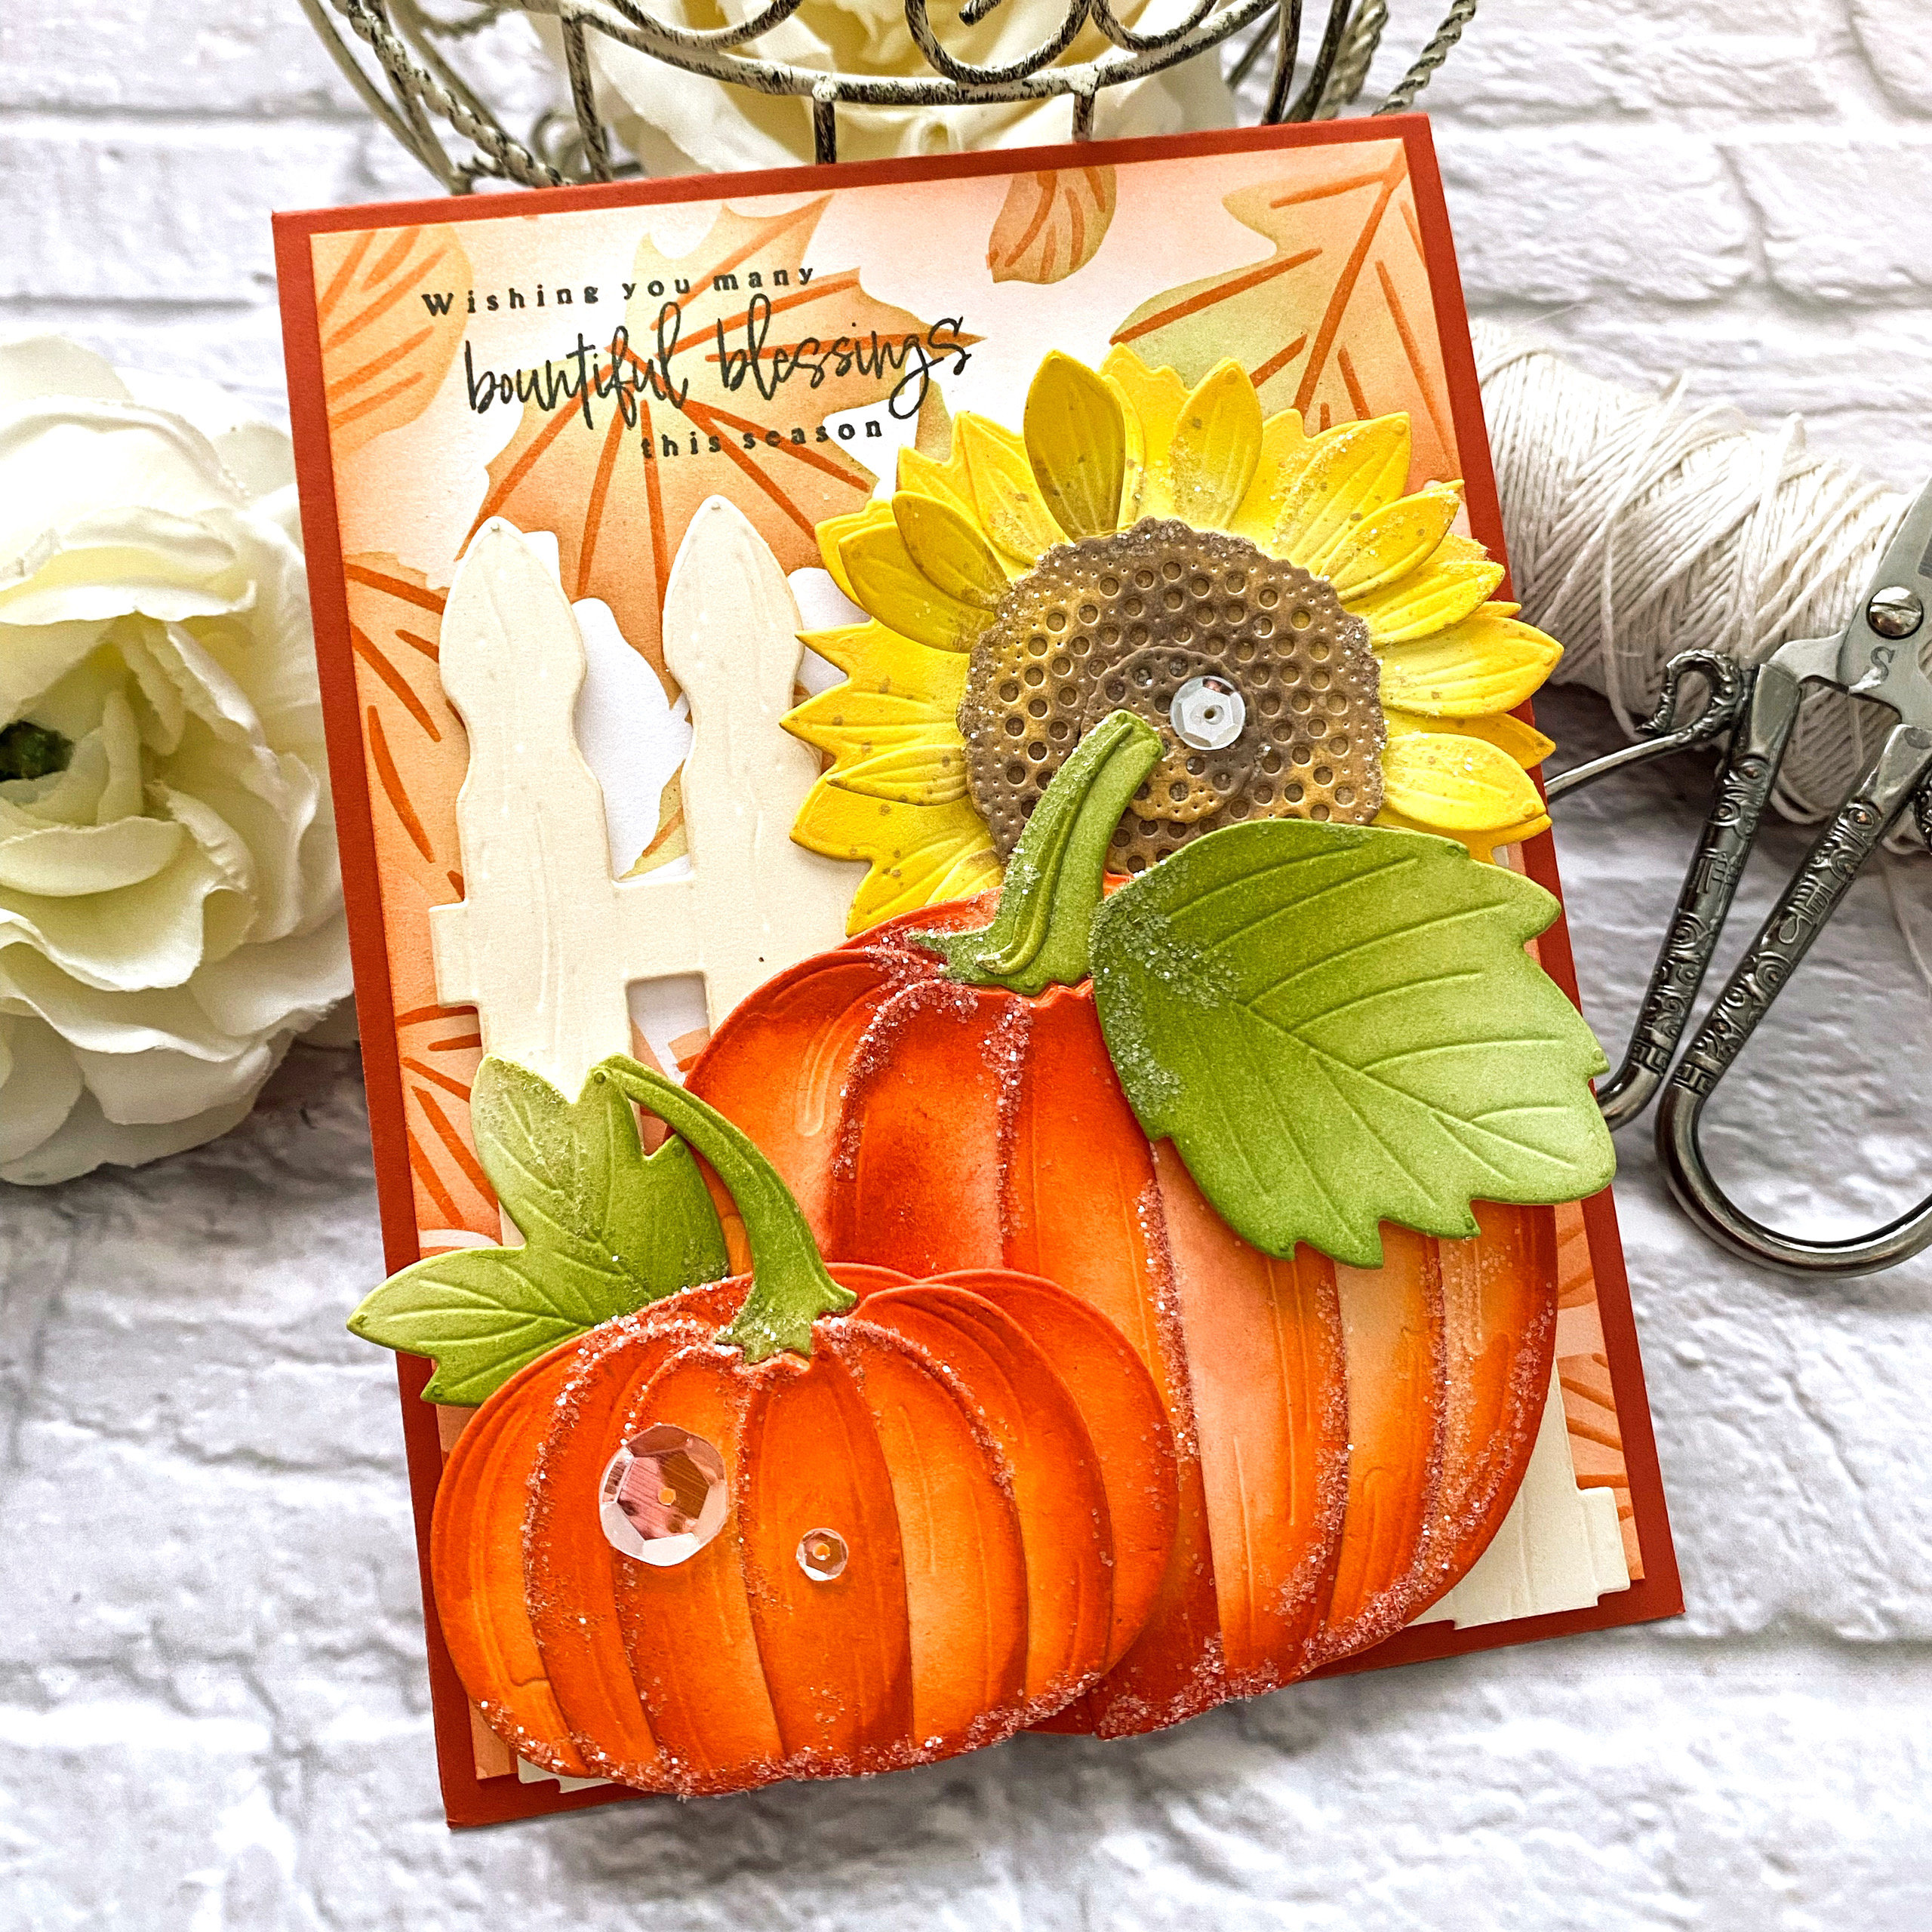
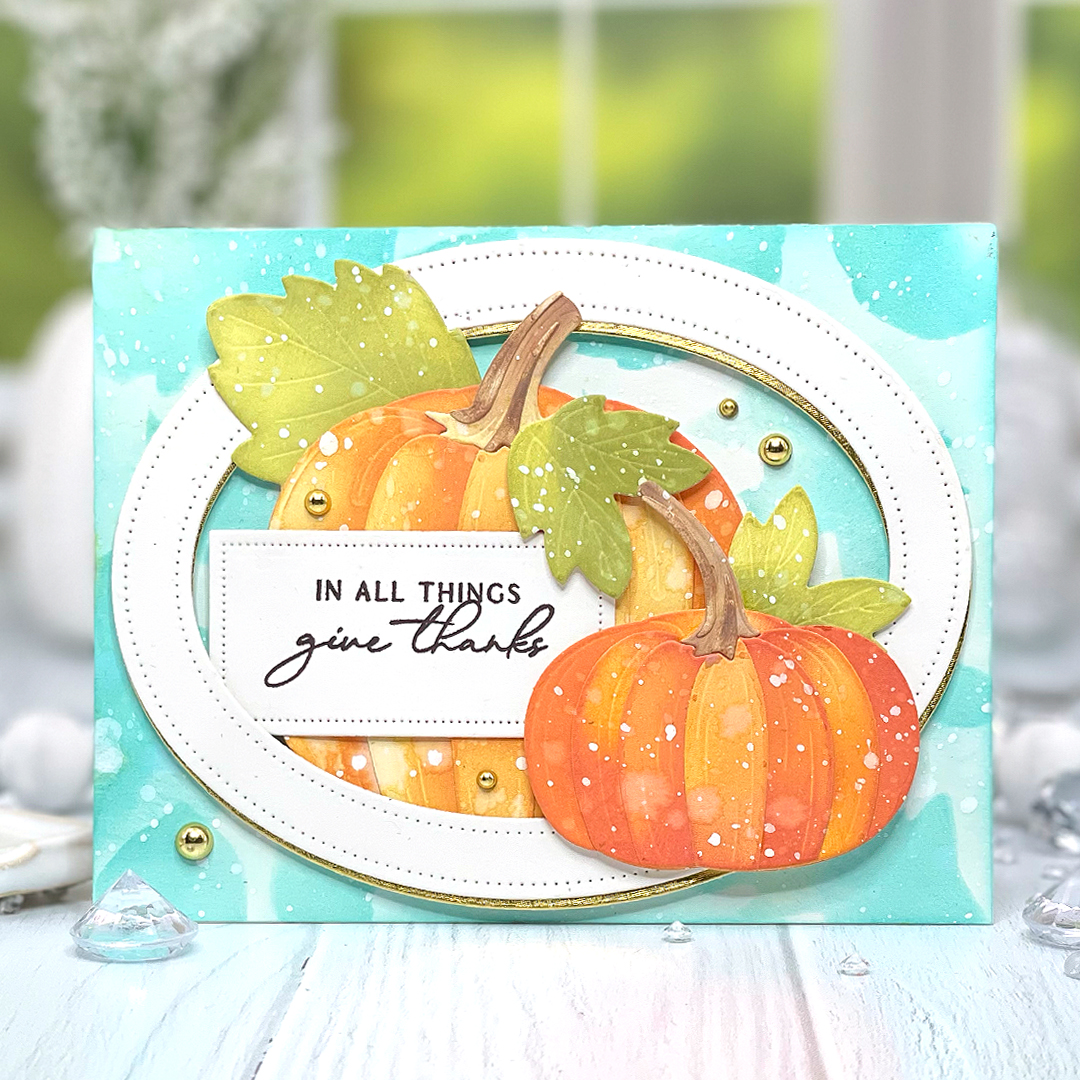
Next up on Day 3, I bring you the lovely colors and leaves of fall. Autumn leaves speak their own special language as they blow in the breeze, as they fall to the ground, and as they crunch underfoot. And then of course, add in a pumpkin or two, and I am the happiest girl on earth. Introducing the new Fantastic Foliage stamp set and coordinating dies, the Fall Leaves: Stencils, and the Into the Blooms: Pumpkin dies.
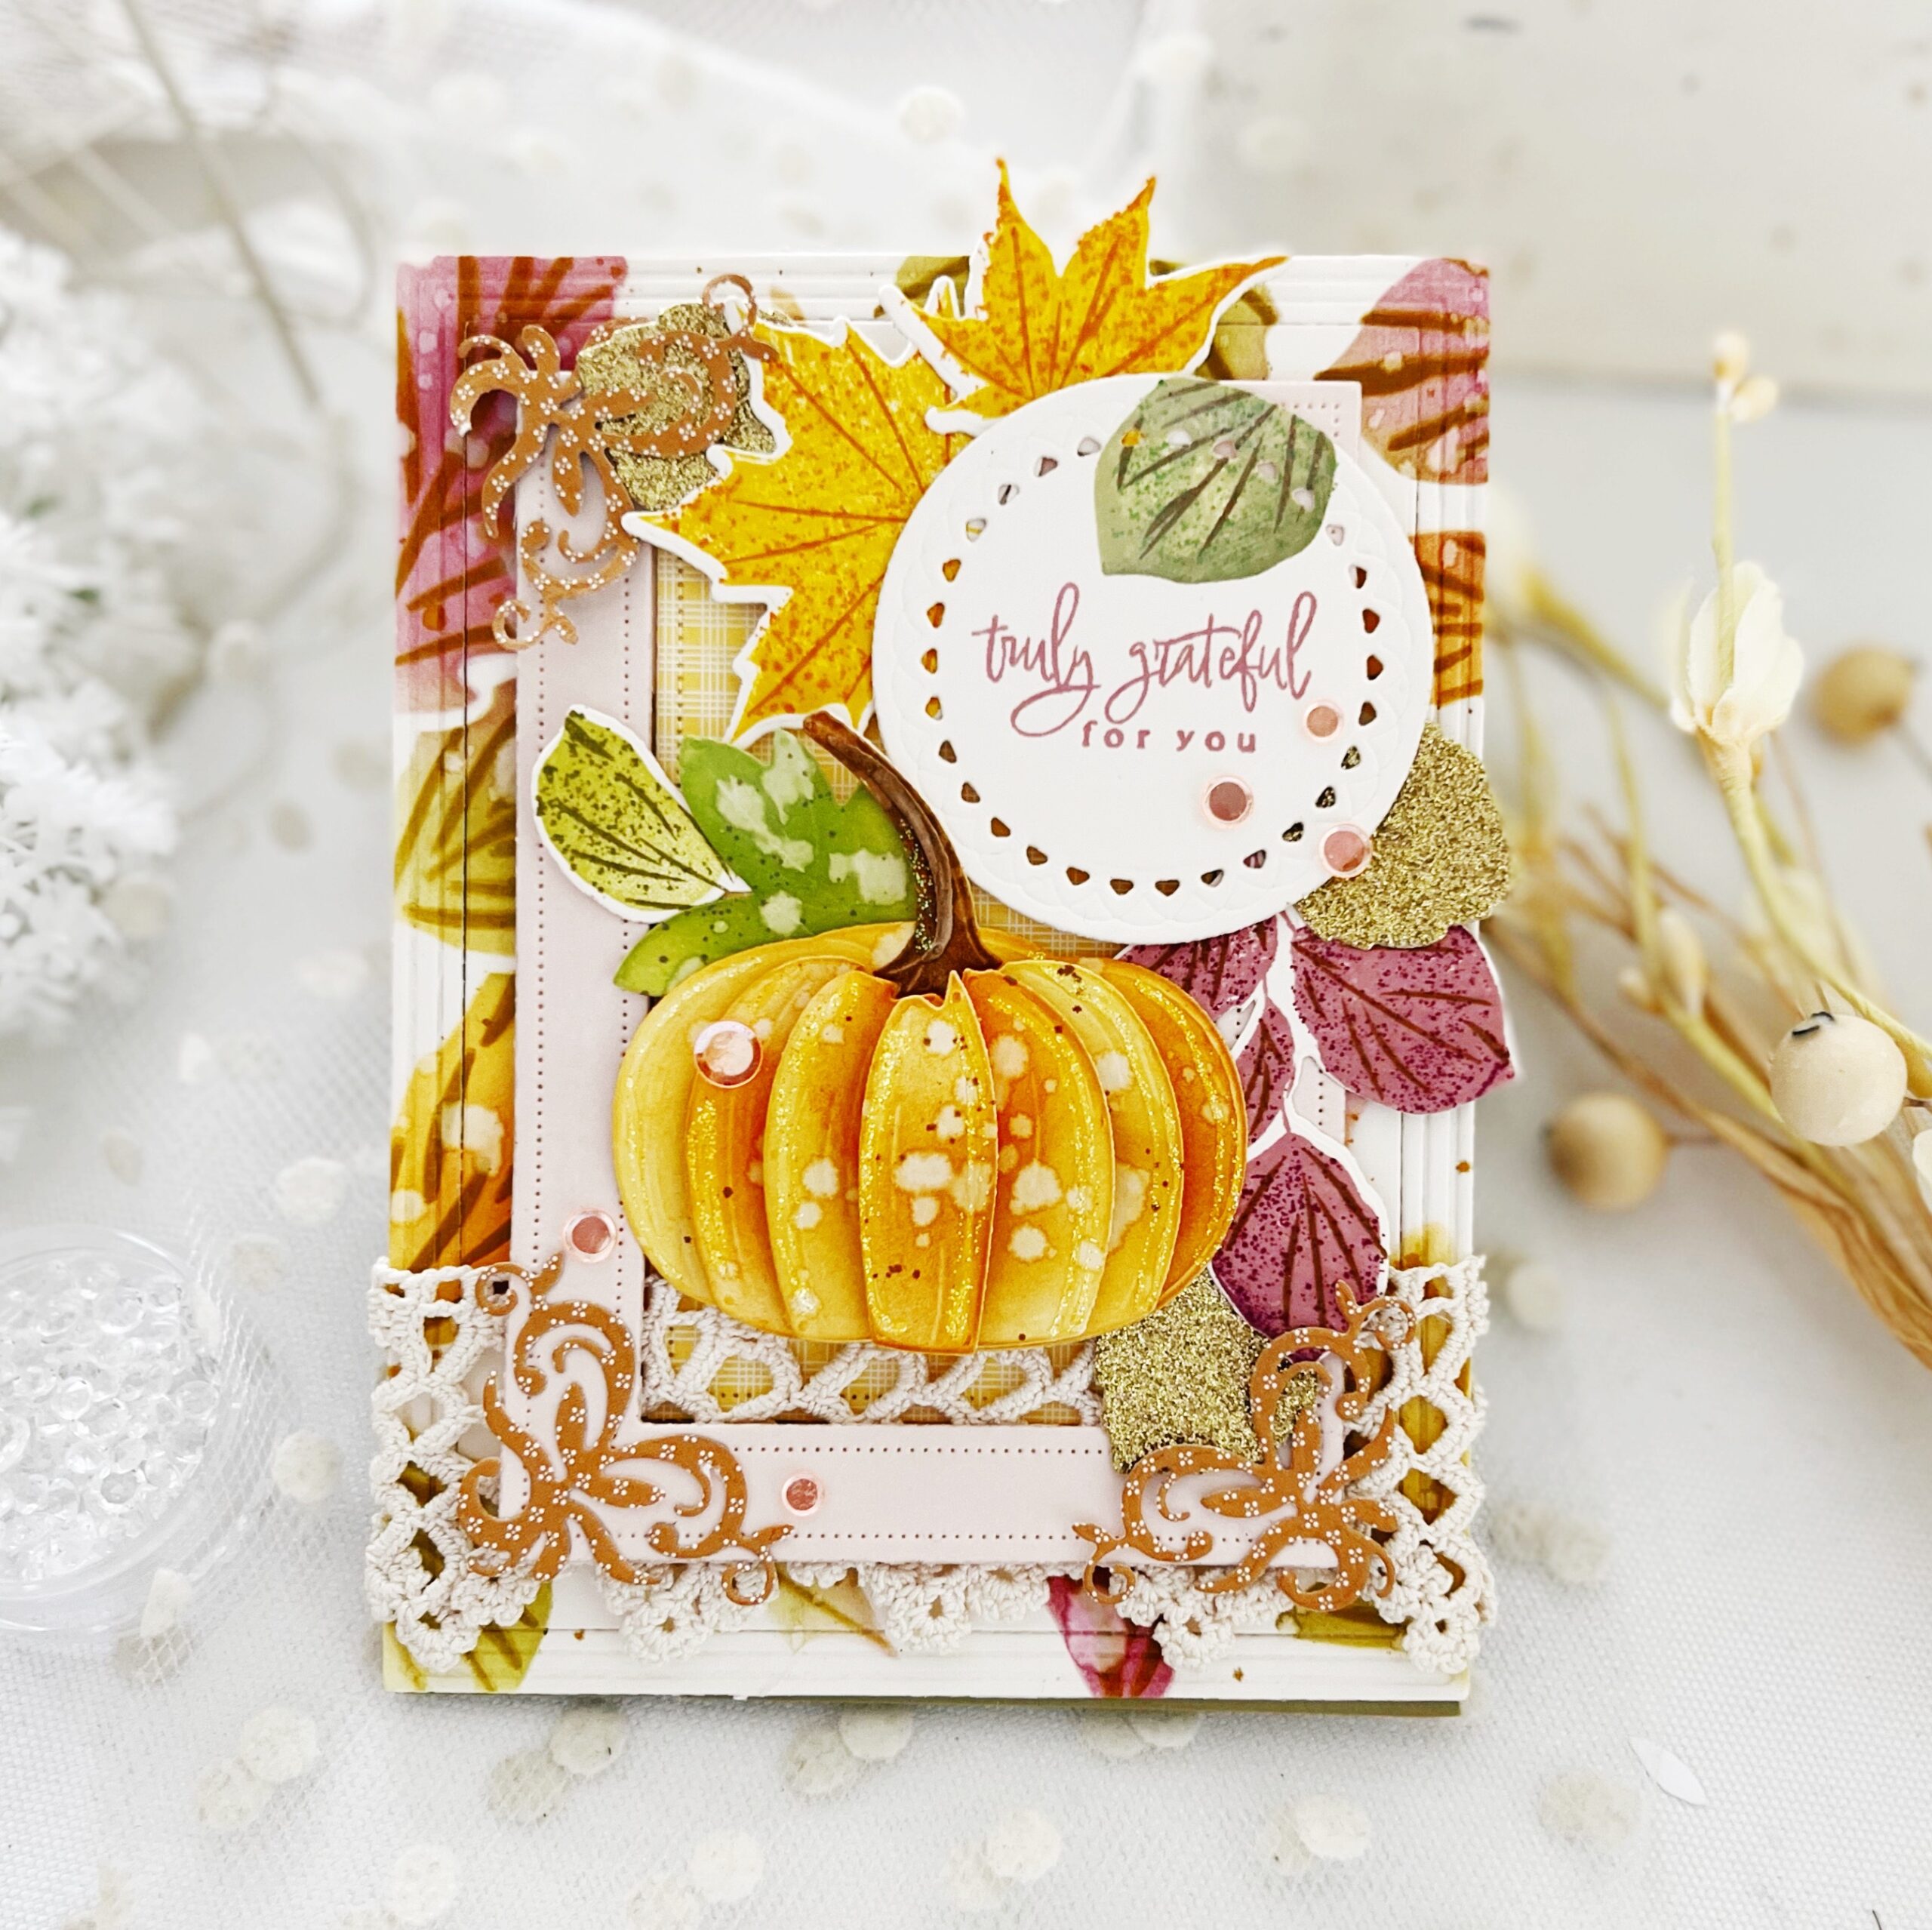
I’ve used the gorgeous, new Fallen Leaves: Stencil to create my background, selecting Autumn Rose, Limeade Ice, Ripe Avocado, Summer Sunrise, and Saffron Spice as my color combination. I spritzed my leaves with water to create a soft, speckled, watercolor look, and then added a bit of Distress Spray. This stencil collection is a 2-step process, enabling the leaves that you stencil on first to come to life with the veining that happens with the second stencil. I love multi-step stencils, don’t you?
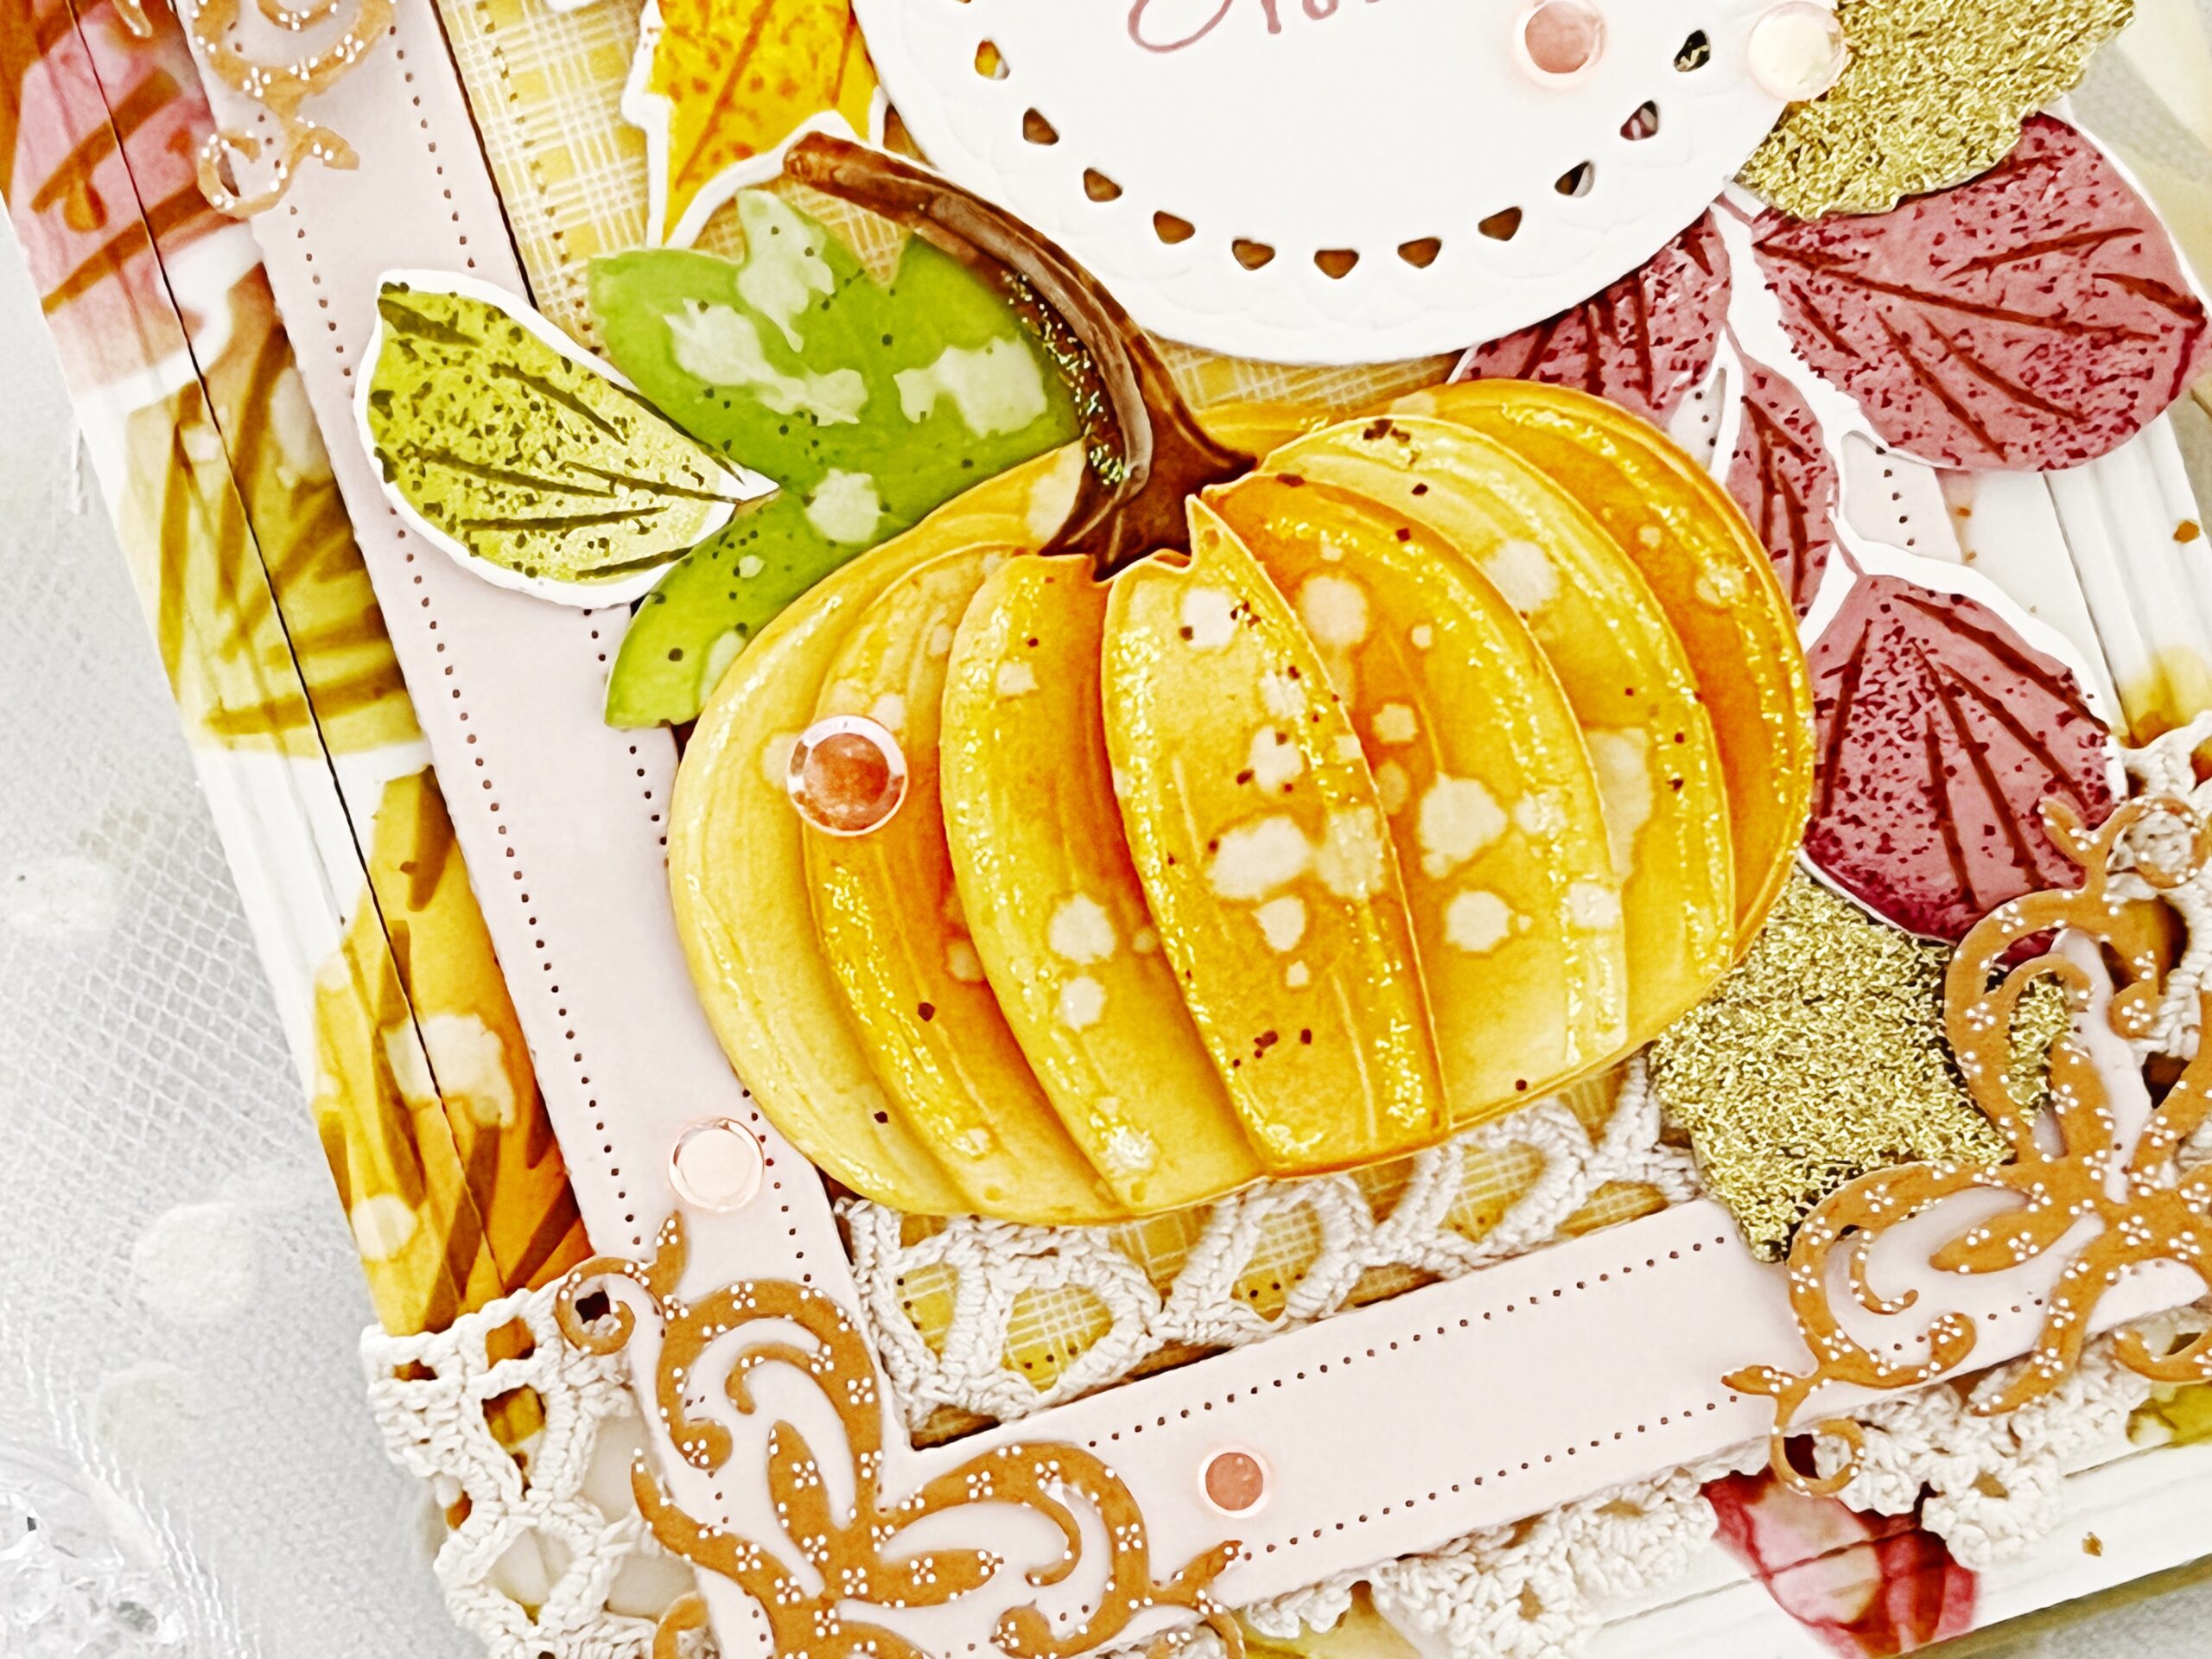
Next came the cutest pumpkin I have ever seen, the Into the Blooms: Pumpkin small die. This sweet pumpkin is a 6-layer pumpkin, but comes together so easily. I began with Vintage Cream cardstock and sponged on ink in Summer Sunrise, Orange Zest, and Honey Nut. The cute stem is part of the layering mentioned. I am so in love with this little guy. And, this die collection comes with a larger pumpkin too. So get ready to layer, play, experiment, and be inspired all throughout the Fall holidays!
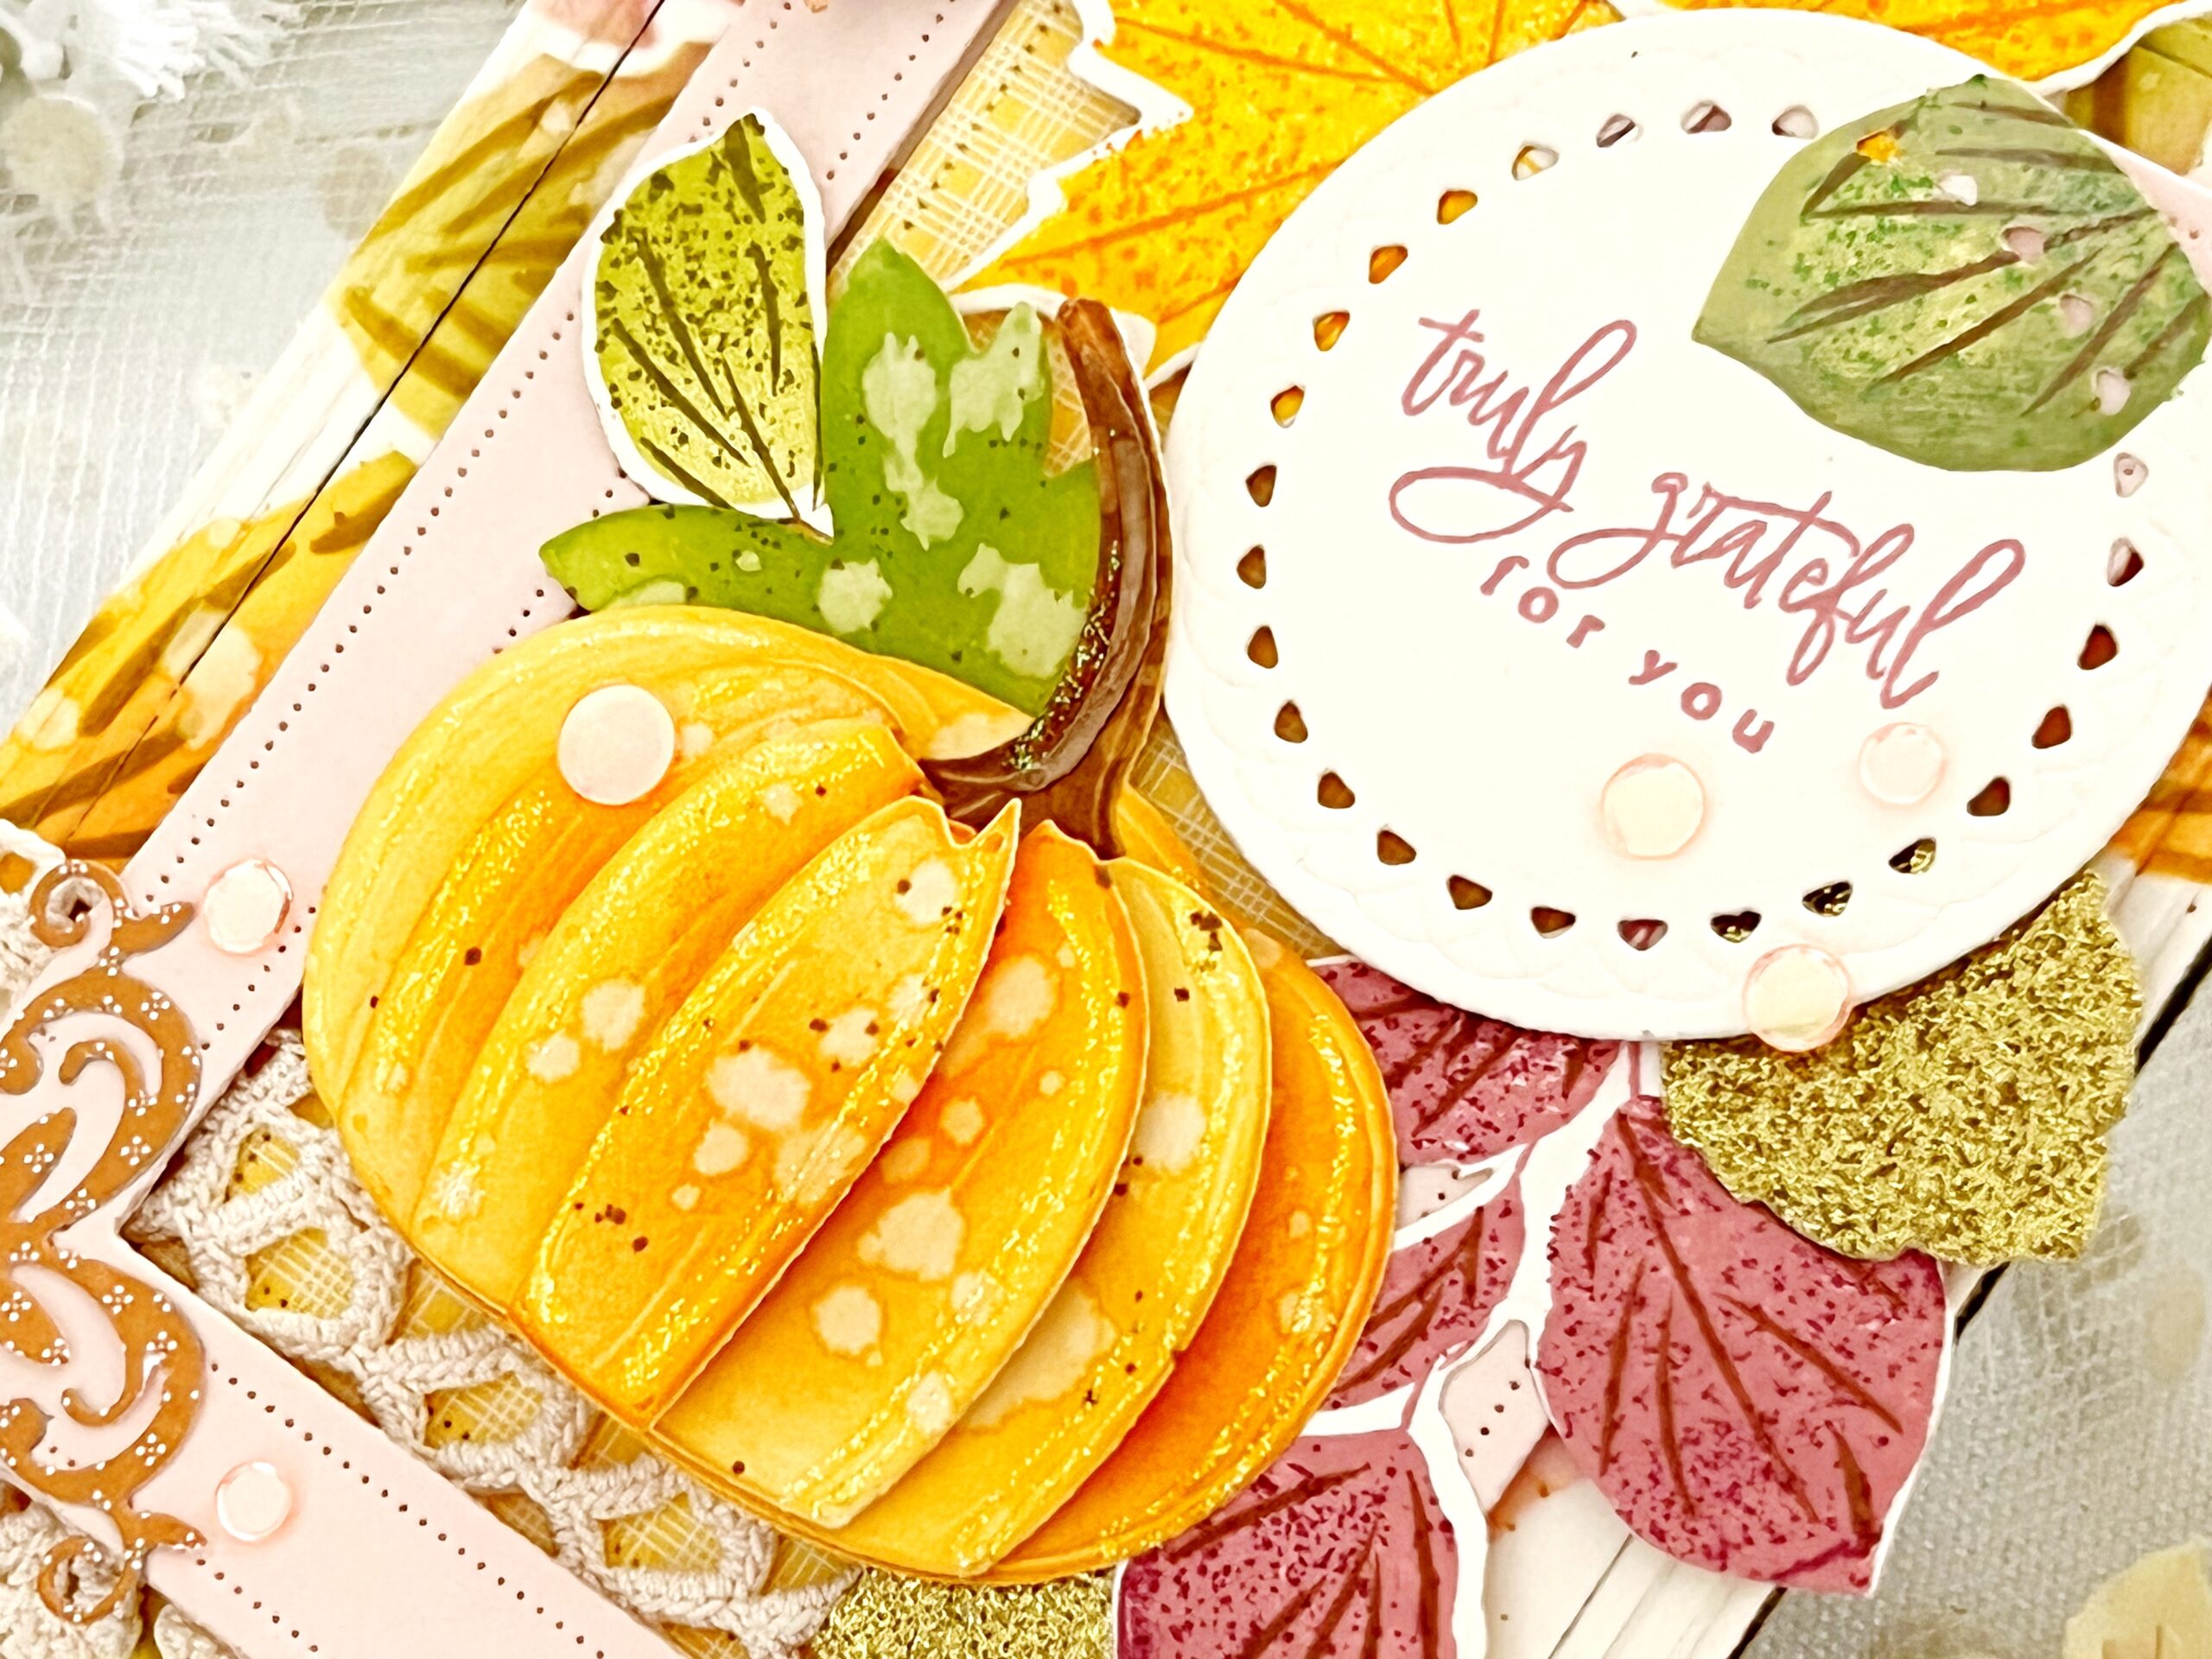
The sentiments found in the Fantastic Foliage stamp set are beautiful and are created in such an elegant font….perfect for the gorgeous leaves in this stamp set. I stamped my sentiment in Autumn Rose ink on a die cut Love to Layer: Scalloped Circle. I added one stamped leaf, and die cut and stamped the rest to surround my sentiment and accent my Into the Blooms: Pumpkin. I adore the sweet speckled layer on these 3-step stamps. To finish, I added die cut corners found in the Vintage Blooms stamp set. I had such a fun time creating this card for you!
Supplies used:
STAMPS: Fantastic Foliage
INK: Autumn Rose, Limeade Ice, Ripe Avocado, Summer Sunrise, Saffron Spice, Orange Zest, New Leaf, Dark Chocolate, Honey Nut
PAPER: Vintage Cream, Bitty Big Harvest Gold
DIES: Fantastic Foliage, Into the Blooms: Pumpkins, Pierced Feature Frames, Border Bling: Skinny Embossed Frame, Vintage Blooms, Love to Layer: Scalloped Circles
OTHER: Fallen Leaves: Stencils, cardstock, patterned paper, trim, Moonshine sequins, Distress Ink and Spray

TIPS:
- Tearing edges of several layers will add visual interest and is an easy technique.
- To add splatters to the background, apply distress ink or paint to a glass mat or acrylic block and spritz with water. Pick up ink with a small brush and tap it over the background.
- Jute twine adds an element of texture.

TIPS:
- Use unexpected colors for leaves.
- Mix embossed and not embossed leaves together.
- Add splatters to create visual interest


TIPS:
- Add texture to stenciled leaves in background by die cutting with the Tin Stitch die.
- Angle the frame and pumpkins to add visual interest.
- Blend 2-3 ink shades over the pumpkins and leaves to add depth.
TIPS:
- Use layering stencils on dark card stock.
- I added water splatter to mimic the outdoors and to add texture
- When using layering stamps, add additional colors to the first stamp to create realistic looking leaves.

TIPS:
- Key to great hot foiling results is using quality smooth paper (Glimmer Specialty Cardstock is my preference).
- Embossed vellum works well to add a sentiment without covering up much of the focal point.
- Intricate dies like the Delicately Woven die may need to be cut several times with repositioning over the die plate each time and also by adding a metal shim.
TIPS:
- Die cut all of the pumpkins and leaves using white card stock. Ink blend using inks to desire shading and add detailing with a dauber.
- Add splatters for added interest and detail.
We hope you have enjoyed all the beautiful projects that we have shared with you today! We would love to hear what you think of everything we have introduced! Please leave a comment on this post to tell us what you like the most and why, and you will be eligible to win big!

Leave a comment today and you will be automatically entered to win a $50 Papertrey Ink gift certificate! You have until 7am ET, August 17th to leave your comment and be eligible to win. Only one comment per person please. One randomly selected winner will be posted on the August Release Winners Page by 11 PM ET on August 18th.


Leave a Reply