

 “In this class we will get lost in the world of watercolor. We’ll put together a mini palette and spend some time exploring color mixing, seeing what magic we can create with a limited color palette. While we’re exploring, we’ll learn a few watercolor techniques and paint a pretty poppy and background.”
 Instructions for Assembling Your Palette:
- If you purchased the SAF kit, the first thing you’ll want to do is assemble your mini palette. Attach a small piece of magnet sheet to the bottom of each watercolor pan so they will stay put inside the tin. You may also want to write the color name of each paint onto the pans for future reference. The paints are Daniel Smith brand, and contain the following colors: Dark Blue = Phthalo Blue (Red Shade), Yellow = Hansa Yellow Medium, Orange/Red = Transparent Pyrrol Orange, Magenta = Quinacridone Lilac, Black = Lamp Black
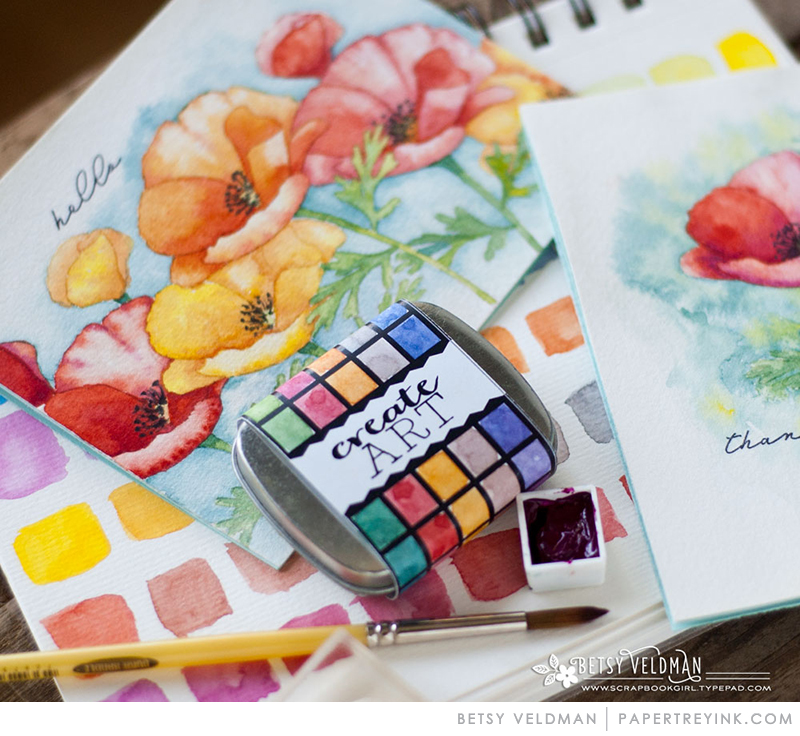
- Now it’s time to play a bit with your new mini palette of paints and create a fun wrap for the tin that doubles as a reference swatch! So many colors and shades can be made by mixing the four paint colors in the palette (not including the black). The SAF kit includes a printed wrap with a grid that can be painted with all of the different shades.
- There are five rows on the printed band, each with ten squares. Paint the first square in the first row blue, straight from your palette, and the last square of that same row with pure yellow. Now gradually begin adding just a bit of blue to your pure yellow paint, and paint that color in the next square. Continue doing this, adding just a bit more blue to the mix each time, until the entire row of squares is filled in. You should see the colors gradually changing from yellow to green, and finally to blue as you come to the end of the row.
- Use this same process to fill in all the rows of the wrap, experimenting with all of the different color combos. Your rows should be mixes of the following colors: Yellow ———> Blue, Orange ———> Magenta, Yellow ———> Orange, Orange ———> Blue, Magenta ———> Blue
- Wrap your finished swatch strip around your palette tin once it’s dry, and secure the ends with a bit of adhesive.
Project Instructions:
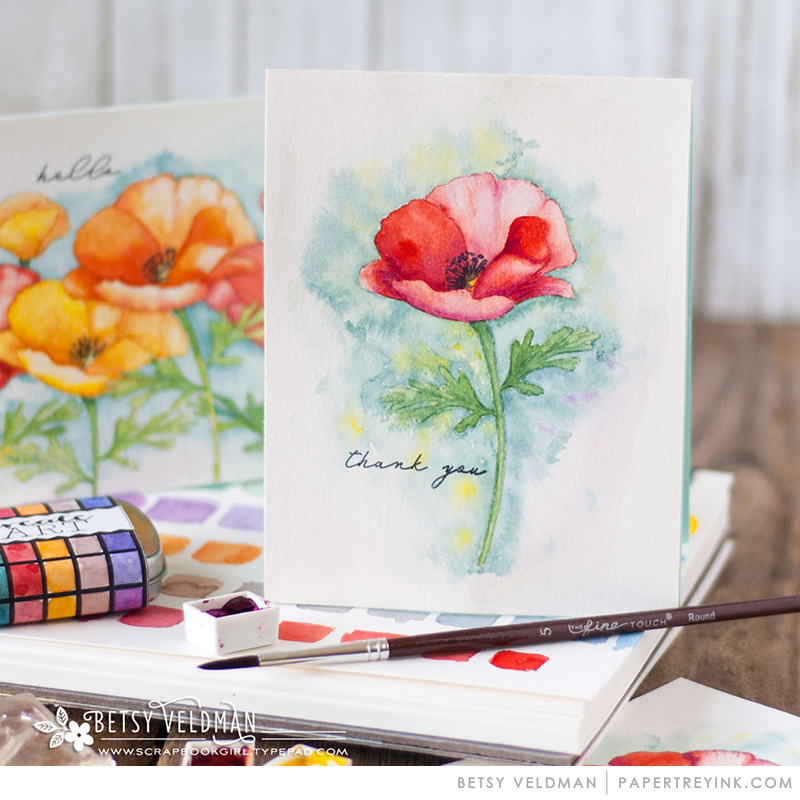
- Stamp the poppy image onto watercolor paper using Soft Stone ink.
- Begin watercoloring the petals, almost like a paint-by-number. Start with the large oval petal on the left side of the flower using the dark orange watercolor paint. While the orange is still wet, drop in a bit of the magenta paint towards the center of the flower to add some deeper shading.
- Work on painting all of the petals, being careful not to paint petals that are next to each other while they are still wet, or they will bleed into each other. Experiment with some different shading techniques such as wet-on-wet, dry brush blending, etc. These will be shown in the video tutorial.
- Mix some blue and yellow paint to create green for the stem and leaves. Paint those, adding shading and details as desired.
- Paint the center of the flower yellow. Allow to dry, then add the stamen detail with black paint.
- Look at your swatch strip and decide on a color for the background. A lighter, more watery color is best so it doesn’t over power your flower image. Mix up a fair amount of this color and add to the background around the flower using a wet-on-wet technique. Drop in some areas of a second color to add more interest if desired.
- Once your piece is completely dry, stamp a sentiment of your choice using black ink. Adhere the finished panel to a card base.
Supplies:
- STAMPS: Painted Poppy SAF set, or an outline floral image of your choice
- INK: Soft Stone, True Black
- PAPER: Watercolor paper (a high quality cotton watercolor paper such as Arches, Fabriano, etc, as some of the blending techniques will be much more difficult on lower quality paper), Cardstock color of your choice for the card base.
- OTHER: Mini palette tin and watercolors from the kit, or watercolor paints of your choice, paintbrush (smaller round)
CLICK HERE to visit Betsy’s blog
 CLICK HERE to view our live broadcast from Cincinnati!

- Now it’s your turn! Create a watercolor project. You can choose to re-create the exact project from Betsy above or design your own using the same concepts. Your project must also incorporate at least one Papertrey product.
- Post your project on your blog, in your gallery, Instagram or on any other photo-hosting site (such as photobucket or flickr).
- Add your project to the InLinkz list below.
- You will have until 7am ET, Thursday, August 30th, to add your link to the list to be eligible to win. One project per person please.

- One randomly selected winners will be chosen from all of the InLinkz entries on this post on Thursday, August 30th. The winner will be posted on our Stamp-A-Faire 2018 Winners Page after 9pm ET on Thursday night . The randomly selected winner will get a $20 PTI gift certificate to spend however they like!
- One randomly selected winner will be chosen from the comments of this post on Thursday as well. You will have until 7am ET, Thursday, August 3oth to add your comment and be eligible to win. The randomly selected winner will get a $10 PTI gift certificate.
Leave a Reply