


I decided to tackle a large box of ribbon that I had been meaning to integrate into my ribbon storage system for months. I like to have universal & expandable storage systems for all of my favorite supplies. It is easier for me to keep track of what I have and use it. For my ribbon I re-spool everything onto wooden clothespins. It has worked SO well for me. It was one of the best storage solutions I ever implemented! The box of miscellaneous ribbon that I had was a big tangled mess (and I didn’t think to take a before photo!). I finished getting it all spooled this morning!

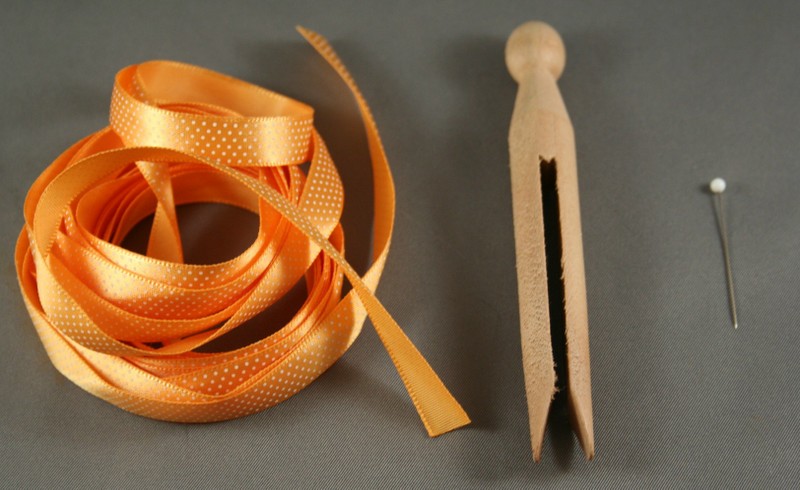
 After I gave you a tour of my studio a few months back, I received several questions on how exactly I spool the ribbon onto clothespins. So I thought since I was up to my eyeballs in the task, I could photograph the process step by step. You need the ribbon, a wooden clothespin (I buy mine by the bag at the Dollar Tree) and a glass head pin (sewing section of any craft store or Wal-Mart).
 First, I insert the end of the ribbon in the slit of the clothespin. You only need the end to extend about half an inch or so.
 Then fold the end over onto the base of the clothespin and hold it in place with your thumb. You will want to fold it so the good side of your ribbon is face up.
 Next you want to pull the other end of the ribbon (the opposite end from the one you folded over in the last step) down over the short end. This will help keep it from pulling back through the slit without using any tape to hold it in place.
 Start spooling the ribbon at an angle down the length of the clothespin. Try to keep even spacing because this will ensure that your spool will be evenly dispersed once it is completed.
 Then spool back up the clothespin in an opposing angle. Keep everything fairly tight as you are working to help make sure that the ribbon doesn’t come off the clothespin when in storage.
 You will continue spooling until you have completed your entire length of ribbon. I have found that with most types of ribbon on th market, I can comfortably get 5 yards per clothespin. The clothespins take up a lot less room than a spool as well.
 To keep the end of the ribbon in place, fasten it with your glass head pin. Viola, a completed clothespin spool. Easy, isn’t it?
 Once I had all of my ribbon untangled and spooled onto clothespins, I organized them into jars. I have one jar for each color. It really enables me to find what I want when I need it. If I need to browse I just pick up the jar and shake it a little to look at all the contents.
 It looks like a ribbon rainbow when I have all the jars lined up on my shelf!
Leave a Reply