
Hey everyone! I’m excited to share a few packaged Halloween treats with you today! I’ve used many of the spine-tingling Ink to Paper stamps and dies that came out last month, including the Tent-Style Packaging; which technically isn’t spooky, but it does work well as a treat receptacle.


I’ve made a ton of projects for All Hallow’s Eve already this year and most of them have used traditional colors, so I thought I’d go with a much different color palette for these. The main colors are Sweet Blush, Lilac Grace, Melon Berry, and Stormy Sea, plus a lot of silver embossing.

I’ve made a ton of projects for All Hallow’s Eve already this year and most of them have used traditional colors, so I thought I’d go with a much different color palette for these. The main colors are Sweet Blush, Lilac Grace, Melon Berry, and Stormy Sea, plus a lot of silver embossing.

After cutting the packaging to create Sweet Blush, Lilac Grace, and Stormy Sea tents (*don’t forget to cut out 2 of each), it was time to figure out what designs to use on the front of the tent. Caught In My Web is a background stamp that will cover the tent completely, so that was my first choice and I embossed it with silver embossing powder. Knowing that I am very scared of spiders, my dear, sweet children have been playing with some plastic ones, even leaving one for me to find in my pajamas. I confiscated it to put on the front of the pink tent. (It happens to have some pink dots on its legs, so it even matches!)

Some of the sentiment sets had fitting phrases to go with the spider and web package, like ‘filled with: creeps / crawlies’ from Halloween Fillings and ‘yikes!’ from the Ghosts & Ghoulies Sentiments. Both of those are inexpensive mini sets and both worked great with the stitched banner dies.


I embossed all the sayings in white and set up the smaller ones to appear like the spider’s legs were holding them in place. The larger label is folded around the front of the tent. There isn’t really anything creepy or crawly in the tent package–it’s just a fig bar, though I suppose to a kid expecting a candy bar, it’s a pretty crummy substitute! I punched a hole through the top of the tents, including the top of the fig bar wrapper, then slid Hibiscus Burst ribbon through it, tying it off in a bow.

I embossed all the sayings in white and set up the smaller ones to appear like the spider’s legs were holding them in place. The larger label is folded around the front of the tent. There isn’t really anything creepy or crawly in the tent package–it’s just a fig bar, though I suppose to a kid expecting a candy bar, it’s a pretty crummy substitute! I punched a hole through the top of the tents, including the top of the fig bar wrapper, then slid Hibiscus Burst ribbon through it, tying it off in a bow.
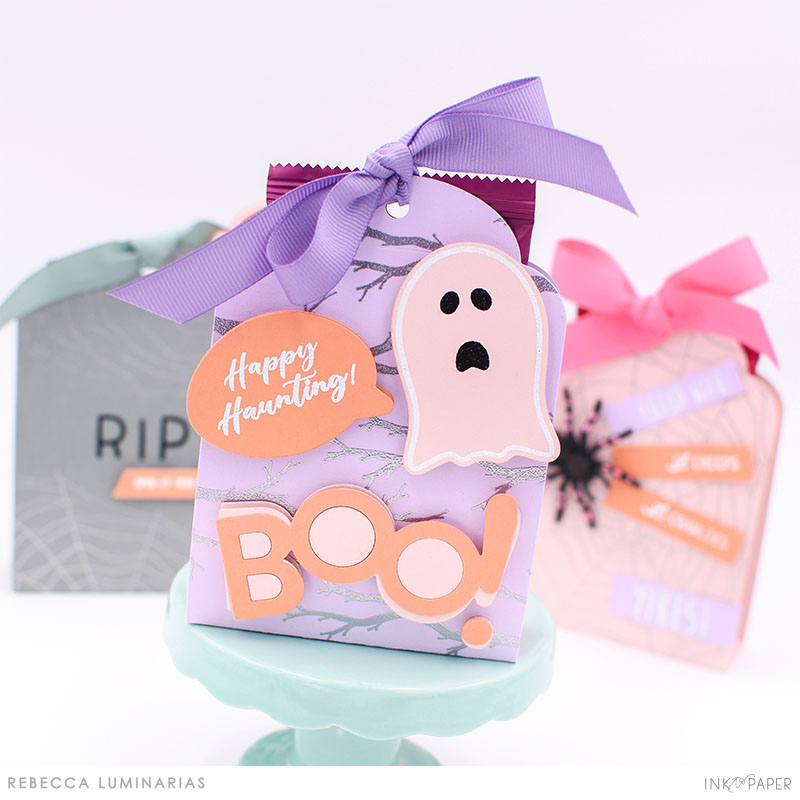
I decided that ghosts were a good fright to pair with the branches, so I made a pink one with the Ghosts & Ghoulies set, and used the word bubble, too, for a ‘happy haunting’ message.
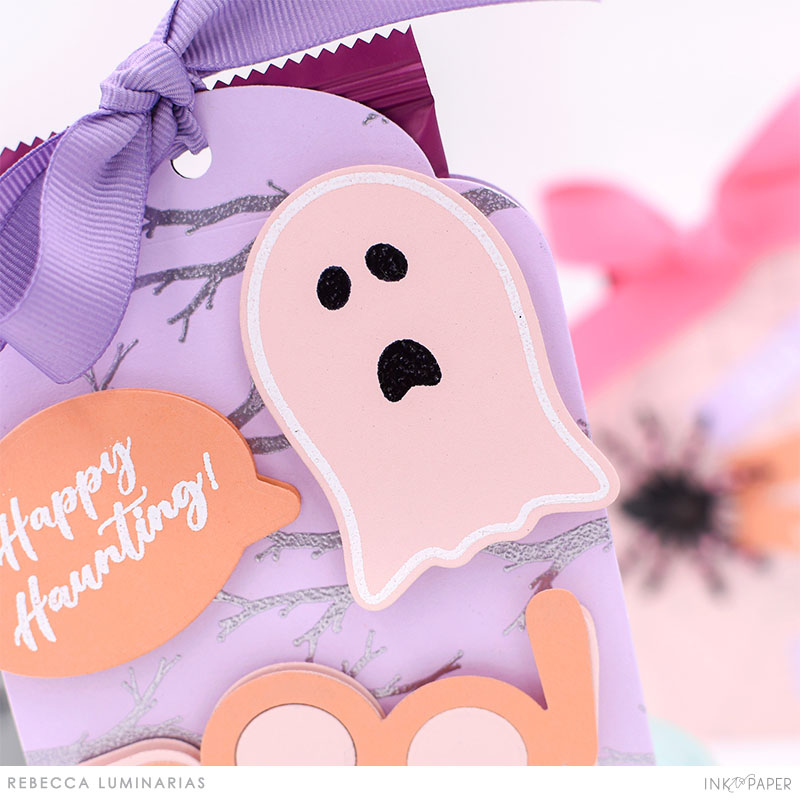
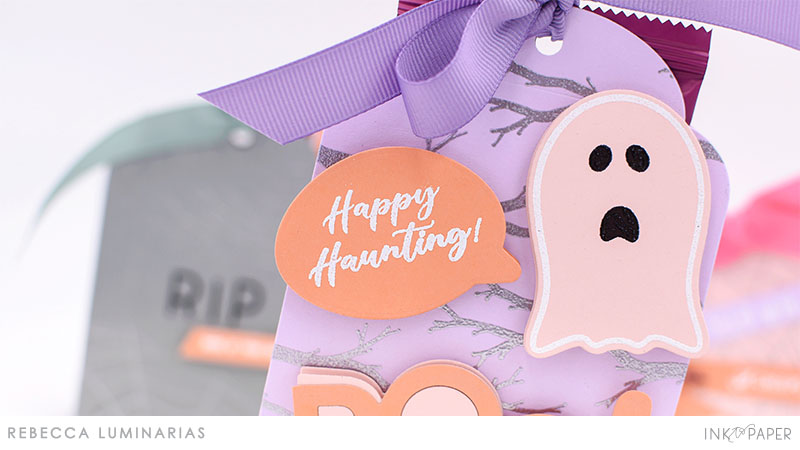
The ‘Boo!’ die was also too good not to use here, so I doubled up on Sweet Blush and Melon Berry cuts, then offset them, and adhered the set to the bottom of the tent. Another fig bar and some Winter Wisteria ribbon top off this terrifying treat.

As I was assembling the first two tents, I realized that the shape of the tent resembled a headstone, and I couldn’t pass up the opportunity to make one for this Halloween post! I chose Stormy Sea to make the tent, and then stamped Caught In My Web again, but this time I only stamped portions of it across the top and bottom of the tent. It’s embossed with silver again, though.

As I was assembling the first two tents, I realized that the shape of the tent resembled a headstone, and I couldn’t pass up the opportunity to make one for this Halloween post! I chose Stormy Sea to make the tent, and then stamped Caught In My Web again, but this time I only stamped portions of it across the top and bottom of the tent. It’s embossed with silver again, though.

It also seemed relevant to have a sinister-looking ghost coming up out of the package so I created one with the Ghosts & Ghoulies set, then closed the top with Ocean Tides grosgrain ribbon.

You can have a lot of fun coming up with fun Halloween treats, and it’s even more fun when you find spooky uses for items that aren’t spooky at all, like the Birdie tree branch and the What’s Inside stamps. And when your all-occasion, versatile tent packaging happens to look like a grave marker, well, that seems serendipitous, does it not?

Thank you so much for joining me on this hair-raising journey! What do you plan to make this Halloween? I’m sure it’s going to be terror-ific and boo-tiful!

STAMPS: Caught In My Web, Ghosts & Ghoulies, Ghosts & Ghoulies Sentiments, Birdie, Frame It Out: What’s Inside, Halloween Fillings, Holly Jolly Holiday
INK: Watermark
PAPER: Lilac Grace, Sweet Blush, Melon Berry, Stormy Sea, Orange Zest
DIES: Tent-Style Packaging, Ghosts & Ghoulies, To Die For Sentiments: Halloween, Diagonal Banners, Banner Builder: Basics
OTHER: Winter Wisteria, Hibiscus Burst, Ocean Tides grosgrain ribbon, silver, white, black embossing powder, rubber spider, fig bars, hole punch
Leave a Reply