


Hello Papertrey friends! It’s November 6th and you know what that means…we can officially talk about Christmas now! I think a lot of us were already talking about it, especially in this crafty niche of the internet, but I’ll be dedicating my next 2 Ambassador posts to focusing on holiday packaging. This month it’s gift bags featuring my Twinkling Trees stamps and dies. Next month, it’s all about gift cards and I’ll share a couple details about that at the end of this post.

For now, let’s get on with the show! I like to keep things pretty simple this time of year. We’ve all got a lot to do and not a lot of time to do it. When I need to wrap something quick, a muslin bag is almost always my go-to. I love paper bags, I love wrapping paper, I love decorating boxes…but they are not always as quick and easy as I need them to be during the mass present-wrapping sessions we tend to experience during the holidays. In today’s post, I’ll show you how you can quickly transform muslin bags (available in the PTI store!) into super-cute Christmas gift bags.


I wanted to use the Twinkling Trees stamp and die collection, as well, because there are so many things you can do with them. They work for cards, tags, gift wrap, even home decor! It’s a versatile set for the holidays and I started by cutting out a bunch of the larger trees in various cardstock colors–white, Pinefeather, Pure Poppy, Limeade Ice, and Sweet Blush. I left some of them solid and used the coordinating die to cut the stars out of others. Then I cut some out of Papertrey felt in the same colors.

I saved all the tiny cut out stars because they’re too cute to throw away and they’re even going to come in handy on my bags and tags. In fact, I stitched a few of them to a 5″ x 7″ muslin bag. Surprisingly, it didn’t take that long, just a few minutes, and this is the kind of thing I can do anywhere, so I’ll probably make a bunch of these bags in one sitting of whatever podcast or Netflix show I’m binging to unwind in the evenings.
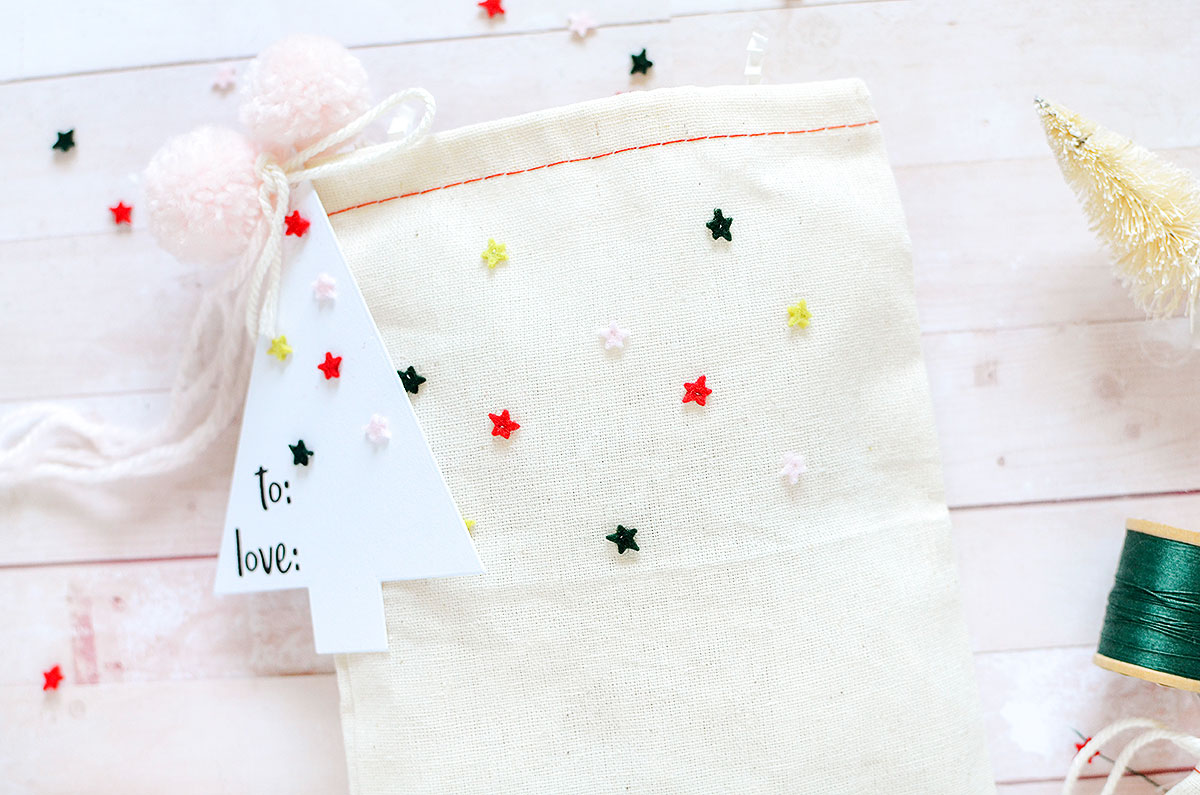
They do get a bit more difficult the further away from the top of the bag you go, but if you’re an expert sewer, you probably have a trick for this, and if you’re not (like me), you’re okay just working with the top section. The end result is festive and cute and this same technique will also work for other occasions in a different color palette–think babies, kids’ birthdays, the 4th of July, the list goes on!

Staying on the simple side of the road, I applied the same tiny star design to a plain white die cut tree. Instead of stitching, I glued these on, but if you’d rather sew them in place, by all means, do! I stamped ‘to: / love:’ at the bottom. That stamp is from You Deserve Flowers and it fits so nicely in the left corner of the tree! Just for a small flourish, but completely optional, are a couple of little pink yarn pom poms tied on with the tag for a pop of extra color and texture.

It’s such a simple idea, but I think it’s a fun one, and textures like felt and yarn always make me feel wintry, warm, and cozy so I think the felt is a great choice to use!

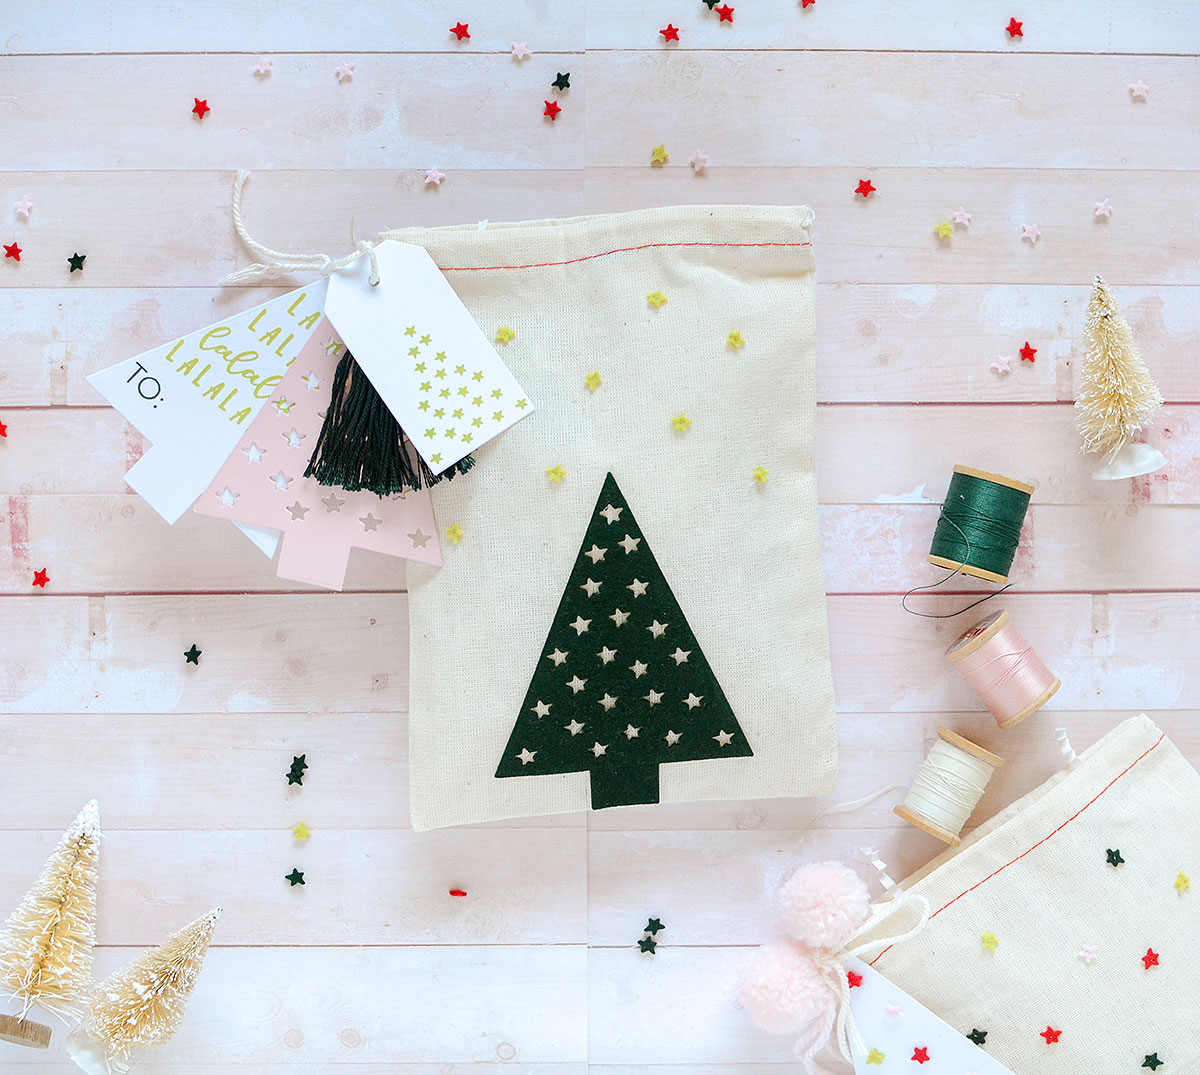
Wanting to use one of the actual star-cut trees on a bag, I adhered a Pinefeather felt tree to the front of one with Fabri-Tac. At this point, depending on your timetable, you can leave it at that, add a tag, and be done. You could even stamp a quick holiday sentiment above the tree if you wanted to take it a step further. I chose to add some Limeade Ice felt stars around the top and above the tree.


Again, it took just a few minutes to produce and the outcome is so pretty! If you’d rather not have to fuss with the stitching, there are single star stamps in the Twinkling Trees set that you could stamp around the tree in the same type of pattern.

For the tag, I layered a trio together beginning with a solid white tree. I stamped ‘Fa la la la…’ in Limeade Ice and then added ‘To’ at the bottom in Pinefeather. The Keep It Simple: To and From stamp set is one of my go-to sets for times like this; it offers so many options and different sizes so there’s bound to be a style and size that meets your needs.

A Sweet Blush star cut-out tree is layered over that; I like that there are snippets of Limeade Ice peeking through the stars! I added an embroidery floss tassel in DMC 500 to match Pinefeather. The final layer is a simple white tag with a mini tree of stars stamped in LI.

I could have gone and added more layers, ribbons and lace, but the idea is to create quick gift bags that don’t require much thought. When it comes to adding all the extras, for me, it’s easy to get swept up and lost in the embellishing. I love it; it’s my favorite part of the gift wrap process. It’s also the most time consuming and I could spend an hour or more just puttering around with the extras. Most of us–including me–just don’t have that kind of time during the rush of the holidays–even if we’re starting now. I’m hoping that these minimally embellished, but still handmade alternatives offer unique ideas that you’ll have fun creating and are proud to give out.

Here’s one last idea that will literally take you 30 seconds to make so it’s a great mass production option:

I just stamped a message in Pure Poppy; in this case it’s ‘Merriest holidays’ from Twinkling Trees. (By the way, TT has a variety of holiday sentiments so you can mix and match them to create some variations on your gift bags.) Then I took the large star pattern in the tree shape and stamped it underneath in Pinefeather. It’s a large image and a decent-sized sentiment so that’s all you really need for a classically Christmas design.

You can use any images and sentiments, too–whatever you have on hand, or if you want to match the gift bag to a Christmas card, that’s a great idea. I’m just thinking that I need to go order Kimberly Crawford’s “Sending Joy” set because the images in that are perfect for this kind of thing and I want to add that plaid image along the bottom of my tree bags in black! Gotta go order that set NOW!! (I’ll be sure to share the outcome on Instagram once it’s done.)

Tip: For stamping on the cotton bags, dark inks and thick, solid images work best, but that doesn’t mean you can’t try lighter colors and any image you’d like. I’ve stamped anything and everything on these bags!
I hope you found some packaging inspiration here today. Even I get overwhelmed at this time of year and gift wrapping is the thing I love to create more than anything else. I plan to share a few more projects on my blog using my Good Tidings kit from 2017, as well as some other PTI stamps, dies, and products. They’ll be intermittently posted throughout November and December so if you think about it, stop by every once in awhile and have a look.
Next month’s Packaging Ambassador post is all about gift card holders and I’ll be working with some PTI dies for those–I’m really excited! Thank you so much for being here today; it’s the season for gratitude and I very much appreciate all of your kind comments, messages, and encouraging words. What a wonderful community we have here!

Stamps: Twinkling Trees, Keep It Simple: To & From, You Deserve Flowers
Paper: White, Sweet Blush, Pinefeather, Limeade Ice
Ink: Limemade Ice, True Black, Pure Poppy, Pinefeather
Dies: Twinkling Trees, Fillable Frames #9 Tag, Circle Tag from Good Tidings Kit
Other: Muslin Bags (5″ x 7″), Felt (Pinefeather, Limeade Ice, Pure Poppy, Sweet Blush), Embroidery Floss (DMC 500)

Love these packaging ideas! You picked the perfect stamps/dies. I especially like the idea using felt for the trees.
Darling projects! You make me want the Twinkling Trees!
Thank you so much Ms. Packaging Ambassador for your lovely and festive gift packaging ideas!
Clever ideas for using this set. My favorite is using the tree-shaped stars to stamp on the bag with a message above. Nothing like picking the easiest for my favorite. 🙂 Thanks for sharing!
Such great packaging ideas! I love them-fun and festive! Thanks for sharing
Terrific ideas and
the bags look so
festive and fun!
Carla from Utah
Who knew muslin bags could look so cute and be so versatile? Obviously, Rebecca did. She nailed it with this post…so very clever!
These ideas are so sweet! What patience to sew on the little stars!
I just love all of these ideas!!! You show how to make the bags0 from the very fancy and embellished to the plain and only stamped. Whichever ones you have shown are absolutely gorgeous and fantastic!!!!!! Great post!!