 Happy New Year, friends! Are you off to a great start? I’m sure you’re pretty well over all the gift-wrapping after the holidays, so I have a packaging idea today that you can set aside and come back to whenever you’re ready to get back into wrapping (which, for me, is anytime!)

I’m talking about some pretty in pink birthday bows and paper shred! I think this post will be just what you need to get you back in the spirit of packaging!

 You’ll need some felt and the Paper & Package Large and Small Bow Dies for this one. I’ve assembled one of each bow from Sweet Blush PTI Felt. **Hands up if you’d like a Bow Assembly Tutorial video on the PTI YouTube channel!! Let me know here and I’ll make it happen!**
 My first package is a box that I covered in black and white dotted wrapping paper. You can use any gift wrap to cover your box; I felt like going with a black/white/pink palette because it’s a whole lot of fun! I added Raspberry Fizz Grosgrain ribbon next, but first I need to cut out some tags.
 I chose a basic style tag because I like to layer tags and it can get a bit difficult sometimes to layer fancier tags (although, by no means is it impossible!), so I’m using my Paper & Package Essential Tag die collection. It also offers 3 different sizes and when it comes to layering, it’s always good to have different widths and lengths.
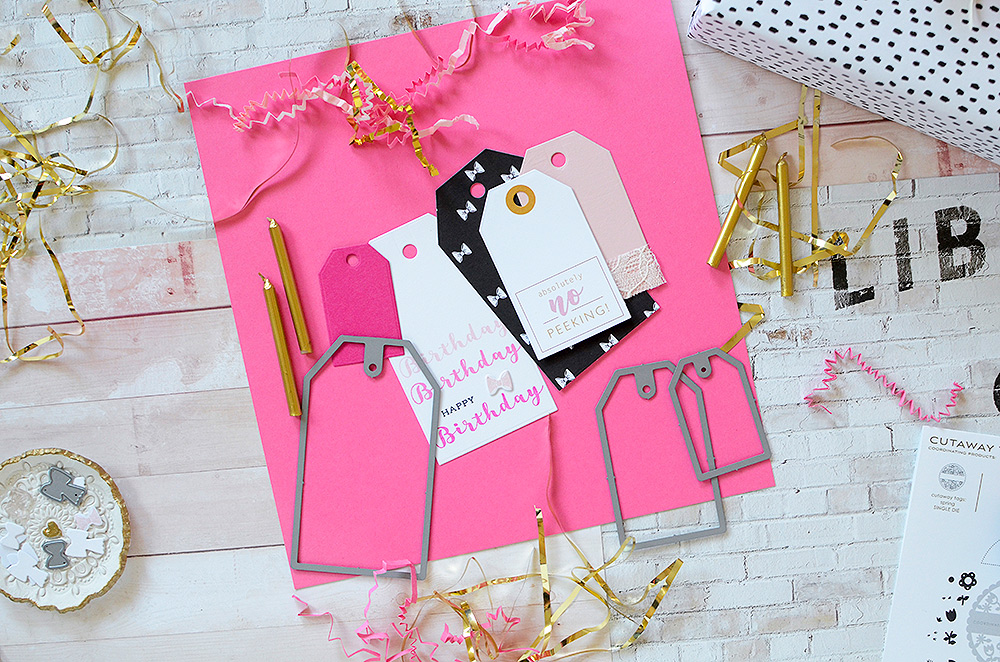 I cut a large tag from White cardstock that I’m going to stamp on, another large tag from the black and white bows paper in my Good Tidings Main Kit, a medium tag from Sweet Blush cardstock, a small tag from Raspberry Fizz, and then I die cut the “absolutely no peeking” tag, also from Good Tidings.
 Before I talk about the quick and easy alterations I made to the tags, I just want to share a little tip with you. Obviously, it would be so awesome if everyone reading this went out and purchased the Good Tidings Main Kit (if you don’t have it already)…but I know that the holidays are over and also, it may not be in everyone’s budget to do so. So here is some great news: Did you know you can get ALL the paper and ALL of the tag sheets for only $5? Yes, that’s correct–only $5!! It’s such a steal! At least half of the paper is not holiday-specific, and many of the tags can be used for other occasions as well. So if you liked the designs but don’t want to grab up the entire kit post-Christmas, the 26-sheet paper pack is an amazing and useful deal! You can find it HERE.

I usually like to highlight one or two areas of a present to be the focal point(s) when I create the wrap, and everything else just adds a little pop of color or texture or dimension. On this package, the highlights will be the bow, the paper shred, and the stamped tag. Let’s build our layer of tags…
 On the large white tag, I used the Cutaway Tags: Spring stamp set, choosing ‘happy’ and ‘Birthday’ for my sentiments. I started by stamping ‘Birthday’ across the bottom of the tag in Raspberry Fizz ink. I then stamped ‘happy’ above it in True Black. Above that, I stamped Birthday again in Hibiscus Burst, and once more above that in Sweet Blush. I love the spectrum of pinks! I added one more detail, stamping a Sweet Blush solid bow on white cardstock and then die cutting the shape, adhering it to the tag. (For this, you will need to purchase the entire Good Tidings Main kit, or maybe you already have a cute bow die to work, like the Gift Card Cozy Bow Die or either of the bows from the Gathered Garden set.)

After I made my main tag, I assembled the layers, building up from the bottom. I started with the black and white bows tag, then the stamped tag, with the Sweet Blush under it and fanned out to the left. (A scrap of lace was added to the light pink tag for texture.) Above the stamped tag is the smallest tag from Raspberry Fizz, and then the ‘no peeking’ tag, fanned to the right. Think of these tags as a hand of cards: You fan them out in your hands so you can see part of the card, but not all of it, because that would be awkward to hold. It’s the same principle.
 I laid them out on the package and tucked them under the RF ribbon (which is adhered on the bottom of the box). There are dabs of glue to keep them in place, but they’re not solidly stuck onto the package.
The next step is the add the paper shred and a little gold tinsel. For the paper shred, I just ran my pink card stocks through a paper shredder and pulled out the pretty crinkled bundles afterward. Isn’t it pretty?! I mixed it with a little gold tinsel, which I purchased at a Daiso store, but have also seen at times in the party aisles of Target, Joann, and party supply stores. If you can’t find it, use silver Christmas tinsel (I’ll show you on the next gift!).
 I don’t want the fill to lay flat, so I mixed the bunch together and stuck it to the center of the package with 2 or 3 large glue dots. By adhering some, but not all of it, it still remains in place, but has some dimension to it, as well.
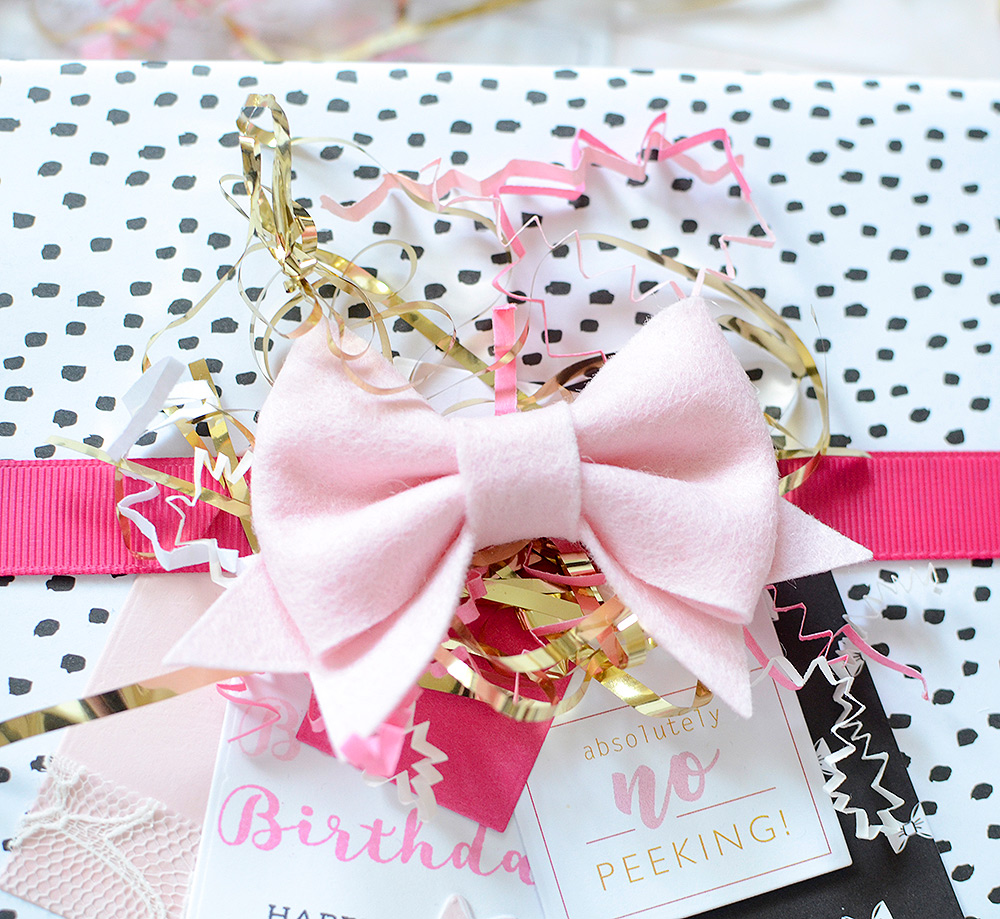 The last piece is the felt bow (this is the Large Bow). I LOVE this bow! It looks so pretty in this gorgeous Sweet Blush shade, sitting atop this pile of fun. I think the paper fill and big bow topper definitely feel festive and if this is what is going on on the outside of the box, just imagine what’s happening on the inside!! Happy Birthday indeed!

For the next gift, I used the Small Bow die, silver tinsel–the exact kind they sell every holiday season to adorn Christmas trees (you probably have some or know someone who does), a few tags, and a 5″ x 7″ muslin bag. I had one leftover from my Good Tidings Trimmings kit, but these bags can be purchased separately.

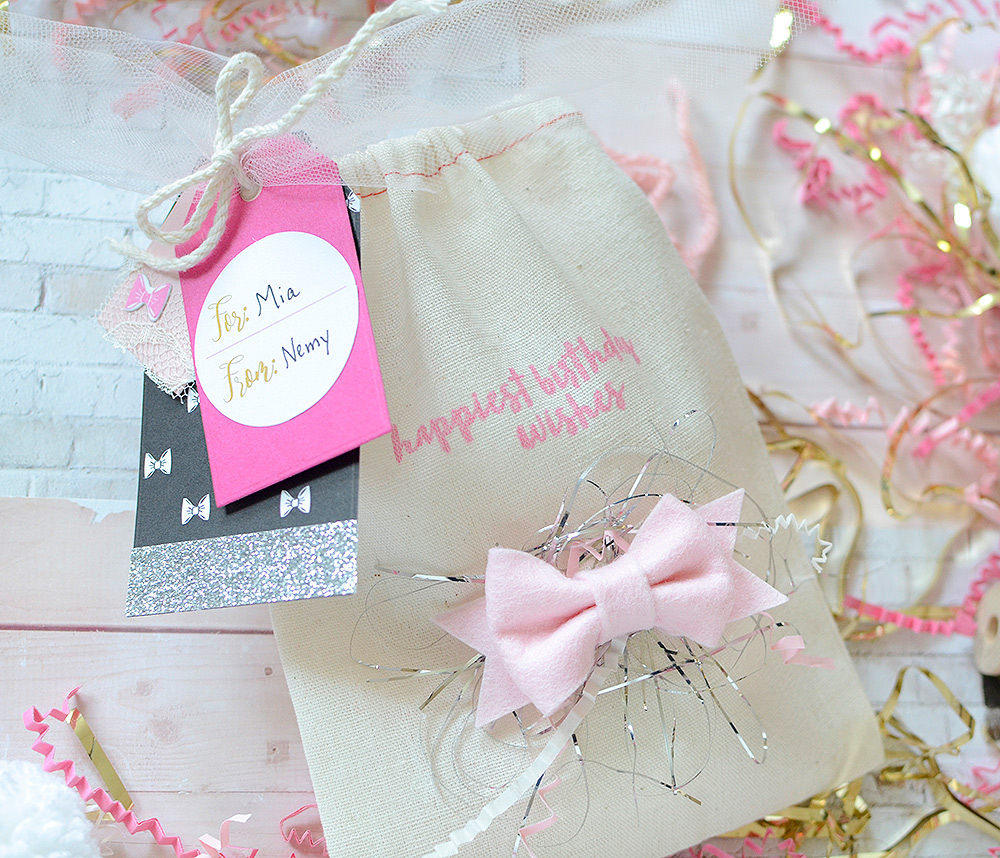 After I die cut and assembled my bow from SB felt, I decided to add a stamped sentiment to the bag. ‘Happiest birthday wishes’ from the Tropics set was the perfect size for this bag, and stamped in Raspberry Fizz ink, it’s easy to read.
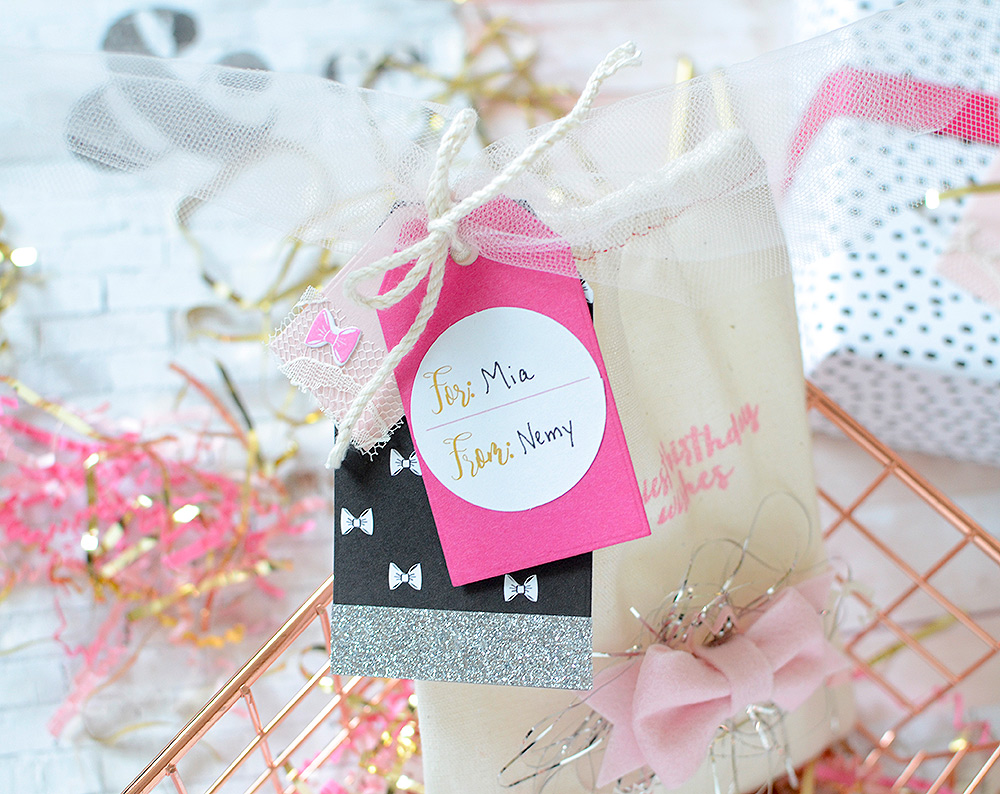
 While I didn’t use as many tags on this package as I did on the first, I still managed to use 3! I used the Essential Tag die collection again, choosing one of each, and cut them from the same assortment of papers as in the first gift. There’s a large tag from GT bows paper, a medium tag from Raspberry Fizz, and a small tag from Sweet Blush.
 A few add-ons like silver glitter tape, lace, and a stamped/die cut Hibiscus Burst bow give the tag set some extra interest. I stuck a pre-made round T0/From label from Good Tidings onto the RF tag, and filled in the required fields. Also note that it’s sometimes okay to do things a little bit out of order. Here, for instance, the small tag sits underneath the medium tag, but because I pushed it out the the left when I tied the tags on, you can still see it. It’s an added layer, but doesn’t cover up the important information conveyed on the T0/From tag.
 To finish, I crumpled up some more of my paper shred, mixed it with the silver tinsel, and glued the “center” to the bag. I put the glue right on the bag (you’ll want to slip some vellum or wax paper inside the bag to prevent the two sides of the bag from sticking together) and then placed the festive bundle of trims on top of it. Again, it’s mostly, but completely, adhered. After I added the small felt bow with more glue, I was confident that the tinsel and paper fill were firmly in place.

 That’s that–another festive birthday wrap for you. It’s pretty each to do, and whenever you top anything with a bow, it makes it instantly giftable! Again, I’d love to hear if you’re interested in a video tutorial for the bows. If you’d find it useful, I’d love to put one together to help you out!
And remember, you can bookmark this post and come back to it if you’re not quite over the stress of holiday wrapping–I won’t be mad 🙂 Thank you so much for handing out today and celebrating birthdays with me. The good news is that a little birdie told me there might be some more birthday fun in store on the Papertrey Blog this month–woo-hoo!

Dies: Paper & Package Large Bow, Paper & Package Small Bow, Paper & Package Essential Tag Die Collection
Stamps: Tropics, Cutaway Tags: Spring
Ink: Raspberry Fizz, True Black, Hibiscus Burst, Sweet Blush
Cardstock: Raspberry Fizz, Hibiscus Burst, Sweet Blush, White
Felt: Sweet Blush
Ribbon: Raspberry Fizz Grosgrain Ribbon
Good Tidings Patterned Paper Collection
Leave a Reply