

It's hard to believe that the first of June has already arrived. And of course, one of the most momentous occasions this month is Father's Day, Sunday, June 20th! I have challenged myself and the team to get creative with how they are celebrating that special man in their lives this year, sharing ideas that you can utilize yourself.
I always like to do something nice for David on this special holiday. He's such a wonderful father & role model to our children… words just never seem to be enough to convey how much it means to me to have a partner that is so dedicated to this important role. (I did a post about him last year expanding upon my thoughts & feelings, which you can read HERE).
I have seen silhouettes making a comeback over the past few months and I thought it would be so meaningful for David to have some freezing the children's sweet little profiles, in this moment. Perfect to adorn the walls in our new home that will hopefully be completed by Christmas!
So let me show you how some of your paper crafting supplies paired with a few simple steps can create treasured keepsakes, perfect for Dad!
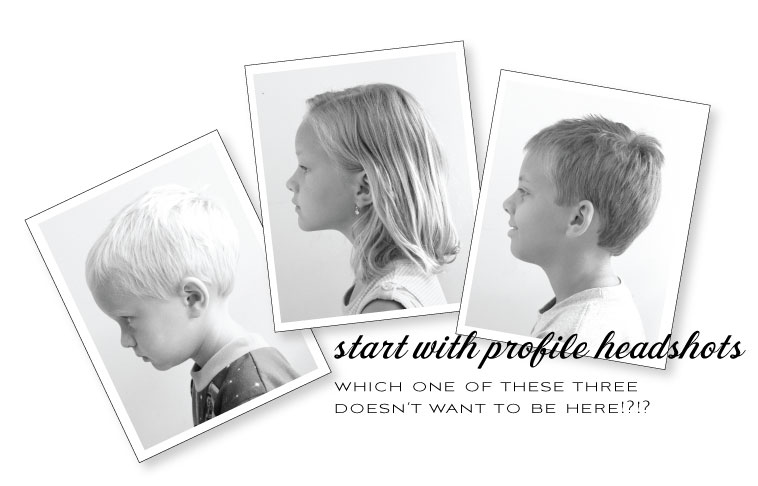
To begin, I took profile shots of all three kids in front of a blank wall. They all cooperated pretty well…except Ethan thought it was a pretty lame idea and thought he should make a grouchy face!

Next, I opened my photos in my photo editing software and increased the contrast so I could easily see the profile line more clearly. You don't have to do this step if you aren't familiar with editing photos, but it does help streamline the process a bit.
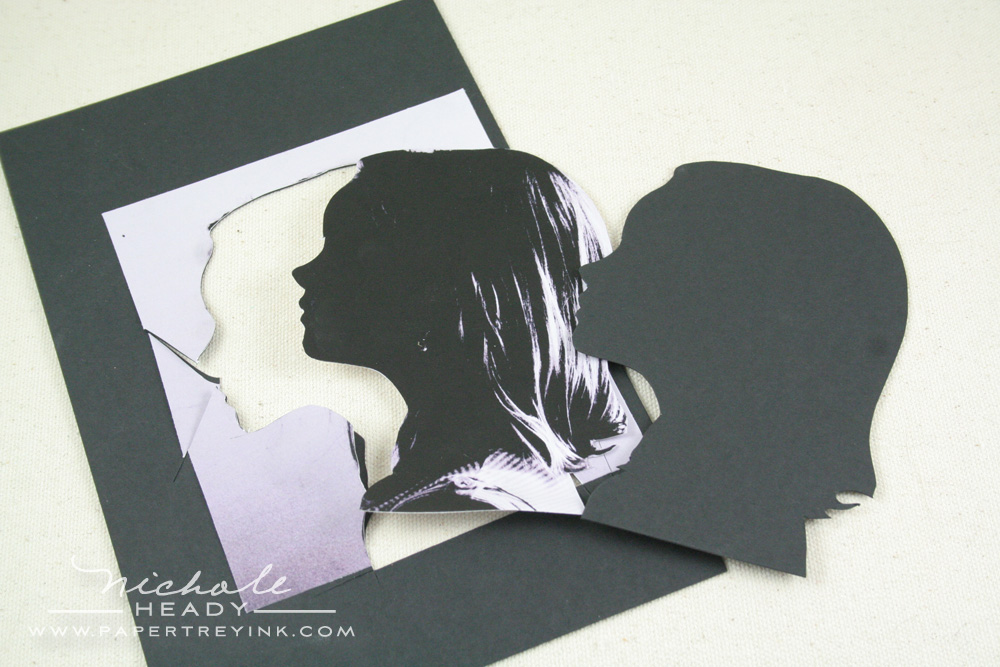
I printed out the photos to the size I wanted and used a bit of adhesive in each of the four corners to tack the photo down onto a piece of True Black cardstock. I then used a nice, sharp craft knife to cut through both layers, tracing around the edge of the profile line. If there are any little places that have any extra zigs or zags, you can use an emery board or sanding block to remove them.
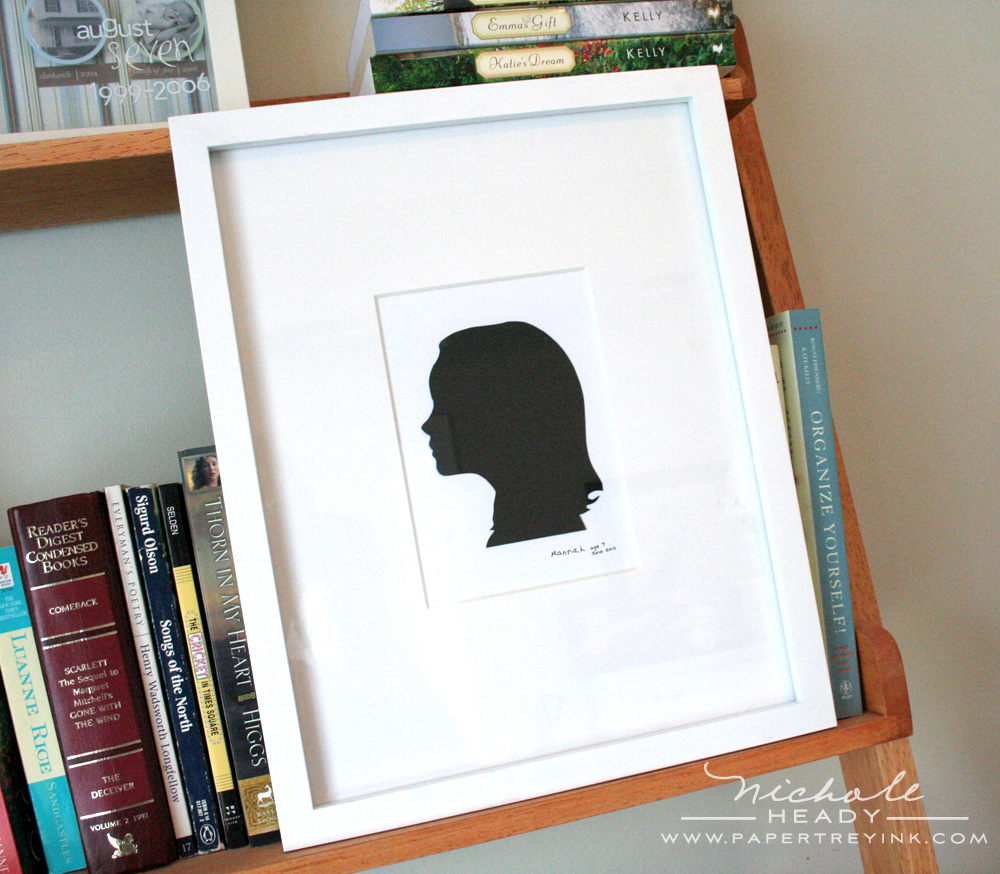
I matted each of the silhouettes in an 11" x 14" white frame that has a 5" x 7" opening. I got the frames at Target very inexpensively. This is the finished frame featuring Hannah.
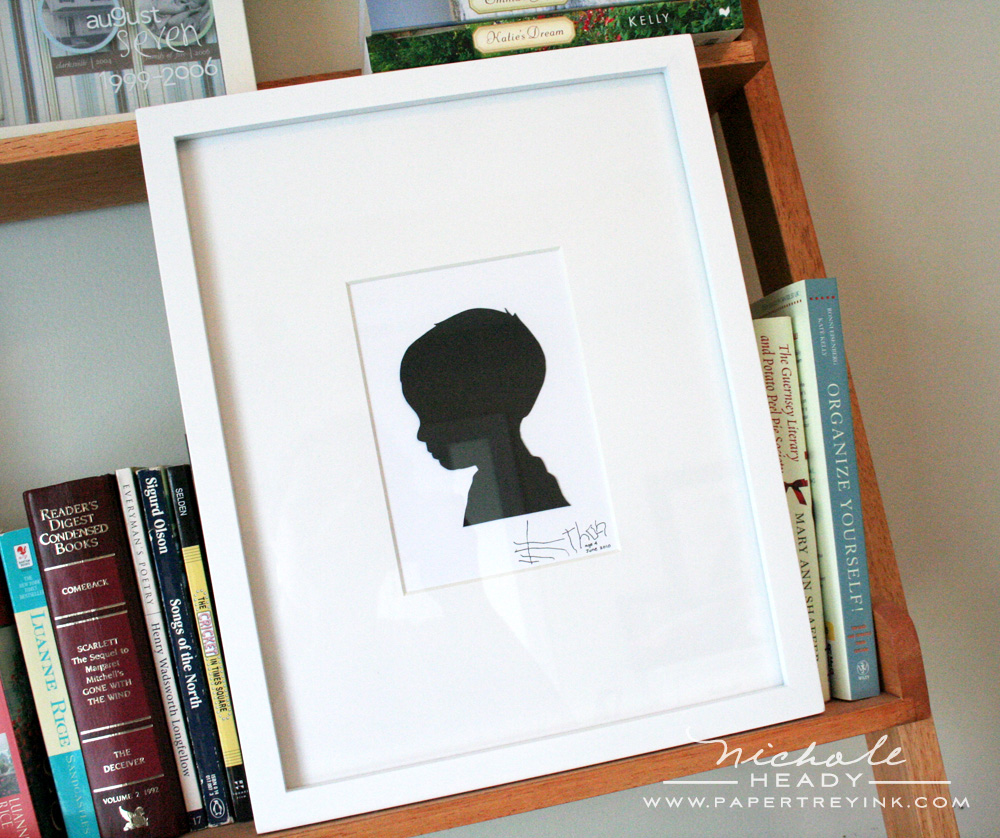
This depicts little Ethan. Notice how I had each of the kids sign their name to the lower right-hand corner of their silhouette. I also added their age and the date.
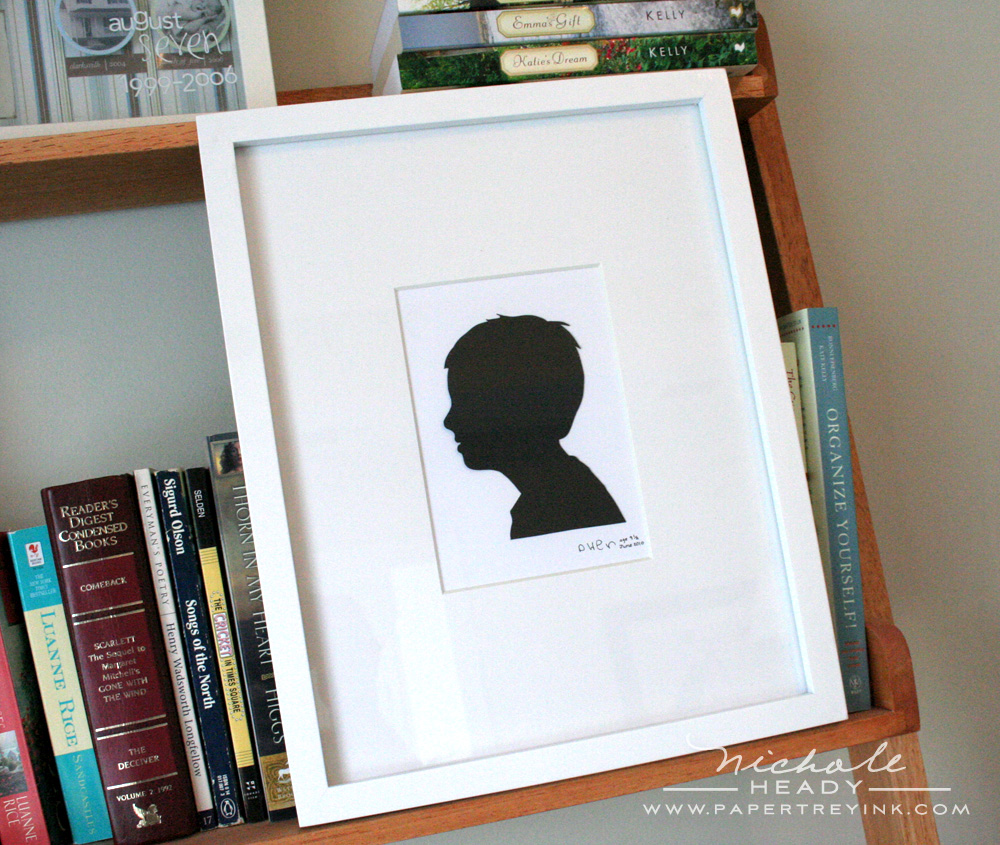
And lat but not least, here's Owen! I love how you can tell he was smiling, even with it being just a silhouette! Such a great memory piece!

Here's all three of the frames together on the wall. I really think David is going to enjoy having these. And they make such a great decor statement as well!

Of course, these need to be wrapped and ready to go in style.

I stacked all three of the frames on top of one another and tied them together with SImply Chartreuse Twill. I made a tag using Fillable Frames #4 stamp set & coordinating die, stamped in Simply Chartreuse ink. I also brushed just a bit of the Tea Dye Duo around the edges. I used Rustic Button Twine to tie the tag in place as well as accent it with a Simply Chartreuse button.
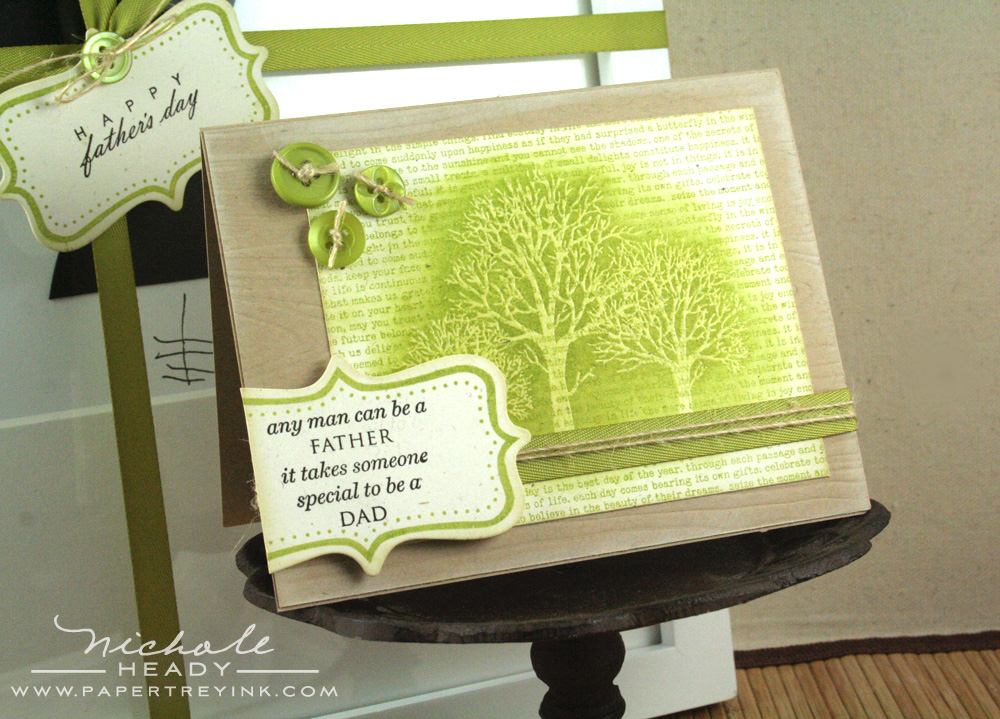
The card is a simple little project, but I know it is something that David will just love.
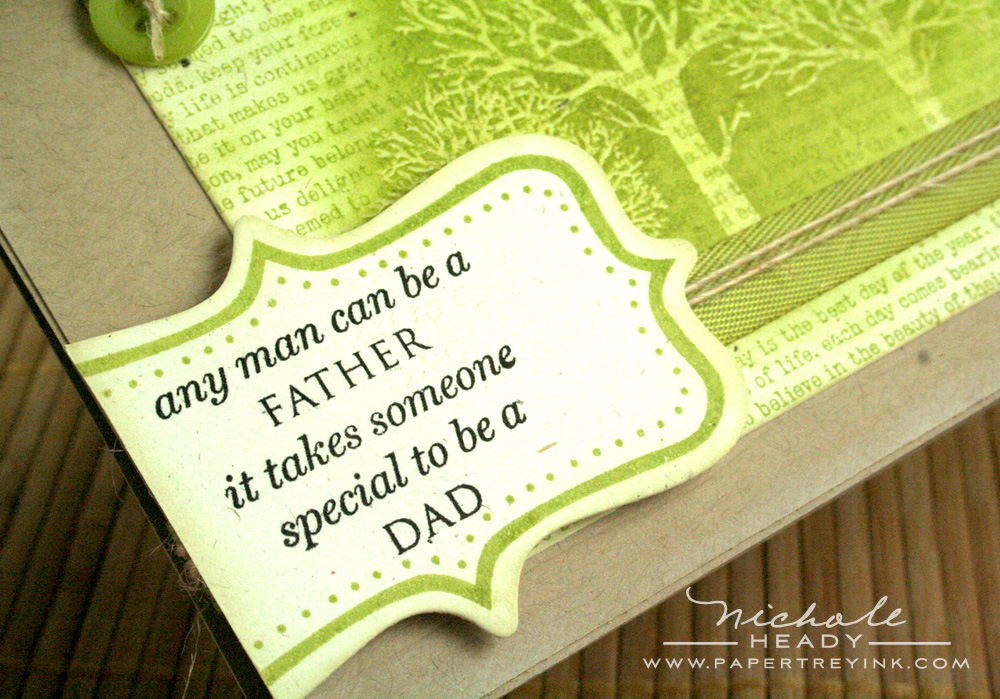
The sentiment, from Father Knows Best, is stamped on another die-cut & stamped version of Fillable Frames #4. It is always fun to cut portion of a frame off like this, giving you more options and versatility.
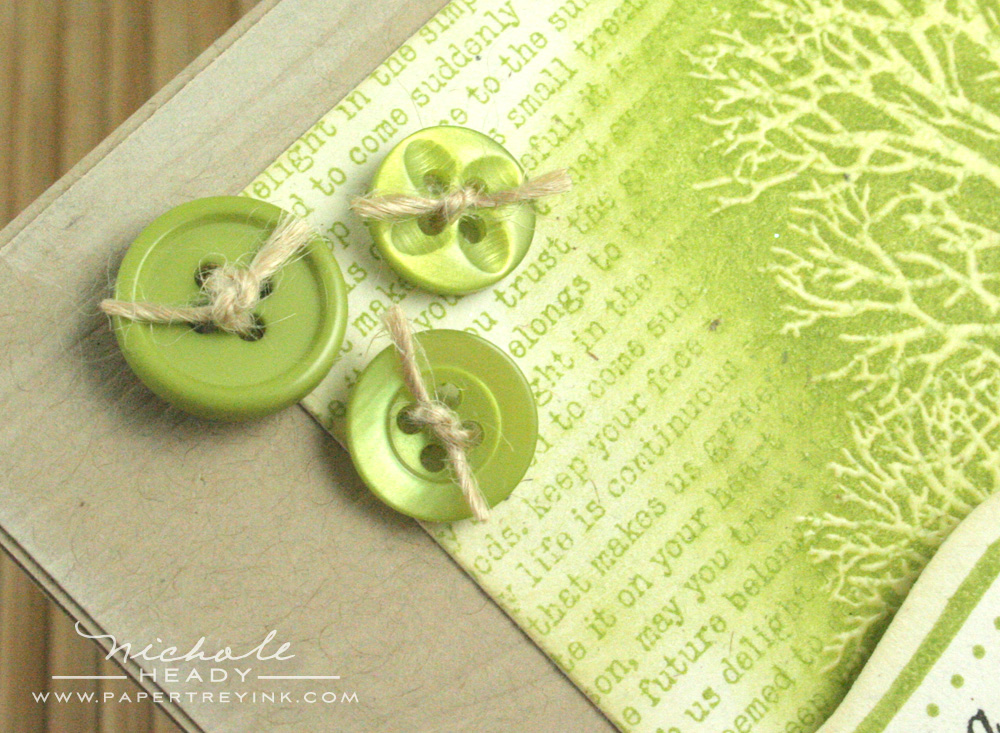
Three Simply Chartreuse buttons are attached to the upper corner with glue dots. They help to balance out the heaviness of the frame.

The focal point was created with Background Basics: Text Style and the silhouette image from Through the Trees. I stamped the text repeatedly on the background with Simply Chartreuse ink, then stamped the trees with Versamark ink on top of that. I sprinkled on some clear Filigree embossing powder and heat to set. The magic then happens when you rub Simply Chartreuse ink over the trees in soft circular motions, making the image pop from the text. One of my favorite techniques!

I think this all adds up to a wonderful gift that David will enjoy for years to come! Not to mention easy and economical too! That wraps it up for my project… now you get to embark on a journey through all of the other talented designer's work! Enjoy this celebration of fatherhood!
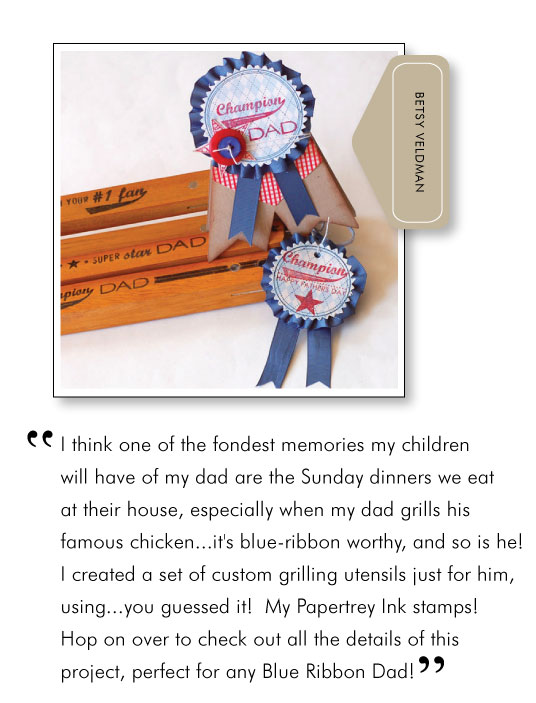
CLICK HERE to see more from Betsy Veldman.
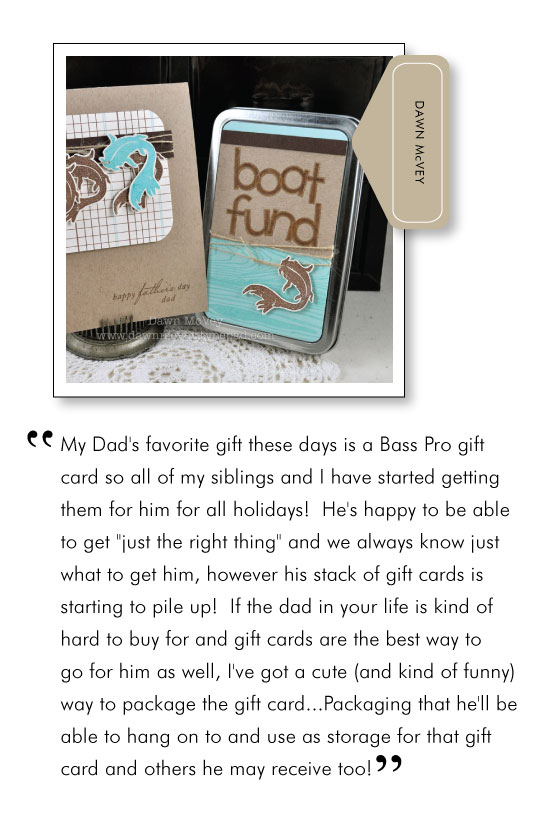
CLICK HERE to see more from Dawn McVey.
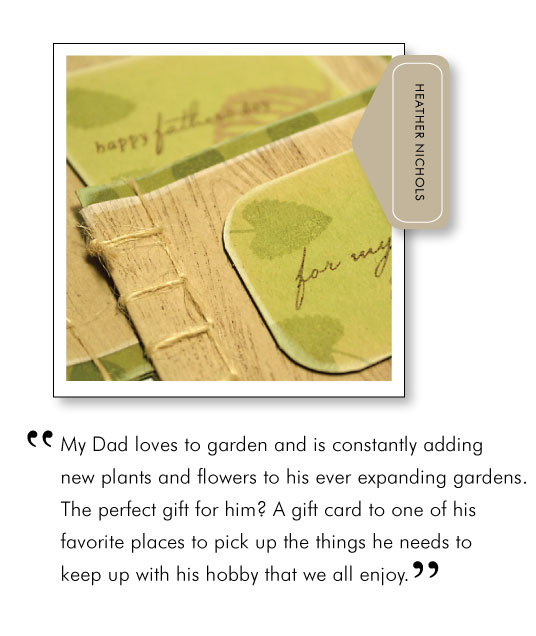
CLICK HERE to see more from Heather Nichols.

CLICK HERE to see more from Lisa Johnson.
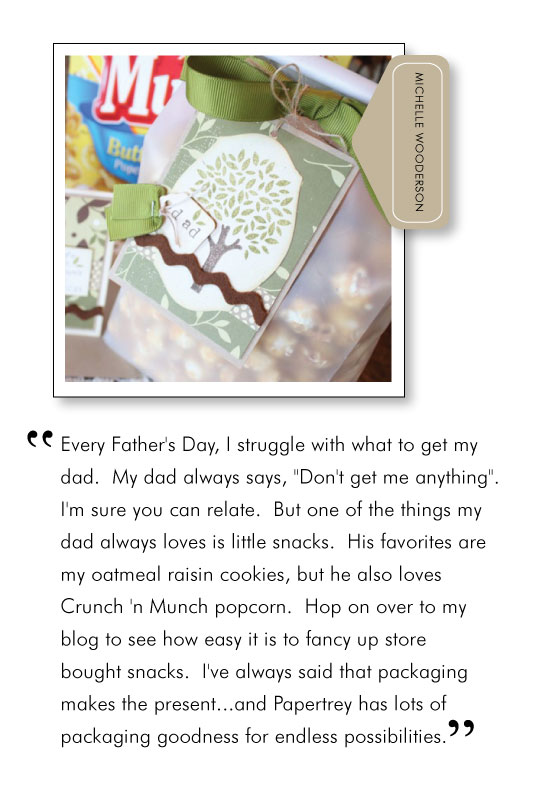
CLICK HERE to see more from Michelle Wooderson.

CLICK HERE to see more from Ashley Cannon-Newell. This is her last assignment with us as a Distinguished Guest Designer. Be sure to let Ashley know how much you enjoyed her time with us! It has been such an honor to have her onboard for this short time!
And just to provide you with a few more ideas, here are some other posts that may interest you…
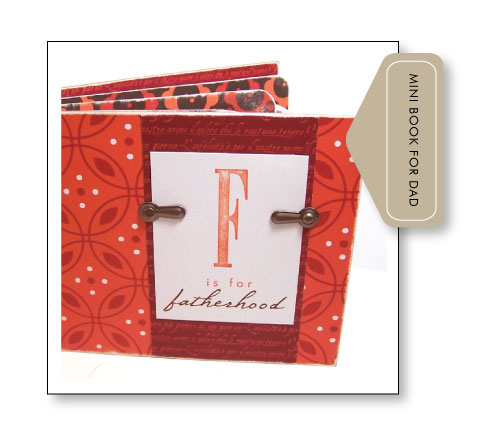
CLICK HERE to see a special mini-album I created for David in 2006, complete with a list of fatherly quotes that might come in handy for you when creating your own version of the project.
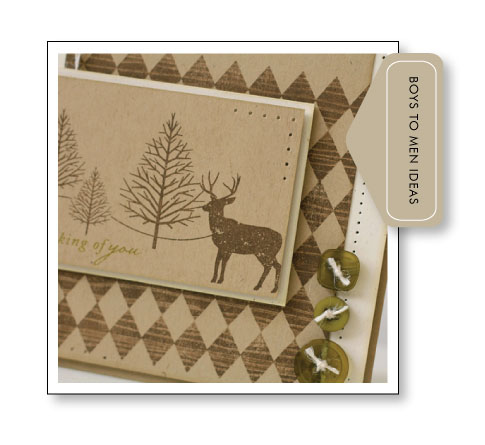
CLICK HERE to revisit the group post the entire team participated in a few months ago, entitled Boys to Men. It features tips & tricks for creating masculine themed projects with ease, which can help give you confidence when creating projects perfect for dad.
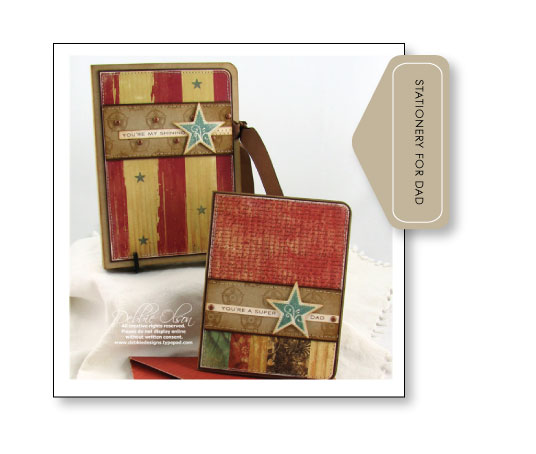
CLICK HERE to see Debbie Olson's special stationery set that is perfectly suited for dad.
Aren't everyones creations just amazing? I am confident that we have prepared you with the inspiration to create special gifts for all of the special father figures in your life! I hope that you are able to take one of these ideas (or two or three) and give them a unique twist to make them your own! Happy Father's Day everyone!

FATHER'S DAY CARD
- STAMPS: Father Knows best (sentiment), Background Basics Text Style, Through the Trees, Fillable Frames #4
- INK: Simply Chartreuse, True Black, Tea Dye Duo, VersaMark, Vintage Cream
- PAPER: Kraft, Rustic Cream
- OTHER: Simply Chartreuse buttons & twill, Rustic Jute Button Twine, Fillable Frames #4 die, Woodgrain Impression Plate, Clear Filigree Embossing Powder, foam dimensionals
- FINISHED SIZE: 4.25" x 5.5"

U are a genious, Nicole! My jaw just dropped reading how you did your project. What a beautiful father’s day gift. Love it. Thanks for sharing. Can’t wait to see the DT’s projects.
Oh I just love the silhouettes! I have to tell you though, I have an Ethan and a Hannah, too, but no Owen 🙂 He’s a Joseph instead. Too cute.
TFS.
Nichole, you have such impeccable taste–fabulous project, as always! Hope you Memorial Day festivities went well today. 🙂
what a great hop! I enjoyed it immensely. Thanks to you, Nichole and the whole design team.
Oh my word – those silhouettes are awesome! Thanks for showing us how to do them. I am blow away by how simple it seems. What a great keepsake!
You’ve done it once again. I love the frames. I think that is a great idea. Your mind must never stop, you always have the best ideas. Thanks for the jump start. Have a great week. Look forward to what’s next.
Thnak you Nichole for this jaw dropping project!! I am sure gonna make something like it…by the way, the new color looks divine, I don’t have it yet coz I live far far away..but I cant wait for that day!
Good grief, your silhouettes are perfect Nichole! What a fabulous gift! And thanks so much for all the wonderful inspiration you’ve given us today.
I love all of the projects but your silhouettes are wonderful! The addition of the children’s signatures finishes them perfectly! Thank you for the Father’s Day inspiration!
Awesoome Father’s Day gift Nichole! Just precious!
What a wonderful idea. I remember doing this when I was a little girl. You know, having your silhouette cast on a large piece of paper on a wall and tracing it. What a great updated way to do this. Thanks for sharing.
Nichole, this is just the coolest idea! The children signing their names makes it even more personal and special. I bet David loves this!
This is such a precious and beautiful gift. One I think I will have to try – thank you so much for explaining how your created these.
I really like how you used the Fillable Frame – I think this one is probably my favorite in the series so far.
Thank you also for explaning how you created the beautiful card by embossing the trees and adding the ink – I can’t wait to try this technique.
What a fantastic and creative gift!!! I love this idea!
What a powerhouse of a post! Amazing projects ladies!!!
Love your project Nichole! Very classy and traditional with a modern flare! So cool. I just love how you use this blog to inspire us each month!!! You deserve the Best Blog Ever award! Looking fwd to the next post!
I remember my mom making sillouettes of my brother and me when we were little. This is so classy looking!
What beautiful artwork ladies! You have all managed to creat wonderful pieces of art, and tributes to the Dad’s in your lives. Thanks for sharing!
What a fun bunch of gift sets! No excuses not to make Father’s Day memorable! 🙂
Your silhouettes are beautiful! And that card is absolutely stunning. I love the softness of those trees.
Corinna
http://www.myscrapbooklife.com
Wow, I love the silhouettes you created using your children’s profiles. They are awesome!! And, your card is fabulous!! I must try that as it’s a great look. tfs
What a wonderful and I bet unexpected Father’s Day gift! Love the idea and how they turned out.
These are all wonderful ideas!! I love the special gift that you made for David, and the card that goes with it! I am always inspired by your creative projects! Thanks so much!
Oh, my goodness, Nichole! This project is, simply, amazing! You are so talented! Thanks for sharing!
Oh how beautiful the silhouettes, are Nicole! Such a thoughtful and wonderful gift idea. Thanks so much to you and the DT, I am really loving this Father’s Day inspirations!
What a wonderful gift. He is going to appreciate them so much. Maybe a little tear in the corner of his eye!!
Love the sillouettes! Thanks for the wonderful tutorial!
Love it a lot!!! I will be doing some of my children too.
Can the die be used with a cuttlebug?
Wow! What a wonderful idea! Those silhouettes are fantastic!
What a great idea. They turned out so nice. I might have to try this. Last year I made an album for my husband similar to the one that you had shared on your blog…he loved it! Him and the boys get it out all the time and flip through it. Thanks for all the inspiration and enjoy your week 🙂
Nichole your husband will cherish these pictures you have created forever! How beautiful they are. Thank you, as always, for the step by step instructions.
Brilliant! Love the children silhouette project! Thanks so much for sharing this idea with me!
AMAZING!!!! I absolutley LOVE your silhouette’s Nicole – so absolutley AMAZING!!! I have to go back and have another look – definitley something I will be trying in our home!! Thanks so much for the idea…you are just brilliant! xxx
Nicole, I love your silhouettes – they are perfect! The card is beautiful – it’s a very sweet and wonderful gift for Father’s day.
Just when I think you cannot possibly get any more creative, you do! I love these ideas. I wish I had thought to do this when my kids were younger! I absolutely LOVE the card! Very Nice!
amazing idea with the silhouettes.thanks for sharing how you made them.
Love all the projects! I gave Papertrey Ink a “shout out” on my blog today. Love the balloon stamps! http://wadingincreativity.blogspot.com/2010/06/balloons-and-windows.html
Absolutely fabulous! This will be a gift your husband will treasure the rest of his life. So very creative – as usual. Thanks for sharing and inspiring us. All the Designers’ projects are creative and inspiring.
I absolutely love this project. For sure going to do this for our new place!!!!
Nicole, what a wonderful idea: simple and special. I really love it!! Thanks for sharing.
Hello Nichole, I just wanted to thank you for this great project! I needed a birthday present for my hubby from the kids and this just set all my buzzers off! I had to make it (or at least use your idea for the silhouettes). I did it in record time and am very pleased with the outcome. Just in case you want a peek, it’s here: birthday-present-for-my-other-half-from.html
Thanks for sharing your creativity with us!
Love, Alex
OOps, just noticed the URL didn’t work, here it is again: http://eisbaerentraeume.blogspot.com/2010/06/birthday-present-for-my-other-half-from.html
Thanks, Alex
Oh boy. This month’s release is going to be dangerous!
And thank you so much to the Papertrey team for the stamp set I received in the mail as a thank you. Wow. What a nice surprise.
Thanks so much for the silhouette idea, my husbands fathers day gift is all done (a week early!) and very inexpensive. I’m sure he will love it as much as I do. Keep the great ideas coming!
Cool gift idea! Glad I saw this post. This is a really cool idea and one that for sure will stand out for any father. Thank you so much for sharing your immense creativity!
Thanks so much for sharing. It’s so beautiful.